
Looking for a side dish that pops with flavor? Parmesan roasted cauliflower is your answer! This dish combines crispy textures and rich, cheesy notes, making it perfect for any meal. I’ll guide you through easy steps to achieve the perfect roast. Plus, we’ll explore tips, variations, and storage methods. Get ready to impress your family and friends with this tasty and simple recipe!
Ingredients
List of Ingredients
To make Parmesan roasted cauliflower, gather these simple ingredients:
– 1 large head of cauliflower, cut into bite-sized florets
– 3 tablespoons extra virgin olive oil
– 1 cup freshly grated Parmesan cheese
– 2 teaspoons garlic powder
– 1 teaspoon onion powder
– 1 teaspoon smoked paprika
– Salt and freshly ground black pepper, to taste
– Fresh parsley, finely chopped (for garnish)
Notes on Ingredient Quality
Using fresh ingredients makes a big difference in taste. Look for a cauliflower head that is firm and free of blemishes. The olive oil should be extra virgin for the best flavor. Freshly grated Parmesan cheese melts better than pre-grated. It has a richer taste and adds a creamy texture. Spices should be fresh too. This helps ensure you get the best flavor in every bite.
Optional Add-ins
If you want to change things up, try these add-ins:
– Red pepper flakes for heat
– Lemon zest for a fresh twist
– Balsamic glaze drizzled on top for sweetness
– Other cheeses like mozzarella or cheddar for different flavors
These options let you customize the dish to fit your taste. Feel free to mix and match!
Step-by-Step Instructions
Preparing the Cauliflower
Start with a large head of cauliflower. Cut it into small, bite-sized florets. This size helps them cook evenly. Rinse the florets under cold water. Then, dry them well with a towel. Removing excess moisture helps them roast better.
Mixing the Seasonings
In a large mixing bowl, add the dried cauliflower florets. Pour in three tablespoons of extra virgin olive oil. Toss the florets until they are well-coated. In another bowl, mix one cup of freshly grated Parmesan cheese, two teaspoons of garlic powder, one teaspoon of onion powder, and one teaspoon of smoked paprika. Add salt and freshly ground black pepper to taste. Combine these dry ingredients well.
Roasting Process
Spread the coated cauliflower onto a lined baking sheet. Make sure they are in a single layer. This step helps them roast evenly. Preheat your oven to 425°F (220°C). Place the baking sheet in the oven and roast for 25 to 30 minutes. Flip the florets halfway through for even cooking. Look for a golden brown color and a tender texture.
Serving Suggestions
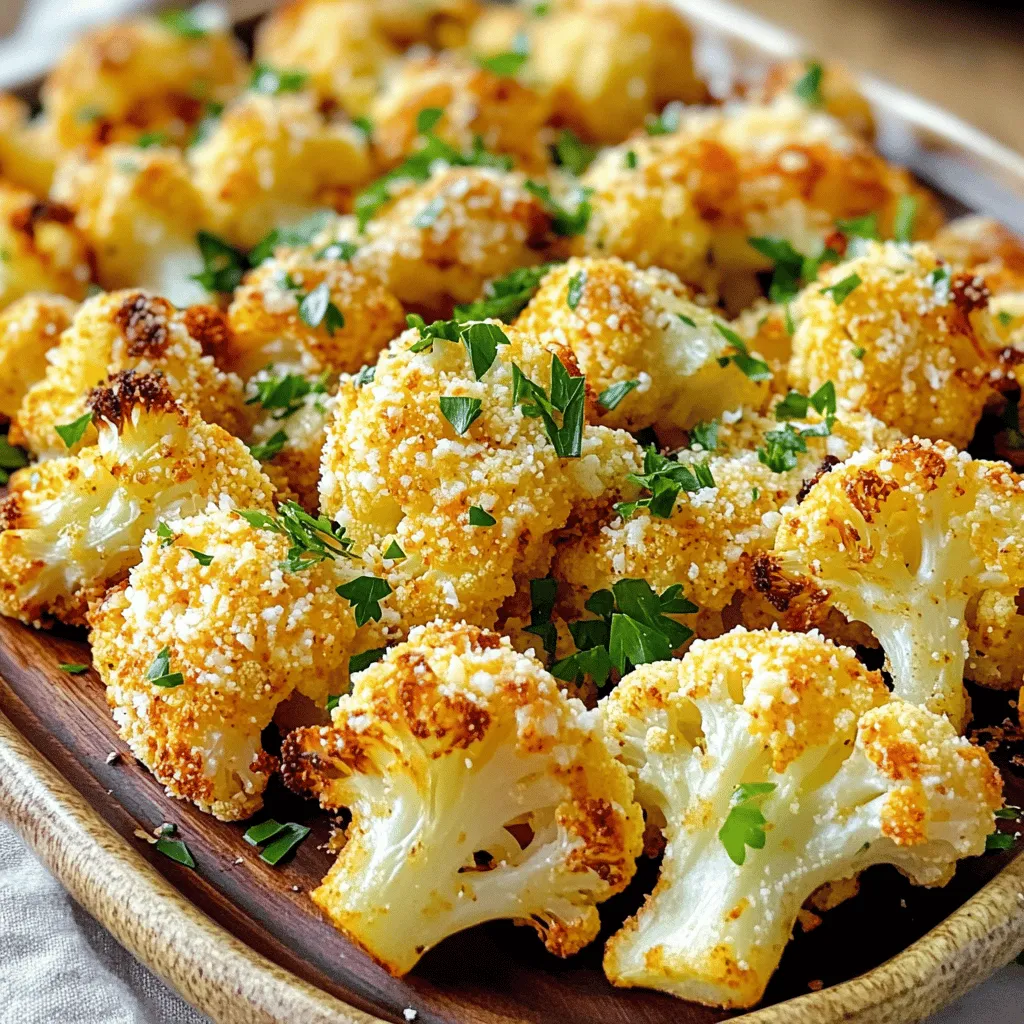
Once done, take the cauliflower out of the oven. Let it cool for a few minutes. Garnish with fresh parsley for a pop of color. Serve it on a bright platter for a beautiful display. You can also drizzle a little olive oil on top for extra flavor. This dish pairs well with grilled meats or as part of a veggie spread. Enjoy your delicious Parmesan roasted cauliflower!
Tips & Tricks
Achieving the Perfect Roast
To get that perfect roast, you need the right oven temperature. Preheat your oven to 425°F (220°C). This high heat crisps the edges and makes the cauliflower tender. Spread the florets in a single layer on the baking sheet. If they are too crowded, they will steam instead of roast. Flip them halfway through cooking for even browning. Aim for a golden color; that’s when they taste the best.
Common Mistakes to Avoid
One common mistake is not drying the cauliflower. After washing, make sure it’s dry. Excess water can lead to soggy florets. Another mistake is using old Parmesan cheese. Fresh cheese melts better and has more flavor. Lastly, don’t skip the seasoning. A light touch of salt and pepper really makes a difference.
Enhancing Flavor Profiles
You can easily make this dish even tastier. Try adding a squeeze of lemon juice before serving for a zesty kick. Fresh herbs like thyme or rosemary also add depth. For spice lovers, sprinkle some red pepper flakes for heat.
Variations
Different Cheese Options
You can switch up the cheese for more flavor. Try pecorino Romano for a saltier bite. Goat cheese adds creaminess and tang. For a milder taste, use mozzarella or cheddar. Each cheese brings a unique twist to the dish. So, feel free to experiment with what you have on hand.
Spice Level Adjustments
If you like heat, add some cayenne pepper or crushed red pepper flakes. Start with a pinch and taste as you go. For a milder flavor, skip the smoked paprika. You can also use Italian seasoning for a different herb mix. Adjusting spices lets you make the dish your own.
Adding Vegetables
You can mix in other veggies for fun. Try bell peppers, carrots, or zucchini. Cut them into similar sizes as the cauliflower. This way, everything cooks evenly. Roasting a mix adds color and taste. You get a delightful medley on your plate.
Storage Info
How to Store Leftovers
To keep your Parmesan roasted cauliflower fresh, place it in an airtight container. Make sure it cools to room temperature first. This helps prevent moisture buildup. Store it in the fridge for up to four days. If you want to enjoy it later, make sure to check the smell and texture before eating.
Reheating Tips
When it’s time to enjoy your leftovers, reheating is key. I recommend using the oven for the best results. Preheat your oven to 350°F (175°C). Spread the cauliflower on a baking sheet. Heat for about 10 to 15 minutes. This will crisp it up again and keep the cheese flavor strong. You can also use a microwave for quick reheating. Just heat for one to two minutes. But keep in mind, it won’t be as crispy.
Freezing Instructions
If you want to store the cauliflower for longer, freezing is a great option. Start by letting it cool completely. Then, place it in a freezer-safe bag. Squeeze out as much air as possible before sealing it. You can freeze it for up to three months. When ready to eat, thaw it overnight in the fridge. Then, reheat in the oven for the best taste.
FAQs
How long does it take to roast cauliflower?
Roasting cauliflower takes about 25 to 30 minutes. Preheat your oven to 425°F (220°C). Place the cauliflower on a baking sheet in a single layer. Halfway through, flip the florets for even cooking. You want them to be golden brown and fork-tender.
Can I make this recipe ahead of time?
Yes, you can make this dish ahead of time. Roast the cauliflower and let it cool. Store it in an airtight container in the fridge for up to three days. When you’re ready to serve, just reheat it in the oven. This keeps it crisp and tasty.
What can I serve with Parmesan Roasted Cauliflower?
Parmesan roasted cauliflower pairs well with many dishes. Serve it alongside grilled chicken or fish for a balanced meal. It also complements pasta or a fresh salad. You can even use it as a topping for grain bowls. This dish adds a flavorful crunch to your plate.
In this blog post, we explored how to make delicious Parmesan Roasted Cauliflower. We outlined the key ingredients and shared tips for picking top-quality ones. I provided step-by-step instructions, covering preparation, mixing, roasting, and serving. You learned tips to ensure perfect roasting and avoid common mistakes. We discussed variations like different cheeses and spices, along with storage and reheating advice.
With these insights, you can enjoy this tasty dish in many ways. Take your time and have fun creating your own version!


