Parmesan Herb Baked Zucchini Simple and Flavorful Dish

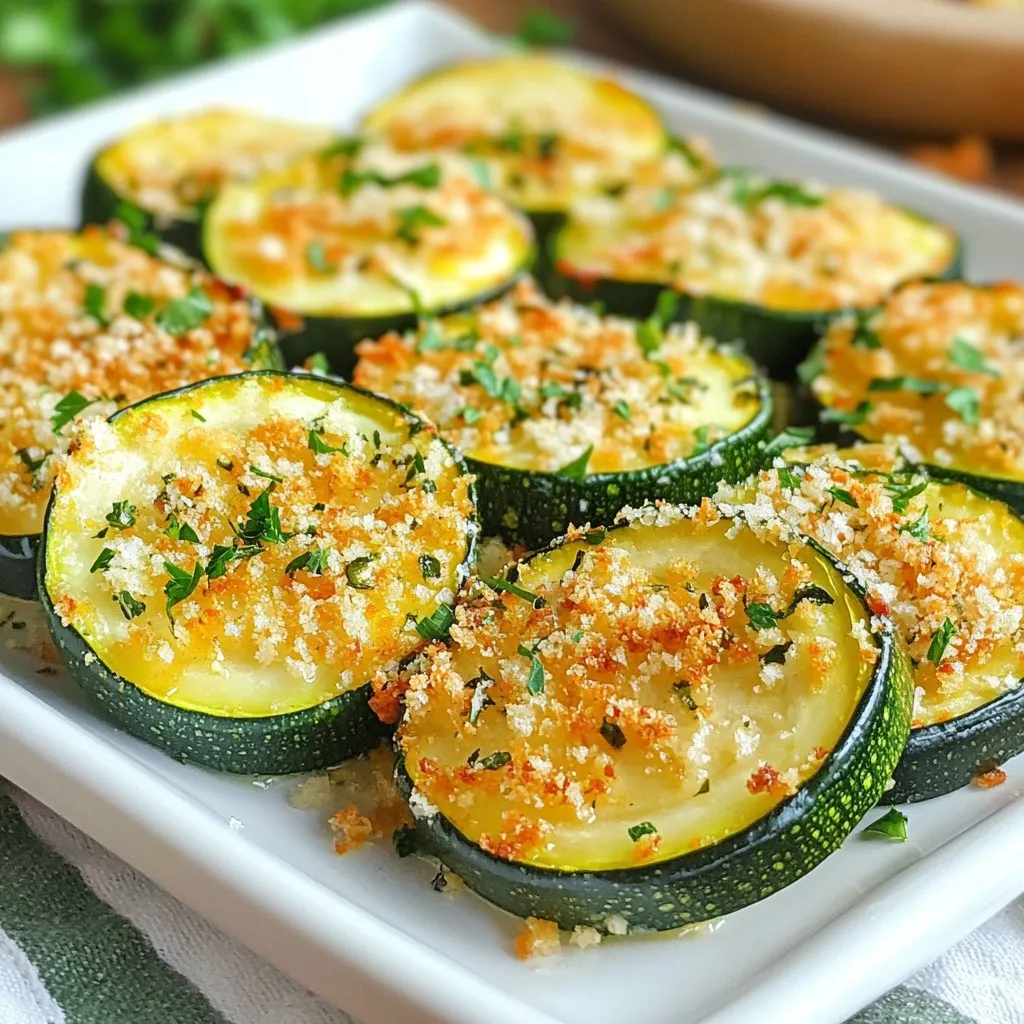
Looking for a quick, tasty side dish? Try my Parmesan Herb Baked Zucchini! This simple recipe only takes a few steps and delivers amazing flavor. You’ll love the crunchy topping of Parmesan and herbs over tender, roasted zucchini. Perfect for any meal, it’s also easy to customize. Let’s dive into the ingredients and make this delightful dish together!
Why I Love This Recipe
- Easy to Make: This recipe requires minimal prep and cooking time, making it perfect for a quick weeknight dinner or a last-minute side dish.
- Healthy Ingredients: Packed with fresh zucchini and wholesome breadcrumbs, this dish is a nutritious option that doesn’t compromise on flavor.
- Cheesy Goodness: The combination of Parmesan cheese and herbs creates a deliciously savory topping that elevates the simple zucchini to a whole new level.
- Customizable: You can easily adjust the herbs and spices to your taste, or even add your favorite toppings for a unique twist!
Ingredients
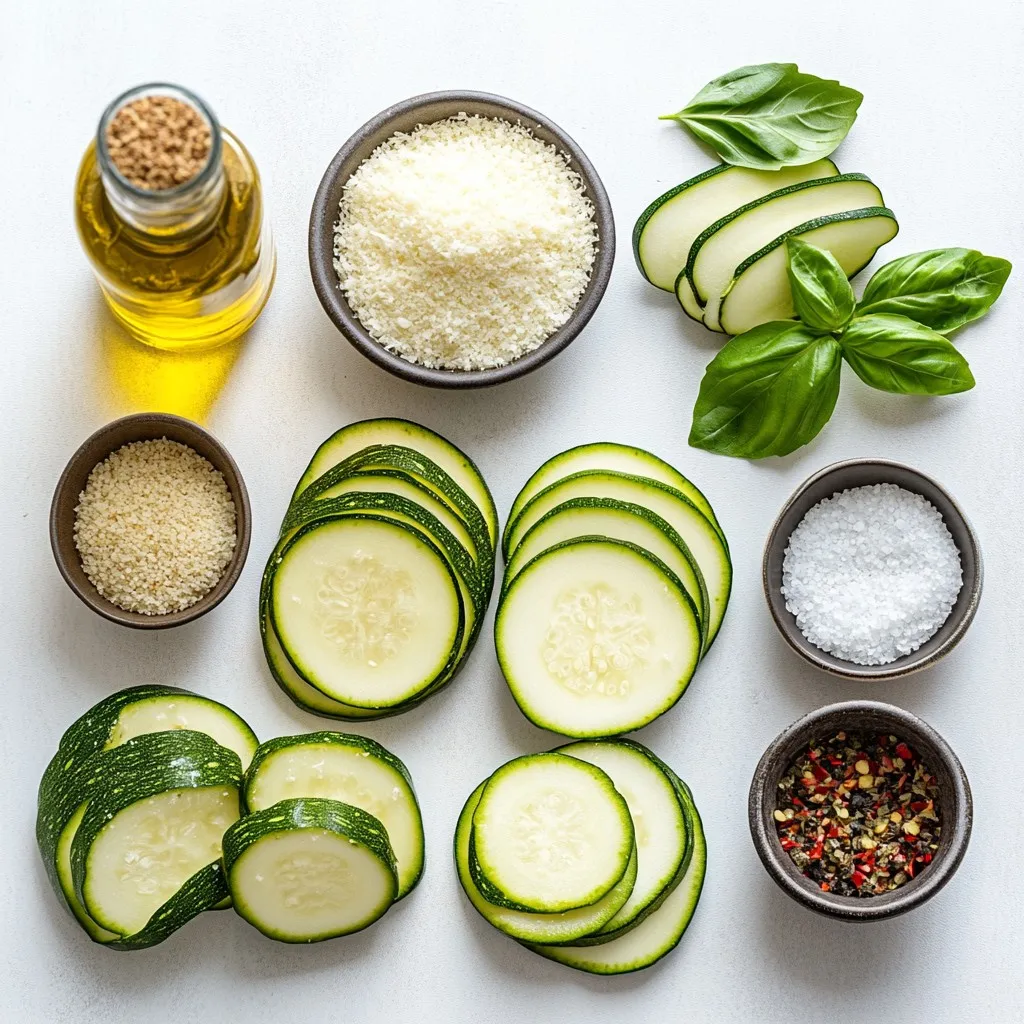
Here’s what you need to make Parmesan herb baked zucchini. Gather these simple items:
- 4 medium zucchinis, sliced into 1/4-inch rounds
- 1 cup finely grated Parmesan cheese
- 1/2 cup whole grain breadcrumbs
- 2 tablespoons extra-virgin olive oil
- 2 teaspoons garlic powder
- 1 teaspoon dried oregano
- 1 teaspoon dried basil
- 1/2 teaspoon red pepper flakes (optional for a kick)
- Salt and freshly ground black pepper to taste
- Fresh parsley, finely chopped (for garnish)
These ingredients work together to create a tasty dish. The zucchini is light and fresh. The Parmesan adds rich flavor, while the herbs give it a nice aroma. Whole grain breadcrumbs add a lovely crunch. You can adjust the red pepper flakes for heat or leave them out. Fresh parsley adds a touch of color and taste at the end. This dish shines with these simple yet vibrant ingredients.

Step-by-Step Instructions
Preheat the Oven
First, preheat your oven to 425°F (220°C). This high heat helps the topping get crispy.
Prepare the Topping
In a bowl, mix together the Parmesan cheese, breadcrumbs, garlic powder, oregano, basil, and red pepper flakes. Add a pinch of salt and pepper. Stir until everything blends well.
Toss the Zucchini
Take your sliced zucchini and place it in a large bowl. Drizzle the olive oil over the slices. Toss them gently until they are all coated in oil.
Arrange on a Baking Sheet
Line a baking sheet with parchment paper. Lay the zucchini slices in a single layer, making sure they do not overlap.
Add the Topping
Sprinkle the Parmesan mixture over the zucchini slices. Press down slightly to help it stick well.
Bake
Place the baking sheet in the hot oven. Bake for 15 to 20 minutes. Watch closely until the zucchini is tender and the topping is golden brown.
Cool and Garnish
Once baked, take the sheet out of the oven. Let the zucchini cool for a few minutes. Just before you serve, sprinkle fresh parsley on top for a burst of color.
Tips & Tricks
Best Practices for Baking Zucchini
To get the best out of your zucchini, choose firm ones. Look for medium-sized zucchinis. They taste better and hold their shape. Cut them into 1/4-inch rounds for even cooking. This size helps them bake well. Always preheat your oven to 425°F. This heat helps create that nice, crispy topping you want.
Ensuring a Crispy Topping
A crispy topping makes this dish shine. Mix the Parmesan cheese and breadcrumbs well. Use fresh, finely grated Parmesan for the best flavor. When you sprinkle it on, press down lightly. This action helps it stick. Keep an eye on the zucchini in the oven. Bake them until the topping turns golden brown. This usually takes about 15 to 20 minutes.
Serving Suggestions
For a great presentation, serve your baked zucchini on a wooden platter. You can also use individual plates for a fancy touch. Drizzle a bit of extra virgin olive oil over the top. A sprinkle of fresh parsley adds color and flavor. If you like, add more Parmesan for an extra treat. Enjoy your dish with a light salad or some grilled chicken.
Pro Tips
- Choose Firm Zucchini: Select zucchinis that are firm and free of blemishes for the best texture and flavor.
- Adjust Seasoning: Feel free to tweak the herbs and spices according to your taste; add more garlic or herbs for a bolder flavor.
- Perfectly Crispy: For an extra crispy topping, broil the zucchini for the last 2-3 minutes of baking, but watch closely to prevent burning.
- Serving Suggestions: Pair with a dipping sauce like marinara or ranch for a delightful appetizer or side dish.

Variations
Different Cheeses to Use
You can switch up the cheese in this dish. Try using pecorino Romano for a sharper flavor. Feta can also add a nice tang. If you prefer a milder taste, mozzarella works well too. Each cheese gives a unique touch to your Parmesan herb baked zucchini.
Adding Other Vegetables
Feel free to mix in other veggies. Eggplant slices or bell peppers can add color and taste. You can also use carrots or squash. Just make sure to cut them to a similar size as the zucchini. This helps them cook evenly.
Seasoning Alternatives
You can change the seasonings to match your taste. Try thyme or rosemary for a fresh twist. If you want more heat, add more red pepper flakes. A sprinkle of lemon zest can brighten the dish too. Adjusting the seasonings lets you create your own flavor profile.
Storage Info
How to Store Leftovers
To store any leftover Parmesan herb baked zucchini, let it cool to room temperature. Place the zucchini in an airtight container. Make sure to layer a piece of parchment paper between the layers to keep them from sticking. Store it in your fridge for up to three days. This way, you can enjoy the dish later without losing its flavor.
Reheating Suggestions
When you’re ready to eat the leftovers, preheat your oven to 350°F (175°C). Place the zucchini on a baking sheet. Reheat them for about 10-15 minutes, or until they are warm. This method helps keep the topping crispy. You can also use a microwave, but the texture may not be as nice. If you use the microwave, heat in 30-second bursts to avoid overcooking.
Freezing Instructions
If you want to freeze the baked zucchini, first let it cool completely. Then, arrange the slices in a single layer on a baking sheet. Freeze them for about 1-2 hours until they are firm. After that, transfer the slices to a freezer-safe bag or container. Label it with the date. You can freeze them for up to three months. When you want to enjoy them, just reheat from frozen in the oven, and you’ll have a tasty dish ready to go!
FAQs
Can I use other vegetables instead of zucchini?
Yes, you can! Try eggplant, squash, or bell peppers. They all work well. Slice them into similar sizes for even cooking. Each vegetable adds its own unique flavor and texture to the dish. You can use a mix for variety and color.
How can I make this recipe gluten-free?
To make this dish gluten-free, swap the whole grain breadcrumbs for gluten-free ones. Many brands offer great options. You can also use crushed nuts or ground oats as a substitute. These will still give you a crunchy topping.
What are some good side dishes to pair with Parmesan Herb Baked Zucchini?
This baked zucchini pairs well with many side dishes. Consider serving it with grilled chicken or fish. A fresh salad or quinoa adds a nice touch too. Pair it with rice or pasta for a heartier meal.
How do I make the topping even more flavorful?
To boost the flavor of the topping, add fresh herbs like thyme or rosemary. You can mix in some lemon zest for a bright taste. Try adding different cheeses, like mozzarella or feta, for a twist. Adjust the spices to your liking for a personal touch.
This blog post shares a tasty recipe for Parmesan Herb Baked Zucchini. You learned about key ingredients, step-by-step instructions, and helpful tips to ensure a crisp topping. We also discussed variations, storage methods, and answered common questions. Remember, this dish is easy to make and adapt. It’s a great way to enjoy healthy veggies. Experiment with flavors to make it yours. Enjoy your cooking adventure with zucchin

Parmesan Herb Baked Zucchini
Ingredients
- 4 medium zucchinis, sliced into 1/4-inch rounds
- 1 cup finely grated Parmesan cheese
- 1/2 cup whole grain breadcrumbs
- 2 tablespoons extra-virgin olive oil
- 2 teaspoons garlic powder
- 1 teaspoon dried oregano
- 1 teaspoon dried basil
- 1/2 teaspoon red pepper flakes (optional for a kick)
- to taste Salt and freshly ground black pepper
- to taste Fresh parsley, finely chopped (for garnish)
Instructions
- Preheat the Oven: Start by preheating your oven to 425°F (220°C), ensuring it's hot enough to create a crispy topping.
- Prepare the Topping: In a mixing bowl, blend together the grated Parmesan cheese, whole grain breadcrumbs, garlic powder, oregano, basil, red pepper flakes (if using), and a pinch of salt and pepper. Stir until all ingredients are well combined.
- Toss the Zucchini: Take the sliced zucchini rounds and place them in a large mixing bowl. Drizzle the olive oil over the zucchini slices and use your hands or a spatula to toss them gently until they are evenly coated in oil.
- Arrange on a Baking Sheet: Line a baking sheet with parchment paper for easy cleanup. Lay the zucchini slices out in a single layer, ensuring they are not overlapping.
- Add the Topping: Generously sprinkle the Parmesan and breadcrumb mixture over the zucchini slices, pressing down slightly as you go to ensure it sticks.
- Bake: Place the baking sheet in the preheated oven and bake for 15-20 minutes. Keep an eye on them until the zucchini is tender and the topping has turned a delightful golden brown and crispy.
- Cool and Garnish: Once baked, carefully remove the baking sheet from the oven and allow the zucchini to cool for a few minutes. Just before serving, sprinkle the freshly chopped parsley over the top for a pop of color and a burst of freshness.


![To make roasted garlic hummus, gather these essential ingredients: - 1 cup canned chickpeas, rinsed and drained - 1/4 cup tahini - 1/4 cup extra virgin olive oil - 1 whole head of garlic - 2 tablespoons freshly squeezed lemon juice - 1/2 teaspoon ground cumin - Sea salt, to taste - Water, as needed These ingredients work together to create a creamy and delicious hummus. The chickpeas provide a smooth base, while tahini adds richness. Roasted garlic brings a sweet, mellow flavor that transforms the dish. To elevate your hummus, consider these optional garnishes: - Chopped fresh parsley - Smoked paprika Adding these garnishes gives your hummus a pop of color. Fresh parsley adds a touch of brightness, while smoked paprika contributes a subtle warmth. You will need a few key tools to prepare your hummus: - Food processor - Aluminum foil - Baking sheet A food processor is essential for achieving a smooth texture. Aluminum foil helps roast the garlic evenly, while a baking sheet supports the garlic in the oven. For the full recipe, check out the complete guide to making roasted garlic hummus. Enjoy the process and get ready for a tasty treat! To start, I preheat my oven to 400°F (200°C). This heat helps the garlic roast well. Next, I take a whole head of garlic and cut off the top. I make sure to expose the tops of the cloves. Then, I drizzle a little olive oil over the cloves. This step helps the garlic stay moist. I wrap the garlic in aluminum foil tightly and place it in the oven. I roast it for about 30-35 minutes. The cloves should turn soft and golden brown. After roasting, I let it cool for a few minutes. In my food processor, I add 1 cup of rinsed chickpeas and 1/4 cup of tahini. Then, I squeeze in 2 tablespoons of lemon juice and add 1/2 teaspoon of ground cumin. I also sprinkle in some sea salt. Next, I squeeze the roasted garlic cloves from their skins into the bowl. I usually use three to four cloves for a great flavor. I blend everything until it becomes smooth and creamy. While blending, I slowly drizzle in 1/4 cup of extra virgin olive oil. If the hummus feels too thick, I add water by the tablespoon until I like the texture. Once my hummus is smooth, I taste it to check if it needs more salt or lemon juice. This step is key for flavor balance. I then transfer the hummus to a serving bowl. I drizzle a bit of olive oil on top to add richness. For a pop of color, I garnish it with chopped parsley and a sprinkle of smoked paprika. To serve, I love pairing the hummus with fresh pita bread or sliced veggies. This makes for a great snack or appetizer. You can find the Full Recipe [here]. To get the right texture, start with good chickpeas. Use canned chickpeas for ease. Rinse and drain them well to remove excess salt. When blending, add olive oil slowly. If your hummus is too thick, add water a bit at a time. This makes it smooth and creamy. Roasted garlic is the star here, but you can add more flavor. Try adding herbs like fresh parsley or basil. A pinch of smoked paprika gives a nice kick. For a zestier taste, add more lemon juice. Taste as you go—this is key! One big mistake is not roasting the garlic enough. Soft, golden cloves bring the best flavor. Another common error is adding too much water at once. This can make your hummus runny. Lastly, don’t forget to taste your blend. Adjusting salt and lemon juice helps create a balanced dip. For the full recipe, refer to the main article. {{image_4}} You can change the flavor of your hummus easily. Adding herbs like basil or cilantro gives a fresh taste. For a warm twist, try adding spices like smoked paprika or chili powder. Just a pinch can turn your dip into a flavor explosion. Mix in fresh herbs or spices after blending for the best taste. While chickpeas are classic, other beans work well too. White beans, like cannellini, add creaminess. Black beans offer a rich, earthy flavor. You can even use lentils for a different texture. Each bean brings its own taste. Feel free to swap them out and explore new flavors. If you love heat, this spicy hummus is for you. Start with the full recipe and add heat! After blending, mix in chopped jalapeños or a splash of hot sauce. You can also use crushed red pepper for a milder kick. This spicy version pairs well with crunchy veggies or pita chips, making your snack time exciting. To keep your roasted garlic hummus fresh, store it in an airtight container. This helps prevent exposure to air, which can lead to spoilage. Always let the hummus cool completely if you just made it. Once cooled, cover it tightly and place it in the fridge. You can freeze hummus for later use. Portion it into smaller containers. This makes it easy to thaw only what you need. Leave a little space at the top of the container. Hummus expands when frozen. When you’re ready to eat it, thaw it in the fridge overnight. Stir well before serving. Homemade roasted garlic hummus lasts about five to seven days in the fridge. Check for any off smells or changes in color. If you see any mold, it’s best to throw it away. Fresh hummus should have a smooth texture and rich aroma. Keeping these tips in mind helps you enjoy your hummus at its best. Don't forget to check the [Full Recipe] for the perfect hummus experience! Roasted garlic can last about one week in the fridge. Store it in a sealed container. If you want to keep it longer, you can freeze it. Roasted garlic freezes well and can last up to three months. Yes, you can use fresh garlic, but the flavor will be different. Fresh garlic is sharp and strong, while roasted garlic is sweet and mild. If you want a more intense garlic taste, add a small amount of fresh garlic to your hummus. Start with one clove and adjust to your taste. Roasted garlic offers many health benefits. It can help boost your immune system. It also may lower blood pressure and improve heart health. Roasted garlic is rich in antioxidants, which fight free radicals. Plus, it can aid digestion and add flavor to meals without extra fat or salt. Enjoying roasted garlic in hummus gives you these benefits in a tasty way. This blog covered all you need for tasty roasted garlic hummus. We explored key ingredients, helpful tools, and the easy steps for making hummus. You learned tips to get the right texture and boost flavor. We shared fun variations to try, plus essential storage advice. Roasted garlic hummus is simple and fun to make. Enjoy the process and don't hesitate to get creative with your flavors! Remember, practice makes perfect.](https://dishtreats.com/wp-content/uploads/2025/06/4ccbc263-5457-4179-8ada-bd86b908b6b9-768x768.webp)

