One-Pot Spinach Artichoke Pasta Creamy Delight

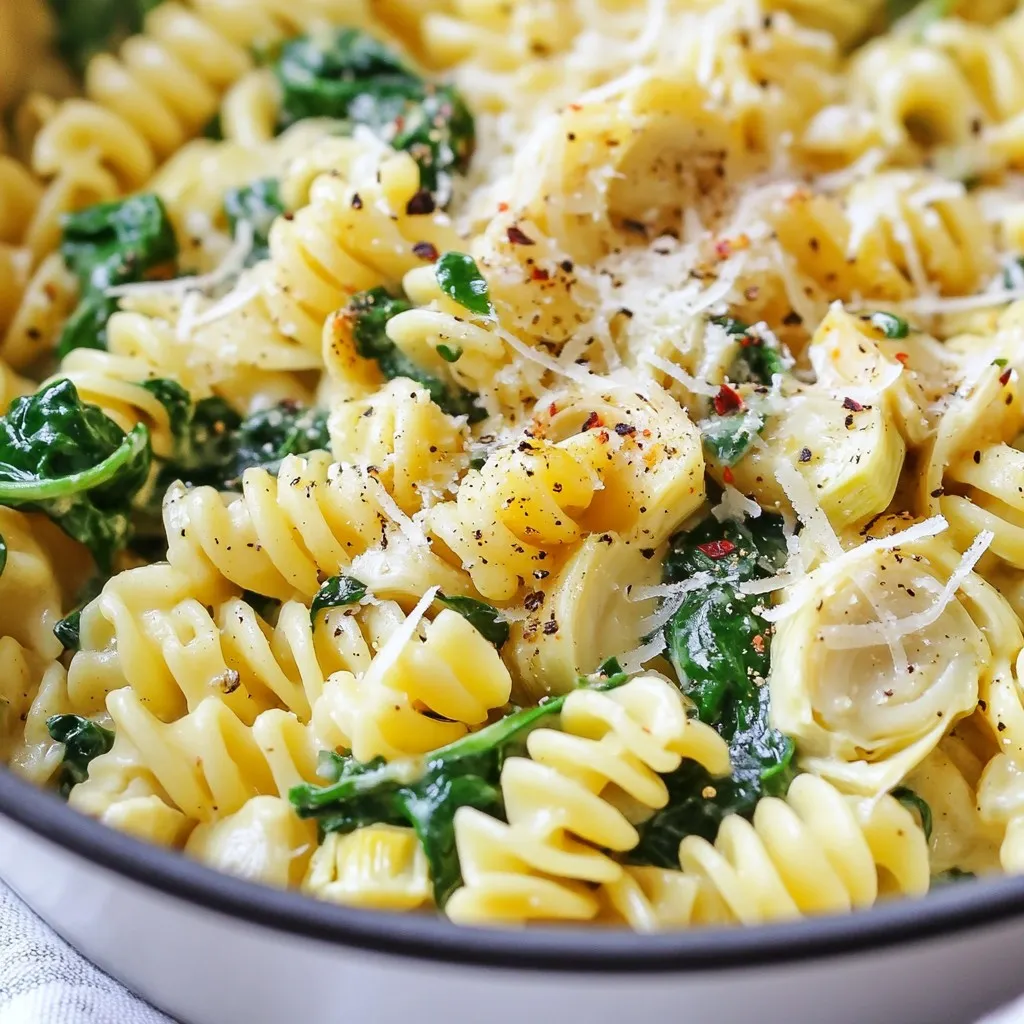
Get ready for a creamy delight that’s easy and fun to make! My One-Pot Spinach Artichoke Pasta combines rich flavors and simple steps all in one pot. Imagine creamy sauce enveloping tender pasta, spinach, and artichokes, with just the right spice. Perfect for any night, this dish saves time and effort while still tasting amazing. Ready to impress? Let’s dive into how to make this warming meal!
Why I Love This Recipe
- Quick and Easy: This one-pot recipe comes together in just 30 minutes, making it perfect for busy weeknights.
- Flavorful Ingredients: With the combination of spinach, artichokes, garlic, and creamy Parmesan, every bite is packed with flavor.
- Healthy and Satisfying: Loaded with greens and whole grains, this pasta dish is both nutritious and filling.
- Versatile Dish: Feel free to customize with your favorite pasta or add protein like chicken or shrimp for an extra boost.
Ingredients
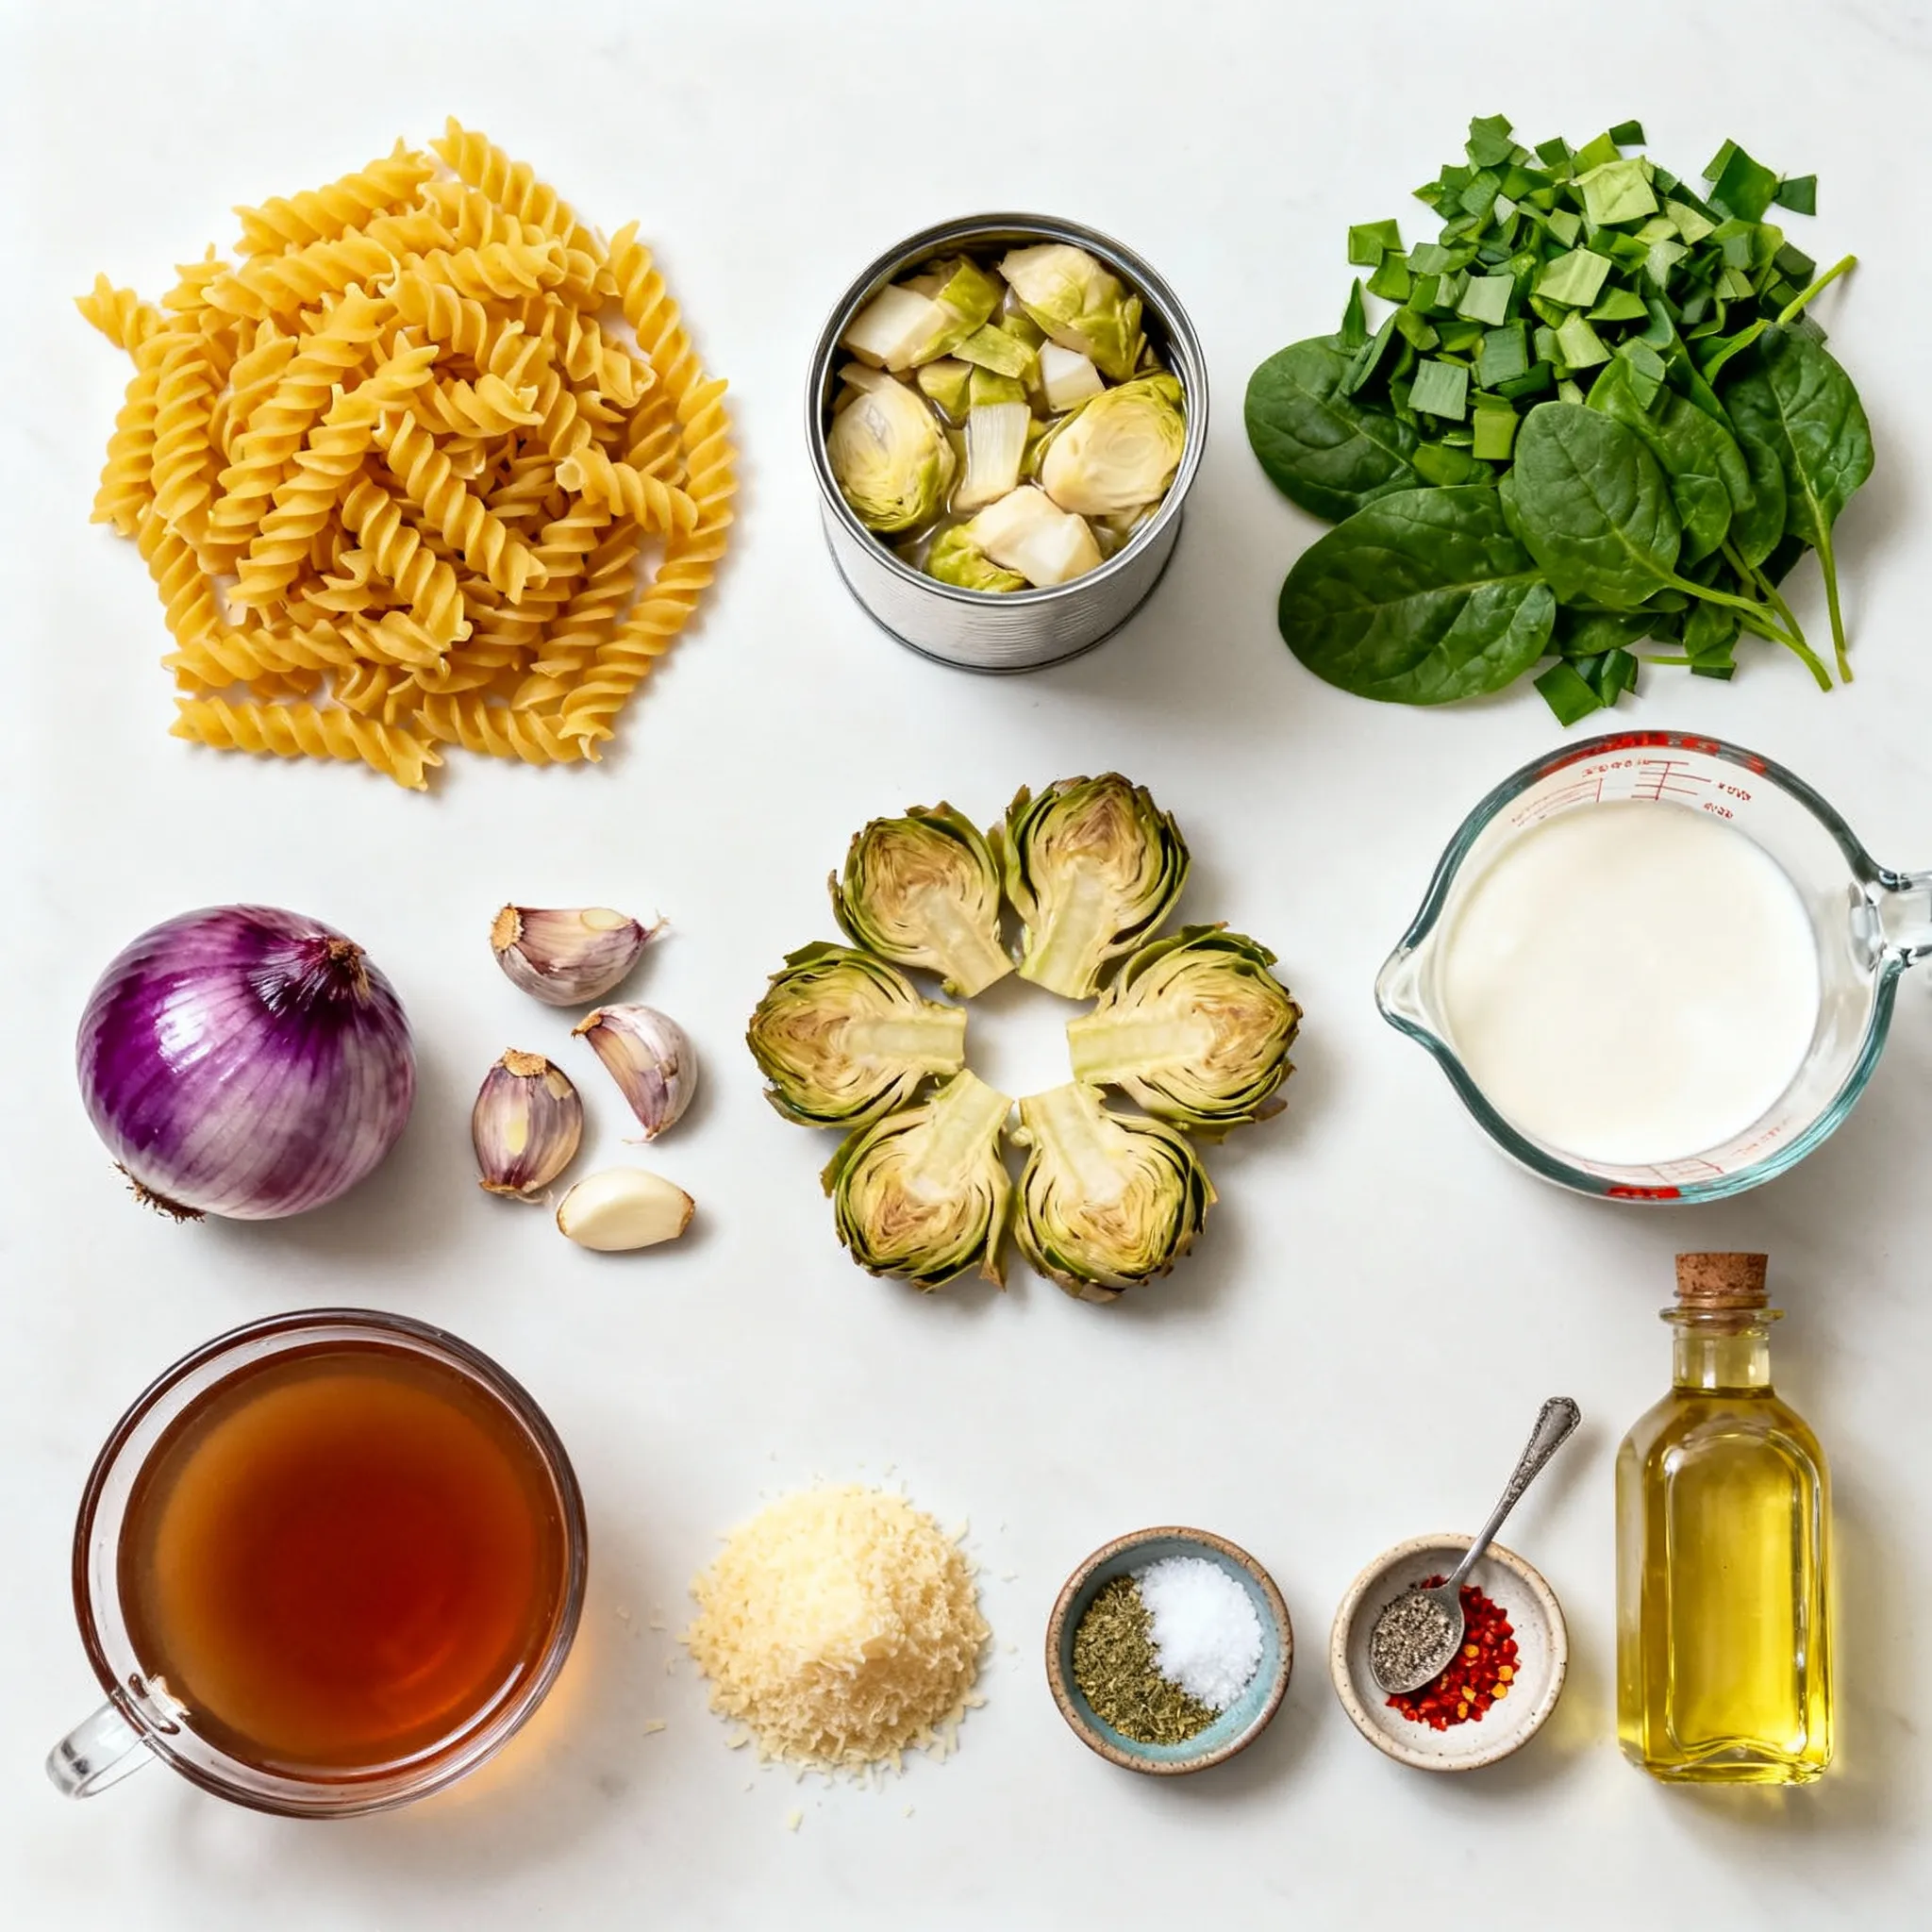
List of Essential Ingredients
- 12 oz pasta (your choice of fusilli or penne)
- 2 cups fresh spinach, roughly chopped
- 1 can (14 oz) artichoke hearts, drained and roughly chopped
- 4 cloves garlic, minced
- 1 medium onion, diced
- 1 cup vegetable broth
- 1 cup heavy cream
- 1 cup grated Parmesan cheese
- 1 teaspoon Italian seasoning
- Salt and freshly cracked black pepper to taste
- 2 tablespoons extra virgin olive oil
These ingredients create a rich and creamy pasta dish. The artichokes and spinach give great flavor and texture. You can use any pasta shape that you like. I often choose fusilli or penne for their ability to hold sauce well.
Optional Garnishes
- Red pepper flakes (for a touch of spice)
- Additional grated Parmesan cheese
- Fresh parsley, chopped
Garnishing your dish makes it look more appealing. Red pepper flakes add nice heat, while parsley adds color. Extra cheese always makes it better!
Nutritional Information Breakdown
- Servings: 4
- Calories per serving: Approximately 600
- Protein: 20g
- Carbohydrates: 60g
- Fat: 30g
- Fiber: 4g
This dish offers a balance of flavors and nutrients. The cheese and cream provide protein and fat, while spinach adds fiber and vitamins. It’s a hearty meal that satisfies without being overly heavy.

Step-by-Step Instructions
Preparing the Base and Sautéing
Start by heating 2 tablespoons of extra virgin olive oil in a large pot over medium heat. Once hot, add 1 medium diced onion. Sauté the onion for about 3-4 minutes. You want it to turn soft and clear. Next, add 4 minced garlic cloves. Cook for 1 more minute. The garlic should smell great, but don’t let it burn.
Making the Sauce
Now, it’s time to make the sauce. Pour in 1 cup of vegetable broth and 1 cup of heavy cream. Stir well to blend everything together. Bring this mixture to a gentle simmer. This helps all the flavors mix and get tasty.
Cooking the Pasta to Perfection
Add 12 oz of uncooked pasta to the pot. Use either fusilli or penne. Sprinkle in 1 teaspoon of Italian seasoning, along with salt and freshly cracked black pepper to taste. Stir everything well to ensure the pasta is covered in the liquid. Cover the pot and cook for about 10-12 minutes. Stir occasionally. You want the pasta to be al dente, with most of the liquid soaked up.
Final Touches: Integrating Spinach and Cheese
Once the pasta is cooked, take the pot off the heat. Stir in 2 cups of roughly chopped fresh spinach and 1 cup of grated Parmesan cheese. This will make the dish creamy and delicious. The spinach should wilt right away.
Serving Suggestions
Serve your pasta right away. Use wide, shallow bowls to show off the colors. You can add more Parmesan cheese on top if you like. For a little kick, sprinkle some red pepper flakes. Enjoy your creamy delight!
Tips & Tricks
How to Choose the Right Pasta
When making One-Pot Spinach Artichoke Pasta, you want the right pasta. Fusilli and penne work best. Their shapes hold sauce well and add texture. Fusilli’s twists catch bits of spinach and artichokes. Penne’s tubes hold the cream, making each bite rich. Use what you prefer. Just make sure it’s not too thin or delicate.
Perfecting the Creamy Sauce
A creamy sauce makes this dish shine. Start with heavy cream for richness. It blends smoothly with the vegetable broth. This mix creates a luscious base. Always stir well to combine flavors. Add Italian seasoning for a herbal touch. Taste as you go and adjust salt and pepper. This way, you ensure every bite is flavorful.
Enhancements for Extra Flavor
Want to take this dish further? Think about adding more flavors. A squeeze of lemon brightens the dish. It adds a zesty kick that balances the creaminess. You can also sprinkle in some red pepper flakes. This adds warmth and a little heat. Lastly, fresh herbs like basil or parsley can bring freshness. Don’t be afraid to experiment. Your taste buds will love it!
Pro Tips
- Fresh Ingredients Matter: Using fresh spinach and high-quality artichoke hearts will elevate the flavor of your dish significantly.
- Customize Your Pasta: Feel free to use whole wheat or gluten-free pasta for a healthier option or to accommodate dietary restrictions.
- Save Some Cheese: Reserve a bit of Parmesan cheese for garnishing the finished dish; it adds a nice touch and enhances presentation.
- Make It Ahead: This dish can be made ahead of time and reheated. Just add a splash of broth or cream when reheating to maintain creaminess.

Variations
Creamy Spinach Artichoke Pasta with Chicken
You can make this dish heartier by adding chicken. Start with cooked chicken breast. Dice it into small pieces and sauté it with the onion and garlic. This adds protein and makes the meal more filling. It also gives a nice texture to the creamy sauce. Feel free to use leftover chicken or rotisserie chicken for ease.
Vegan Version of One-Pot Pasta
To make a vegan version, replace heavy cream with coconut milk or cashew cream. Use nutritional yeast instead of Parmesan cheese for a cheesy flavor. Make sure to check that your vegetable broth is vegan-friendly. This keeps the dish creamy while making it plant-based and still delicious.
Adding Other Vegetables for Flavor
You can mix in other veggies to enhance the taste. Consider adding bell peppers, mushrooms, or zucchini. Sauté these with the onion and garlic for extra flavor. You can also throw in some cherry tomatoes for a burst of sweetness. This not only adds color but also boosts the nutrition of your meal.
Storage Information
Best Practices for Storing Leftovers
To keep your one-pot spinach artichoke pasta fresh, let it cool first. Place it in an airtight container. This helps avoid moisture loss. Store it in the fridge for up to three days. If you know you won’t eat it soon, consider freezing it.
Reheating Tips for Optimal Texture
When reheating, add a splash of broth or cream. This keeps the pasta creamy and moist. Use the stovetop for best results. Heat on low while stirring gently. You can also use a microwave; just cover it to keep moisture in.
Freezing Guidelines for Future Meals
To freeze, portion the pasta into freezer-safe bags. Flatten the bags for easy stacking. You can freeze it for up to three months. When ready to eat, thaw it overnight in the fridge. Reheat it as mentioned above for a tasty meal.
FAQs
How long does the one-pot pasta last in the fridge?
One-pot spinach artichoke pasta stays fresh in the fridge for about 3 to 4 days. Store it in an airtight container. This keeps the pasta moist and tasty. If you want to enjoy it later, make sure to cool it down first before placing it in the fridge.
Can I use frozen spinach or artichokes?
Yes, you can use frozen spinach and artichokes. Just thaw them first and drain any excess water. Frozen veggies can save time and still taste great. They work well in this dish, keeping it easy and convenient.
What can I substitute for heavy cream?
If you want a lighter dish, there are good substitutes for heavy cream. You can use half-and-half, whole milk, or even coconut milk for a dairy-free option. Each will change the flavor a bit but will still make your pasta creamy.
Are there gluten-free options for this recipe?
Absolutely! You can use gluten-free pasta for this recipe. Many brands offer tasty gluten-free options, like brown rice or chickpea pasta. This way, you can enjoy the creamy delight without worrying about gluten.
In this post, we covered essential ingredients and how to create a tasty one-pot pasta. I shared step-by-step instructions for preparing, cooking, and serving it. Tips on pasta choices and sauce perfection added extra value. Plus, we explored fun variations and storage tips to keep your dish fresh.
With these insights, you can now make a delicious and satisfying meal. Enjoy your cookin

One-Pot Spinach Artichoke Pasta Delight
Ingredients
- 12 oz pasta (fusilli or penne)
- 2 cups fresh spinach, roughly chopped
- 1 can (14 oz) artichoke hearts, drained and roughly chopped
- 4 cloves garlic, minced
- 1 medium onion, diced
- 1 cup vegetable broth
- 1 cup heavy cream
- 1 cup grated Parmesan cheese
- 1 teaspoon Italian seasoning
- to taste salt and freshly cracked black pepper
- 2 tablespoons extra virgin olive oil
- optional red pepper flakes (for garnish)
Instructions
- In a large pot, heat the extra virgin olive oil over medium heat. Add the diced onion and sauté for about 3-4 minutes until the onion becomes translucent and soft.
- Stir in the minced garlic and cook for an additional 1 minute until it's fragrant, being careful not to let it burn.
- Add the chopped artichoke hearts to the pot, stirring them in and cooking for 2 minutes to meld the flavors.
- Pour in the vegetable broth and heavy cream, stirring to combine thoroughly. Bring the mixture to a gentle simmer, allowing the flavors to develop.
- Add the uncooked pasta to the pot along with the Italian seasoning, salt, and freshly cracked black pepper. Stir everything together to ensure that the pasta is submerged in the liquid.
- Cover the pot and cook for approximately 10-12 minutes, stirring occasionally, until the pasta is al dente and most of the liquid has been absorbed.
- Remove the pot from heat and stir in the chopped spinach and grated Parmesan cheese. Mix until the spinach wilts and the cheese transforms the dish into a creamy delight.
- Taste your dish and adjust the seasoning if necessary, adding extra salt, pepper, or red pepper flakes for a touch of heat according to your preference.
- Serve your pasta immediately, garnished with additional Parmesan cheese and a sprinkle of red pepper flakes if you're a fan of spice.


![- 1 cup uncooked jasmine rice - 1 pound shrimp, peeled and deveined - 2 tablespoons vegetable oil - 3 tablespoons soy sauce - 1 tablespoon sesame oil - Salt and pepper, to taste - 1 cup mixed vegetables - 2 cloves garlic, minced - Fresh green onions, for garnish When I make Easy Shrimp Fried Rice, I always start with the main ingredients. The jasmine rice gives a lovely aroma and texture. For the shrimp, I prefer fresh, peeled, and deveined ones. They cook quickly and taste great. Seasonings are key to this dish. Soy sauce adds umami, while sesame oil gives a nutty flavor. Always remember to season with salt and pepper to bring out the taste. I love adding optional ingredients for extra flavor and color. Mixed veggies like peas and carrots add a nice crunch. Minced garlic gives it a punch, and fresh green onions on top make it look beautiful. For the full recipe, check out the details. Enjoy cooking! - First, rinse 1 cup of jasmine rice under cold water. Use your hands to stir the rice as you rinse. This helps remove excess starch. Keep rinsing until the water runs clear. Drain the rice well. - Next, take a medium saucepan. Add the rinsed rice along with 2 cups of water or low-sodium chicken broth. Bring it to a boil over high heat. Once it boils, lower the heat. Cover the pot with a lid and let it simmer for 15 minutes. The rice will absorb the liquid and become tender. When done, fluff the rice with a fork and set it aside to cool. - Now, heat 2 tablespoons of vegetable oil in a large skillet or wok over medium-high heat. Add 2 cloves of minced garlic and 1 small finely chopped onion. Sauté them for 2-3 minutes. The garlic should smell nice, and the onion will turn clear. - Then, add 1 pound of peeled and deveined shrimp to the skillet. Spread them out evenly. Cook for 2-3 minutes, until the shrimp turn pink and opaque. Once cooked, take them out and set them aside on a plate. - In the same skillet, toss in 1 cup of mixed vegetables. Stir-fry them for 2-3 minutes. They should soften but stay colorful. - Next, push the cooked vegetables to one side of the skillet. Pour in 2 large lightly beaten eggs on the other side. Scramble them until fully cooked and a bit golden. - Now, add the cooled jasmine rice to the skillet. Mix it in with the scrambled eggs and vegetables. Gently fold in the cooked shrimp, ensuring everything combines well. - Drizzle 3 tablespoons of soy sauce and 1 tablespoon of sesame oil over the rice mixture. Stir everything well. Season with salt and freshly ground black pepper to taste. Cook for another 2-3 minutes to let the flavors mix. - Finally, take the skillet off the heat. Garnish with sliced green onions for a fresh touch before serving. This is how you create a delicious shrimp fried rice. For the full recipe, check the section above! - Rinse rice for fluffiness: Rinsing jasmine rice helps remove excess starch. This keeps the rice from becoming sticky. Rinse it until the water runs clear. - Avoid overcooking shrimp: Cook shrimp until they turn pink and opaque. Overcooked shrimp can become rubbery. Remove them from heat as soon as they are done. - Use low-sodium soy sauce: This allows you to control salt levels. It makes your fried rice taste good without too much sodium. - Add extra vegetables for nutrition: Toss in broccoli, peas, or bell peppers. This boosts fiber and vitamins, making your meal healthier. - Recommended garnishes: Fresh green onions add color and taste. You can also sprinkle sesame seeds for a fun crunch. - Pairing options for a complete meal: Serve with a side of steamed veggies or a light salad. This makes your meal balanced and tasty. If you want to dive deeper into the recipe, check out the Full Recipe. {{image_4}} You can easily switch out shrimp in this dish. Try using chicken or tofu instead. Both options work great. For chicken, use bite-sized pieces and cook until golden. For tofu, press it to remove water and then cube it. Sauté until crispy. These changes keep the meal tasty and fun! If you want a vegetarian dish, just leave out the shrimp. Increase the number of vegetables instead. You can add more peas, carrots, bell peppers, or even broccoli. This makes the dish colorful and healthy. Plus, you still get a yummy meal that fills you up! Want to make your fried rice pop with flavor? Add spices like chili or ginger. These spices add heat and depth. You can also mix in some citrus zest, like lemon or lime. This adds a fresh, bright taste that enhances the dish. These little changes make a big difference! Check out the Full Recipe for more ideas. To store shrimp fried rice, let it cool first. Place it in an airtight container. This keeps the rice fresh and prevents it from drying out. You can refrigerate it for up to three days. When you want to eat it, check for any off smells or changes in texture. If you want to freeze shrimp fried rice, portion it into small containers. Make sure to leave some space at the top for expansion. This dish can last in the freezer for about one month. When ready to eat, thaw it in the fridge overnight for best results. For reheating, the stovetop is ideal. Add a splash of water or broth to keep it moist. Heat over medium heat, stirring often. You can also use the microwave. Heat in 30-second intervals, stirring in between. This way, your shrimp fried rice will taste fresh and full of flavor. For more cooking tips, you can check the [Full Recipe]. To boost flavor, use fresh ingredients. Fresh garlic, ginger, and green onions add depth. Try adding a splash of fish sauce for umami. A sprinkle of lime juice brightens the dish. For heat, add chili flakes or sriracha. Lastly, use low-sodium soy sauce to control saltiness. These tips help create a tasty, vibrant meal. Yes, you can prepare shrimp fried rice ahead of time. Cook the rice and shrimp, then store them separately. Keep everything in airtight containers in your fridge. When ready to eat, combine and reheat in a skillet. Add a splash of water or broth to keep it moist. This method ensures your dish stays fresh and delicious. You can use many veggies to add color and crunch. Consider bell peppers, broccoli, or snap peas. Zucchini and mushrooms also work well. Toss in some corn for sweetness or spinach for extra greens. Feel free to mix and match based on your taste. This allows for fun, creative variations. Yes, shrimp fried rice can be gluten-free. Use tamari instead of soy sauce. Check labels on other sauces to ensure they are gluten-free. Most vegetables are naturally gluten-free too. By choosing the right ingredients, you can enjoy this dish without worry. It makes for a tasty option for everyone! You learned how to make shrimp fried rice from scratch. We covered the key ingredients, step-by-step cooking instructions, and helpful tips. You can easily customize this dish with different proteins and veggies. Remember to store leftovers properly for future meals. Enjoying this dish should be fun and easy. With these steps, you can impress your family and friends. Happy cooking!](https://dishtreats.com/wp-content/uploads/2025/06/9ac088a4-5695-4856-8853-65ac7e0439f3-768x768.webp)


