Welcome to the world of sweet indulgence with my No-Bake Strawberry Cheesecake! This simple dessert is perfect for everyone, from busy parents to budding chefs. You don’t need fancy skills or hours in the kitchen. With just a handful of ingredients, you’ll create a creamy delight that’s as fun to make as it is to eat. Stick around, and I’ll guide you through every step of this mouthwatering treat!
Ingredients
Essential Ingredients for No-Bake Strawberry Cheesecake
To make a no-bake strawberry cheesecake, you need a few key ingredients. Each ingredient plays a vital role in the flavor and texture of the cake. Here’s what you’ll need:
– 200g digestive biscuits, finely crushed
– 100g unsalted butter, melted
– 400g cream cheese, softened to room temperature
– 100g powdered sugar
– 1 teaspoon pure vanilla extract
– 250ml heavy whipping cream
– 300g fresh strawberries, hulled and sliced
– 100g strawberry jam
– Fresh mint leaves for garnish (optional)
Ingredient Measurements and Substitutions
If you’re missing an ingredient, don’t worry! You can make easy swaps. Instead of digestive biscuits, you can use graham crackers. For butter, margarine works too. If you want a lighter version, try using low-fat cream cheese. You can also substitute heavy cream with whipped topping for a similar effect.
Tips for Selecting Fresh Strawberries
When choosing strawberries, look for bright red color and a shiny surface. Check for firmness and avoid any with soft spots. Fresh strawberries should smell sweet and fragrant. If you can, buy them from a local market to ensure they are in season. This will make your cheesecake taste even better!
Step-by-Step Instructions
Preparation of the Biscuit Base
To start, gather your ingredients. You need 200g of digestive biscuits and 100g of unsalted butter. First, crush the biscuits into fine crumbs. A food processor works best for this. If you don’t have one, you can place the biscuits in a zip-top bag and crush them with a rolling pin.
Next, melt the butter in a small saucepan or microwave. Mix the crushed biscuits and melted butter in a large bowl. Stir until the mixture looks like damp sand.
Now, take a 9-inch springform pan. Firmly press the biscuit mix into the bottom of the pan. Make it even and flat. This is your base. Place the pan in the fridge for about 10 minutes to let it set.
Making the Cheesecake Filling
For the filling, you’ll need 400g of cream cheese, 100g of powdered sugar, and 1 teaspoon of pure vanilla extract. In a new bowl, use an electric mixer to beat the cream cheese. Add the powdered sugar and vanilla extract. Blend until the mix is smooth and creamy. Be sure there are no lumps.
Now, in another bowl, whip 250ml of heavy cream until stiff peaks form. This means it should hold its shape. Gently fold the whipped cream into the cream cheese mix. Use a spatula for this. Be careful not to lose the air in the whipped cream.
Assembling and Chilling the Cheesecake
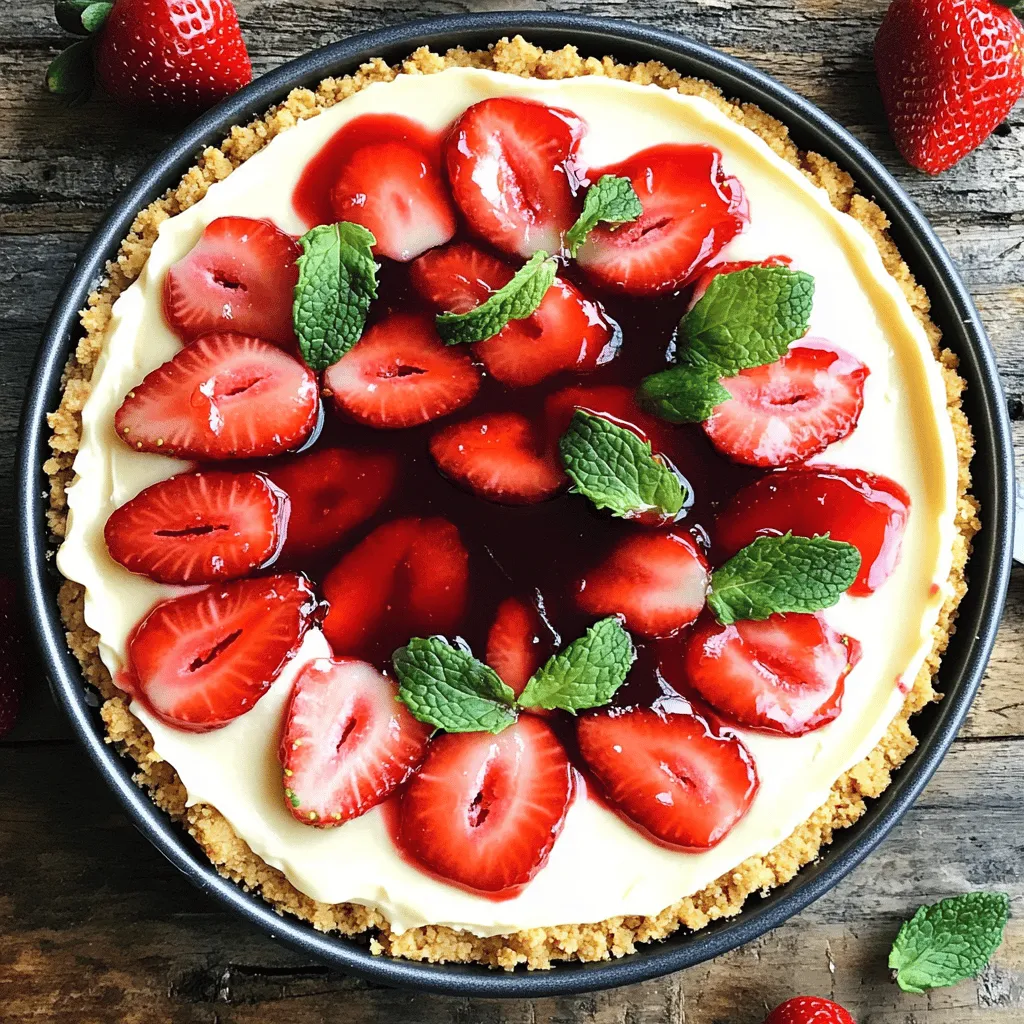
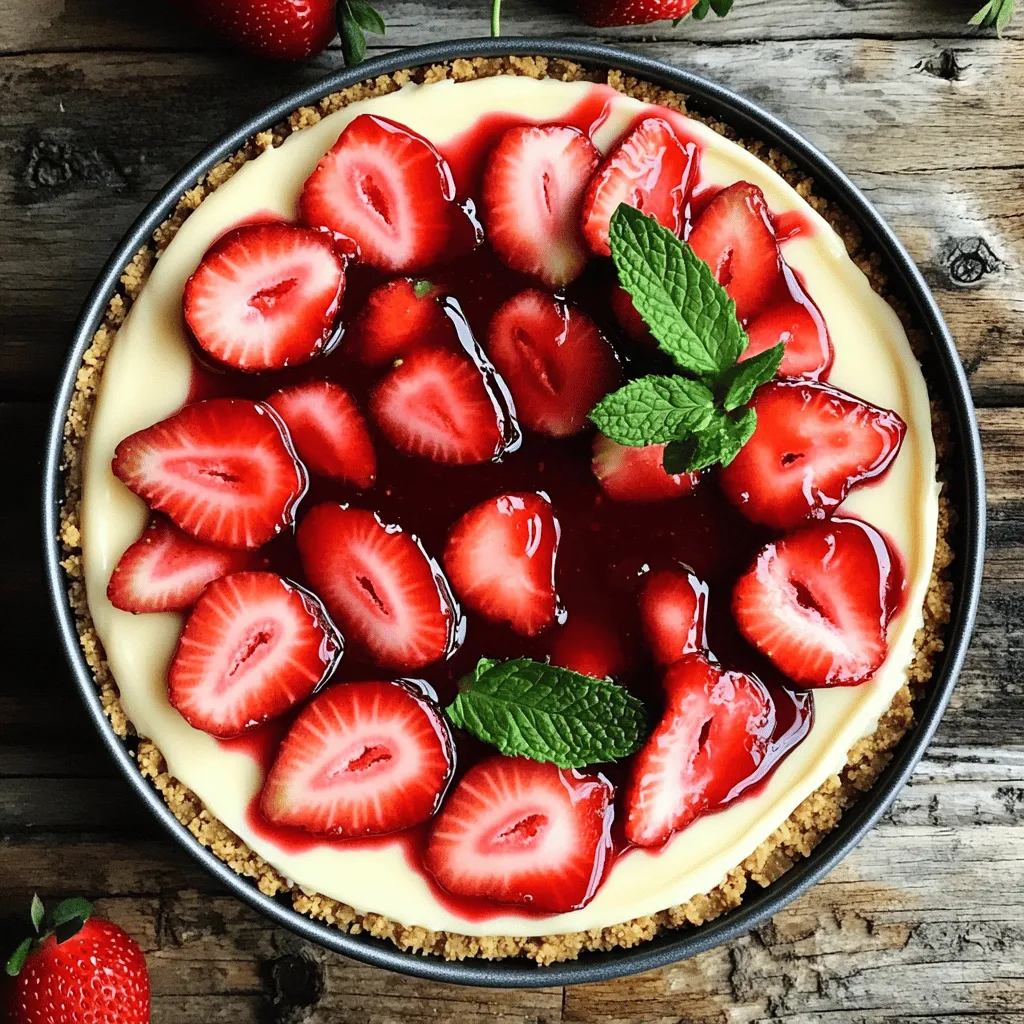
Once your filling is ready, pour it over the chilled biscuit base. Use a spatula to spread it out evenly. Next, take 300g of fresh strawberries. Slice them and arrange them on top of the cheesecake filling. Make a nice pattern for a pretty look.
In a small saucepan, heat 100g of strawberry jam until it melts. Remove it from heat and let it cool slightly. Drizzle the melted jam over the strawberries. Cover the cheesecake with plastic wrap and place it in the fridge. Let it chill for at least 4 hours, but overnight is best.
When it’s ready, run a warm knife around the edge of the pan to loosen it. Then, carefully release the sides of the springform pan. Now, your no-bake strawberry cheesecake is ready to enjoy!
Tips & Tricks
Achieving the Perfect Cheesecake Texture
To get the best texture, you need to mix well. First, ensure your cream cheese is soft. This helps it blend smoothly. When you whip the cream, aim for stiff peaks. This keeps your cheesecake light and fluffy. Always fold the whipped cream gently into the cheese mixture. This step is key to keeping air in your cheesecake.
Common Mistakes to Avoid
One big mistake is not chilling the base long enough. If the base isn’t set, it will crumble when you cut it. Another mistake is over-mixing the cream cheese. This can lead to a dense texture. Make sure to use fresh strawberries; old ones can affect the taste. Finally, don’t skip the strawberry jam drizzle. It adds flavor and makes your cheesecake look great.
How to Easily Cut and Serve the Cheesecake
To cut the cheesecake cleanly, use a warm knife. Dip the knife in hot water and wipe it dry. This helps you get neat slices. Serve each slice on a dessert plate. You can garnish with mint leaves and extra strawberries. This adds a pop of color and freshness.
Variations
Alternative Fruit Toppings
You can switch out strawberries for other fruits. Try blueberries, raspberries, or peaches. Each will give a unique taste. Fresh fruit adds color and flavor. You can also use canned fruit if fresh isn’t available. Just make sure to drain any juice before adding.
Chocolate or Caramel Drizzle Options
Chocolate or caramel can elevate your cheesecake. Melt chocolate and drizzle it on top for a rich taste. A caramel drizzle gives a sweet contrast to the tartness of the strawberries. You can use store-bought sauces or make your own. Just pour it on right before serving to keep it fresh.
Gluten-Free Biscuit Base Options
If you need a gluten-free option, use gluten-free biscuits. Brands like gluten-free graham crackers work well. Crush them just like regular biscuits. Blend with melted butter and press into your pan. This way, everyone can enjoy the cheesecake without worry.
Storage Info
How to Store No-Bake Strawberry Cheesecake
To keep your no-bake strawberry cheesecake fresh, store it in the fridge. Use an airtight container or cover it tightly with plastic wrap. This prevents odors from other foods from mixing in. Keep the cheesecake chilled until you are ready to serve it.
Freezing and Thawing Tips
You can freeze this cheesecake if you want to save leftovers. Slice the cheesecake into portions before freezing. Wrap each slice in plastic wrap, then place them in a freezer bag. This helps maintain its taste and texture. To thaw, take it out of the freezer and place it in the fridge for several hours. Avoid microwaving, as it can ruin the texture.
Shelf Life in the Refrigerator
In the fridge, your no-bake strawberry cheesecake will last for about three to four days. After that, it may start to lose its freshness. For the best taste, enjoy it within the first few days. Always check for any signs of spoilage before serving.
FAQs
How long does the cheesecake need to set?
The cheesecake needs at least four hours to set. I recommend letting it chill overnight for the best results. This allows the flavors to meld and the texture to firm up nicely.
Can I use frozen strawberries?
Yes, you can use frozen strawberries. Just thaw them first and drain any excess liquid. Frozen strawberries can work well, but fresh ones give a better taste and texture.
What can I substitute for cream cheese?
You can use Greek yogurt or mascarpone cheese as substitutes. Both options offer a creamy texture, but the taste will differ slightly. Choose what you like best for your cheesecake.
How to tell when the cheesecake is ready to serve?
The cheesecake should be firm to the touch and not jiggle in the center. Run a warm knife around the edge before removing the springform pan. This method helps prevent cracks and ensures a clean slice.
You learned how to make a no-bake strawberry cheesecake. We covered key ingredients, measurements, and tips for choosing ripe strawberries. I shared step-by-step instructions for the biscuit base, filling, and chilling process. Remember to avoid common mistakes for the best texture and serving. You can explore fruit variations and storage tips to keep it fresh. Enjoy your delicious dessert, and don’t hesitate to experiment with new flavors!


