Craving a sweet treat that captures the essence of fall? You’re in the right place! These No-Bake Pumpkin Spice Latte Truffles are a delightful way to enjoy the cozy flavors of fall without turning on the oven. With just a few simple ingredients and easy steps, you can make these creamy, chocolate-covered delights at home. So, roll up your sleeves, and let’s dive into the joy of making these tasty truffles together!
Ingredients
Detailed Ingredients List
– 1 cup almond flour
– 1/2 cup rolled oats
– 1/4 cup pure maple syrup
– 1/4 cup pumpkin puree
– 2 tablespoons creamy almond butter
– 2 teaspoons pumpkin spice mix
– 1 teaspoon pure vanilla extract
– 1/4 teaspoon salt
– 1/2 cup dark chocolate chips
– Optional rolling ingredients: cocoa powder or crushed nuts
To create these no-bake pumpkin spice latte truffles, gather all your ingredients first. Almond flour forms the base. It gives a nice texture. Rolled oats add a little chewiness, making the truffles hearty. Pure maple syrup brings natural sweetness. Pumpkin puree adds moisture and flavor.
Creamy almond butter gives a rich taste and helps bind everything. The pumpkin spice mix adds that cozy fall flavor we love. Don’t forget the pure vanilla extract; it enhances the sweetness. A hint of salt balances the flavors perfectly.
For a delightful finish, melt some dark chocolate chips. They coat the truffles and add a rich touch. If you want, roll the truffles in cocoa powder or crushed nuts for an extra layer of flavor. These simple ingredients come together to make a delicious treat!
Step-by-Step Instructions
Preparing the Mixture
First, grab a large mixing bowl. In it, combine 1 cup of almond flour and 1/2 cup of rolled oats. Stir them together well. This helps to break up any lumps. Next, add 1/4 cup of pure maple syrup and 1/4 cup of pumpkin puree. Then, mix in 2 tablespoons of creamy almond butter, 2 teaspoons of pumpkin spice mix, 1 teaspoon of pure vanilla extract, and a pinch of 1/4 teaspoon of salt. Blend everything until you have a sticky, smooth dough.
Forming the Truffles
Now it’s time to shape the mixture. Use your hands to form small balls, about 1 inch in diameter. Place each ball on a parchment-lined baking sheet. Make sure to leave space between them. This helps to prevent sticking.
Melting the Chocolate
Next, melt the dark chocolate chips. Put 1/2 cup of chocolate chips in a microwave-safe bowl. Heat them in the microwave for 30 seconds at a time. Stir well between each heating. Keep going until the chocolate is smooth and melted.
Coating the Truffles
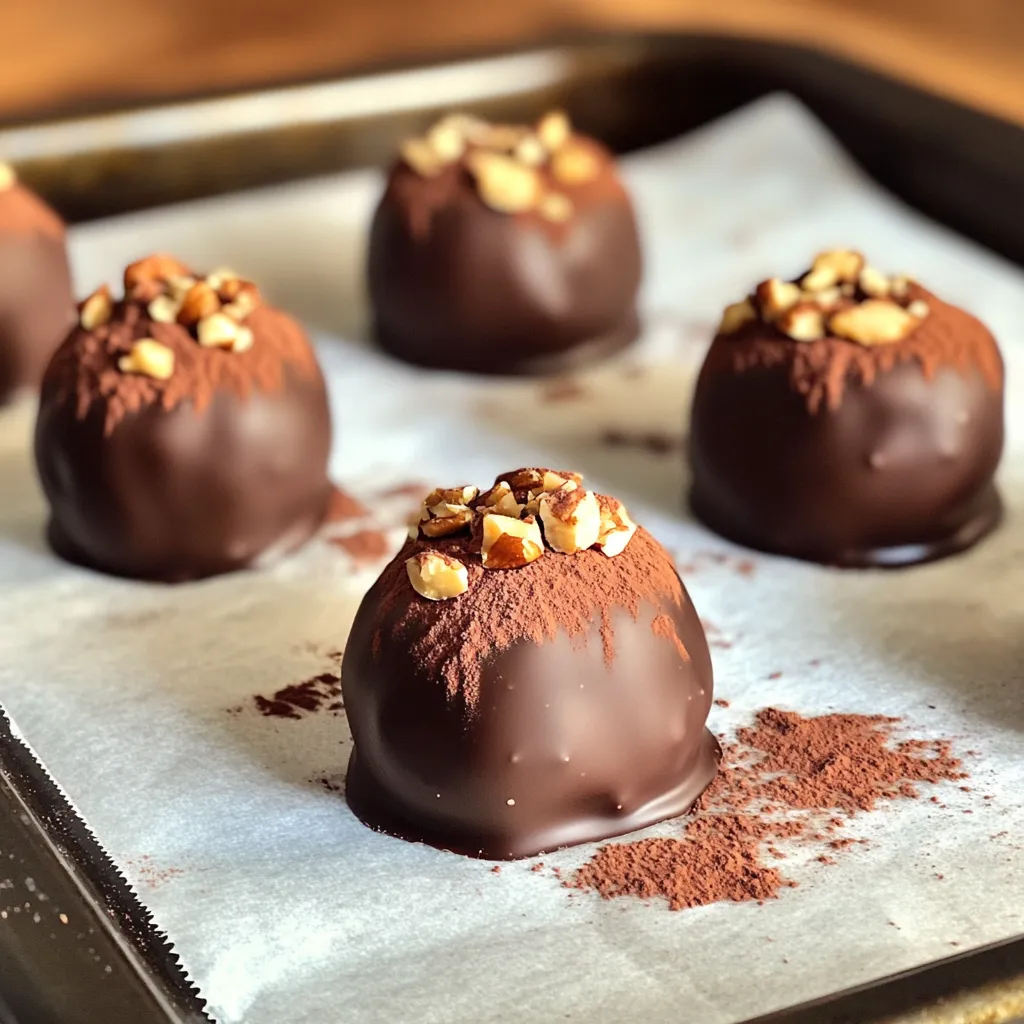
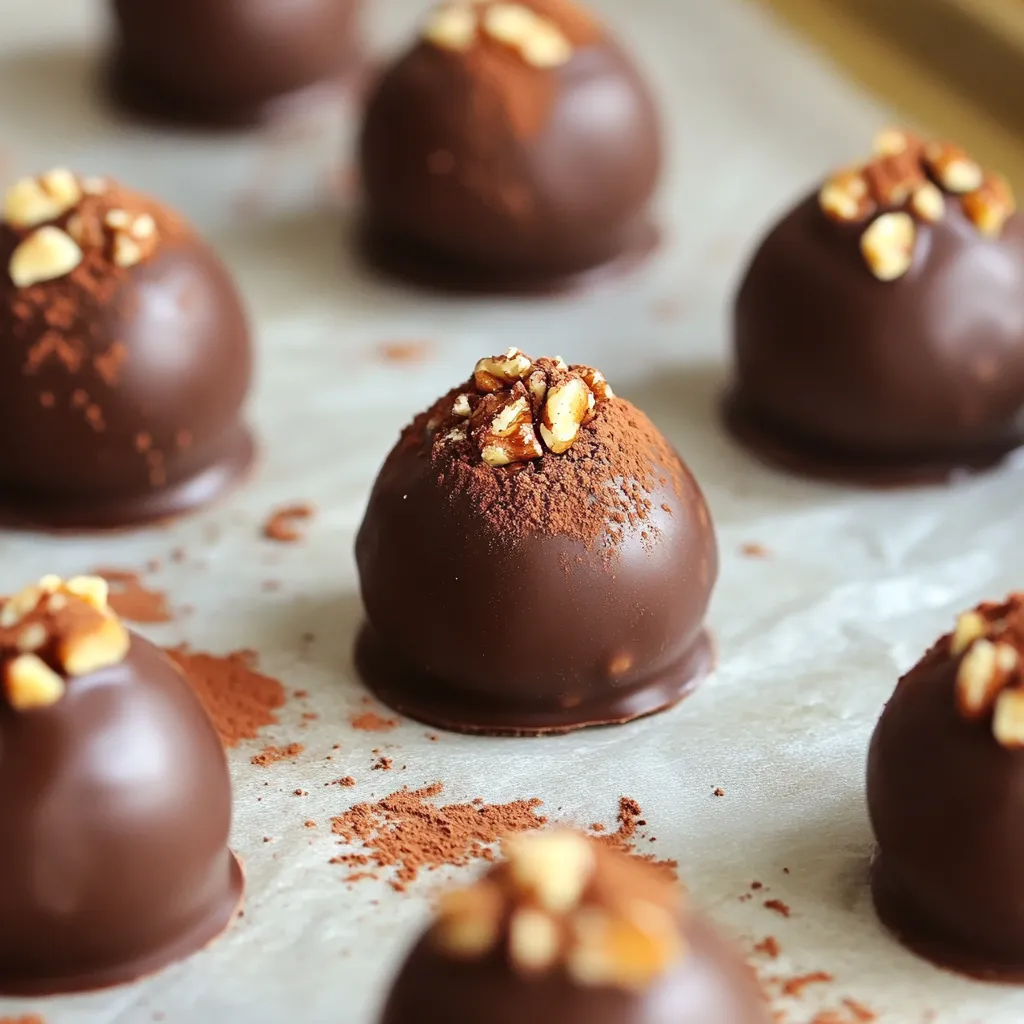
Once the chocolate is ready, dip each truffle into the melted chocolate. Use a fork to lift the truffle out. Let any extra chocolate drip back into the bowl. For added flavor, you can roll the truffles in cocoa powder or crushed nuts while the chocolate is still wet.
Setting the Truffles
After dipping, place the coated truffles back on the parchment paper. Put the baking sheet in the refrigerator for about 30 minutes. This helps the chocolate harden. Enjoy these tasty truffles chilled, or store them in an airtight container in the fridge for up to one week.
Tips & Tricks
Successfully Making Truffles
To make the perfect truffles, ensure you have a sticky, cohesive dough. This will help the truffles hold their shape. When mixing, combine the almond flour and oats well before adding the wet ingredients. Once mixed, use your hands to form small balls. This step is key to creating a nice texture.
When it comes to coating the truffles in chocolate, use a fork. This tool helps you dip each truffle evenly, ensuring a good chocolate layer. Let the excess chocolate drip off before placing the truffles on parchment paper. This method keeps your truffles neat and delicious.
Presentation Tips
For a beautiful display, serve the truffles on a decorative platter. You can sprinkle a dusting of cocoa powder for a classy touch. Garnishing with whole almonds or a sprinkle of cinnamon adds a lovely look. These small details make your truffles stand out at any gathering.
Pairing Suggestions
These truffles taste best when served chilled. Keep them in the fridge until you are ready to enjoy them. Pairing them with coffee or tea enhances their rich flavors. The warm drinks contrast nicely with the cool sweetness of the truffles. This combination makes for a delightful treat, perfect for any time of year.
Variations
Flavor Alternatives
You can change the taste of your truffles easily. Try using different nut butters. Almond butter works great, but peanut or cashew butter can add a fun twist. Each nut butter gives a unique flavor.
You can also switch up the chocolate. Dark chocolate is rich, but you might like milk chocolate or white chocolate. For a vegan option, use dairy-free chocolate chips. Each choice brings a different taste and look.
Healthier Versions
If you want a lighter treat, reduce the maple syrup. This cuts down on sweetness. You can also add protein powder. This makes your truffles more filling and gives them extra nutrition. Choose your favorite flavor of protein powder for a fun twist.
Seasonal Twists
Seasonal ideas can make your truffles special. For a holiday treat, add crushed peppermint. It gives a fresh taste and adds a festive touch.
You can also mix in nuts or dried fruit. Chopped walnuts or cranberries can add great texture. These additions make your truffles even more interesting and fun to eat.
Storage Info
How to Store
Store your truffles in an airtight container. Place them in the fridge. This keeps them fresh and tasty.
Shelf Life
These truffles last up to one week in the fridge. Enjoy them throughout the week for a sweet treat.
Freezing Truffles
To freeze, place the truffles in a single layer on a baking sheet. Once frozen, transfer them to a freezer-safe bag or container. They can stay frozen for up to three months. Thaw them in the fridge before enjoying!
FAQs
Can I use a different flour?
Yes, you can. If you need gluten-free options, try coconut flour or oat flour. Almond flour works well, but it may not suit all diets. For nut-free, consider using sunflower seed flour. Each flour has a different texture, so adjust the amount as needed.
What can I use instead of maple syrup?
If you don’t have maple syrup, honey is a great swap. Agave syrup also works well and gives a similar sweetness. Both options add a lovely flavor. Just remember to adjust the amount since some are sweeter than others.
How long should I refrigerate the truffles?
You should refrigerate the truffles for about 30 minutes. This time gives the chocolate a chance to set. If you want a firmer truffle, leave them longer. The longer they chill, the denser they become.
Are these truffles vegan?
Yes, these truffles can be vegan. Just use dairy-free chocolate chips. Make sure your nut butter is also vegan-friendly. The pumpkin puree, maple syrup, and other ingredients are already vegan.
Can I make these nut-free?
Absolutely! You can replace almond flour and almond butter with sunbutter and sunflower seed flour. This keeps the truffles nut-free while still being tasty. Just watch out for any cross-contamination if you’re very sensitive to nuts.
These truffles blend almond flour, oats, maple syrup, and pumpkin for a tasty treat. You can customize them with different nuts or spices. Follow the steps to make your own delicious truffles. Store them in the fridge for up to a week. Enjoy them chilled with coffee or tea. Simple tips can help you improve your truffle-making skills. With a few creative twists, you can make these truffles your own. Try them out and impress your friends!


