No-Bake Pumpkin Cream Cheese Mousse Cups Dreamy Treat

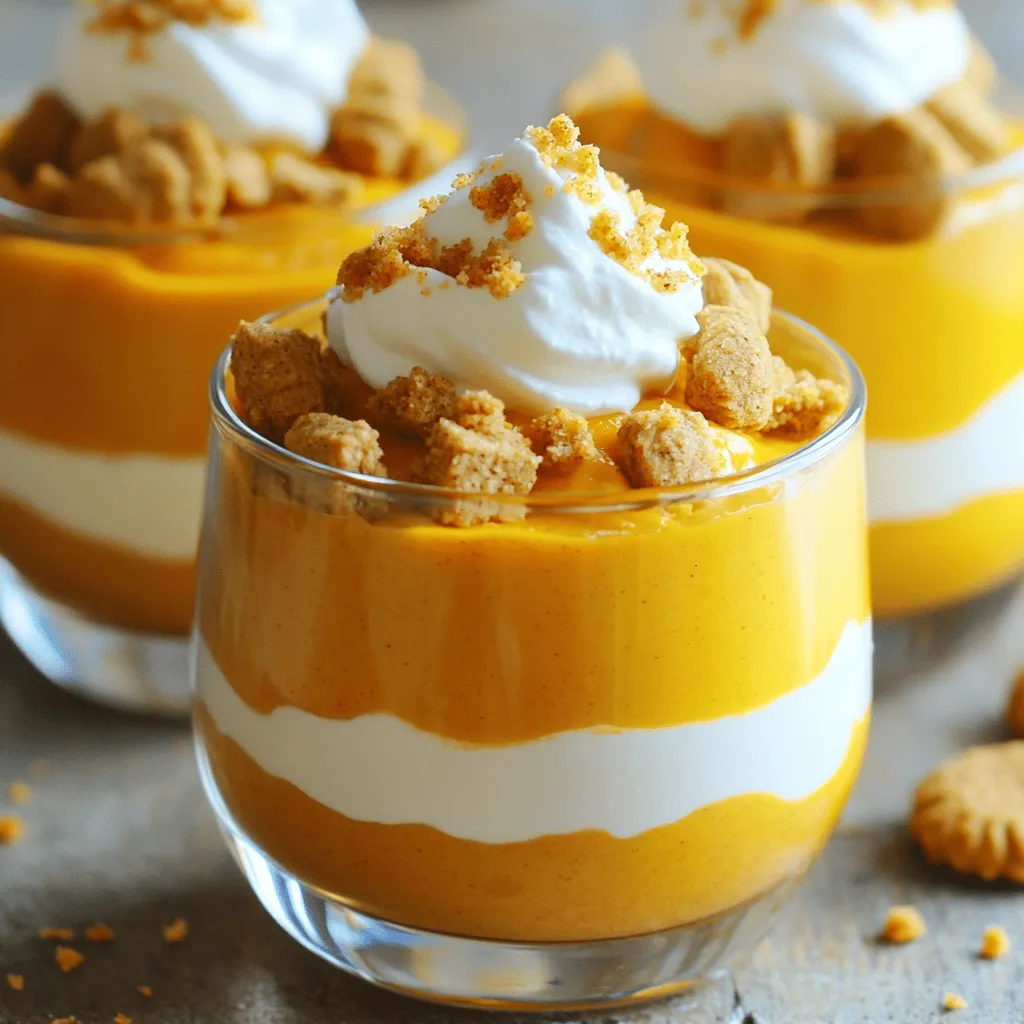
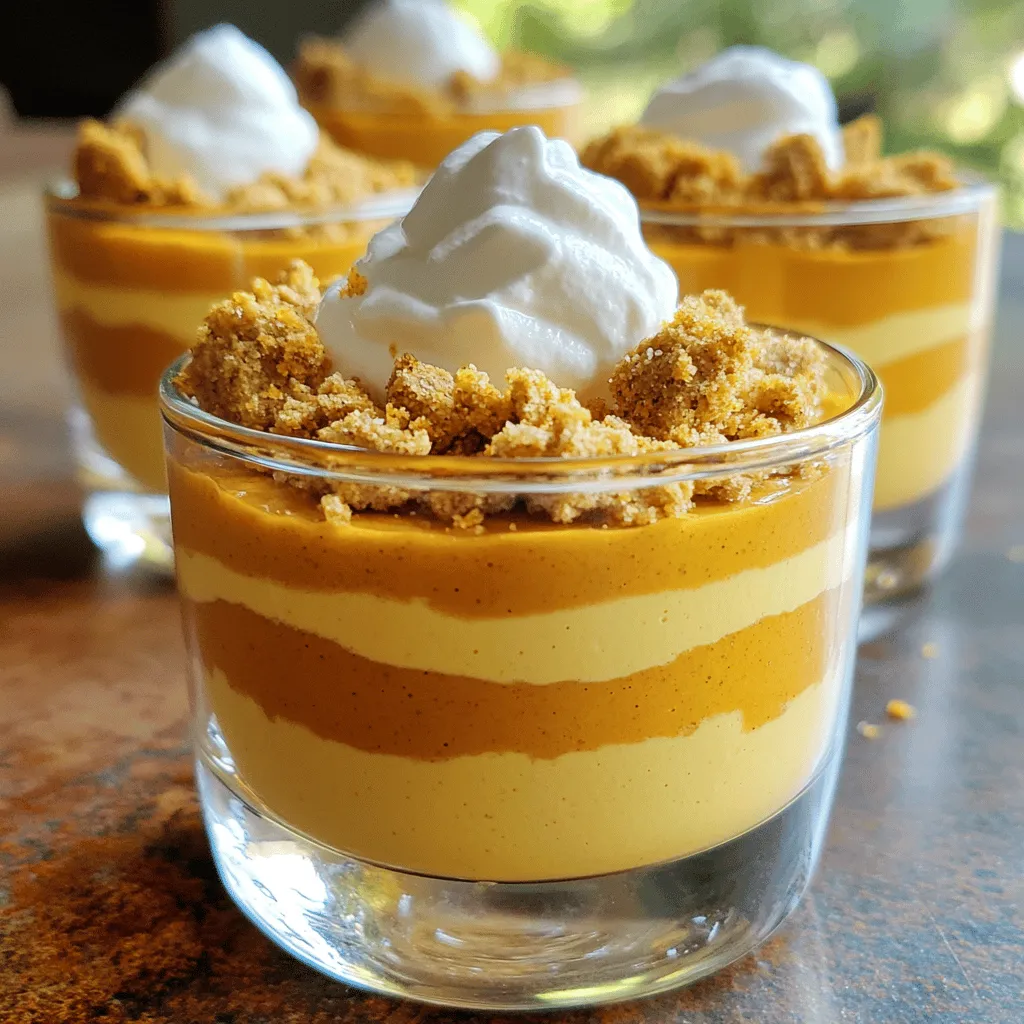
Are you ready to dive into a sweet, creamy delight? My No-Bake Pumpkin Cream Cheese Mousse Cups are the perfect fall treat. With just a few simple ingredients, you can whip up a dessert that’s both easy and impressive. Say goodbye to baking stress and hello to dreamy mousse cups. Let’s explore how to make this delicious treat your new favorite go-to dessert!
Ingredients
To make these No-Bake Pumpkin Cream Cheese Mousse Cups, gather the following ingredients:
- 1 cup pumpkin puree
- 8 oz cream cheese, softened to room temperature
- 1/2 cup powdered sugar
- 1 teaspoon vanilla extract
- 1 teaspoon pumpkin pie spice
- 1 cup heavy whipping cream, chilled
- 1/4 cup crushed gingersnap cookies (for garnish)
- Optional: whipped cream for an extra topping
These ingredients come together to create a tasty, creamy treat. You want to ensure your cream cheese is soft. This step helps it mix well with the other ingredients. Pumpkin puree brings that classic fall flavor. The powdered sugar adds just the right sweetness. Vanilla extract and pumpkin pie spice give depth to the taste.
Chilling the heavy cream is key. It whips up light and fluffy when cold. Gingersnap cookies add a crunchy finish. You can add whipped cream on top for extra flair. Gather these ingredients, and you’re ready to create your dreamy dessert!
Step-by-Step Instructions
Mixing the Cream Cheese
Start with softened cream cheese. This is key for a smooth mix. Cold cream cheese will clump up. Use an electric mixer, and beat on medium speed. Aim for a creamy consistency without lumps. If you have lumps, keep mixing until they vanish.
Combining Ingredients
Next, add the pumpkin puree, powdered sugar, vanilla extract, and pumpkin pie spice. Mix these on low speed. This helps keep the mixture creamy and smooth. Make sure everything blends well. You want a lovely, uniform color and flavor.
Whipping the Heavy Cream
In a clean bowl, pour in the chilled heavy cream. Use a whisk or an electric mixer for this step. Beat on medium-high speed. Watch for stiff peaks, which should hold their shape. This takes a few minutes but is worth it for the fluffiness.
Folding the Mixtures
Now, it’s time to combine the whipped cream and pumpkin mix. Use a spatula for this. Gently fold the whipped cream into the pumpkin mixture. Be careful not to deflate the whipped cream. You want to keep that airy texture for a light mousse.
Filling the Cups
Grab your serving cups or glasses. Use a spoon or piping bag to fill them. Aim to fill them about three-quarters full. This gives a nice look and leaves space for topping. Make sure to fill evenly for a great presentation.
Chilling the Mousse
Cover each cup with plastic wrap. Place them in the fridge to chill. Let them set for at least 2 hours. This cooling time is crucial for a perfect texture. You will know they are ready when they feel firm but still creamy.
Tips & Tricks
Storing Leftovers
- Best Practices for Storage: Store your mousse cups in the fridge. Use an airtight container or wrap them tightly with plastic wrap. This keeps them fresh and safe from odors.
- Duration of Freshness: Mousse cups stay good for about 3 days. After that, they may lose their creamy texture and flavor.
Serving Suggestions
- Creative Ways to Present: Use clear cups to show off the lovely layers. You can also use small jars for a rustic look. This makes your dessert feel special.
- Alternative Garnishes: Try using chopped nuts or chocolate shavings. They add a new taste and texture. You can also switch the gingersnap cookies for crushed graham crackers for a different crunch.
Common Mistakes to Avoid
- Common Errors in Preparation: Make sure your cream cheese is soft before mixing. Cold cream cheese can lead to lumps in your mousse.
- Troubleshooting Tips: If your mousse is too runny, it may need more whipped cream. Fold in a bit more whipped cream until you reach the right texture. If it’s too thick, add a splash of milk or cream to loosen it up.

Variations
Flavor Additions
You can easily change the taste of your mousse. Here are two fun ideas:
- Chocolate Pumpkin Mousse: Add 1/4 cup of cocoa powder to your pumpkin mixture. This will give it a rich, chocolatey flavor. You can also fold in mini chocolate chips for extra fun.
- Maple-Infused Pumpkin Mousse: Swap out the powdered sugar for 1/2 cup of pure maple syrup. This adds a warm sweetness that pairs well with pumpkin.
Dietary Modifications
If you need to change the recipe for diet needs, I have some options:
- Gluten-Free Options: Use gluten-free gingersnap cookies for the garnish. Check the labels to ensure they are safe for gluten-free diets.
- Vegan Alternatives: Substitute the cream cheese with vegan cream cheese. Use coconut cream instead of heavy whipping cream for a dairy-free mousse.
Seasonal Twists
Make your mousse fun for any season. Here are some ideas:
- Fall-Themed Variations: Add chopped pecans or walnuts on top for a crunchy treat that screams fall.
- Holiday-Inspired Edibles: Mix in a splash of eggnog for a festive twist. You can also add a sprinkle of nutmeg on top for a holiday flair.
Storage Info
Refrigeration Guidelines
How long does the mousse last in the fridge? The no-bake pumpkin cream cheese mousse will stay fresh for about 3 to 5 days in the fridge. Store it in an airtight container to keep it safe from other food odors.
What are the signs that the mousse has spoiled? If your mousse smells sour or has a change in color, it is time to toss it. Also, if you see any mold, do not eat it.
Freezing the Mousse
How do you freeze the mousse? To freeze the mousse, first, place it in an airtight container. Leave some space at the top since it may expand. You can also freeze it in individual cups. Seal them well to protect from freezer burn.
What are the best thawing tips for the best results? When ready to eat, thaw the mousse in the fridge overnight. This keeps it creamy. Avoid thawing at room temperature, as it can change the texture.
FAQs
Can I make No-Bake Pumpkin Mousse ahead of time?
Yes, you can make this dessert ahead of time. I suggest preparing it a day before. This gives the flavors time to blend well. Just chill it in the fridge until ready to serve.
What type of pumpkin puree should I use?
Use canned pumpkin puree for the best results. Look for 100% pumpkin, not pumpkin pie filling. This ensures your mousse tastes fresh and rich.
Is it possible to use fresh pumpkin instead?
Yes, you can use fresh pumpkin. First, cook and puree the pumpkin until smooth. Make sure to drain excess water. This will keep your mousse from being too runny.
Can I substitute cream cheese with Greek yogurt?
You can use Greek yogurt as a substitute. It will make the mousse lighter and tangier. However, the texture will differ slightly from using cream cheese.
How do I achieve a firmer mousse texture?
To make your mousse firmer, add more whipped cream. You can also chill it longer. If needed, consider adding gelatin for an extra boost of firmness.
What are some alternative garnishes I can use?
Try crushed nuts or chocolate shavings as toppings. You can also use caramel or maple syrup for extra flavor. Fresh fruit like pomegranate seeds adds a nice touch too.
You learned how to create a delicious no-bake pumpkin mousse. We covered all the important ingredients like pumpkin puree and cream cheese. I shared step-by-step instructions to help you mix, whip, and chill your mousse just right.
Don’t forget the tips for storage and serving. With simple variations, you can make this dessert fit any occasion. Enjoy your pumpkin mousse, and feel free to get creative with it!


![To make the best pumpkin spice muffins, you need the following key ingredients: - 1 cup pumpkin puree - 1/2 cup brown sugar - 1/2 cup granulated sugar - 1/3 cup vegetable oil - 2 large eggs - 1 teaspoon vanilla extract - 1 1/2 cups all-purpose flour - 1 teaspoon baking soda - 1 teaspoon baking powder - 2 teaspoons pumpkin pie spice - 1/2 teaspoon salt These ingredients create a fluffy, moist muffin that bursts with autumn flavor. The pumpkin puree adds natural sweetness and moisture. Brown sugar gives a rich, caramel taste, while the spices bring warmth and comfort to each bite. You can make your muffins even better with these optional ingredients: - 1/2 cup chopped walnuts or pecans - 1/2 cup chocolate chips Adding nuts gives a nice crunch, while chocolate chips add sweetness. Feel free to mix and match based on your taste. You can even leave them out for a classic muffin. Accurate measurement is key to great baking. Here’s how to measure your ingredients correctly: - Flour: Use a spoon to fill your measuring cup, then level it off with a knife. - Brown Sugar: Pack it firmly into the cup for proper measurement. - Liquid Ingredients: Use a liquid measuring cup and check at eye level for accuracy. Following these tips ensures your muffins turn out perfectly every time. For the full recipe, check out the details above and get ready to bake your delicious pumpkin spice muffins! Start by preheating your oven to 350°F (175°C). This step is key for even baking. Next, prepare a standard muffin tin. You can use paper liners or spray each cup with non-stick spray. This will make it easy to remove the muffins later. In a large bowl, combine the pumpkin puree, brown sugar, granulated sugar, and vegetable oil. Add in the eggs and vanilla extract. Whisk these together until smooth. Make sure there are no lumps. This mix gives your muffins their rich flavor. In another bowl, sift together the all-purpose flour, baking soda, baking powder, pumpkin pie spice, and salt. Sifting helps to mix and aerate the flour. It makes for a lighter muffin. This mix is important for texture. If you want to add some extra texture, gently fold in chopped walnuts or pecans. You can also add chocolate chips for a sweet touch. Be careful not to overmix; just combine until they’re evenly spread in the batter. Now, spoon the muffin batter into the prepared tin. Fill each cup about 3/4 full. This allows room for the muffins to rise. Bake for 18-20 minutes. Check if they’re ready by inserting a toothpick in the center. If it comes out clean, they’re done! Let them cool in the tin for 5 minutes before moving them to a wire rack. This cooling step is essential for the best texture. For the complete recipe, check out the [Full Recipe]. To keep muffins light and fluffy, don’t overmix the batter. When you combine wet and dry ingredients, mix just until you see no dry flour. A few lumps are okay. Overmixing makes muffins tough. Also, ensure your baking powder and baking soda are fresh. Old leavening agents won't help the muffins rise. Store your pumpkin spice muffins in an airtight container. This keeps them soft and moist. You can keep them at room temperature for up to three days. For longer storage, place them in the fridge for a week. If you want to save them for later, freeze them. Wrap each muffin in plastic wrap before placing them in a freezer-safe bag. They can last for up to three months in the freezer. Presentation makes any dish more inviting. For a lovely touch, sprinkle powdered sugar on top of each muffin. Serve them on a pretty platter. You can also add a small bowl of softened butter for easy spreading. This makes your muffins look even more delicious and inviting. {{image_4}} You can make gluten-free pumpkin spice muffins easily. To do this, swap regular flour with gluten-free flour. Look for blends that work well in baking. These blends often include almond flour or coconut flour. Check the package to ensure it has a good flavor. The muffins will still taste great! The texture may vary slightly, but they will remain soft and delicious. If you want vegan muffins, you can make some simple changes. Replace eggs with flax eggs. To make a flax egg, mix 1 tablespoon of ground flaxseed with 2.5 tablespoons of water. Let it sit for about 5 minutes until it thickens. Use plant-based oil instead of vegetable oil. You can also use almond milk or another plant-based milk instead of regular milk. These muffins will be light and fluffy, just like the classic recipe. You can jazz up your pumpkin spice muffins with extra flavors. Try adding maple syrup for a sweet twist. Just reduce the sugar a little to balance it out. You can also add orange zest for a fresh, bright taste. A teaspoon of orange zest will give the muffins a nice citrus kick. Feel free to get creative! You can mix and match these flavors to find your favorite combination. These variations can make your pumpkin spice muffins even more special. Check out the full recipe to get started! To keep your pumpkin spice muffins fresh, store them in an airtight container. Place a paper towel in the container to absorb moisture. This helps prevent sogginess. Store them at room temperature for up to three days. If you want to keep them longer, consider freezing. Freezing is a great way to save your muffins. Start by letting them cool completely. Then, wrap each muffin in plastic wrap. Place the wrapped muffins in a freezer-safe bag. Label the bag with the date. You can freeze them for up to three months. To enjoy your muffins warm, reheat them in the oven. Preheat your oven to 350°F (175°C). Place the muffins on a baking sheet. Heat for 10 to 15 minutes. You can also use a microwave for quick reheating. Just warm them for 15 to 20 seconds. Enjoy your pumpkin spice muffins fresh! Yes, you can use canned pumpkin. It saves time and gives great flavor. Make sure to choose 100% pure pumpkin, not pumpkin pie filling. This keeps the taste just right. Canned pumpkin is often smoother, which helps in mixing. It also has a longer shelf life. So, if you have a can, use it! For eggs, you can use several substitutes. Common options include: - 1/4 cup unsweetened applesauce - 1/4 cup mashed banana - 1 tablespoon ground flaxseed mixed with 2.5 tablespoons water These options keep your muffins moist and fluffy. They also add a hint of flavor. Choose what fits your taste best! Check your muffins after 18 minutes. Insert a toothpick into the center. If it comes out clean or with a few crumbs, they are done. If the toothpick is wet, bake for 1-2 more minutes. Keep an eye on them to avoid overbaking. Perfect muffins should be soft and lightly golden. Absolutely! To make mini muffins, use a mini muffin tin. Fill each cup about halfway. Bake them for 10-12 minutes. Keep checking with a toothpick until they are done. Mini muffins are great for snacks and sharing. They are just as tasty and fun! For the full recipe, check out the details above. In this post, we explored how to make delicious pumpkin spice muffins. I covered the essential and optional ingredients, along with measuring them for great results. The step-by-step instructions guide you through prepping, mixing, and baking. I also shared tips for light muffins and ways to store them well. Finally, I offered tasty variations like gluten-free and vegan options. Now you’re ready to enjoy these warm, flavorful treats any time! Your perfect pumpkin spice muffin awaits.](https://dishtreats.com/wp-content/uploads/2025/06/e45c4b1d-a4d2-42b5-b442-a33a757785ba-768x768.webp)
. First, preheat your oven to 225°F (110°C). This low heat helps the apples dry out slowly. Next, line two baking sheets with parchment paper. This step keeps the chips from sticking. Now it’s time to wash and core the apples. Rinse them well under cold water. Use a sharp knife or a corer to remove the seeds and the core. The best apples for this recipe are Fuji or Honeycrisp. They have a perfect balance of sweet and tart. Slice the apples into thin rounds. Aim for about 1/8 inch thick. A mandoline slicer makes this easy, but a sharp knife works too. Consistent thickness ensures even baking and crispiness. To keep your apple slices from browning, you will need lemon juice. Toss the apple slices in a bowl with one teaspoon of lemon juice. This step adds flavor and helps maintain their color. In a separate bowl, combine one tablespoon of ground cinnamon, one tablespoon of sugar (if you want it sweeter), and a pinch of salt. Mix this well. Now, sprinkle this cinnamon-sugar mixture evenly over the coated apple slices. Toss gently, ensuring each slice is coated without breaking them. Arrange the apple slices in a single layer on your prepared baking sheets. Make sure the slices do not overlap. This spacing allows them to bake evenly and become crispy. Place the baking sheets in the preheated oven. Bake the apple slices for about 1.5 to 2 hours. Halfway through baking, turn the slices. This will help them cook evenly. Keep an eye on them towards the end. You want them to be golden and crisp, not burnt. Once done, remove the sheets from the oven. Let the apple chips cool completely on the sheets. They will get even crispier as they cool. For the full recipe, check out the earlier sections. Enjoy making these tasty baked cinnamon apple chips! To get that perfect crunch in your baked cinnamon apple chips, thickness matters. Slice your apples about 1/8 inch thick. If they're too thick, they won’t crisp well. If they’re too thin, they might burn. Use a sharp knife or a mandoline for even slices. When it comes to baking, spacing is key. Place the apple slices on your baking sheets in a single layer. Make sure they don’t touch or overlap. This allows hot air to circulate and helps them bake evenly. To keep your baked apple chips fresh, store them in an airtight container. A glass jar or a resealable bag works great. Keep them in a cool, dry place. Storing them this way can help them last up to two weeks. Look for signs of freshness. If your chips are still crisp and fragrant, they’re good to snack on. If they start to feel soft or lose their crunch, it's time to toss them. Baked cinnamon apple chips make a great snack on their own. You can also serve them with dips like peanut butter or yogurt. They add a nice crunch to salads or granola bowls too. For a fun twist, try pairing them with cheese. The sweet and savory mix is delightful. You can also serve them alongside other snacks like popcorn or nuts for a tasty snack platter. Whether you enjoy them solo or with friends, these chips never fail to please! {{image_4}} You can have fun with flavors! Try different spices like vanilla or ginger. They add a unique twist to your apple chips. You can also adjust the sweetness. If you want a sweeter chip, add more sugar. For less sweetness, skip the sugar. You can even use honey or maple syrup instead. This way, you create a snack that fits your taste perfectly. Different apples give varied tastes and textures. Fuji and Honeycrisp work great, but don’t stop there! You can try Granny Smith for a tart flavor. Gala apples are sweeter and softer. Each type changes the final result. Experimenting with apple varieties keeps it exciting and tasty. Want a different texture? Dehydrating apples is a great choice. You can use a food dehydrator for an even, dry result. It takes longer, but the crunch is worth it. If you don’t have a dehydrator, your oven works too! Just lower the temperature and keep an eye on them. By adjusting the method, you can find your favorite way to enjoy these apple chips. For the full recipe, check the section above. Apples are a great snack. They are full of vitamins and fiber. One medium apple has about 95 calories and 4 grams of fiber. This helps keep your heart healthy. When you bake apple chips, you keep many of these benefits. Baked apple chips are better than store-bought snacks. Many snacks are full of added sugars and fats. Baked apple chips have no preservatives and you control the ingredients. This makes them a healthier choice for your family. A serving of baked apple chips has about 50-60 calories. This is much lower than many processed snacks. In fact, chips and cookies can have more than double that amount. You can enjoy a tasty snack without feeling guilty. Making your own snacks at home is better. You avoid unhealthy ingredients. You also save money. Homemade baked apple chips cost less than store-bought options. Plus, they taste fresher and crispier. Baked cinnamon apple chips are gluten-free and vegan. This makes them a great choice for many diets. You can enjoy them without worry. If you need to cut sugar, you can skip the optional sugar. You can also use natural sweeteners like honey or agave syrup if you want a sweet touch. Adjusting the recipe is easy to fit your needs. Enjoy these healthy chips any time! To make your apple chips crispy, focus on a few key factors. First, slice the apples very thin, about 1/8 inch thick. This helps them bake evenly. Second, arrange the slices in a single layer on your baking sheet. Avoid overlapping them to allow hot air to circulate. Lastly, bake at a low temperature of 225°F (110°C). This slow baking helps remove moisture, resulting in a perfect crispy texture. Yes, you can use other fruits to make chips. Pears and peaches work well and have great flavors. Bananas can also make tasty chips but will need a bit more care. Slice them thin and watch closely while they bake. You can even mix fruits for a fun variety! Baked apple chips can last up to a week when stored properly. Keep them in an airtight container at room temperature. If you notice any signs of softness, they may not be fresh anymore. For the best crunch, enjoy them sooner rather than later. Using sugar is not necessary for this recipe. If you prefer, you can leave it out. The cinnamon and apple flavors are sweet enough on their own. You might also try alternatives like honey or maple syrup for a different taste. Just remember, these can change the texture a bit. Yes, you can freeze baked apple chips! Place them in a freezer-safe bag or container. When you're ready to eat them, let them thaw at room temperature. You can also re-crisp them in the oven for a few minutes. Enjoy these tasty snacks later without losing their flavor! For the full recipe, check out the previous sections. Baked cinnamon apple chips are easy to make and taste great. You need just a few ingredients, like apples and spices. The step-by-step guide ensures perfect results every time. Don’t forget the tips for storage and serving. You can even try different flavors and apple types. These homemade snacks are healthier than store-bought options. Enjoy them anytime as a delicious treat. Get ready to impress yourself and others with your apple chips! Happy baking!](https://dishtreats.com/wp-content/uploads/2025/07/23051670-7243-464d-be8c-81eac2c3effc-768x768.webp)


