No-Bake Oreo Cheesecake Simple and Tasty Dessert

Are you craving a simple yet delicious dessert? Look no further than this No-Bake Oreo Cheesecake! With just a few easy steps, you can create a rich and creamy treat that will impress your friends and family. This guide gives you all the tips you need, from gathering ingredients to serving with style. Get ready to indulge in a dessert that combines the classic taste of Oreos with smooth cheesecake. Let’s dive in!
Ingredients
To make a No-Bake Oreo Cheesecake, you need a few simple items. Here’s what you’ll need:
- 24 Oreo cookies (plus extra for garnish)
- 4 tablespoons unsalted butter, melted
- 16 oz cream cheese, softened to room temperature
- 1 cup powdered sugar
- 1 teaspoon pure vanilla extract
- 1 cup heavy whipping cream
- 1/2 cup mini chocolate chips (optional)
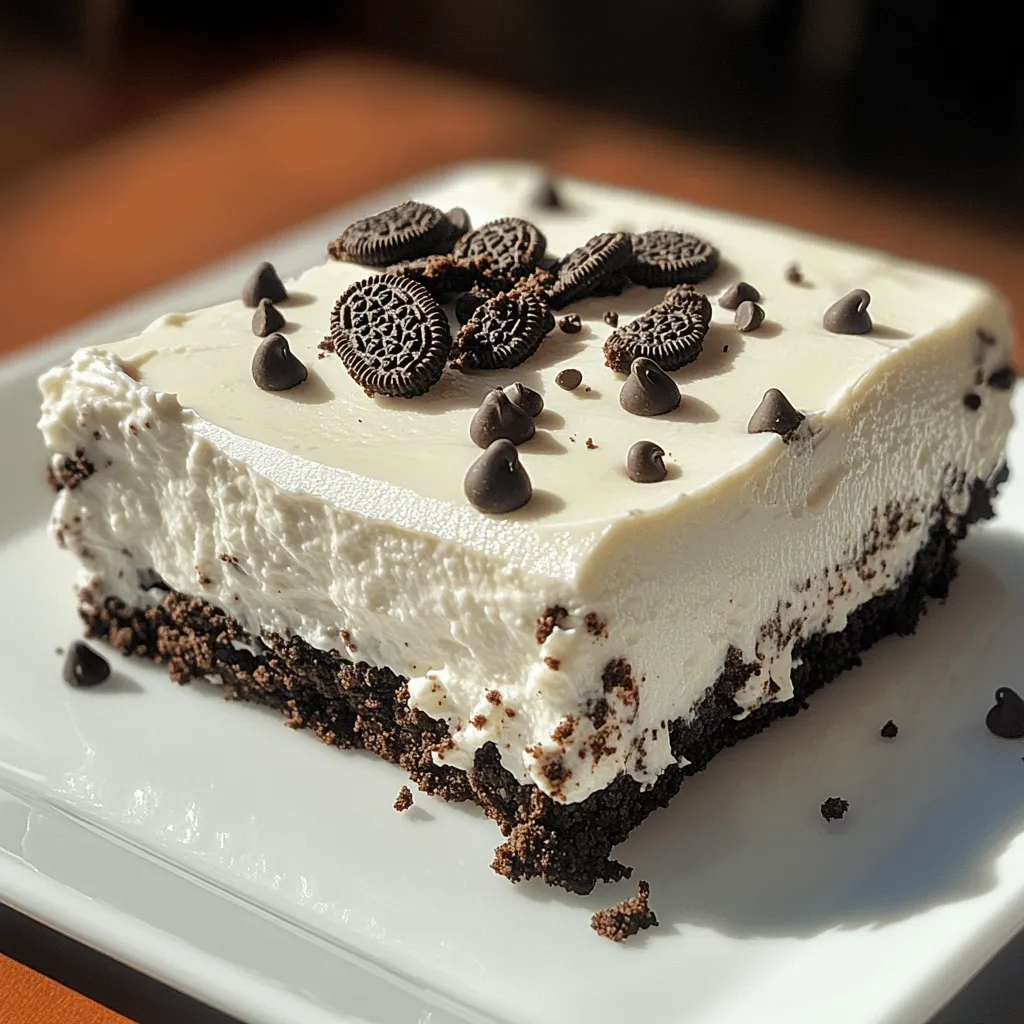
These ingredients come together to create a rich and creamy dessert. The Oreo cookies give a wonderful crunch and flavor. The cream cheese makes the filling smooth and light. Together, they make a perfect treat for any occasion.
When you gather your ingredients, make sure the cream cheese is at room temperature. This step helps it mix smoothly with the other ingredients. The heavy cream should also be cold for whipping. This will help it reach stiff peaks, making your cheesecake fluffy.
You can add mini chocolate chips to the filling if you like a bit of extra texture. They add a fun surprise in every bite. If you want to make the dessert look fancy, save a few crushed Oreos for garnish. Trust me, your guests will love it!
Step-by-Step Instructions
Create the Crust
First, I take 24 Oreo cookies and place them in my food processor. I pulse them until they turn into fine crumbs. Next, I add 4 tablespoons of melted unsalted butter. I blend these two until I have a sandy texture. This mixture will form the base of my cheesecake.
Prepare the Springform Pan
I grab a 9-inch springform pan and press the Oreo crumb mixture firmly into the bottom. I make sure it is even and well-packed. Once done, I refrigerate it to chill while I prepare the filling. This step is key to a great crust.
Prepare the Cheesecake Filling
In a large bowl, I beat 16 ounces of softened cream cheese until it’s smooth. Then, I gradually add 1 cup of powdered sugar and 1 teaspoon of pure vanilla extract. I keep beating until the mixture is creamy and has no lumps. This filling is rich and delicious.
Whip the Heavy Cream
In a separate cold bowl, I pour in 1 cup of heavy whipping cream. I whip it until stiff peaks form. This process takes a few minutes. I am careful not to over-whip it. Then, I gently fold the whipped cream into the cream cheese mixture. If I want, I can add half a cup of mini chocolate chips for extra crunch.
Assemble and Chill the Cheesecake
I carefully spoon the cheesecake filling onto the chilled crust. Using a spatula, I smooth the surface for a nice finish. After that, I cover the cheesecake and place it back in the fridge. I let it chill for at least 4 hours, but overnight is best for great texture and flavor.
Serve with Style
When I’m ready to serve, I gently remove the cheesecake from the springform pan. I like to garnish the top with crushed Oreo cookies for a nice touch. Then, I slice it into wedges and serve. This dessert looks as good as it tastes!
Tips & Tricks
Perfecting the Cheesecake
To make your cheesecake smooth, start with room temperature cream cheese. Cold cream cheese can lead to lumps. Mix until it is silky and creamy. Next, when whipping the cream, watch your timing. Over-whipping will make the cream too stiff. You want it to be fluffy but still soft. This balance helps create a light texture in your cheesecake.
Serving Suggestions
When it’s time to serve, let your creativity shine. Drizzle chocolate sauce over each slice for a rich touch. You can also add a dollop of whipped cream to make it pop. Serving on decorative plates adds an elegant feel. Each plate can be a mini work of art! If you like, garnish with extra crushed Oreo cookies for that extra crunch. This dessert will impress everyone at your table.

Variations
Flavor Alternatives
You can change the flavor of your no-bake Oreo cheesecake easily. One fun twist is to add mint extract. This gives your dessert a cool, mint chocolate flavor. Just a little goes a long way, so start with half a teaspoon. Mix it in when you add the vanilla extract.
Another great idea is to add fresh fruit toppings. Strawberries or raspberries work perfectly. They add a burst of color and taste. You can place them on top right before serving. This makes your cheesecake look even more inviting!
Dietary Modifications
If you need a gluten-free option, use gluten-free Oreo cookies. Many brands offer these, and they taste just as good. Your cheesecake will still be rich and delicious.
For a dairy-free version, swap out the cream cheese. Use vegan cream cheese and coconut cream instead. This will keep your cheesecake creamy and yummy.
Storage Info
Refrigeration
After enjoying your No-Bake Oreo Cheesecake, store any leftovers in an airtight container. This keeps it fresh and tasty. You can keep it in the fridge for up to 5 days. If you see any signs of spoilage, toss it out.
Freezing Tips
For longer storage, freeze the cheesecake. It can last up to 2 months in the freezer. Wrap it tightly in plastic wrap. Then, place it in a freezer-safe container. When you’re ready to eat, let it thaw in the fridge overnight. This method keeps the cheesecake’s flavor and texture intact.
If you want to make it ahead of time, freezing is a great option. Just remember to label it with the date.
FAQs
How long does it take to set the cheesecake?
The cheesecake needs a chilling time of at least 4 hours. For the best firmness, let it chill overnight.
Can I use other cookies for the crust?
Yes, you can use any chocolate sandwich cookies for the crust. Oreos work well, but others give great taste too.
Is it possible to make this ahead of time?
Absolutely! You can make this cheesecake a day or two in advance. It saves time and still tastes fresh.
What do I do if my cheesecake cracks?
To prevent cracks, ensure proper cooling and chilling. If it cracks, you can cover it with toppings to hide the flaws.
Can I use low-fat cream cheese?
Yes, you can use low-fat cream cheese. It may change the richness and texture a little, but it still works well.
This blog post shines a light on making a delicious Oreo cheesecake. We covered the key ingredients, clear steps for making the crust and filling, serving tips, and creative variations. Perfecting your cheesecake is all about small details. Remember to use room temperature cream cheese and avoid over-whipping the cream. You can store leftover cheesecake easily, making it great for later. With these tips in hand, you’re ready to create a dessert that impresses everyone. Enjoy every bite of your creamy, tasty cheesecake!


![- 2 cups cooked chicken, shredded - 1 can (10 oz) red enchilada sauce - 1 can (15 oz) black beans, rinsed and drained - 1 cup corn kernels (fresh, frozen, or canned) - 1 small onion, finely chopped - 2 cloves garlic, minced - 2 cups shredded Mexican cheese blend - 8 small corn tortillas, cut into quarters - 1 teaspoon ground cumin - 1 teaspoon chili powder - ½ teaspoon salt - ¼ teaspoon black pepper - 1 cup sour cream (for serving) - Fresh cilantro, chopped (for garnish) When I make Chicken Enchilada Casserole, I love using fresh, simple ingredients. Each item adds flavor and texture. You can use rotisserie chicken for a quick option. It saves time and keeps the dish tasty. The red enchilada sauce gives it that signature kick. I prefer black beans for added protein. They blend well with the other flavors. Corn adds sweetness and a nice crunch. I often choose fresh corn when it's in season, but frozen works great too. Onions and garlic bring an aromatic base. They make the kitchen smell amazing while cooking. The cheese is essential. I like a Mexican cheese blend because it melts beautifully. Corn tortillas are the heart of this dish, creating layers of goodness. The spices, like cumin and chili powder, enhance the flavors without overwhelming them. Finally, a dollop of sour cream and fresh cilantro on top makes it perfect. This combination of ingredients creates a hearty meal your family will love. For the complete recipe, check the Full Recipe section. 1. Preheat the oven to 350°F (175°C). This helps cook the casserole just right. 2. In a large skillet, heat a little oil over medium heat. Add the chopped onion. Sauté for 3-4 minutes. Wait until the onion turns soft and clear. 3. Next, add minced garlic to the skillet. Cook for 1 more minute. This will fill your kitchen with a lovely smell. 4. Stir in the shredded chicken and red enchilada sauce. Add the rinsed black beans, corn, cumin, chili powder, salt, and pepper. Mix well and cook for 5-7 minutes. Make sure everything is hot and well combined. 1. Grease a 9x13 inch baking dish with a little oil or butter. This prevents sticking. 2. Take half of the tortilla quarters and place them at the bottom of the dish. Overlap them slightly to cover the bottom. 3. Spoon half of the chicken mixture over the tortillas. Spread it out evenly. Then, sprinkle 1 cup of shredded cheese on top. 4. Repeat with the remaining tortilla quarters and chicken mixture. Top with the rest of the cheese for a cheesy crust. 1. Cover the casserole tightly with aluminum foil. Bake for 20 minutes. This allows the flavors to mix well. 2. After 20 minutes, remove the foil. Bake uncovered for an extra 10-15 minutes. Wait until the cheese is bubbly and golden. 3. When done, take the casserole out of the oven. Let it cool for about 5 minutes before serving. This makes it easier to cut and serve. Enjoy this savory chicken enchilada casserole with your family! For the full recipe, check out the details above. - Use rotisserie chicken for time-saving: Rotisserie chicken is great for busy days. It saves time and adds flavor. Just shred it and mix it into your casserole. You get tasty results without a lot of work. - How to properly layer for even cooking: Start with tortilla quarters at the bottom. This helps soak up the sauce and keeps the bottom from getting soggy. Spread the chicken mixture evenly over the tortillas. Repeat this process. Finish with cheese on top for a bubbly crust. - Adjusting spice levels: If you like heat, add more chili powder or some diced jalapeños. For milder flavors, reduce the chili powder. Taste as you go to find your perfect balance. - Additional toppings and garnishes ideas: Try adding sliced avocado, diced tomatoes, or pickled red onions. These bright toppings add color and flavor. A sprinkle of fresh cilantro also makes your dish pop! - Best side dishes to serve with casserole: Serve with a simple green salad or Mexican rice. These sides add freshness and balance the rich casserole. You can also offer tortilla chips for crunch. - How to present for a family meal: Cut the casserole into squares for easy serving. Use a large spoon to add a dollop of sour cream on top. Finish with a sprinkle of cilantro for a beautiful presentation. Enjoy this meal around the table! {{image_4}} You can easily swap ingredients in your Chicken Enchilada Casserole. If you want a different meat, use turkey or beef instead of chicken. Both options taste great and keep the dish hearty. For a vegetarian version, try using black beans and colorful veggies like bell peppers or zucchini. These swaps keep the casserole flavorful and filling. If you need gluten-free options, use corn tortillas instead of flour ones. They work perfectly in this casserole and add a nice flavor. For those who want a dairy-free meal, look for plant-based cheese and sour cream. These substitutes will still give you the creamy texture you love without the dairy. To change the flavor profile, add some spice! For a Mexican-inspired twist, mix in jalapeños or your favorite salsa. This will add a kick and extra layers of flavor. If you prefer a Southwestern style, try adding more spices like smoked paprika or cayenne pepper. This will give the casserole a warm, smoky taste that everyone will enjoy. For the full recipe, check out [Full Recipe]. Store leftover Chicken Enchilada Casserole in an airtight container. This keeps it fresh. Make sure it cools down before sealing. It lasts about 3-4 days in the fridge. If you notice any odd smell or color, it's best to toss it. You can freeze the casserole both before and after baking. If you freeze it before baking, wrap it tightly in plastic wrap. Bake it straight from the freezer. This usually takes about 45-60 minutes at 350°F. If you freeze it after baking, let it cool first. Cover it with foil or plastic wrap. To reheat, bake at 350°F for about 30 minutes, or until hot. You can make this casserole ahead for busy weeknights. Simply prepare it a day in advance and store it in the fridge. Portion it into individual servings for quick meals. This way, you can just grab and heat it when needed. It makes weeknight dinners simple and stress-free. Can I make Chicken Enchilada Casserole in advance? Yes, you can make this dish ahead of time. Prepare it up to the baking step. Cover it and store it in the fridge. When ready, bake it straight from the fridge. This saves time on busy nights. What can I substitute for black beans? You can use pinto beans, kidney beans, or chickpeas. Each option adds a unique flavor. Just rinse and drain them before adding. How do I reheat leftovers without drying out the dish? To reheat, cover the casserole with foil. Heat it in a 350°F oven for about 20 minutes. This keeps it moist and warm. You can also microwave individual portions with a damp paper towel. What size baking dish should I use? I recommend a 9x13 inch baking dish. This size holds all the layers well. It helps the casserole cook evenly. How do I know when the casserole is completely done? The casserole is done when the cheese is golden and bubbly. Insert a knife in the center; it should be hot. The layers should look set and not runny. Can I adjust the spice level of the casserole? Yes, you can make it spicier or milder. Add more chili powder for heat. For milder flavor, reduce the spices or choose mild enchilada sauce. What are the best toppings to add for extra flavor? You can add sliced jalapeños, diced avocado, or fresh lime juice. Chopped green onions and extra cilantro also give a nice touch. These toppings enhance the dish's taste and look. This Chicken Enchilada Casserole is easy and fun to make, with great flavors. You learned about ingredients, step-by-step instructions, and tips for better cooking. Don’t forget to try different variations, depending on your taste or needs. Storing leftovers is simple, making this dish great for meal prep. This recipe is perfect for family meals or gatherings. Enjoy the warmth and comfort it brings to your table. Now, grab your ingredients and start cooking!](https://dishtreats.com/wp-content/uploads/2025/07/f6c231a9-1b86-4c94-be4f-d7e13d8c3061-768x768.webp)


