No-Bake Chocolate Mint Cheesecake Bars Delightful Treat

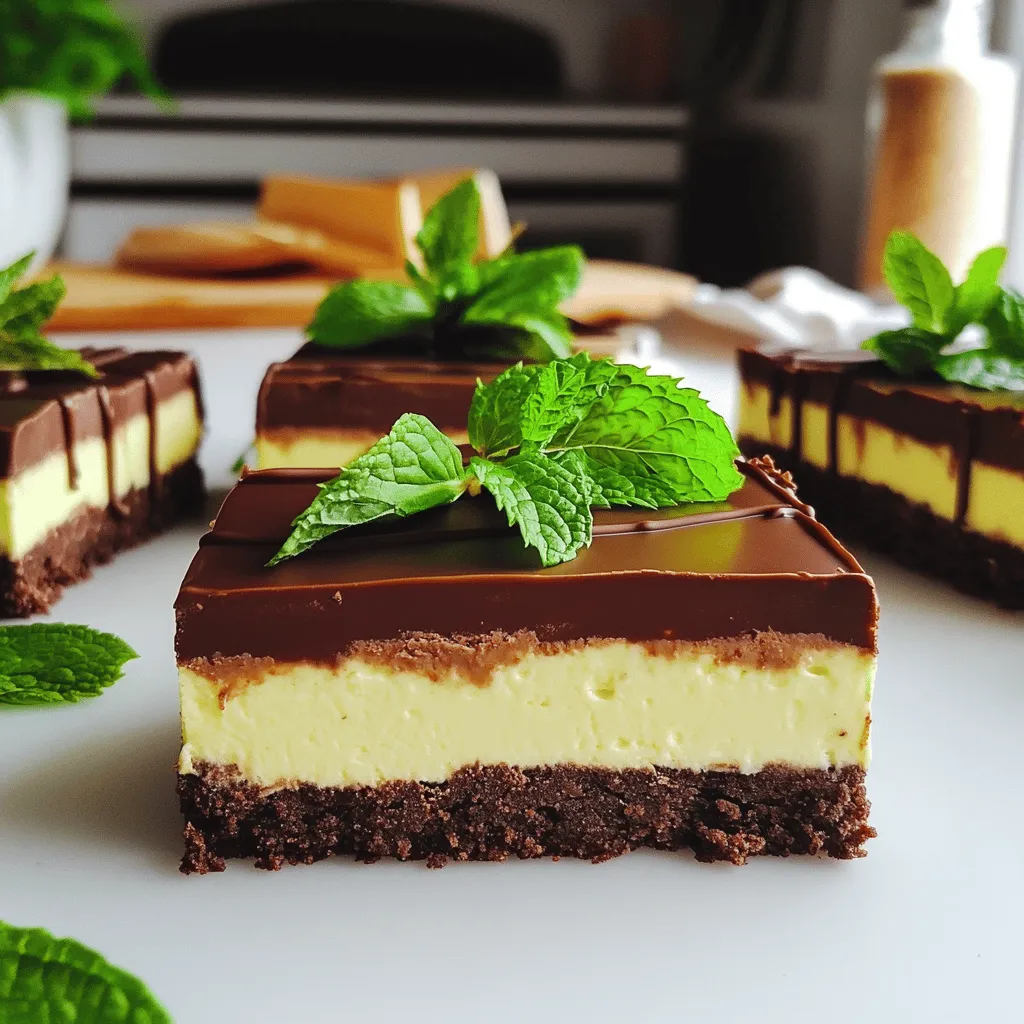
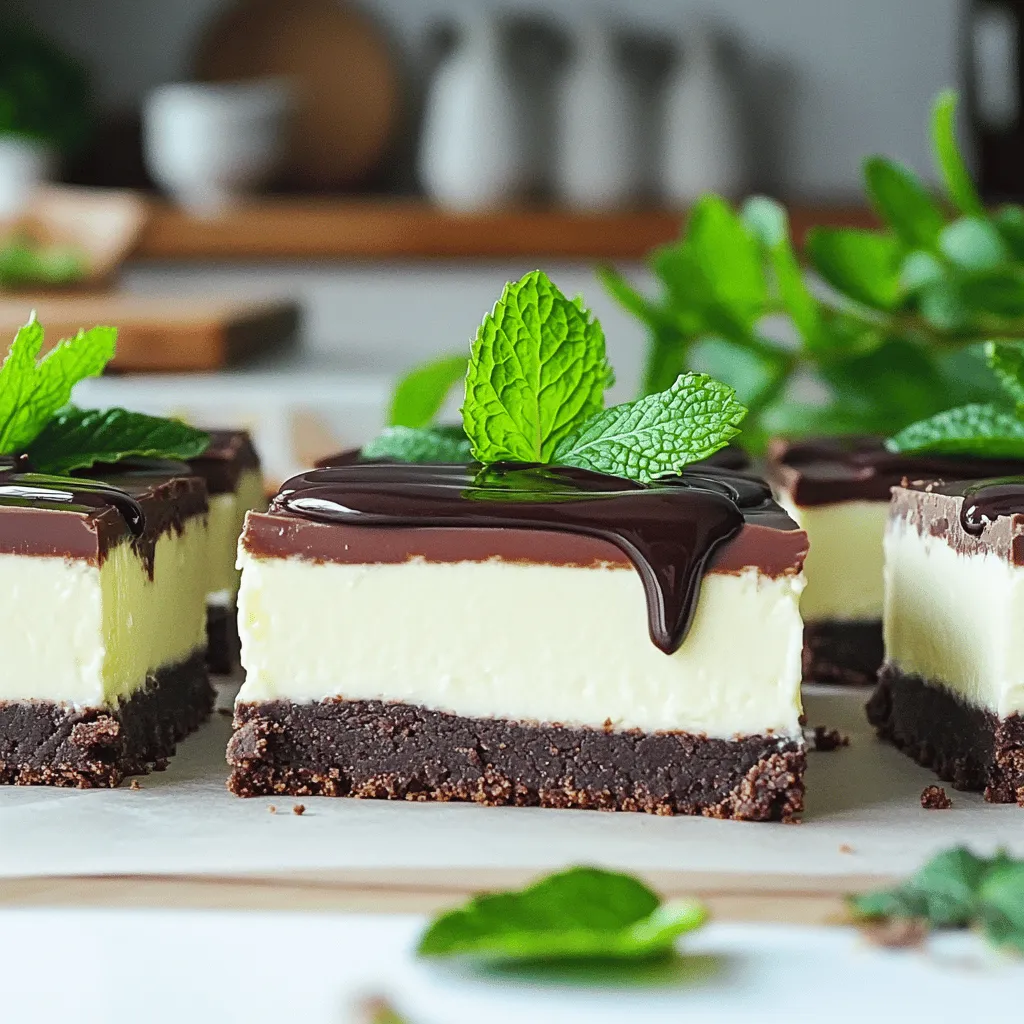
Are you ready to whip up a treat that’s both easy and delicious? Let me introduce you to my No-Bake Chocolate Mint Cheesecake Bars. This simple dessert combines rich chocolate and refreshing mint flavors, perfect for any occasion. You won’t need to turn on the oven! Join me for a step-by-step guide that makes creating this delightful dessert a breeze. Let’s get started!
Ingredients
Complete Ingredient List
- 1 ½ cups chocolate cookie crumbs
- ½ cup unsalted butter, melted
- 16 oz cream cheese, softened to room temperature
- 1 cup powdered sugar
- 1 teaspoon pure vanilla extract
- 1 teaspoon peppermint extract
- 1 cup heavy whipping cream
- 1 cup dark chocolate chips
- 1 tablespoon vegetable oil
- Fresh mint leaves for garnish
To make No-Bake Chocolate Mint Cheesecake Bars, you need simple yet tasty ingredients. The chocolate cookie crumbs form the base, giving a nice crunch. Melted unsalted butter helps bind the crumbs. Cream cheese makes the filling rich and creamy. You will also need powdered sugar for sweetness, along with pure vanilla and peppermint extracts for flavor.
For the finishing touch, whip heavy cream until it’s light and airy. This adds volume to the cheesecake filling. You will also need dark chocolate chips for a glossy top layer and some vegetable oil to help the chocolate melt smoothly. Finally, fresh mint leaves make a pretty garnish and add a pop of color.
Gather these ingredients before you start. Each one plays a key role in making your cheesecake bars delicious. You can find most of these items at your local grocery store. If you want to customize, think about different flavors or types of chocolate.
Step-by-Step Instructions
Preparing the Crust
- In a medium bowl, combine 1 ½ cups of chocolate cookie crumbs and ½ cup of melted unsalted butter. Mix until it looks like wet sand.
- Firmly press the mixture into the bottom of a 9×9-inch baking dish. Make sure it is even. Chill the crust in the fridge while you make the filling.
Making the Cheesecake Filling
- In a large bowl, beat 16 oz of softened cream cheese using an electric mixer until smooth.
- Gradually add 1 cup of powdered sugar and mix well until there are no lumps.
- Add 1 teaspoon of pure vanilla extract and 1 teaspoon of peppermint extract to the cream cheese mixture. Mix until blended.
- In another bowl, whip 1 cup of heavy cream until stiff peaks form. Carefully fold this into the cream cheese mix until no white streaks are left.
Assembling the Bars
- Spread the cheesecake filling evenly over the chilled cookie crust using a spatula.
- In a microwave-safe bowl, melt 1 cup of dark chocolate chips and 1 tablespoon of vegetable oil in 30-second intervals. Stir until smooth.
- Drizzle the melted chocolate over the cheesecake layer. Use a spatula to spread it evenly.
- Cover the dish with plastic wrap and refrigerate for at least 4 hours, or overnight. This helps the bars set.
- Once set, cut the cheesecake into neat bars and garnish with fresh mint leaves before serving.
Tips & Tricks
Achieving the Perfect Cheesecake Texture
To make the best cheesecake, use room temperature ingredients. This helps the cream cheese mix well. Cold cream cheese can leave lumps. Let it sit out for about 30 minutes before you start.
Whipping cream is key for a light texture. Use a clean bowl and beaters when whipping cream. Whip the cream until stiff peaks form. Then, gently fold it into the cream cheese mixture. Start at the bottom and lift it up. This keeps the mixture airy. Avoid stirring too hard, or it will deflate.
Serving Suggestions
You can garnish these bars to make them pop. Fresh mint leaves add a bright touch. You can also sprinkle chocolate shavings on top. This makes the bars look fancy and delicious.
Pair your cheesecake bars with a scoop of vanilla ice cream. The cold ice cream balances the rich taste of the bars. You can also serve them with a cup of hot coffee. The warm drink enhances the mint flavor. Enjoy your treats!

Variations
Flavor Modifications
You can tweak the flavor of these bars to suit your taste. For a different twist, try adding other extracts. You might enjoy using vanilla or almond instead of peppermint. This change can make each bite unique and exciting.
You can also swap out chocolate types. If you prefer a sweeter taste, use milk chocolate instead of dark chocolate. Dark chocolate gives a rich flavor, while milk chocolate adds sweetness. Each option creates a new dessert experience.
Dietary Adjustments
If you need to make it gluten-free, switch the chocolate cookie crumbs for gluten-free cookies. Many brands offer gluten-free options that taste great. This way, everyone can enjoy the bars together.
For dairy-free options, use a dairy-free cream cheese. Brands like Tofutti and Kite Hill make good substitutes. You can also replace heavy cream with coconut cream for a rich texture. These simple swaps still keep the bars creamy and delicious.
Storage Info
Best Ways to Store Leftovers
To store your No-Bake Chocolate Mint Cheesecake Bars, keep them in the fridge. Place the bars in an airtight container. They will stay fresh for up to five days. If you want to keep them longer, you can freeze them. Wrap each bar in plastic wrap and then put them in a freezer bag. This method helps to prevent freezer burn.
Reheating Instructions
When you are ready to enjoy the frozen bars, thaw them in the fridge overnight. This slow thaw keeps the texture nice. After thawing, take them out and serve. You can add fresh mint leaves for a pop of color. Enjoy your delicious treat!
FAQs
How long do No-Bake Chocolate Mint Cheesecake Bars last?
No-Bake Chocolate Mint Cheesecake Bars last about one week in the fridge. Store them in an airtight container to keep them fresh. After a week, the taste and texture may change, so enjoy them sooner for the best flavor.
Can I make these bars ahead of time?
Yes, you can make these bars ahead of time. They taste even better after chilling overnight. This allows the flavors to blend well. Just cover them tightly and keep them in the fridge until you are ready to serve.
What can I use instead of cream cheese?
If you want to skip cream cheese, try using Greek yogurt or silken tofu. Both options give a creamy texture. Greek yogurt adds some tanginess, while silken tofu makes it dairy-free. Blend them well to ensure smoothness.
How can I make these bars without peppermint flavor?
To make these bars without peppermint, simply skip the peppermint extract. You can replace it with vanilla extract or almond extract for a different taste. This change gives the bars a new flavor while keeping them just as delicious.
These no-bake chocolate mint cheesecake bars are simple to make and delicious. We covered the ingredients and steps to create a tasty treat. You can customize the flavors to suit your taste, swap ingredients for dietary needs, and store leftovers easily.
Now you can enjoy a sweet, refreshing dessert anytime. Try these bars at your next gathering. They are sure to impress!


![To make Cherry Almond Protein Muffins, you need simple and healthy ingredients. Here’s a list for you: - 1 cup almond flour - 1/2 cup rolled oats - 1/2 cup protein powder (vanilla or unflavored) - 1/4 cup honey or maple syrup - 1/2 cup plain Greek yogurt - 2 large eggs - 1/2 cup unsweetened almond milk - 1 teaspoon baking powder - 1/2 teaspoon baking soda - 1/2 teaspoon salt - 1 cup fresh or frozen cherries, pitted and halved - 1/4 cup sliced almonds (for topping) - 1 teaspoon almond extract Each ingredient plays a key role in making these muffins tasty and nutritious. Almond flour gives a nutty flavor and a great texture. Rolled oats add heartiness and health benefits. Protein powder boosts the protein content, making these muffins perfect for a snack or breakfast. Using honey or maple syrup adds sweetness, while Greek yogurt keeps the muffins moist. The eggs help bind everything together, giving structure. Almond milk keeps the muffins light and adds a hint of almond flavor. Baking powder and baking soda make the muffins rise, resulting in fluffy bites. Cherries bring a burst of color and flavor, while sliced almonds on top add a delightful crunch. The almond extract enhances the nutty taste, tying all the flavors together. You can find the full recipe in the article to guide you step by step. Happy baking! Set your oven temperature to 350°F (175°C). Line a muffin tin with paper liners or grease each cup lightly. This helps the muffins come out easily after baking. In a large bowl, combine the almond flour, rolled oats, protein powder, baking powder, baking soda, and salt. Use a whisk to stir these ingredients well. Mixing them well ensures that your muffins rise evenly. In another bowl, whisk together the honey (or maple syrup), Greek yogurt, eggs, almond milk, and almond extract. Mix until it is smooth and creamy. This step adds moisture and flavor to your muffins. Gradually add the wet mixture to the dry mixture. Stir gently with a spatula until just combined. Be careful not to overmix the batter, as this can make the muffins tough. Gently fold the halved cherries into the batter. This adds bursts of flavor throughout each muffin. Then, fill each muffin cup about two-thirds full with the batter. This allows space for the muffins to rise. Place the muffin tin in the oven and bake for 18-20 minutes. The muffins should be golden on top. You can check for doneness by inserting a toothpick in the center; it should come out clean. Let the muffins cool in the pan for 5 minutes before transferring them to a wire rack. To make the best cherry almond protein muffins, watch your baking time. I suggest checking them at the 18-minute mark. If they look golden and a toothpick comes out clean, they are ready. Overbaking can dry out the muffins, so keep a close eye on them. After baking, let the muffins cool in the pan for five minutes. This step helps them firm up and gives you the right texture. Then, move them to a wire rack to cool completely. If you don’t have almond flour, you can use oat flour or whole wheat flour. They work well and will still taste great. For protein powder, you can try using a plant-based option or even a different flavor. If you need a non-dairy version, swap Greek yogurt for coconut yogurt or silken tofu. For almond milk, you can use soy milk or oat milk. These changes will still keep your muffins tasty and nutritious. Want to kick up the flavor? You can add a pinch of cinnamon or nutmeg to the batter. Both spices pair well with the cherries and almonds. You might also try adding a splash of vanilla extract for extra sweetness. If you enjoy a hint of citrus, a bit of lemon zest can brighten the taste. These simple additions can make your muffins even more delightful. Check out the full recipe to get started on your delicious cherry almond protein muffins! {{image_4}} You can play with flavors in these muffins. Dark chocolate chips add a rich touch. You can mix in some unsweetened coconut for a tropical twist. If you want to switch up the fruit, try using blueberries or raspberries. Both fruits pair well with almonds and give a fresh taste. You can also use dried cherries for a chewiness that works great in muffins. To make these muffins vegan, swap the eggs for flax eggs. Just mix one tablespoon of ground flaxseed with three tablespoons of water and let it sit for five minutes. Use plant-based yogurt instead of Greek yogurt. Maple syrup is a good choice to keep it sweet. You can still enjoy the same tasty muffins without animal products. If you want to cut back on sugar, reduce the honey or maple syrup. You can try using mashed bananas or unsweetened applesauce. Both will keep your muffins moist and sweet. Just remember to balance the flavors so you still enjoy every bite. Use spices like cinnamon to enhance the taste without adding more sugar. For the full recipe, check out the [Full Recipe] section above! To keep your Cherry Almond Protein Muffins fresh at room temperature, place them in an airtight container. This helps to keep moisture in and air out. Store them for up to three days. If you live in a warm area, keep them in a cool, dry place. Avoid direct sunlight, as it can dry them out. These muffins taste best when fresh, so enjoy them soon after baking. For long-term storage, freezing is the best option. Allow the muffins to cool completely before freezing. Wrap each muffin tightly in plastic wrap or aluminum foil. Then, place them in a freezer-safe bag or container. This method prevents freezer burn and helps preserve flavor. You can freeze them for up to three months. When ready to eat, simply thaw them in the fridge overnight or leave them at room temperature for a few hours. To enjoy your muffins warm, you can easily reheat them. Preheat your oven to 350°F (175°C). Place the muffins on a baking sheet and warm them for about 10 minutes. This method helps restore their soft texture. You can also use the microwave for a quick fix. Heat each muffin for 15-20 seconds. Just be careful not to overheat, as that can make them dry. For the full recipe, check out the delicious Cherry Almond Protein Muffins! Yes, you can use frozen cherries. They work just as well as fresh cherries. Just make sure to thaw them first and drain any extra liquid. This keeps the batter from becoming too wet. Frozen cherries can add a nice burst of flavor, and they are often just as nutritious as fresh ones. To check if your muffins are done, look for a golden top. Insert a toothpick into the center of a muffin. If it comes out clean or with a few crumbs, the muffins are ready. They should feel firm to the touch. If they are still wet, bake them for a few more minutes. Each muffin has about 150 calories. They are rich in protein and fiber. The almond flour and Greek yogurt add healthy fats and nutrients. Plus, cherries provide antioxidants. This makes them a tasty and nutritious snack. Enjoy these muffins guilt-free, knowing they are good for you! For the complete recipe, check the Full Recipe section. This blog post covers a simple and tasty cherry almond protein muffin recipe. You learned about the key ingredients and steps to make them. I shared tips for baking success, ingredient swaps, and ways to customize the recipe. Muffins can be fun and flexible. Whether you want to make them vegan or low-sugar, it's easy! Always store them well to keep their flavor fresh. Enjoy cooking, and have fun trying different variations. Your kitchen adventures can lead to yummy treats!](https://dishtreats.com/wp-content/uploads/2025/07/36a729b1-00f1-4288-a77b-47884a3c4d33-768x768.webp)


![- 4 thick slices of bread (brioche or challah) - 2 large eggs - 1/2 cup milk - 1 teaspoon vanilla extract - 1 teaspoon ground cinnamon - 1 tablespoon granulated sugar For this recipe, I love using thick slices of brioche or challah bread. They soak up the egg mixture well and give a soft, rich texture. The eggs, milk, and vanilla extract create a smooth base for dipping. Ground cinnamon adds warmth and flavor, while granulated sugar enhances the sweetness. - 1 tablespoon granulated sugar - 1/2 teaspoon ground cinnamon - 1 tablespoon unsalted butter (for frying) The cinnamon sugar mixture is the star here. It adds a sweet crunch that makes each bite special. Using unsalted butter for frying helps achieve that golden brown crust. You want the sticks to be crispy on the outside but soft inside. - Maple syrup or honey - Optional fresh fruits and berries Serve these French toast sticks with maple syrup or honey for dipping. It adds a nice touch of sweetness. Fresh fruits or berries can brighten the plate and add some refreshing flavor. You can use strawberries, blueberries, or even banana slices. It all comes together for a fun and tasty breakfast! For the full recipe, visit [Full Recipe]. To start, grab a shallow bowl. In this bowl, whisk together 2 large eggs, 1/2 cup of milk, 1 teaspoon of vanilla extract, and 1 teaspoon of ground cinnamon. Add 1 tablespoon of granulated sugar for sweetness. It’s important to mix until everything blends well and becomes slightly frothy. This mixture will coat your bread sticks and give them great flavor. Now, take your thick slices of bread, like brioche or challah. Cut each slice into uniform sticks, about 1 inch wide. This helps them cook evenly. After cutting, dip each stick into the egg mixture. Make sure to fully submerge it so it gets well-coated. Let any extra liquid drip off before cooking. This step is key to avoid soggy sticks. Next, it's time to cook! Preheat a non-stick skillet over medium heat. Add 1 tablespoon of unsalted butter to the pan. Wait for it to melt and swirl it around to coat the bottom. Carefully place the coated bread sticks in the skillet, making sure not to overcrowd them. Cook each side for about 2-3 minutes. You want them to turn golden brown and get a slightly crispy texture. This method gives you the best result for your Cinnamon Sugar French Toast Sticks. For a full recipe with all details, check out the [Full Recipe]. To make great cinnamon sugar French toast sticks, you need to control the heat. I suggest using medium heat for the best results. Medium heat cooks the bread evenly without burning it. If you cook on high heat, you may get burnt outsides and soggy insides. Next, prevent soggy French toast sticks. After dipping the sticks in the egg mixture, let them sit for a moment. This helps the bread absorb the mixture without getting too wet. For an appealing look, stack the French toast sticks neatly on a plate. You can sprinkle a little extra cinnamon sugar on top for a pop of color. Add fresh fruit like strawberries or blueberries on the side. This not only adds color but also freshness. Using the right tools makes cooking easier. A non-stick skillet or griddle is best for frying. This helps prevent sticking and makes cleanup simple. A spatula is handy for flipping the sticks. A shallow bowl is key for mixing the egg mixture. You’ll find this method gives you the best results for your cinnamon sugar French toast sticks. Remember to check the [Full Recipe] for detailed steps and proportions to ensure success. {{image_4}} You can change the flavor of your cinnamon sugar French toast sticks in fun ways. Adding a few drops of almond or orange extract gives a twist to the classic taste. These extracts bring a unique sweetness that pairs well with cinnamon. You can also try using different types of bread. Flavored bread like chocolate or pumpkin spice adds an exciting touch. Just think about how much fun it would be to bite into a chocolate French toast stick! If you need gluten-free or dairy-free options, you can easily adapt this recipe. Use gluten-free bread made from rice or almond flour. For dairy-free, almond or oat milk works well. If you want vegan French toast sticks, substitute eggs with flaxseed meal or a plant-based egg replacement. This way, everyone can enjoy this treat, no matter their diet. Get creative with dipping sauces and toppings! You can try different sauces like chocolate, peanut butter, or fruit compote. These add a fun twist to the flavor. You can also serve your French toast sticks with whipped cream or yogurt. Top them with fresh fruits like strawberries or blueberries for extra color and taste. Each bite can be a new flavor adventure! To store leftover cinnamon sugar French toast sticks, place them in an airtight container. This keeps them fresh and prevents drying out. You can store them in the fridge for up to three days. If you want to keep them longer, consider freezing. When reheating, I recommend using the oven for the best texture. Preheat your oven to 350°F (175°C). Place the sticks on a baking sheet and heat for about 10 minutes. This method helps restore their crispiness. If you use the microwave, heat them for 20-30 seconds. However, they may turn a bit soggy. To freeze cooked French toast sticks, let them cool completely first. Then, place them in a single layer on a baking sheet. Freeze until solid, then transfer them to a freezer-safe bag. They last up to two months in the freezer. To thaw, move them to the fridge overnight. Reheat in the oven for the best results. To make your French toast sticks crispy, use thick slices of bread. Brioche or challah works best. They soak up the egg mixture without getting too soggy. Here are some tips for crispiness: - Preheat your pan: Heat your skillet on medium. A hot pan helps form a nice crust. - Use enough butter: Butter adds flavor and helps create a golden crust. Don't skimp on it! - Cook without crowding: Give each stick space in the pan. This allows heat to circulate for even cooking. - Flip carefully: Use a spatula to turn them gently. This keeps them from breaking apart. Yes, you can prepare the egg mixture in advance. This saves time when you're ready to cook. Here’s how to store it: - Refrigerate: Store the mixture in a sealed container. Use it within 24 hours for the best results. - Give it a whisk: Before using, stir it again to ensure the ingredients mix well. The type of bread you choose can change the flavor and texture of your French toast sticks. Here are some great options: - Brioche: This bread is soft and rich, making it perfect for soaking up the egg mixture. - Challah: It has a slightly sweet flavor and holds up well when cooked. - Texas toast: Thick slices of this bread create a hearty bite. - Sourdough: If you like a tangy taste, sourdough adds a unique twist. For the full recipe, check out the detailed instructions! In this post, we explored how to make delicious French toast sticks. You learned about key ingredients, quick preparation steps, and helpful cooking tips. We also discussed fun variations and smart storage methods for leftovers. With these tips, you can create a tasty meal that impresses. Remember, the right bread and careful cooking make all the difference. Enjoy your French toast sticks, and feel free to get creative with flavors and toppings!](https://dishtreats.com/wp-content/uploads/2025/07/664e1dd1-150a-4660-86e6-505ad35a42cc-768x768.webp)