Mint Chocolate Chip Cookies Irresistible Treat Recipe

Are you ready to bake the best mint chocolate chip cookies ever? This recipe gives you a sweet, minty treat that melts in your mouth. I’ll share easy steps, tasty tips, and fun variations to make these cookies perfect for any occasion. Whether you’re a baking pro or just starting out, you’ll find something here to enjoy. Let’s dive into the deliciousness of mint chocolate chip cookies!
Why I Love This Recipe
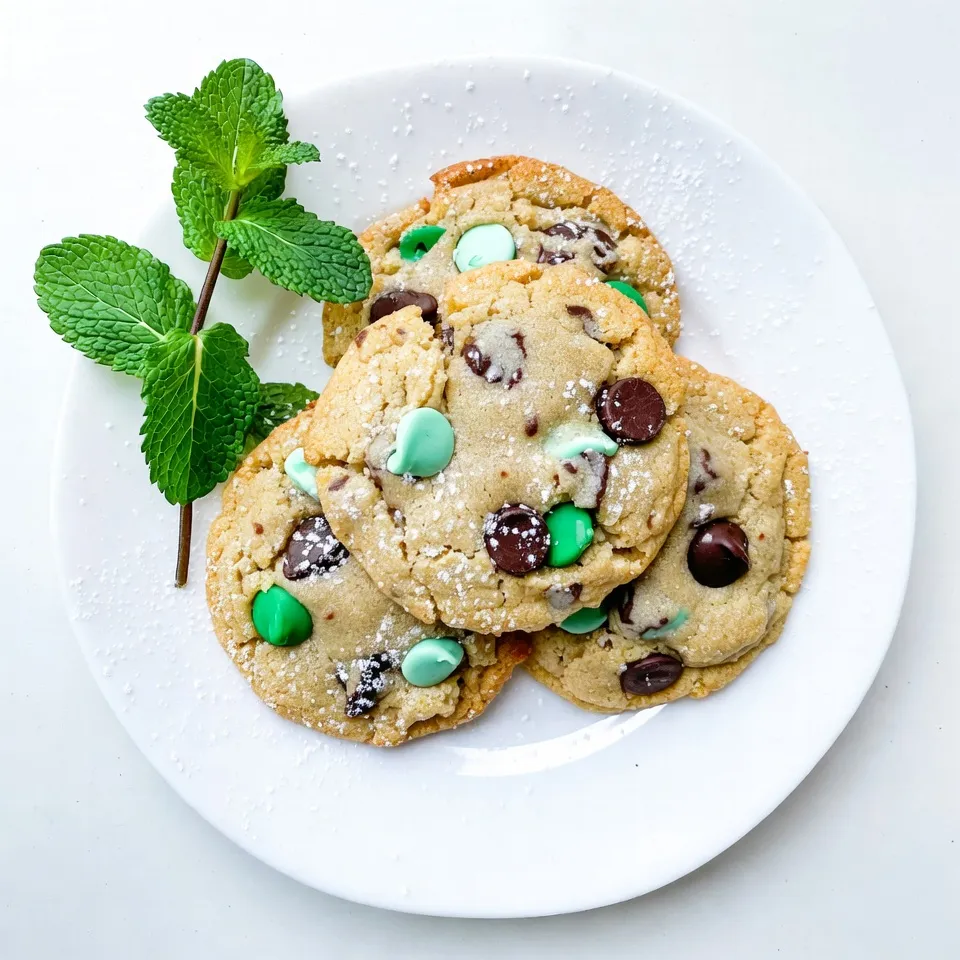
- Delicious Minty Flavor: The combination of peppermint extract and mint chocolate chips creates a refreshing taste that’s perfect for any occasion.
- Chewy Texture: The cookie dough is designed to maintain a chewy consistency, giving you that perfect bite every time.
- Easy to Make: This recipe is straightforward, making it a fun activity for both novice and experienced bakers alike.
- Great for Sharing: With 24 cookies per batch, it’s ideal for parties, gatherings, or simply sharing with friends and family.
Ingredients
List of Ingredients
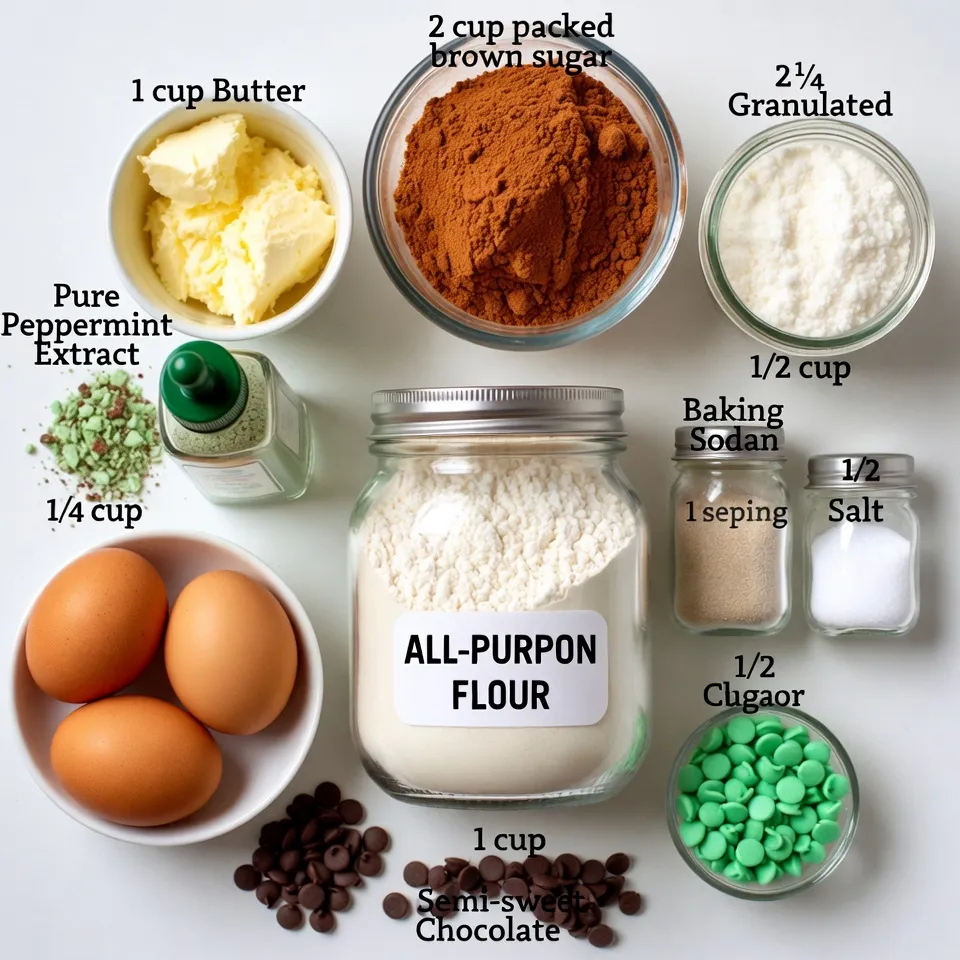
To make my Minty Bliss Chocolate Chip Cookies, gather these items:
- 1 cup unsalted butter, softened
- 1 cup brown sugar, packed tightly
- 1/2 cup granulated sugar
- 2 large eggs, at room temperature
- 2 teaspoons pure peppermint extract
- 2 1/4 cups all-purpose flour
- 1 teaspoon baking soda
- 1/2 teaspoon salt
- 1 cup semi-sweet chocolate chips
- 1/2 cup green mint chocolate chips (or chopped Andes mints)
- 1/4 cup crushed mint candies (optional, for topping)
Measurements and Substitutions
I often adjust some ingredients for different tastes. If you want a richer flavor, try using brown sugar only. It makes the cookies chewier. You can swap unsalted butter with salted butter, but cut back on added salt. If you don’t have eggs, use a flax egg. Mix 1 tablespoon of ground flaxseed with 2.5 tablespoons of water and let it sit for 5 minutes.
Variations of Ingredients
Feel free to mix and match! Instead of semi-sweet chocolate chips, use dark chocolate for a deep taste. If you like white chocolate, that works too. If mint isn’t your thing, you could use orange extract for a zesty twist. You can also leave out the crushed mint candies if you want a smoother cookie without extra crunch. The key is to have fun with it and find what you love!

Step-by-Step Instructions
Preparation Steps
1. Preheat your oven to 350°F (175°C). This helps the cookies bake evenly.
2. Line a baking sheet with parchment paper. This keeps the cookies from sticking.
3. Cream together the butter, brown sugar, and granulated sugar in a large bowl. Use a mixer to blend for 3-4 minutes. You want it light and fluffy.
4. Add the eggs one at a time. Mix well after each egg. Then, stir in the peppermint extract.
5. In a separate bowl, whisk together the flour, baking soda, and salt. This ensures even mixing.
6. Gradually add the dry mix to the wet mix. Blend on low speed until just combined. Don’t over-mix; this keeps cookies soft.
7. Fold in the chocolate chips and green mint chocolate chips gently. Keep the mix even, but don’t overwork the dough.
8. If you want extra mint flavor, add crushed mint candies and fold them in lightly.
Baking Process
1. Scoop spoonfuls of dough onto the baking sheet, spaced about 2 inches apart. This allows room for spreading.
2. Bake for 10-12 minutes. Look for lightly golden edges. The centers may look soft; that’s fine!
3. Remove from the oven when done. Let them cool on the sheet for 5 minutes.
Cooling and Serving Directions
1. Transfer cookies to a wire rack to cool completely. This helps them firm up.
2. For a fun presentation, dust with powdered sugar. A sprig of fresh mint adds a nice touch too!
3. Serve these cookies with cold milk for a delightful treat. Enjoy every bite!
Tips & Tricks
Perfecting Cookie Texture
To get the best texture, start with soft butter. I always let my butter sit out for at least an hour. This helps it blend well with the sugars. When mixing, aim for a light and fluffy batter. Mix on medium speed for about 3-4 minutes. When adding flour, mix just until combined. Over-mixing can make cookies tough.
Common Baking Mistakes to Avoid
One big mistake is not measuring ingredients correctly. Use measuring cups for dry items and liquid measures for wet ones. Also, don’t skip the baking soda; it helps cookies rise. Keep an eye on your cookies in the oven. Take them out when the edges are golden. They may look soft, but they will firm as they cool.
Presentation Tips for Serving
Presentation is key for cookies. I like to arrange my Minty Bliss Cookies on a pretty plate. A light dusting of powdered sugar adds charm. For a fresh touch, place a mint sprig beside the cookies. These cookies taste great with a glass of cold milk. Enjoy the delightful flavors with every bite!
Pro Tips
- Butter Temperature: Ensure your butter is softened to room temperature for optimal creaming with sugars. This creates a light texture in your cookies.
- Egg Incorporation: Add eggs one at a time to ensure even mixing and avoid curdling, enhancing the overall consistency of your cookie dough.
- Do Not Over-Mix: Once you add the dry ingredients, mix just until combined. Over-mixing can lead to tough cookies, ruining the desired soft texture.
- Cooling Time: Allow the cookies to cool on the baking sheet for a few minutes before transferring them to a wire rack. This helps them set and prevents breakage.

Variations
Gluten-Free Mint Chocolate Chip Cookies
You can make gluten-free mint chocolate chip cookies easily. Just swap the all-purpose flour for a good gluten-free blend. Look for blends that include xanthan gum. This helps the cookies hold their shape. Follow the same steps in the recipe, and you will have tasty gluten-free cookies.
Vegan Mint Chocolate Chip Cookie Recipe
To make vegan mint chocolate chip cookies, replace the butter and eggs. Use coconut oil or a vegan butter substitute in place of butter. For eggs, use flaxseed meal. Mix one tablespoon of flaxseed meal with three tablespoons of water. Let this sit for five minutes to thicken. Then, add it to your dough as you would the eggs. This keeps the cookies soft and chewy!
Different Mint Flavoring Options
You can try different mint flavors in your cookies. Instead of peppermint extract, use spearmint extract for a milder taste. You can also add fresh mint leaves for a unique twist. Chop them finely and mix them into the dough. For a fun bite, try using mint candies instead of chocolate chips. Each option gives you a new way to enjoy these cookies!
Storage Info
How to Store Mint Chocolate Chip Cookies
To keep your Mint Chocolate Chip Cookies fresh, store them in an airtight container. This helps lock in moisture and keeps them soft. Place parchment paper between layers to prevent sticking. The cookies will stay fresh for about one week at room temperature.
Freezing Instructions
Freezing is a great way to save cookies for later. First, let your cookies cool completely. Then, place them in a single layer on a baking sheet. Freeze them for about one hour. Once frozen, transfer the cookies to a freezer-safe bag. Squeeze out as much air as you can. They will last for up to three months in the freezer.
Best Ways to Reheat Cookies
To enjoy your cookies warm, reheat them easily. Preheat your oven to 350°F (175°C). Place the cookies on a baking sheet and heat for about 5-7 minutes. If using a microwave, heat them for about 10-15 seconds. This method will make them soft and chewy again. Enjoy your warm cookies with a glass of milk!
FAQs
How do I make Mint Chocolate Chip Cookies chewy?
To make Mint Chocolate Chip Cookies chewy, do not over-mix the dough. Mix until just combined. Also, underbake them slightly. The edges should be golden, but the centers should look soft. This helps keep them chewy. Let them cool on the baking sheet for a bit before moving them. This lets the cookies firm up without losing their soft center.
Can I use other types of chocolate?
Yes, you can use other types of chocolate. Dark chocolate or milk chocolate chips work well too. You can even chop up your favorite chocolate bars. If you want extra mint flavor, use mint chocolate chips. This will add a nice twist to the cookies while keeping the minty taste.
What can I substitute for peppermint extract?
If you do not have peppermint extract, you can use mint leaves. Crush fresh mint leaves and mix them into the dough. You can also try using vanilla extract for a different flavor. Keep in mind, this will change the minty taste but still taste great. Adjust the amount based on your taste preference.
You learned how to make mint chocolate chip cookies. We covered all the key ingredients and how to measure them. I shared tips for perfect texture and avoiding mistakes. You can try variations like gluten-free or vegan options. Storing and reheating cookies is also easy with the right methods.
Baking these cookies is fun and rewarding. Experiment with flavors to find your favorite. Enjoy your tasty treat

Minty Bliss Chocolate Chip Cookies
Ingredients
- 1 cup unsalted butter, softened at room temperature
- 1 cup brown sugar, packed tightly
- 0.5 cup granulated sugar
- 2 large eggs, at room temperature
- 2 teaspoons pure peppermint extract
- 2.25 cups all-purpose flour
- 1 teaspoon baking soda
- 0.5 teaspoon salt
- 1 cup semi-sweet chocolate chips
- 0.5 cup green mint chocolate chips (or chopped Andes mints)
- 0.25 cup crushed mint candies (optional, for a delightful topping)
Instructions
- Preheat your oven to 350°F (175°C) and line a baking sheet with parchment paper to prevent sticking.
- In a large mixing bowl, use a hand mixer or stand mixer to cream together the softened butter, packed brown sugar, and granulated sugar. Mix on medium speed until the mixture is light and fluffy, approximately 3-4 minutes.
- Add the eggs one at a time, allowing each one to fully incorporate into the mixture before adding the next. Stir in the pure peppermint extract until everything is combined.
- In a separate bowl, whisk together the all-purpose flour, baking soda, and salt until well combined. Gradually incorporate this dry mixture into the wet ingredients, mixing on low speed just until combined; avoid over-mixing to maintain a tender cookie texture.
- Gently fold in the semi-sweet chocolate chips and green mint chocolate chips until they are evenly distributed throughout the dough.
- If you're aiming for an extra touch of minty flavor, sprinkle in the crushed mint candies, if desired, and gently mix to incorporate.
- Using a tablespoon or cookie scoop, drop spoonfuls of the cookie dough onto the prepared baking sheet, ensuring to space them about 2 inches apart for even baking.
- Bake in the preheated oven for 10-12 minutes, or until the edges are lightly golden. The centers may look slightly underbaked, but they will firm up as they cool, contributing to the perfect chewy texture.
- Once out of the oven, allow the cookies to cool on the baking sheet for about 5 minutes before carefully transferring them to a wire rack to cool completely.


![To make this delightful chilled peach soup, gather these main ingredients: - 4 ripe peaches, peeled and pitted - 1 cup plain Greek yogurt - 1 cup almond milk - 2 tablespoons honey (or maple syrup for a vegan option) - Juice of 1 lemon - 1 teaspoon vanilla extract - A pinch of salt These ingredients create a creamy and fruity flavor. The ripe peaches give sweetness and vibrancy. Greek yogurt adds creaminess and protein. Almond milk keeps it light and smooth. Honey or maple syrup sweetens it naturally. Lemon juice brightens the taste, while vanilla adds warmth. For an extra touch, consider these garnishes: - Fresh mint leaves for garnish - Crushed pistachios for topping (optional) Mint leaves add a fresh burst of flavor and color. Crushed pistachios give a nice crunch and a nutty taste. You can easily swap out some ingredients if needed: - Use coconut yogurt instead of Greek yogurt for a dairy-free version. - Substitute regular milk for almond milk if you prefer. - Adjust the sweetener; agave nectar works well too. - Try adding a splash of orange juice for a different citrus note. These substitutions help you customize the soup to your taste or dietary needs. You still get a refreshing and delicious chilled peach soup with any of these changes. For the full recipe, visit the [Full Recipe]. Start by washing the peaches well. Peeling them is next. Use a sharp knife to cut the peaches into small, even chunks. This helps them blend smoothly. Remove the pits and add the chopped peaches to your blender. Now, it’s time to mix everything. Add the Greek yogurt, almond milk, honey, lemon juice, vanilla extract, and a pinch of salt to the blender with the peaches. Each ingredient enhances the flavor and texture of the soup. Blend the mixture on high speed. You want it to be smooth and creamy. If you like a little texture, pulse the blender a few times instead of blending non-stop. This gives you control over the final consistency. Taste the soup. If it needs more sweetness or tang, add more honey or lemon juice. Once blended, pour the soup into a bowl or pitcher. Cover it tightly and place it in the fridge for at least two hours. This chilling time allows flavors to mix well. When ready to serve, stir the soup again. Pour it into bowls and garnish with fresh mint leaves and crushed pistachios. For a fancy touch, use chilled bowls. This chilled peach soup is perfect for a light dessert or starter. For the full recipe, check out the details above! To select the best peaches, look for ripe, fragrant fruit. They should have a slight give when you gently press them. Avoid peaches with bruises or soft spots. Choosing freestone peaches makes your prep easier. These peaches separate cleanly from the pit. You can tweak the flavor of your chilled peach soup. If you want it sweeter, add more honey or maple syrup. For more tartness, squeeze in more lemon juice. Always taste as you go. This way, you find the perfect balance for your palate. When blending, start on low speed, then increase. This helps break down the peaches evenly. If you like some texture, pulse the blender a few times instead of blending fully. For a creamier soup, blend longer. Always check the consistency before serving. You want it smooth but not too thin. For more detailed steps, check the Full Recipe. {{image_4}} You can easily make this soup vegan. Just swap Greek yogurt for coconut yogurt. It adds a nice creaminess. Use maple syrup instead of honey for sweetness. You can also try different plant-based milk. Almond, oat, or soy milk work well too. This way, everyone can enjoy a tasty bowl of chilled peach soup. Want to spice it up? Add a pinch of cinnamon or ginger for warmth. These spices can add depth to the sweet peaches. Fresh herbs can make it even better. Try basil or rosemary for a unique twist. Just a small amount can change the flavor profile completely. To change the texture, consider using different fruits. Add diced mango or berries for a fruity crunch. You can also mix in some chia seeds for a fun texture. Blending in some silken tofu can make the soup creamier. Each variation brings a new taste and feel to your chilled peach soup. For the full recipe, check out the details above. Store leftover chilled peach soup in an airtight container. This keeps the soup fresh. Make sure to cool it first before sealing. If you don’t have a container, you can use plastic wrap. Just cover the bowl tightly. Chilled peach soup lasts about 3 to 5 days in the fridge. After that, it may lose its flavor and freshness. Always check for signs of spoilage before eating. If it smells sour or changes color, it's best to toss it. You can freeze chilled peach soup for up to 3 months. Pour it into freezer-safe containers, leaving some space at the top. This allows for expansion when frozen. To enjoy later, thaw it in the fridge overnight. Stir well before serving to restore its smooth texture. For the full recipe, see the section above. Serve chilled peach soup in a bowl or a small glass. I love using chilled bowls for that extra touch. You can drizzle a bit of almond milk on top. A mint leaf adds a great pop of color. This soup works well as a light starter or a refreshing dessert. Yes, you can use frozen peaches. Just make sure they are thawed first. This keeps the soup smooth and creamy. Frozen peaches may change the taste slightly, but they still taste great. Chilled peach soup is quite healthy. It has ripe peaches, Greek yogurt, and almond milk. These ingredients offer vitamins, protein, and healthy fats. The honey adds natural sweetness, making it a tasty and nutritious choice. Enjoy it without guilt! You can mix in other fruits like berries or mangoes. Simply chop them up and blend them with peaches. Adjust the sweetness to match the fruit you choose. This gives you a unique flavor every time. Enjoy experimenting with seasonal fruits for variety! Chilled peach soup is a refreshing treat. We covered the main ingredients, like fresh peaches, and how to blend them for the best flavor. I shared tips on choosing, storing, and even varying the recipe for vegan options. Remember, this soup is easy to make and fun to try. Enjoy exploring different flavors or garnishes to suit your taste. Now, it’s time to make your own chilled peach soup and savor each bite!](https://dishtreats.com/wp-content/uploads/2025/07/cde2237f-ab80-4fd7-9ae6-23109d9f52c0-768x768.webp)


![- 4 thick slices of bread (brioche or challah) - 2 large eggs - 1/2 cup milk - 1 teaspoon vanilla extract - 1 teaspoon ground cinnamon - 1 tablespoon granulated sugar For this recipe, I love using thick slices of brioche or challah bread. They soak up the egg mixture well and give a soft, rich texture. The eggs, milk, and vanilla extract create a smooth base for dipping. Ground cinnamon adds warmth and flavor, while granulated sugar enhances the sweetness. - 1 tablespoon granulated sugar - 1/2 teaspoon ground cinnamon - 1 tablespoon unsalted butter (for frying) The cinnamon sugar mixture is the star here. It adds a sweet crunch that makes each bite special. Using unsalted butter for frying helps achieve that golden brown crust. You want the sticks to be crispy on the outside but soft inside. - Maple syrup or honey - Optional fresh fruits and berries Serve these French toast sticks with maple syrup or honey for dipping. It adds a nice touch of sweetness. Fresh fruits or berries can brighten the plate and add some refreshing flavor. You can use strawberries, blueberries, or even banana slices. It all comes together for a fun and tasty breakfast! For the full recipe, visit [Full Recipe]. To start, grab a shallow bowl. In this bowl, whisk together 2 large eggs, 1/2 cup of milk, 1 teaspoon of vanilla extract, and 1 teaspoon of ground cinnamon. Add 1 tablespoon of granulated sugar for sweetness. It’s important to mix until everything blends well and becomes slightly frothy. This mixture will coat your bread sticks and give them great flavor. Now, take your thick slices of bread, like brioche or challah. Cut each slice into uniform sticks, about 1 inch wide. This helps them cook evenly. After cutting, dip each stick into the egg mixture. Make sure to fully submerge it so it gets well-coated. Let any extra liquid drip off before cooking. This step is key to avoid soggy sticks. Next, it's time to cook! Preheat a non-stick skillet over medium heat. Add 1 tablespoon of unsalted butter to the pan. Wait for it to melt and swirl it around to coat the bottom. Carefully place the coated bread sticks in the skillet, making sure not to overcrowd them. Cook each side for about 2-3 minutes. You want them to turn golden brown and get a slightly crispy texture. This method gives you the best result for your Cinnamon Sugar French Toast Sticks. For a full recipe with all details, check out the [Full Recipe]. To make great cinnamon sugar French toast sticks, you need to control the heat. I suggest using medium heat for the best results. Medium heat cooks the bread evenly without burning it. If you cook on high heat, you may get burnt outsides and soggy insides. Next, prevent soggy French toast sticks. After dipping the sticks in the egg mixture, let them sit for a moment. This helps the bread absorb the mixture without getting too wet. For an appealing look, stack the French toast sticks neatly on a plate. You can sprinkle a little extra cinnamon sugar on top for a pop of color. Add fresh fruit like strawberries or blueberries on the side. This not only adds color but also freshness. Using the right tools makes cooking easier. A non-stick skillet or griddle is best for frying. This helps prevent sticking and makes cleanup simple. A spatula is handy for flipping the sticks. A shallow bowl is key for mixing the egg mixture. You’ll find this method gives you the best results for your cinnamon sugar French toast sticks. Remember to check the [Full Recipe] for detailed steps and proportions to ensure success. {{image_4}} You can change the flavor of your cinnamon sugar French toast sticks in fun ways. Adding a few drops of almond or orange extract gives a twist to the classic taste. These extracts bring a unique sweetness that pairs well with cinnamon. You can also try using different types of bread. Flavored bread like chocolate or pumpkin spice adds an exciting touch. Just think about how much fun it would be to bite into a chocolate French toast stick! If you need gluten-free or dairy-free options, you can easily adapt this recipe. Use gluten-free bread made from rice or almond flour. For dairy-free, almond or oat milk works well. If you want vegan French toast sticks, substitute eggs with flaxseed meal or a plant-based egg replacement. This way, everyone can enjoy this treat, no matter their diet. Get creative with dipping sauces and toppings! You can try different sauces like chocolate, peanut butter, or fruit compote. These add a fun twist to the flavor. You can also serve your French toast sticks with whipped cream or yogurt. Top them with fresh fruits like strawberries or blueberries for extra color and taste. Each bite can be a new flavor adventure! To store leftover cinnamon sugar French toast sticks, place them in an airtight container. This keeps them fresh and prevents drying out. You can store them in the fridge for up to three days. If you want to keep them longer, consider freezing. When reheating, I recommend using the oven for the best texture. Preheat your oven to 350°F (175°C). Place the sticks on a baking sheet and heat for about 10 minutes. This method helps restore their crispiness. If you use the microwave, heat them for 20-30 seconds. However, they may turn a bit soggy. To freeze cooked French toast sticks, let them cool completely first. Then, place them in a single layer on a baking sheet. Freeze until solid, then transfer them to a freezer-safe bag. They last up to two months in the freezer. To thaw, move them to the fridge overnight. Reheat in the oven for the best results. To make your French toast sticks crispy, use thick slices of bread. Brioche or challah works best. They soak up the egg mixture without getting too soggy. Here are some tips for crispiness: - Preheat your pan: Heat your skillet on medium. A hot pan helps form a nice crust. - Use enough butter: Butter adds flavor and helps create a golden crust. Don't skimp on it! - Cook without crowding: Give each stick space in the pan. This allows heat to circulate for even cooking. - Flip carefully: Use a spatula to turn them gently. This keeps them from breaking apart. Yes, you can prepare the egg mixture in advance. This saves time when you're ready to cook. Here’s how to store it: - Refrigerate: Store the mixture in a sealed container. Use it within 24 hours for the best results. - Give it a whisk: Before using, stir it again to ensure the ingredients mix well. The type of bread you choose can change the flavor and texture of your French toast sticks. Here are some great options: - Brioche: This bread is soft and rich, making it perfect for soaking up the egg mixture. - Challah: It has a slightly sweet flavor and holds up well when cooked. - Texas toast: Thick slices of this bread create a hearty bite. - Sourdough: If you like a tangy taste, sourdough adds a unique twist. For the full recipe, check out the detailed instructions! In this post, we explored how to make delicious French toast sticks. You learned about key ingredients, quick preparation steps, and helpful cooking tips. We also discussed fun variations and smart storage methods for leftovers. With these tips, you can create a tasty meal that impresses. Remember, the right bread and careful cooking make all the difference. Enjoy your French toast sticks, and feel free to get creative with flavors and toppings!](https://dishtreats.com/wp-content/uploads/2025/07/664e1dd1-150a-4660-86e6-505ad35a42cc-768x768.webp)