Mediterranean Quinoa Stuffed Peppers Flavorful Delight

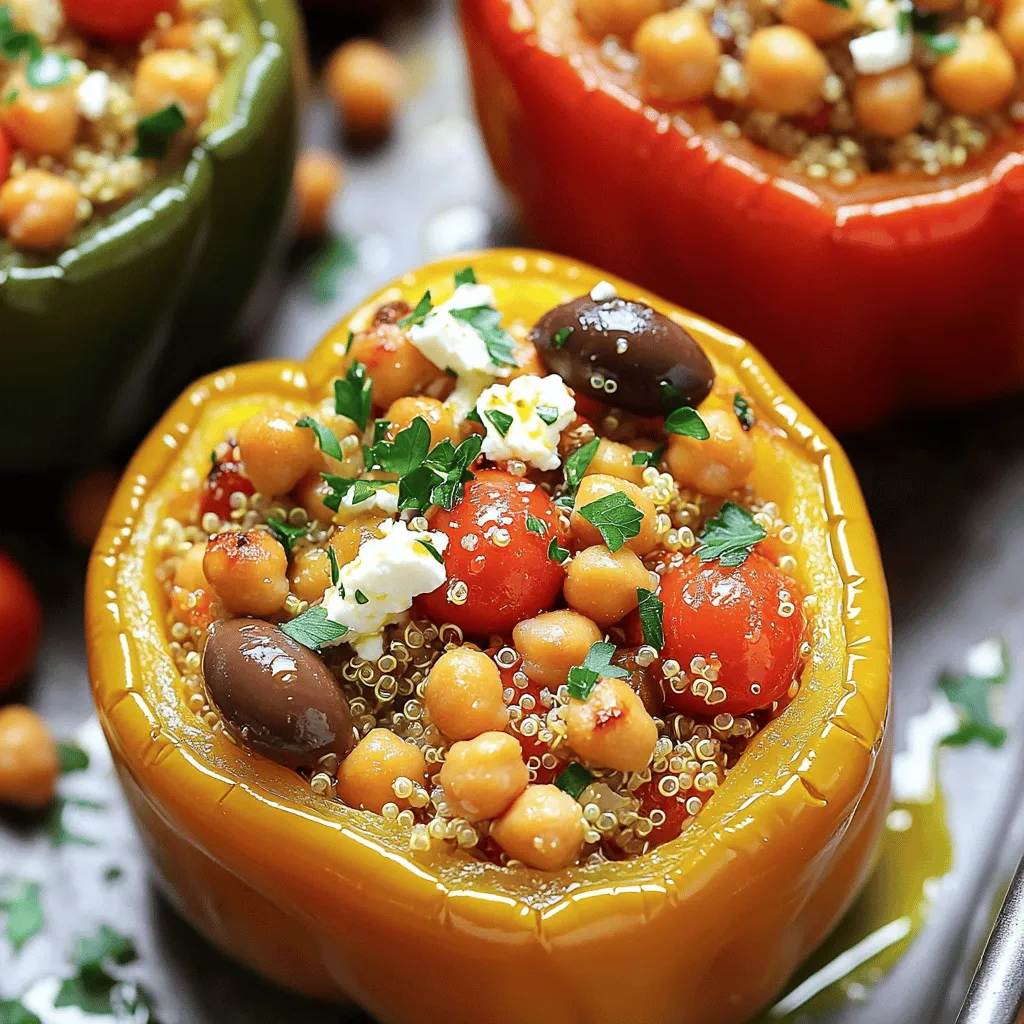
Are you ready to elevate your dinner game? These Mediterranean Quinoa Stuffed Peppers are not just healthy; they burst with flavor in every bite! Packed with protein-rich quinoa, colorful veggies, and aromatic herbs, this dish is a vibrant feast for the senses. Whether you’re a busy parent or a meal prep pro, my easy guide will show you how to create a delightful culinary experience everyone will love. Let’s dive into this tasty adventure!
Ingredients
Main Ingredients Needed
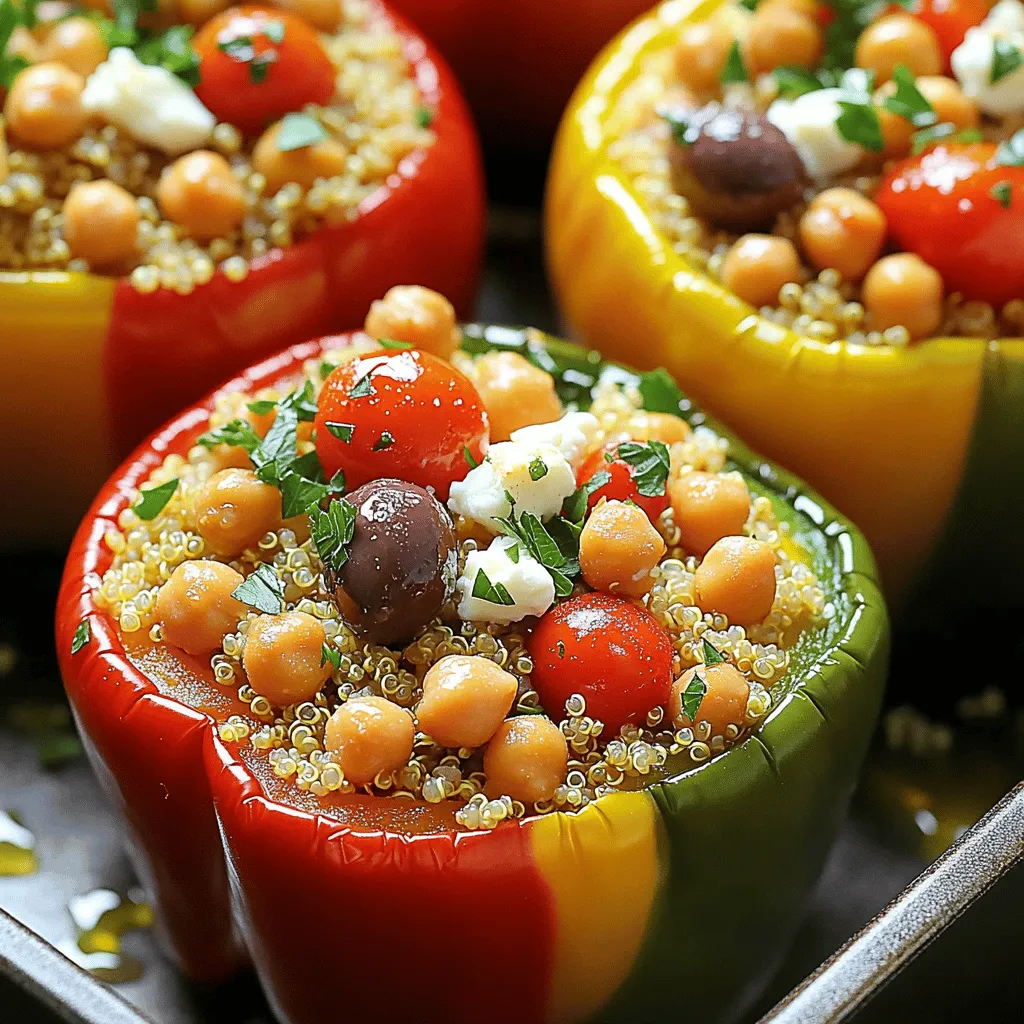
- 4 large bell peppers (any color for a vibrant presentation)
- 1 cup quinoa, thoroughly rinsed under cold water
- 2 cups vegetable broth (preferably low-sodium)
- 1 can (15 oz) chickpeas, rinsed and drained
- 1 cup cherry tomatoes, halved
- 1/2 cup Kalamata olives, pitted and coarsely chopped
- 1/2 cup feta cheese, crumbled
- 1 teaspoon dried oregano
- 1 teaspoon garlic powder
- 1/2 teaspoon smoked paprika for an extra flavor dimension
- 1 tablespoon olive oil (plus more for drizzling)
- Salt and freshly cracked black pepper to taste
- Fresh parsley, finely chopped for garnish
Quinoa is a super grain. It is full of protein and fiber. This helps you feel full and strong. Chickpeas add extra protein and fiber too. They also bring a nice texture. These ingredients make the dish healthy and tasty!
Optional Ingredients
You can add more fun toppings to your stuffed peppers. Try slices of avocado or a sprinkle of fresh herbs like basil or mint. You can also play with seasonings. A dash of cumin or chili powder can give your dish a kick. Experimenting with flavors makes cooking exciting!
Step-by-Step Instructions
Preparation Steps
1. Preheat the Oven: Set your oven to 375°F (190°C). This helps cook the peppers evenly.
2. Prepare the Peppers: Cut the tops off the bell peppers. Remove the seeds and membranes. Drizzle olive oil on the outside and sprinkle with salt. Place the peppers cut-side up in a snug baking dish.
3. Cook the Quinoa: In a medium saucepan, mix 1 cup of rinsed quinoa with 2 cups of vegetable broth. Bring it to a boil over medium-high heat. Once boiling, lower the heat and cover. Let it simmer for about 15 minutes until fluffy.
Mixing and Stuffing the Peppers
1. Mix the Filling: In a large bowl, combine the cooked quinoa with chickpeas, halved cherry tomatoes, chopped Kalamata olives, crumbled feta, dried oregano, garlic powder, and smoked paprika. Drizzle in a tablespoon of olive oil. Season with salt and black pepper. Stir until well mixed.
2. Stuff the Peppers: Spoon the filling into each bell pepper. Pack it down lightly to maximize filling.
Baking and Serving
1. Bake the Peppers: Cover the baking dish with aluminum foil. Bake for 25 minutes. After that, remove the foil and bake for another 10 minutes until tender and slightly charred.
2. Garnish and Serve: Take the dish out and let it cool for a few minutes. Just before serving, sprinkle with fresh parsley. Serve on a colorful plate, drizzling any juices over the top. You can add extra cherry tomato halves for a lovely touch.Enjoy making these delightful Mediterranean Quinoa Stuffed Peppers!
Tips & Tricks
Cooking Tips
To achieve perfect quinoa texture, rinse the quinoa well before cooking. Rinsing removes bitter saponins. Use two cups of vegetable broth for one cup of quinoa. This adds more flavor. Bring the broth to a boil, then lower the heat. Cover and let it simmer for about fifteen minutes. You should see fluffy grains when it’s done.
For roasting peppers, preheat your oven to 375°F (190°C). Cut the tops off the peppers and remove seeds. Drizzle olive oil on the outside and sprinkle salt. Place them cut-side up in a snug baking dish. Cover with foil for the first part of baking. This keeps them moist. Remove the foil for the last ten minutes to get a nice char on the peppers.
Flavor Enhancements
To enhance flavors, consider adding spices like cumin or coriander. Fresh herbs like basil or mint give a nice twist. You can also use red pepper flakes for some heat. Customize the filling for dietary needs. Swap chickpeas for black beans if you prefer. You can also leave out the cheese for a vegan version.
Presentation Tricks
Garnish your stuffed peppers with fresh parsley to add color. A sprinkle of feta on top makes it look gourmet. Serve on a colorful plate for visual appeal. Use a drizzle of leftover juices from the baking dish over the peppers. Add cherry tomato halves around the plate for extra flair. Enjoy the vibrant look and flavors of your Mediterranean quinoa stuffed peppers!

Variations
Ingredient Substitutions
You can easily swap quinoa for rice or couscous. This gives you more options and flavors. For non-vegetarian versions, try adding ground turkey or chicken. These meat options add protein and richness. You can also use beef or lamb for a heartier taste. Each choice will change the dish while still keeping it delicious.
Cuisine-Flavored Options
Mediterranean quinoa stuffed peppers can have many flavors. Try adding spices like cumin or coriander for a North African twist. You can also mix in fresh herbs like basil or dill for a lighter taste. Seasonal produce works well too. Use zucchini in summer or squash in autumn. This lets you enjoy the dish all year long.
Dietary Considerations
You can make the dish vegan by omitting feta cheese. Instead, try using nutritional yeast for a cheesy flavor. For a gluten-free option, stick with quinoa. It is naturally gluten-free and packed with nutrients. Always check labels on other ingredients, like broth, to ensure they are gluten-free. This way, everyone can enjoy these tasty stuffed peppers.
Storage Info
Storing Leftovers
To keep your Mediterranean quinoa stuffed peppers fresh, follow these simple steps:
- Refrigeration: Place leftovers in an airtight container. They can stay fresh in the fridge for about 3 to 5 days.
- Freezing: If you want to store them longer, freeze the stuffed peppers. Wrap them tightly in plastic wrap, then place in a freezer-safe bag. They can last up to 3 months in the freezer.
Make sure to label your containers. This helps you know what’s inside and when you made it.
Reheating Instructions
Reheating your stuffed peppers correctly helps keep their flavor and texture. Here are the best ways to do it:
- Oven Method: Preheat your oven to 350°F (175°C). Place the peppers in a baking dish. Cover with foil to prevent drying out. Heat for about 20 minutes or until warmed through.
- Microwave Method: Place a stuffed pepper on a microwave-safe plate. Cover with a damp paper towel. Heat for 2 to 3 minutes. Check if it’s hot; if not, heat in 30-second intervals.
To avoid sogginess, do not add extra moisture when reheating. Keep the cover loose to let steam escape. Enjoy your flavorful meal again!
FAQs
Common Questions
What can I serve with Mediterranean Quinoa Stuffed Peppers?
I love serving these stuffed peppers with a side salad. A fresh green salad pairs well. You can add a simple lemon vinaigrette for a zesty touch. You might also try serving them with warm pita bread or tzatziki sauce. These dips add creaminess and flavor.
Can I prepare the filling in advance?
Absolutely! You can make the filling up to two days ahead. Just store it in an airtight container in the fridge. When you’re ready, stuff the peppers and bake. This saves time on busy days.
Troubleshooting Tips
What should I do if my peppers are too firm after baking?
If your peppers are still firm, try baking them longer. Cover them again with foil to keep moisture in. Bake for an extra 10 to 15 minutes. This can help them soften up nicely.
How do I know if the quinoa is cooked properly?
Check the quinoa after about 15 minutes of cooking. The grains should look fluffy and slightly translucent. If you see a little white tail, it’s ready! If not, add a splash of water and cook for a few more minutes.
Nutritional Information
Caloric breakdown per serving
Each stuffed pepper has about 350 calories. This makes it a filling yet light meal.
Key nutrition highlights from the ingredients
- Quinoa is a great source of protein and fiber.
- Chickpeas add more protein and help keep you full.
- The colorful veggies boost vitamins and minerals.
- Feta cheese gives calcium and flavor.
Enjoy these insights as you create your Mediterranean Quinoa Stuffed Peppers!
Mediterranean Quinoa Stuffed Peppers bring flavor and nutrition to your table. We covered essential ingredients, cooking steps, and tips to make this dish a hit. You can adjust the recipe with various flavors and toppings to suit your taste. Don’t forget to store leftovers properly for future meals. This dish not only satisfies your hunger but also supports good health. Now, you’re ready to enjoy a tasty and colorful meal that’s sure to impress!


![When making apple cinnamon overnight oats, you need simple and healthy ingredients. Here’s what you’ll need: - 1 cup rolled oats - 2 cups almond milk (or your preferred milk) - 1 medium apple, diced (a Granny Smith works great for a touch of tartness) - 1 tablespoon chia seeds - 1 tablespoon maple syrup (adjust based on your sweetness preference) - 1 teaspoon ground cinnamon - 1/2 teaspoon vanilla extract - A pinch of salt - Toppings: sliced almonds, additional apple slices, and a sprinkle of cinnamon These ingredients make a tasty breakfast that is full of fiber and nutrients. Rolled oats provide a solid base. Almond milk adds creaminess without extra calories. Diced apple brings natural sweetness and crunch. Chia seeds boost fiber and omega-3s. Maple syrup gives a touch of sweetness, while ground cinnamon adds warmth and flavor. A pinch of salt balances everything out. Feel free to adjust the ingredients to fit your taste. You can add more or less maple syrup, depending on how sweet you like it. I recommend using fresh apples for the best flavor. For a fun twist, try adding your favorite nuts or seeds on top. Check out the Full Recipe for all the details on making this delicious dish! To make apple cinnamon overnight oats, start with a clean space. Gather your ingredients first. This helps make the process smooth and quick. It only takes about ten minutes to prepare. You will need rolled oats, milk, chia seeds, and other tasty items. In a medium bowl, combine 1 cup of rolled oats and 2 cups of almond milk. Then, add 1 tablespoon of chia seeds, 1 tablespoon of maple syrup, and 1 teaspoon of ground cinnamon. Don't forget 1/2 teaspoon of vanilla extract and a pinch of salt. Whisk everything together until it’s mixed well. Next, fold in 1 diced apple. Make sure the apple pieces spread evenly through the mixture. This adds great flavor to every spoonful. Now, take two jars or airtight containers. Spoon the oat mixture evenly into them. Leave some space at the top. This space is important as the oats will expand. Seal the containers tightly and place them in the fridge. Let them chill overnight or for at least six hours. When you wake up, the oats will be ready! Just stir them, and if they are too thick, add a bit of almond milk to reach your desired creaminess. Enjoy! You can find the full recipe [here]. To get the best creamy oats, use the right milk. I like almond milk, but any milk will work. Soaking the oats overnight is key. This allows them to absorb the liquid. If your oats look too thick in the morning, add a splash of milk. Stir well to reach your perfect texture. Choosing the right apple makes a big difference. I recommend using Granny Smith apples for a nice tart flavor. They contrast well with the sweetness of the maple syrup. Other good choices are Honeycrisp or Fuji apples. Both add a sweet crunch and vibrant taste. For a beautiful presentation, use clear glass jars. Show off those lovely layers of oats, apples, and toppings. Just before serving, drizzle extra maple syrup on top. This adds shine and an extra touch of sweetness. Garnish with sliced almonds or apple slices for a pop of color. Enjoy the visual feast as much as the taste! {{image_4}} You can swap almond milk for any milk you like. Cow's milk gives a creamy taste. Cashew milk adds richness. Coconut milk brings a tropical twist. Each milk changes the flavor a bit, so try different ones to find your favorite. Maple syrup is the base for sweetness, but it’s not the only choice. You can use honey if you want a floral note. Agave syrup works well for a mild sweetness. If you prefer less sugar, try mashed bananas or stevia for a low-cal option. Adjust to your taste! Adding more ingredients is easy! You can mix in nuts or seeds for healthy fats. Try flax seeds for extra fiber. Some berries can add antioxidants and a pop of color. A spoonful of yogurt can make it creamy and add protein. Feel free to experiment with different add-ins to boost your overnight oats. Check the Full Recipe for more details on ingredients! You can store your apple cinnamon overnight oats in airtight containers. Glass jars work great. Make sure each jar is sealed tightly. This keeps the oats fresh and tasty. Place them in the fridge after making them. They last well in the cold. These oats are best when eaten within five days. After five days, their taste and texture change. If you see any mold, throw them away. Always check for a sour smell too. It’s better to be safe than sorry! You can freeze overnight oats if you want to keep them longer. Use freezer-safe containers or bags. Just leave some space to allow for expansion. When you're ready to eat, thaw them in the fridge overnight. You can also warm them in the microwave. This way, you enjoy a healthy breakfast boost anytime! For the full recipe, check out the details above. Yes, you can use instant oats, but the texture will change. Instant oats cook faster and may become mushy when soaked. If you want a creamier texture, stick with rolled oats. They absorb liquid well and hold their shape, giving you a better bite. You can change the flavor in many ways. Try different spices like nutmeg or ginger. Add a scoop of peanut butter or almond butter for creaminess. You can also mix in dried fruits, like raisins or cranberries, for a sweet touch. Experimenting with toppings can add crunch, too! Absolutely! This recipe is perfect for meal prep. Make a batch and store it in jars. It will last in the fridge for up to five days. Each morning, you can grab a jar, stir it up, and enjoy a healthy breakfast. Check the full recipe for more details on making these oats. This blog post showed you how to make delicious overnight oats. We covered the key ingredients and step-by-step instructions. Tips helped you achieve creamy texture and great flavor. Plus, I shared fun ways to personalize your oats. Remember, these oats store well, making them perfect for meal prep. Enjoy your tasty and healthy breakfast with ease. You can mix it up as you like and keep it fresh! Start experimenting today and make breakfast something you look forward to.](https://dishtreats.com/wp-content/uploads/2025/07/b5672784-8b9d-49df-af82-0a82d4d3c269-768x768.webp)


![To make a tasty and healthy crispy chickpea salad, you need these main ingredients: - 1 can (15 oz) chickpeas, drained and rinsed - 2 tablespoons olive oil - 1 teaspoon smoked paprika - 1/2 teaspoon garlic powder - 1/2 teaspoon ground cumin - Salt and freshly ground pepper to taste - 4 cups mixed greens (spinach, arugula, and lettuce blend) - 1 cup cherry tomatoes, halved - 1/2 cucumber, diced - 1/4 red onion, thinly sliced Add some optional ingredients to enhance the flavor and texture of your salad: - 1/4 cup feta cheese, crumbled (optional) - A handful of fresh parsley, chopped (for garnish) You will also need a few kitchen tools to make this salad: - A medium-sized mixing bowl for the chickpeas - A large bowl for the salad - A baking sheet lined with parchment paper - A whisk for the dressing - A separate small bowl for mixing the tahini dressing Using these ingredients and tools, you can create a delicious crispy chickpea salad. Try the full recipe for a step-by-step guide! First, preheat your oven to 400°F (200°C). This makes sure the chickpeas get crispy. Line a baking sheet with parchment paper. This helps with easy cleanup later. In a bowl, mix the drained chickpeas with olive oil. Add smoked paprika, garlic powder, ground cumin, salt, and pepper. Make sure each chickpea is well coated. This blend gives them a tasty kick. Spread the seasoned chickpeas evenly on the baking sheet. Don’t crowd them; they need space to get crispy. Bake for 25-30 minutes. Shake the pan halfway through to help them cook evenly. They should turn golden and crunchy. While the chickpeas bake, prepare the salad base. In a large bowl, toss together mixed greens, halved cherry tomatoes, diced cucumber, and thinly sliced red onion. Mixing them now lets the flavors combine as you assemble. In a small bowl, whisk tahini, fresh lemon juice, and a pinch of salt and pepper. If you want a thinner dressing, add a splash of water. This dressing ties the salad together, adding a rich flavor. Once the chickpeas are crispy, take them out and let them cool for a minute. Top your salad with these warm chickpeas. Drizzle the tahini dressing over everything. Add crumbled feta cheese for creaminess, if you like. Finish with fresh parsley for color. Enjoy your Crispy Chickpea Delight Salad! For the complete recipe, check the [Full Recipe]. To make your chickpeas extra crispy, dry them well before cooking. Drain and rinse the canned chickpeas, then lay them on a paper towel. Pat them gently to remove excess moisture. The drier the chickpeas, the crunchier they will be. Toss them with olive oil and spices right before baking. Spread them out on your baking sheet. Avoid crowding them; it helps with airflow and crispiness. Bake at 400°F for 25 to 30 minutes, shaking the pan halfway through. This step ensures even cooking and crispiness. If you have leftovers, store the salad and chickpeas separately. Place the salad in an airtight container in the fridge. Keep the chickpeas in another container. This will help prevent sogginess. When you want to eat the leftovers, reheat the chickpeas in the oven for a few minutes. This will revive their crisp texture. The salad will stay fresh for about two days in the fridge. For the best taste, serve the salad immediately after assembling. The warm chickpeas add a nice contrast to the cool greens. Drizzle the tahini dressing right before serving. This way, it coats the ingredients nicely. You can also sprinkle some feta cheese on top for extra creaminess. Fresh herbs like parsley can brighten the dish. Try adding avocado for creaminess or nuts for crunch. Each addition enhances the flavor and texture of your salad. Enjoy experimenting! {{image_4}} You can swap out greens to change the salad's taste. Try using kale for a hearty crunch. Baby spinach offers a soft, mild flavor. You can even mix in some crunchy cabbage for more texture. Each option adds its unique twist while still pairing well with crispy chickpeas. If you want to make the salad more filling, add protein. Grilled chicken works great with the chickpeas. You can also try adding sliced hard-boiled eggs for richness. For a vegetarian option, toss in some quinoa or black beans. These choices will help boost the meal's nutrients. While tahini dressing is fantastic, don’t be afraid to experiment. A lemon vinaigrette adds a bright zing. You could also try a yogurt-based dressing for creaminess. If you like a kick, a spicy harissa dressing works wonders too. Each dressing brings a new flavor that can change your salad experience. For the full recipe, check out the Crispy Chickpea Delight Salad 🥗. To store leftover salad, first, let it cool down. Place it in an airtight container. This keeps the salad fresh. Add the crispy chickpeas on top only when serving. This way, they stay crunchy. If you mix them in, they can get soggy. If you have leftover crispy chickpeas, you can reheat them. Preheat your oven to 350°F (175°C). Spread the chickpeas on a baking sheet. Bake them for about 10 minutes. This brings back their crunch. You can also use an air fryer for a quicker option. The salad can last up to three days in the fridge. Chickpeas stay good for about a week if stored well. Fresh veggies have a shorter shelf life. Use them within three to five days. Always check for freshness before eating. For a detailed recipe, refer to the Full Recipe. Yes, you can use dried chickpeas. They need soaking and cooking first. To prepare, soak them overnight in water. Cook them until they are tender. This can take about 1 to 2 hours. Then, follow the same steps as with canned chickpeas in the recipe. This salad is packed with nutrients. Chickpeas provide protein and fiber. Mixed greens bring vitamins A and C. Tomatoes offer antioxidants, while cucumbers add hydration. Olive oil is a healthy fat. Feta cheese, if used, adds calcium. Overall, it is a well-balanced meal. To make this salad vegan, skip the feta cheese. The rest of the ingredients are already plant-based. You can also add more veggies or nuts for extra flavor and nutrition. Try adding avocado for creaminess or nuts for crunch. Yes, you can prep it ahead of time. Store the crispy chickpeas in an airtight container. Keep the salad ingredients separate until you are ready to eat. This keeps everything fresh and crispy. Just assemble when you want to enjoy your meal. This salad pairs well with many dishes. Serve it alongside grilled chicken or fish for protein. It also goes great with a warm pita or flatbread. If you want a lighter meal, enjoy it as a stand-alone dish. You can find the Full Recipe for more details. In summary, this blog post covered how to make a crispy chickpea salad. We explored the main ingredients and added options to boost flavor. I shared step-by-step cooking instructions and tips for the perfect crunch. You learned about storage methods and how to customize the dish. Enjoy this salad any time for a tasty and healthy meal. With its simple steps, you can make it again and again!](https://dishtreats.com/wp-content/uploads/2025/06/a0161600-1d29-449f-a743-39fb8b2e717a-768x768.webp)