
Looking for a refreshing dish that packs a flavor punch? Try my Mediterranean Couscous Salad! With fresh veggies and a zesty dressing, this salad is perfect for lunch or dinner. In this post, I’ll guide you through easy steps to create a vibrant, colorful dish that delights the taste buds. Get ready to impress your family and friends with this healthy recipe that’s quick, simple, and delicious!
Why I Love This Recipe
- Fresh and Flavorful: This salad is bursting with fresh ingredients that bring a vibrant Mediterranean flavor to your table.
- Quick and Easy: With minimal cooking required, this recipe is perfect for a quick lunch or a light dinner.
- Customizable: You can easily adapt this salad with your favorite vegetables or proteins, making it a versatile dish.
- Healthy and Nutritious: Packed with vegetables, healthy fats, and whole grains, this salad is a wholesome option for any meal.
Ingredients
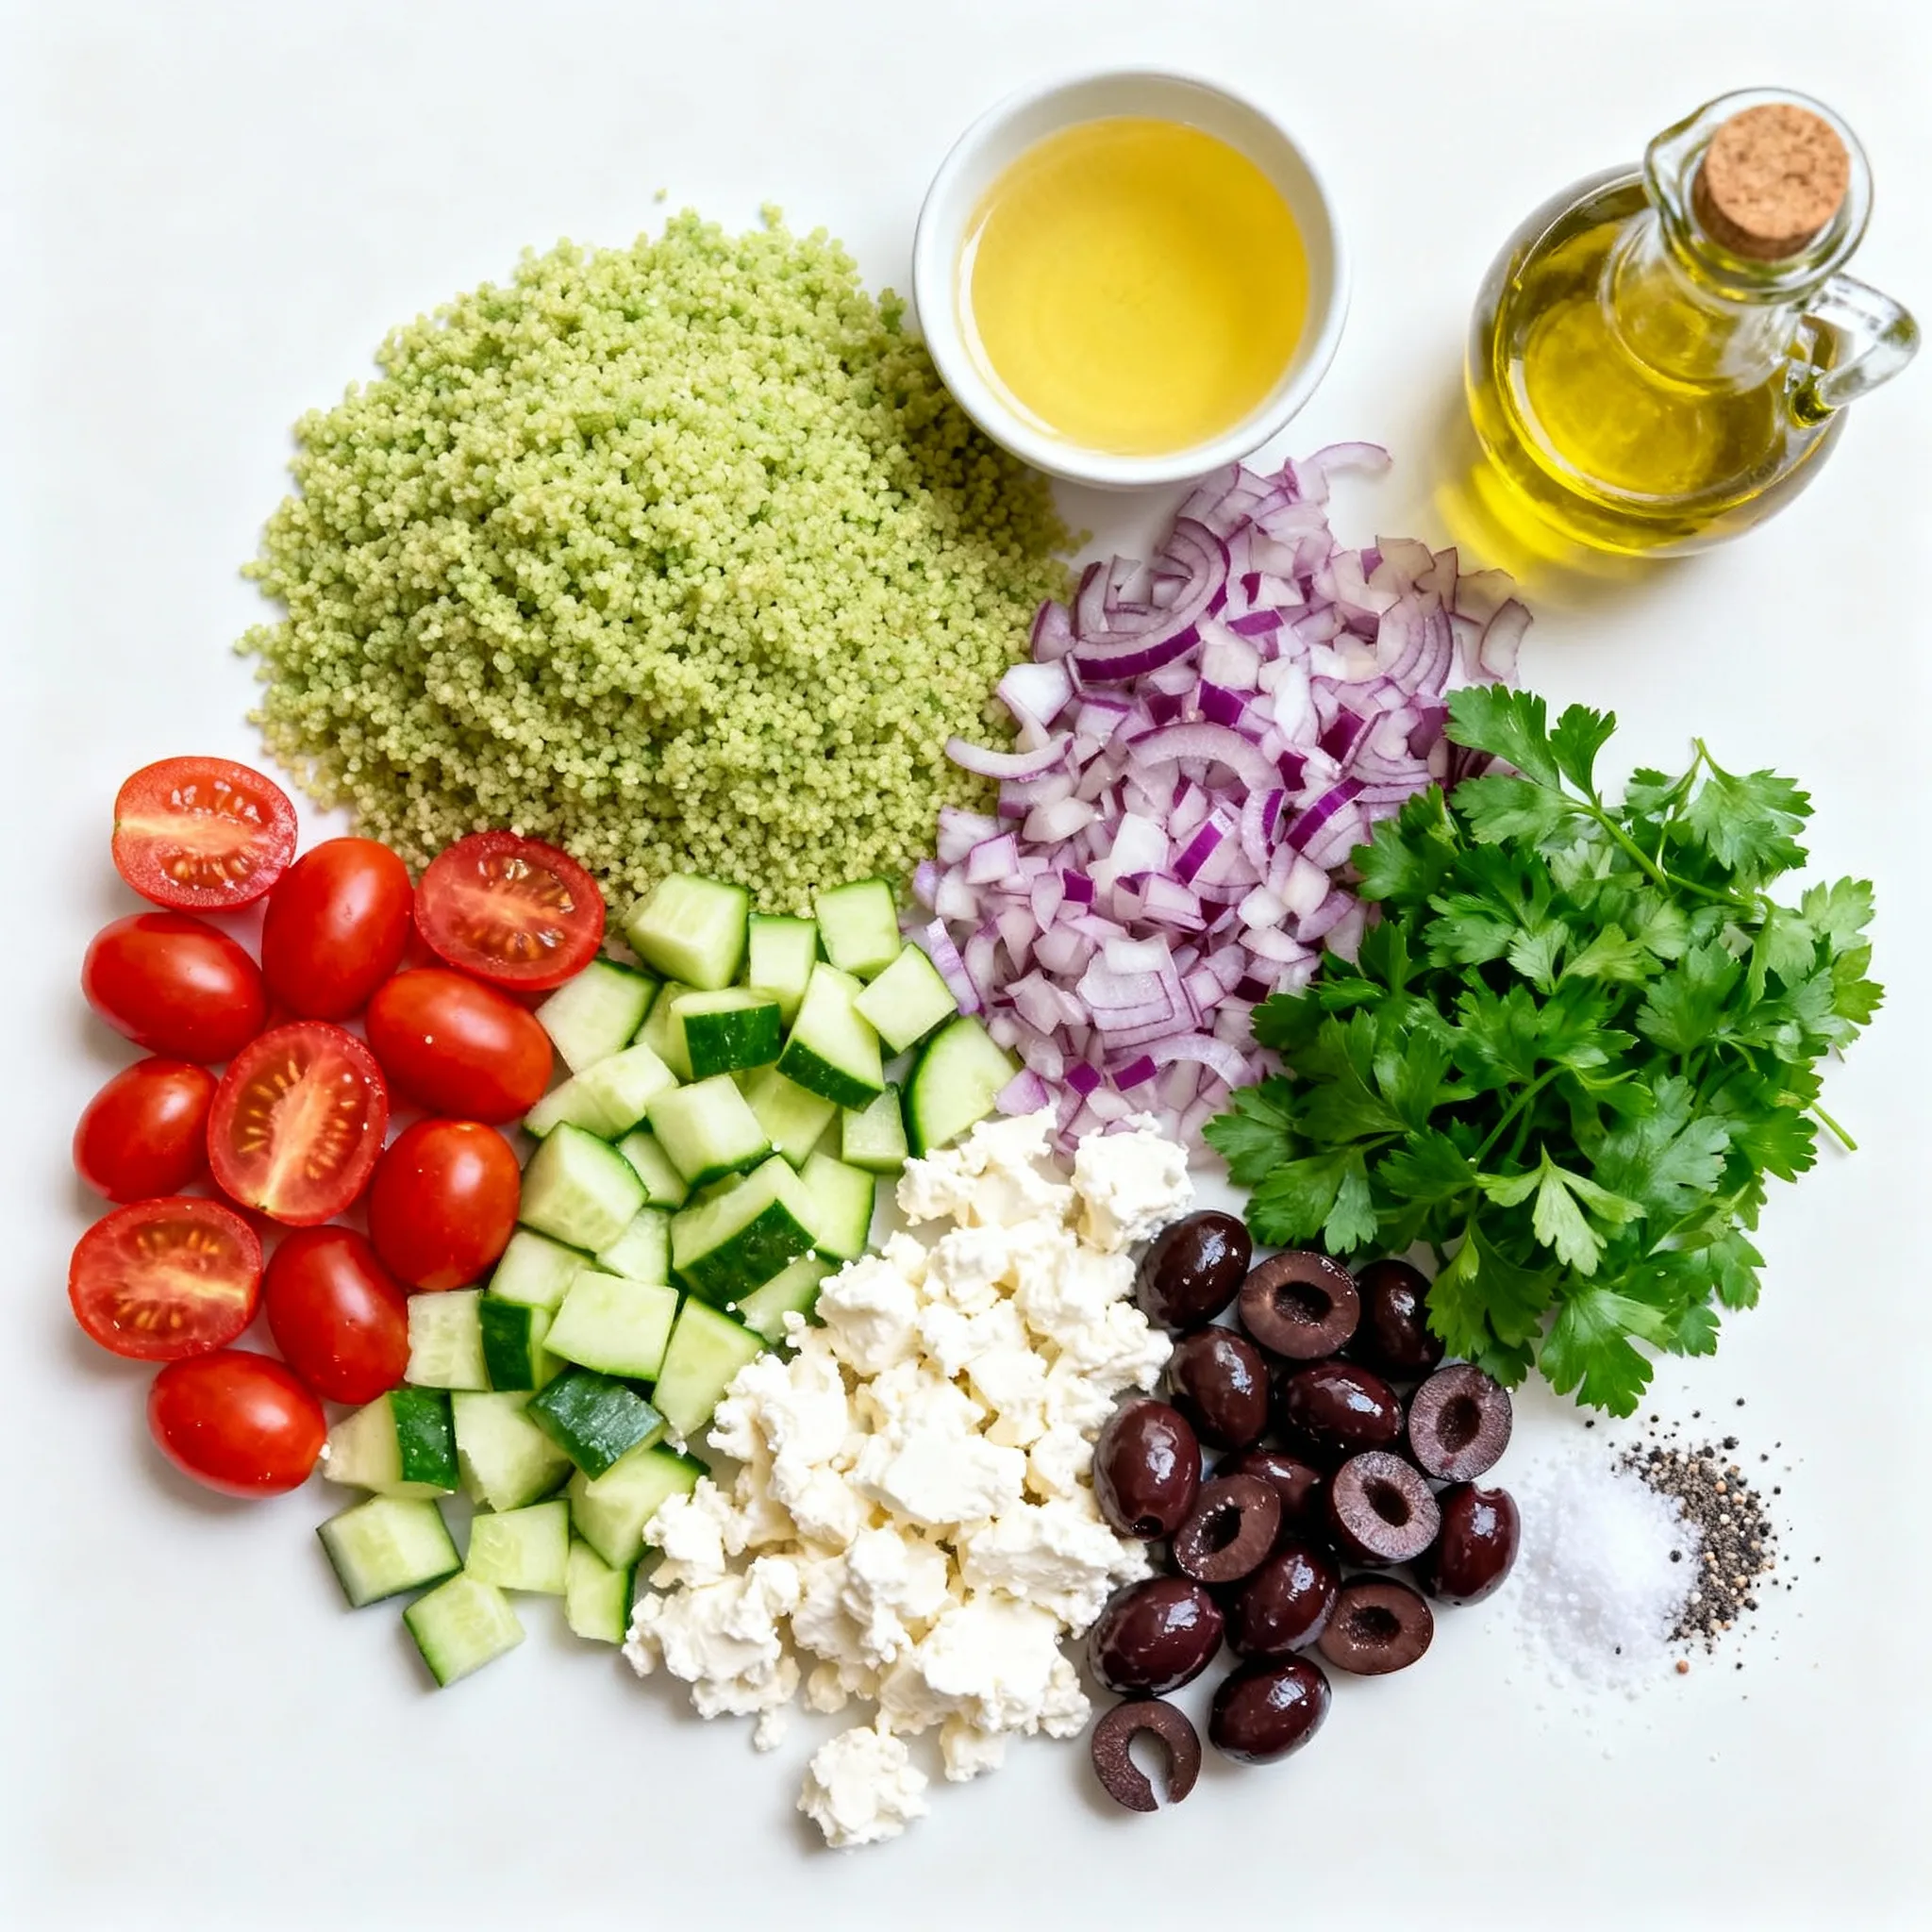
List of Ingredients
– Couscous and Broth
– 1 cup couscous
– 1 1/4 cups vegetable broth (preferably low-sodium)
– Fresh Vegetables
– 1 cup cherry tomatoes, halved
– 1 medium cucumber, diced into small cubes
– 1/2 medium red onion, finely chopped
– 1/2 cup Kalamata olives, pitted and sliced
– 1/4 cup fresh parsley, finely chopped
– Accompaniments
– 1/2 cup feta cheese, crumbled
– Seasoning and Dressing
– 2 tablespoons freshly squeezed lemon juice
– 2 tablespoons high-quality extra virgin olive oil
– Salt and freshly ground black pepper to taste
Gather these ingredients before starting. Using fresh vegetables makes a big difference. The color and taste will be brighter and more appealing. Kalamata olives add a nice touch of saltiness. Feta cheese brings creaminess to each bite. This salad is quick to prepare and so rewarding. You will enjoy each layer of flavor as you mix the ingredients.
Step-by-Step Instructions
Preparation Steps
– Prepare the Couscous: First, bring 1 1/4 cups of vegetable broth to a boil. Use a medium saucepan over medium-high heat.
– Cook and Fluff the Couscous: Once the broth is boiling, stir in 1 cup of couscous. Lower the heat and cover the pot. Let it sit for about 5 minutes until the broth is absorbed.
– Combine Vegetables: In a large bowl, mix 1 cup of halved cherry tomatoes, 1 medium diced cucumber, 1/2 finely chopped red onion, 1/2 cup sliced Kalamata olives, 1/2 cup crumbled feta cheese, and 1/4 cup chopped fresh parsley.
Incorporate Couscous and Dress Salad
– Mix in the Couscous: After the couscous cools to room temperature, add it to the vegetable bowl. Toss gently to combine. Be careful not to break the feta.
– Make the Dressing: In a small bowl, whisk together 2 tablespoons of lemon juice, 2 tablespoons of extra virgin olive oil, and season with salt and black pepper to taste. Mix until it thickens slightly.
– Dress the Salad: Pour the dressing over the salad. Toss gently until all ingredients are coated in the dressing.
Final Steps
– Taste and Adjust: Sample the salad and adjust the seasoning. Add more salt, pepper, or lemon juice if needed for your taste.
– Chill and Serve: Cover the salad with plastic wrap and refrigerate for at least 30 minutes. This chilling time helps the flavors blend well.
Tips & Tricks
Tips for Perfecting the Salad
Choosing the Right Couscous
Use regular couscous for a fluffy texture, or try whole wheat for more fiber. Instant couscous cooks faster but may lack flavor. Always check the package for cooking times.
Balancing Flavors
Aim for a blend of sweet, salty, and tangy. The tomatoes add sweetness, while olives and feta bring saltiness. Fresh lemon juice adds brightness. Taste as you mix, and adjust the seasoning.
Serving Suggestions
Ideal Pairings
This salad pairs well with grilled chicken or fish. It also complements roasted vegetables. For a light lunch, serve it with a slice of crusty bread.
Presentation Ideas
Serve the salad in a colorful bowl. Top it with extra feta and parsley for a pop of color. A drizzle of olive oil adds a nice touch, too.
Pro Tips
- Use Quality Ingredients: The flavor of your salad will greatly depend on the quality of your olive oil and feta cheese. Invest in high-quality brands for the best taste.
- Customize Your Veggies: Feel free to add or substitute other vegetables like bell peppers, zucchini, or spinach to suit your taste and what you have on hand.
- Perfect Chilling Time: Allowing the salad to chill for at least 30 minutes not only melds the flavors but also enhances the overall texture and taste.
- Leftover Magic: This salad keeps well in the fridge for a couple of days. It makes for a quick lunch or side dish, and the flavors continue to develop over time.
Variations
Ingredient Substitutions
Alternative Vegetables
You can change the vegetables in this salad. If you want, try bell peppers for a sweet crunch. Zucchini adds a fresh taste and is easy to find. For a bit of spice, add radishes. These changes keep the salad fun and tasty.
Different Cheeses
Feta cheese is great, but you can use other cheeses too. Goat cheese gives a creamy taste. For a sharper flavor, try blue cheese. If you want a dairy-free option, use a nut-based cheese. Each cheese gives a unique touch to your salad.
Seasonal Variations
Summer Ingredients
In the summer, add in fresh corn or ripe avocados. These ingredients bring a sweet flavor. You can also toss in fresh herbs like basil or mint. They add a bright note and make your salad refreshing.
Fall Additions
In the fall, swap in roasted butternut squash or sweet potatoes. These add warmth and depth. You can also include dried cranberries for sweetness. This mix makes your salad hearty and perfect for cooler days.
Storage Info
Storing Leftovers
To keep your Mediterranean couscous salad fresh, follow these tips:
– Best Practices for Refrigeration: Store the salad in an airtight container. This helps keep moisture in and prevents drying. Place it in the fridge right after serving. It’s best to eat it within three days for the best flavor and texture.
– Freezing Guidelines: Freezing is not ideal for this salad. The couscous and veggies may get mushy when thawed. If you need to freeze it, separate the dressing from the salad. You can freeze the salad without dressing for up to a month. Thaw it in the fridge and add fresh dressing before serving.
Shelf Life
Understanding how long your salad lasts is important:
– How Long It Lasts in the Fridge: The Mediterranean couscous salad lasts about 3 to 5 days in the fridge. The flavors will get better as it sits, but check for freshness.
– Signs of Spoilage: Look for changes in color or smell. If the salad smells sour or the veggies become slimy, it’s time to toss it. Always trust your senses when deciding if food is safe to eat.
FAQs
Can I make this salad ahead of time?
Yes, you can make this salad ahead of time. It tastes even better after chilling. The flavors mix well, creating a tasty dish. Store it in the fridge for up to three days. Just remember to add fresh herbs right before serving.
What can I add to make it more filling?
To make it more filling, consider adding protein. Grilled chicken, chickpeas, or shrimp work well. You can also include avocado for creaminess. Nuts or seeds add a nice crunch too. These additions will make the salad a hearty meal.
Is it suitable for meal prep?
Absolutely! This salad is great for meal prep. It holds up well in the fridge. Portion it into containers for easy lunches. Just keep the dressing separate until you’re ready to eat. This way, the salad stays fresh and crisp.
This blog post explored making a tasty couscous salad. We covered the key ingredients, including couscous, fresh veggies, and dressings. I provided clear steps to prepare and combine these elements. You learned tips for choosing the best ingredients and ideas for serving and storing leftovers. Remember, you can try different veggies and seasonal items to keep it fresh. With this knowledge, you’re ready to create a delicious salad that impresses. Enjoy your cooking adventur


