Maple Roasted Brussels Sprouts Perfectly Crispy Recipe

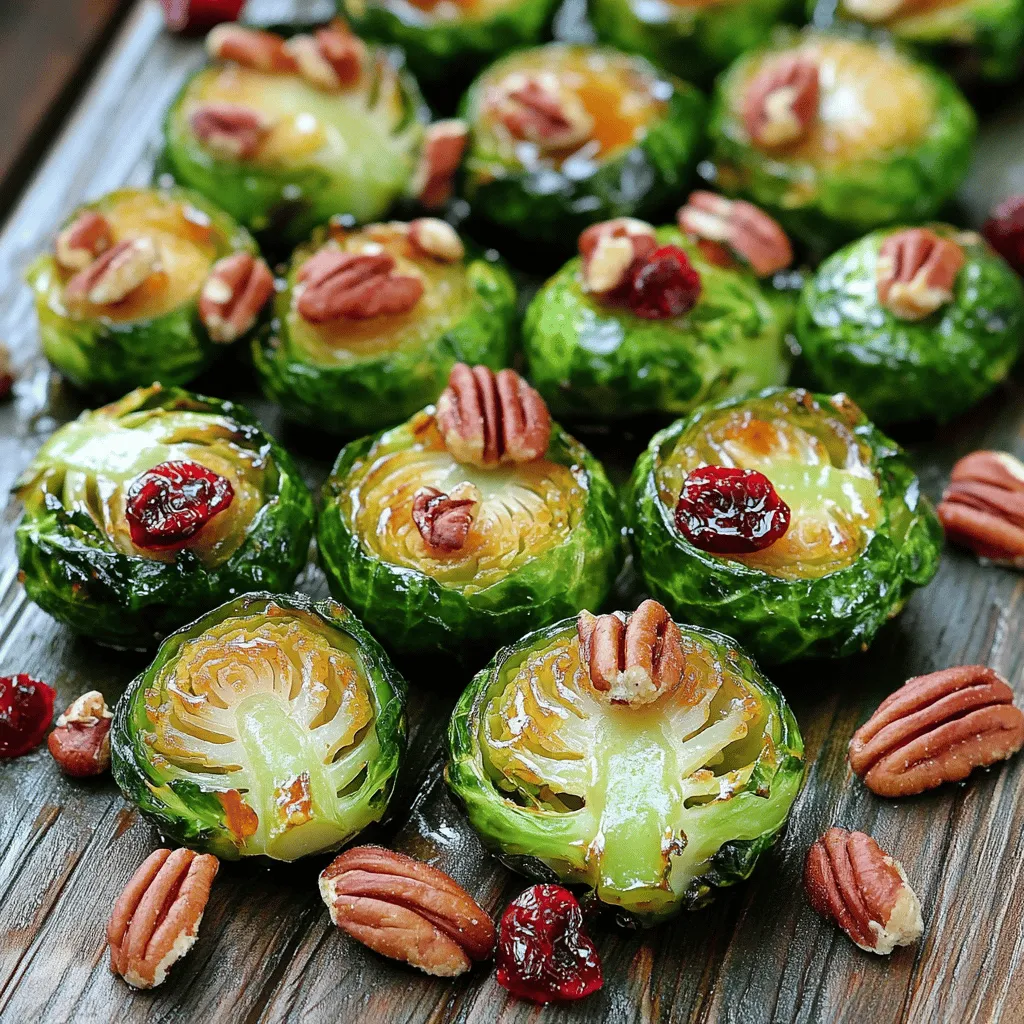
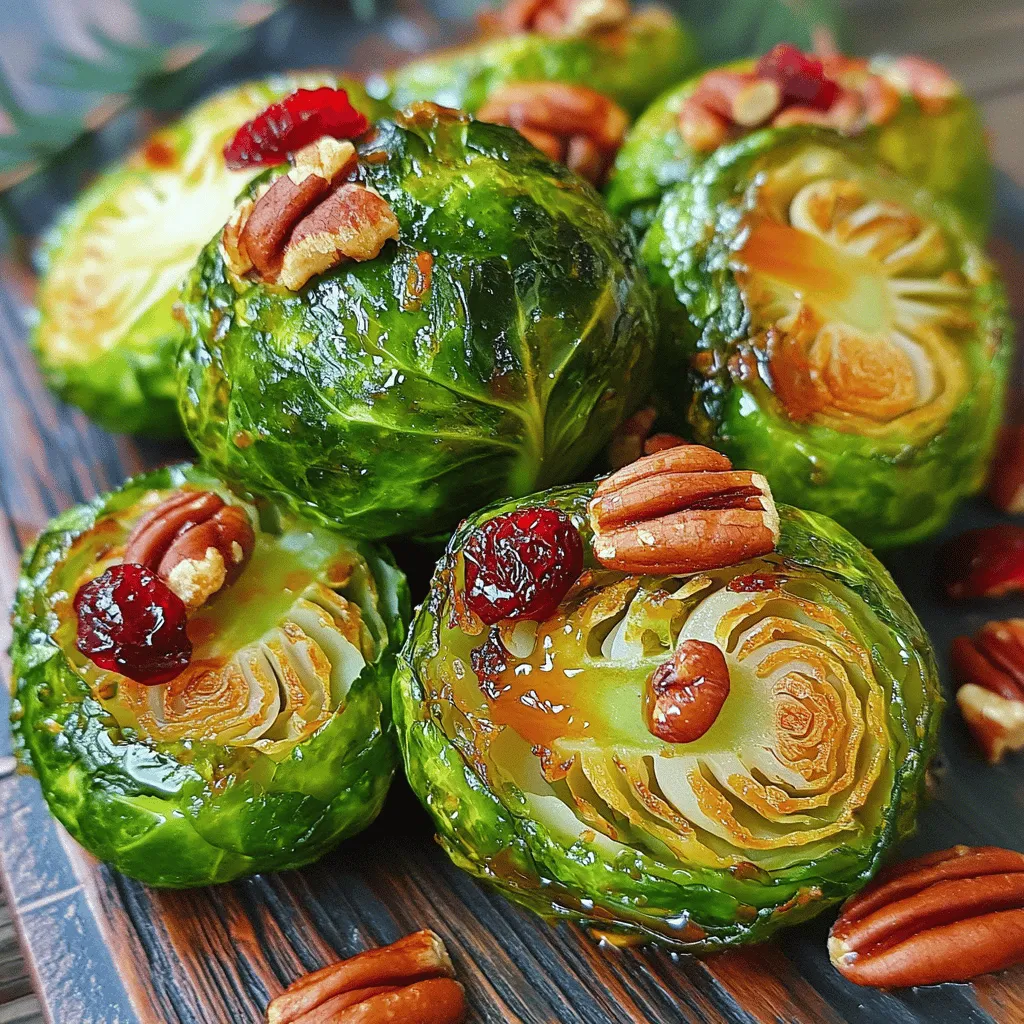
If you want to impress guests with a tasty side dish, try my Maple Roasted Brussels Sprouts! This recipe gives you crispy, sweet, and savory bites. With just a few simple ingredients, you can create a dish that delights everyone at the table. I’ll walk you through easy steps and share helpful tips to make sure your Brussels sprouts turn out perfect every time. Are you ready to get cooking?
Ingredients
List of Ingredients for Maple Roasted Brussels Sprouts
To make this tasty dish, gather these ingredients:
- 1 pound Brussels sprouts, trimmed and halved
- 3 tablespoons extra virgin olive oil
- 2 tablespoons pure maple syrup
- 1 teaspoon balsamic vinegar
- 1 teaspoon garlic powder
- 1/2 teaspoon coarse sea salt
- 1/2 teaspoon freshly ground black pepper
- 1/4 cup chopped pecans (optional, for added crunch)
- 1/4 cup dried cranberries (optional, for a burst of sweetness)
Optional Ingredients for Enhanced Flavor
You can add more flavor with these extras:
- Crushed red pepper flakes for heat
- Fresh herbs like thyme or rosemary
- Grated Parmesan cheese for a savory twist
Ingredient Substitutions for Dietary Preferences
If you have dietary needs, try these swaps:
- Use avocado oil instead of olive oil for a different taste.
- Swap maple syrup with honey or agave for sweetness.
- Replace pecans with walnuts or sunflower seeds if needed.
Step-by-Step Instructions
Preparation Steps for Maple Roasted Brussels Sprouts
Start by gathering all your ingredients. You need a pound of Brussels sprouts, olive oil, maple syrup, balsamic vinegar, garlic powder, salt, and pepper. If you like, add pecans and cranberries for extra flavor. Trim and halve the Brussels sprouts. This helps them cook evenly and get crispy.
Detailed Cooking Instructions and Timing
Preheat your oven to 400°F (200°C). In a large bowl, whisk together the olive oil, maple syrup, balsamic vinegar, garlic powder, salt, and pepper. This mix is key for flavor. Add the halved Brussels sprouts. Toss them well until each sprout is coated. Line a baking sheet with parchment paper. Spread the sprouts in a single layer on the sheet. Roast them for 20-25 minutes. Stir halfway through for even cooking. They should be fork-tender and golden brown. If using pecans, add them during the last 5 minutes. They will add a nice crunch. After roasting, toss in the cranberries if desired.
Tips for Achieving Perfectly Roasted Sprouts
To get that crispy texture, make sure not to crowd the baking sheet. Give the sprouts space to breathe. Use fresh ingredients for the best taste. If you want more caramelization, turn the oven up to 425°F (220°C) for the last few minutes. Always check for doneness by piercing a sprout with a fork. It should feel tender. For a great presentation, serve the sprouts on a platter with a drizzle of maple syrup and extra pecans. This makes your dish look special and inviting.
Tips & Tricks
Best Practices for Roasting Brussels Sprouts
To get the best results, select fresh Brussels sprouts. They should feel firm and bright green. Always cut them in half for even cooking. The flat side browns better and adds flavor. Make sure to space them out on the baking sheet. Crowded sprouts steam instead of roast. Stir them halfway through for even crispiness.
Flavor Profile Enhancements
To boost the flavor, try adding spices. A pinch of cayenne pepper gives heat. Smoked paprika adds a nice depth. Consider mixing in some lemon zest for brightness. You can also swap out the maple syrup for honey or agave. For a savory touch, add crumbled feta or parmesan cheese after roasting.
Troubleshooting Common Issues
If your Brussels sprouts are soggy, they were likely too crowded. Ensure they are dry before roasting. If they burn, your oven may be too hot. Adjust the temperature down a bit. For undercooked sprouts, extend the roasting time by a few minutes. Just keep an eye on them to avoid burning.

Variations
Alternative Add-Ins and Flavor Combinations
You can make Maple Roasted Brussels sprouts even more delicious by adding extras. Try mixing in some crispy bacon for a savory twist. This adds a salty flavor that pairs well with the sweetness of maple. You can also sprinkle in some red pepper flakes for a bit of heat. If you love cheese, goat cheese crumbles add creaminess and tang.
Seasonal Variations to Try
In fall, add roasted sweet potatoes for a heartier dish. The sweet potatoes will complement the maple flavor. In winter, toss in some sliced apples or pears. Their natural sweetness works well with Brussels sprouts. In spring, consider adding fresh herbs like thyme or rosemary for a bright flavor.
Serving Suggestions for Different Meals
These Brussels sprouts shine as a side dish for any meal. Serve them with roast chicken for a comforting dinner. They also pair well with grilled salmon for a healthy option. Try them as a topping on your favorite grain bowl too! For a festive touch, serve them during holiday dinners. Their bright color makes any plate look more inviting.
Storage Info
How to Properly Store Leftovers
After you enjoy your maple roasted Brussels sprouts, let them cool. Once cool, place them in an airtight container. This keeps them fresh for up to three days in the fridge. To prevent sogginess, do not stack them too high. Store them flat, if possible.
Reheating Tips for Optimal Taste
When you’re ready to enjoy leftovers, preheat your oven to 350°F (175°C). Spread the Brussels sprouts on a baking sheet. Heat them for about 10-15 minutes or until warmed through. This method helps keep them crispy. Avoid using the microwave, as it can make them mushy.
Freezing Guidelines for Long-Term Storage
You can freeze Brussels sprouts for later use. First, cool them completely after roasting. Then, place them in a freezer-safe bag or container. Remove as much air as possible to avoid freezer burn. They can last for up to three months in the freezer. When ready to eat, thaw in the fridge overnight before reheating. For the best quality, use them sooner rather than later.
FAQs
How long to roast Brussels sprouts?
Roast Brussels sprouts for 20 to 25 minutes at 400°F (200°C). This time allows them to cook fully and get that desired crispiness. Stir them halfway through to help them brown evenly. You want them to be tender and golden brown when done.
Can I use frozen Brussels sprouts for this recipe?
Yes, you can use frozen Brussels sprouts. However, they may not get as crispy as fresh ones. Thaw them first and pat them dry. This helps remove excess moisture. Keep in mind that the cooking time may vary.
Is this recipe suitable for meal prep?
Absolutely! Maple roasted Brussels sprouts are great for meal prep. They keep well in the fridge for up to four days. Store them in an airtight container. You can reheat them in the oven or microwave before serving.
Can I make Maple Roasted Brussels Sprouts in advance?
You can prepare the Brussels sprouts in advance. Toss them in the maple mixture and store them in the fridge. Roast them just before serving for the best texture. If you like, you can roast them earlier and reheat them. Just remember, they taste best fresh out of the oven.
Maple roasted Brussels sprouts are easy and delicious. We’ve covered the key ingredients, including options for flavor and substitutes. You learned the simple steps for prepping and cooking them perfectly. I shared tips for roasting and ways to add variety. Lastly, I explained how to store and reheat them well.
With this recipe, you can enjoy a tasty dish anytime. Try these ideas to make your cooking fun and flavorful. Enjoy your time in the kitchen!


![To make this tasty dish, gather these simple ingredients: - 1 pound Brussels sprouts, trimmed and halved - 3 tablespoons extra virgin olive oil - 1/4 cup pure maple syrup - 2 tablespoons balsamic vinegar - 1 teaspoon Dijon mustard - 1/2 teaspoon fine sea salt - 1/4 teaspoon freshly ground black pepper - 1/4 cup pecans, roughly chopped for added crunch - 1/4 cup dried cranberries for a touch of sweetness - Fresh thyme leaves for an aromatic garnish (optional) You can easily adjust ingredient amounts based on what you need. Here are some quick conversions: - If you want to make more, use 2 pounds of sprouts and double the glaze. - For less, cut the amounts in half. This still keeps the taste great. - In a pinch, you can swap the pecans for walnuts or almonds. This dish not only tastes good but is also good for you. Here’s a quick look at what’s inside: - Calories: About 200 per serving - Fat: 12 grams (mostly healthy fats from olive oil and nuts) - Carbohydrates: 24 grams (includes natural sugars from maple syrup) - Fiber: 5 grams (great for digestion from Brussels sprouts) - Protein: 3 grams (from nuts and sprouts) This breakdown helps you see the benefits of each ingredient. Enjoy making this dish with fresh, seasonal produce for the best flavor and health benefits. For the complete recipe, check out the Full Recipe. Start by preheating your oven to 400°F (200°C). This step is key for getting perfect crispness. While the oven warms up, clear your kitchen counter. Gather all your tools and ingredients. Having everything ready makes cooking much easier. Take 1 pound of Brussels sprouts. Trim off the ends and cut them in half. Place the halved sprouts in a large mixing bowl. Add 3 tablespoons of extra virgin olive oil and 1/2 teaspoon of fine sea salt. Sprinkle in 1/4 teaspoon of freshly ground black pepper. Toss the sprouts until they are well coated. This ensures each sprout gets flavor. Spread the seasoned Brussels sprouts on a baking sheet. Make sure the cut sides face down. This helps them brown nicely. Place the baking sheet in your preheated oven. Roast for 20-25 minutes. They should be crispy and golden. While they roast, make the maple glaze. In a small saucepan, mix 1/4 cup of pure maple syrup, 2 tablespoons of balsamic vinegar, and 1 teaspoon of Dijon mustard. Heat over medium heat but do not let it boil. Once the sprouts are ready, drizzle the glaze over them. Toss gently to coat. Return the glazed sprouts to the oven for 5 more minutes. This step caramelizes the glaze, making it rich and tasty. After that, take them out and add 1/4 cup of roughly chopped pecans and 1/4 cup of dried cranberries. These add crunch and sweetness. If you want, garnish with fresh thyme leaves for even more flavor. For the full details, check the Full Recipe. When you pick Brussels sprouts, look for bright green ones. They should feel firm and heavy in your hand. Avoid any that have yellow leaves or feel soft. The size matters too; smaller sprouts are sweeter and more tender. If you can, buy them on the stalk. They stay fresh longer that way. Caramelization makes Brussels sprouts sweet and tasty. To get it right, roast them cut-side down. This lets them get nice and brown. Make sure they have space on the baking sheet. If they are too close together, they will steam instead of roast. Use high heat, about 400°F, for best results. Check them halfway through and give them a stir for even cooking. One big mistake is overcooking the sprouts. They should be tender but still have a bit of crunch. Avoid using too much glaze; it can make them soggy. Always glaze right after roasting, then caramelize them for just a few minutes. This step adds flavor without losing the sprout's crispness. Lastly, don’t skip the nuts and cranberries; they add great texture and taste. For the full recipe, check the [Full Recipe]. {{image_4}} You can change the taste of maple glazed Brussels sprouts by adding different nuts or seeds. Try walnuts for a rich flavor or sunflower seeds for a crunch. Almonds also work well; they add a nice texture and nutty taste. Each option gives a new twist to your dish. Just sprinkle them on top after roasting for the best crunch and flavor. If you need to adjust for dietary needs, it’s easy. Use agave syrup instead of maple syrup for a vegan option. For a nut-free dish, skip the pecans and use pumpkin seeds. You can also swap balsamic vinegar with apple cider vinegar for a light zing. These swaps keep the dish tasty while meeting your needs. Brussels sprouts shine in fall and winter, but you can adapt them year-round. In spring, add fresh herbs like basil or parsley for brightness. In summer, pair with grilled corn for a sweet twist. You can also mix in seasonal veggies like carrots or sweet potatoes for color and taste. This way, your dish stays fresh and exciting no matter the season. For the full recipe, check out the Maple Glazed Brussels Sprouts Delight. After enjoying your maple glazed Brussels sprouts, store leftovers right. Place them in an airtight container. They will stay fresh for about three days in the fridge. Keep them away from strong-smelling foods. This helps maintain their flavor. When you reheat, aim to keep the sprouts crispy. Use your oven for the best results. Preheat it to 350°F (175°C). Spread the sprouts on a baking sheet. Heat them for about 10-15 minutes. This method helps keep them crunchy and flavorful. You can also microwave them for quick reheating, but they may not stay as crispy. If you want to enjoy these sprouts later, freezing works too. First, let them cool completely. Spread them on a baking sheet in a single layer. Freeze until solid, then transfer to a zip-top bag. They can last up to three months in the freezer. When ready to eat, thaw them overnight in the fridge. Reheat using the oven for the best taste. Enjoy your tasty treat again! Yes, you can prepare these Brussels sprouts ahead of time. After roasting them, let them cool. Store them in an airtight container in the fridge. They stay fresh for up to three days. When you're ready to serve, just reheat them in the oven. This keeps them crispy and tasty. These Brussels sprouts pair well with many dishes. Serve them alongside roasted chicken or grilled salmon for a complete meal. They also shine as a side dish for holiday dinners. You can even enjoy them with a grain salad or pasta for a light lunch. The sweet glaze adds a nice touch to any plate. You can easily change the sweetness of the glaze. If you want it sweeter, add more maple syrup. Start with an extra tablespoon and taste as you go. For a less sweet glaze, reduce the maple syrup. You can add more balsamic vinegar to balance the flavor. Adjust it to match your taste! We explored how to make Maple Glazed Brussels Sprouts from start to finish. You learned about ingredients, cooking steps, and storage tips. I shared helpful tricks to avoid mistakes and ensure a tasty outcome. You can now customize your dish with variations and serve it with confidence. Remember, fresh ingredients and careful roasting lead to the best flavors. Enjoy making this dish and impress your family and friends. With practice, your skills will grow. Happy cooking!](https://dishtreats.com/wp-content/uploads/2025/07/6c550e47-e99c-4554-a6d4-422f3e5f831a-768x768.webp)

![- 2 cups cooked chicken, shredded - 1 can (10 oz) red enchilada sauce - 1 can (15 oz) black beans, rinsed and drained - 1 cup corn kernels (fresh, frozen, or canned) - 1 small onion, finely chopped - 2 cloves garlic, minced - 2 cups shredded Mexican cheese blend - 8 small corn tortillas, cut into quarters - 1 teaspoon ground cumin - 1 teaspoon chili powder - ½ teaspoon salt - ¼ teaspoon black pepper - 1 cup sour cream (for serving) - Fresh cilantro, chopped (for garnish) When I make Chicken Enchilada Casserole, I love using fresh, simple ingredients. Each item adds flavor and texture. You can use rotisserie chicken for a quick option. It saves time and keeps the dish tasty. The red enchilada sauce gives it that signature kick. I prefer black beans for added protein. They blend well with the other flavors. Corn adds sweetness and a nice crunch. I often choose fresh corn when it's in season, but frozen works great too. Onions and garlic bring an aromatic base. They make the kitchen smell amazing while cooking. The cheese is essential. I like a Mexican cheese blend because it melts beautifully. Corn tortillas are the heart of this dish, creating layers of goodness. The spices, like cumin and chili powder, enhance the flavors without overwhelming them. Finally, a dollop of sour cream and fresh cilantro on top makes it perfect. This combination of ingredients creates a hearty meal your family will love. For the complete recipe, check the Full Recipe section. 1. Preheat the oven to 350°F (175°C). This helps cook the casserole just right. 2. In a large skillet, heat a little oil over medium heat. Add the chopped onion. Sauté for 3-4 minutes. Wait until the onion turns soft and clear. 3. Next, add minced garlic to the skillet. Cook for 1 more minute. This will fill your kitchen with a lovely smell. 4. Stir in the shredded chicken and red enchilada sauce. Add the rinsed black beans, corn, cumin, chili powder, salt, and pepper. Mix well and cook for 5-7 minutes. Make sure everything is hot and well combined. 1. Grease a 9x13 inch baking dish with a little oil or butter. This prevents sticking. 2. Take half of the tortilla quarters and place them at the bottom of the dish. Overlap them slightly to cover the bottom. 3. Spoon half of the chicken mixture over the tortillas. Spread it out evenly. Then, sprinkle 1 cup of shredded cheese on top. 4. Repeat with the remaining tortilla quarters and chicken mixture. Top with the rest of the cheese for a cheesy crust. 1. Cover the casserole tightly with aluminum foil. Bake for 20 minutes. This allows the flavors to mix well. 2. After 20 minutes, remove the foil. Bake uncovered for an extra 10-15 minutes. Wait until the cheese is bubbly and golden. 3. When done, take the casserole out of the oven. Let it cool for about 5 minutes before serving. This makes it easier to cut and serve. Enjoy this savory chicken enchilada casserole with your family! For the full recipe, check out the details above. - Use rotisserie chicken for time-saving: Rotisserie chicken is great for busy days. It saves time and adds flavor. Just shred it and mix it into your casserole. You get tasty results without a lot of work. - How to properly layer for even cooking: Start with tortilla quarters at the bottom. This helps soak up the sauce and keeps the bottom from getting soggy. Spread the chicken mixture evenly over the tortillas. Repeat this process. Finish with cheese on top for a bubbly crust. - Adjusting spice levels: If you like heat, add more chili powder or some diced jalapeños. For milder flavors, reduce the chili powder. Taste as you go to find your perfect balance. - Additional toppings and garnishes ideas: Try adding sliced avocado, diced tomatoes, or pickled red onions. These bright toppings add color and flavor. A sprinkle of fresh cilantro also makes your dish pop! - Best side dishes to serve with casserole: Serve with a simple green salad or Mexican rice. These sides add freshness and balance the rich casserole. You can also offer tortilla chips for crunch. - How to present for a family meal: Cut the casserole into squares for easy serving. Use a large spoon to add a dollop of sour cream on top. Finish with a sprinkle of cilantro for a beautiful presentation. Enjoy this meal around the table! {{image_4}} You can easily swap ingredients in your Chicken Enchilada Casserole. If you want a different meat, use turkey or beef instead of chicken. Both options taste great and keep the dish hearty. For a vegetarian version, try using black beans and colorful veggies like bell peppers or zucchini. These swaps keep the casserole flavorful and filling. If you need gluten-free options, use corn tortillas instead of flour ones. They work perfectly in this casserole and add a nice flavor. For those who want a dairy-free meal, look for plant-based cheese and sour cream. These substitutes will still give you the creamy texture you love without the dairy. To change the flavor profile, add some spice! For a Mexican-inspired twist, mix in jalapeños or your favorite salsa. This will add a kick and extra layers of flavor. If you prefer a Southwestern style, try adding more spices like smoked paprika or cayenne pepper. This will give the casserole a warm, smoky taste that everyone will enjoy. For the full recipe, check out [Full Recipe]. Store leftover Chicken Enchilada Casserole in an airtight container. This keeps it fresh. Make sure it cools down before sealing. It lasts about 3-4 days in the fridge. If you notice any odd smell or color, it's best to toss it. You can freeze the casserole both before and after baking. If you freeze it before baking, wrap it tightly in plastic wrap. Bake it straight from the freezer. This usually takes about 45-60 minutes at 350°F. If you freeze it after baking, let it cool first. Cover it with foil or plastic wrap. To reheat, bake at 350°F for about 30 minutes, or until hot. You can make this casserole ahead for busy weeknights. Simply prepare it a day in advance and store it in the fridge. Portion it into individual servings for quick meals. This way, you can just grab and heat it when needed. It makes weeknight dinners simple and stress-free. Can I make Chicken Enchilada Casserole in advance? Yes, you can make this dish ahead of time. Prepare it up to the baking step. Cover it and store it in the fridge. When ready, bake it straight from the fridge. This saves time on busy nights. What can I substitute for black beans? You can use pinto beans, kidney beans, or chickpeas. Each option adds a unique flavor. Just rinse and drain them before adding. How do I reheat leftovers without drying out the dish? To reheat, cover the casserole with foil. Heat it in a 350°F oven for about 20 minutes. This keeps it moist and warm. You can also microwave individual portions with a damp paper towel. What size baking dish should I use? I recommend a 9x13 inch baking dish. This size holds all the layers well. It helps the casserole cook evenly. How do I know when the casserole is completely done? The casserole is done when the cheese is golden and bubbly. Insert a knife in the center; it should be hot. The layers should look set and not runny. Can I adjust the spice level of the casserole? Yes, you can make it spicier or milder. Add more chili powder for heat. For milder flavor, reduce the spices or choose mild enchilada sauce. What are the best toppings to add for extra flavor? You can add sliced jalapeños, diced avocado, or fresh lime juice. Chopped green onions and extra cilantro also give a nice touch. These toppings enhance the dish's taste and look. This Chicken Enchilada Casserole is easy and fun to make, with great flavors. You learned about ingredients, step-by-step instructions, and tips for better cooking. Don’t forget to try different variations, depending on your taste or needs. Storing leftovers is simple, making this dish great for meal prep. This recipe is perfect for family meals or gatherings. Enjoy the warmth and comfort it brings to your table. Now, grab your ingredients and start cooking!](https://dishtreats.com/wp-content/uploads/2025/07/f6c231a9-1b86-4c94-be4f-d7e13d8c3061-768x768.webp)
