Maple Roasted Brussels Sprouts Flavorful and Easy Delight

Get ready to transform your Brussels sprouts with a delicious twist! In this post, I’ll share a simple recipe for Maple Roasted Brussels Sprouts that pack a flavorful punch. With just a few ingredients, you can create a dish that’s savory, sweet, and easy to make. Whether you’re looking to impress guests or enjoy a tasty snack, these roasted sprouts are a must-try. Let’s dive into the tasty details!
Ingredients
To whip up these delicious maple roasted Brussels sprouts, you will need the following ingredients:
- 1.5 lbs Brussels sprouts, trimmed and halved
- 3 tablespoons pure maple syrup
- 2 tablespoons extra virgin olive oil
- 1 teaspoon garlic powder
- 1 teaspoon sea salt
- ½ teaspoon freshly ground black pepper
- ½ cup pecans, roughly chopped (optional)
- 1 tablespoon balsamic vinegar (optional)
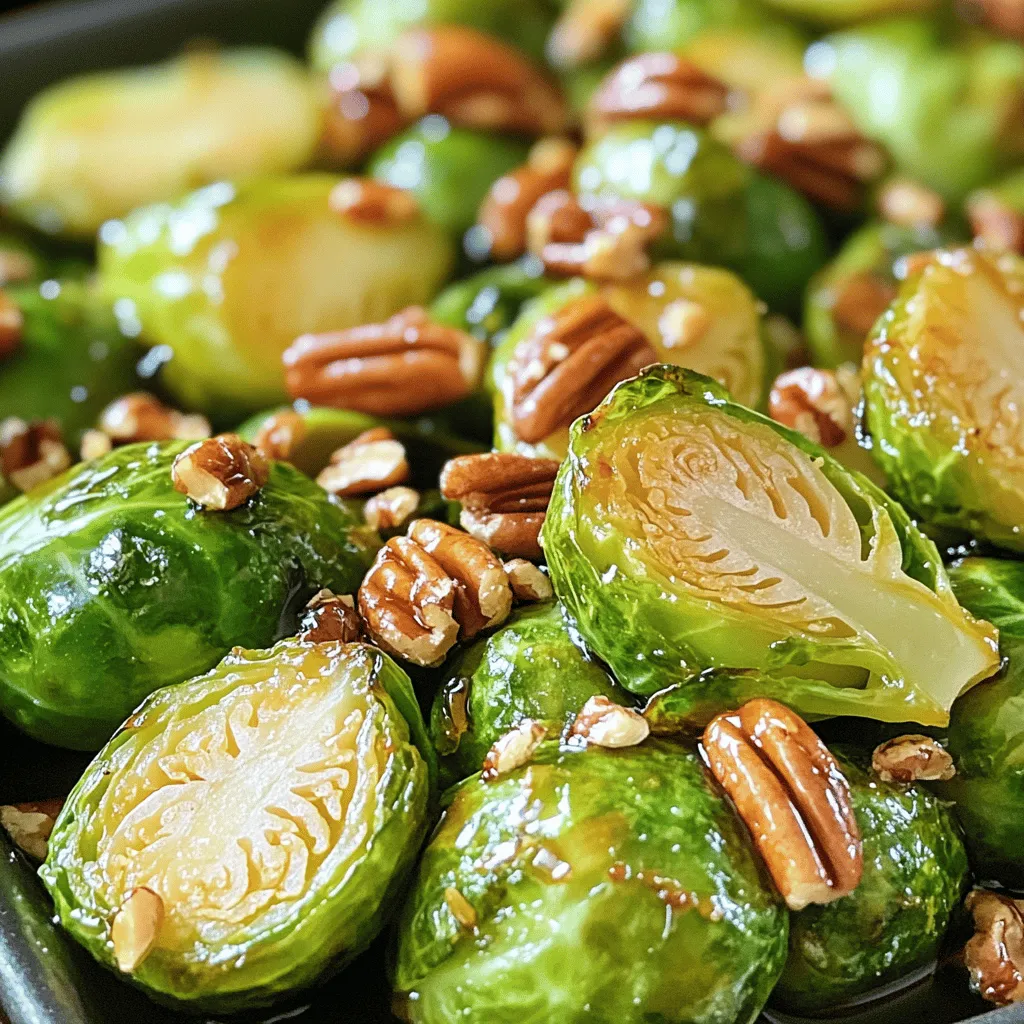
These ingredients combine to create a dish that bursts with flavor. The maple syrup adds sweetness, while the garlic powder and black pepper provide a savory kick. Using fresh Brussels sprouts ensures that you get the best taste and texture. The pecans are a great choice if you want a crunchy element. You can also drizzle balsamic vinegar at the end for a tangy finish, but it’s completely optional.
This recipe is simple yet satisfying. You will enjoy how each ingredient complements the others.
Step-by-Step Instructions
Preparation Steps
- Preheat the oven to 400°F (200°C).
- Trim and halve the Brussels sprouts.
- In a large bowl, mix the Brussels sprouts with olive oil, maple syrup, garlic powder, sea salt, and black pepper.
Roasting Process
- Spread the Brussels sprouts on a baking sheet in a single layer.
- Roast for 20-25 minutes. Shake the pan halfway for even cooking.
Final Touches
- In the last 5 minutes, add the chopped pecans for a nice crunch.
- If you like, drizzle balsamic vinegar over the sprouts before serving.
Tips & Tricks
Ensuring Even Roasting
To get great Brussels sprouts, spacing is key. Spread them out on the baking sheet. If they touch, they steam instead of roast. Roasting needs space for hot air to move. This helps them turn golden and crisp. For crispy edges, shake the pan halfway through cooking. This action gives all sides a nice brown crunch.
Enhancing Flavor
Fresh spices pack a punch! They add more life to the dish. Garlic powder works great, but fresh garlic can shine too. Don’t stop at garlic—try fresh herbs like thyme or rosemary. You can also play with sweeteners. Maple syrup is sweet, but honey or brown sugar adds a new twist. Each sweetener gives a different flavor profile.
Serving Suggestions
Maple roasted Brussels sprouts can fit any meal. They pair well with chicken, turkey, or even fish. You can serve them as a side at dinner or as a snack. They make a tasty appetizer at parties too. Just put them on a platter and watch them disappear. For a special touch, add a sprinkle of feta or Parmesan on top. You’ll find that every bite is a delightful mix of sweet and savory.

Variations
Adding Protein
You can make maple roasted Brussels sprouts even better by adding protein. One option is to use crispy bacon or pancetta. Their savory flavor pairs well with the sweet maple syrup. Simply chop the bacon and cook it until crispy. Then, add it to the Brussels sprouts before roasting. This will give a nice crunch and extra flavor.
If you prefer a vegan option, try using chickpeas or tempeh. These options can add protein without meat. Toss them in with the Brussels sprouts and roast together. They will soak up the maple flavor and add a hearty touch.
Flavor Enhancements
To spice things up, consider adding chili flakes. A pinch can give your dish a nice kick. Just sprinkle them on before roasting. This makes the sweet and savory balance more exciting.
Another way to enhance flavor is by using citrus zest. Try lemon or orange zest for a fresh twist. The bright notes will contrast nicely with the sweet maple. Add the zest right before serving for the best taste.
Seasonal Additions
Roasting Brussels sprouts with other fall veggies is a great idea. Consider adding sweet potatoes or carrots. These vegetables roast well and add color and nutrition to your dish. They also blend perfectly with the maple flavor.
Using seasonal herbs can brighten up your dish too. Fresh rosemary or thyme can add a fragrant touch. Toss these in along with the Brussels sprouts before roasting for a burst of flavor.
Storage Info
Best Practices
To store leftovers, first let them cool. Place the Brussels sprouts in an airtight container. This helps keep them fresh and tasty. You can store them in the fridge for later use. When reheating, use a skillet or oven to keep the texture. Avoid the microwave, as it can make them soggy. Heat them on low until warmed through.
Freezing Instructions
Can you freeze maple roasted Brussels sprouts? Yes, you can! To freeze, let them cool completely first. Spread them on a baking sheet in a single layer. Freeze for a few hours until solid. Then transfer them to a freezer bag or container. This helps prevent clumping.
To thaw, place them in the fridge overnight. You can also reheat them from frozen. Just add a few extra minutes to the cooking time in the oven.
Shelf Life
How long do leftovers last in the fridge? They can last up to 3 days in the fridge. After this time, they may lose flavor and texture. Check for signs of spoilage. Look for any off smells or mold. If you see these, it is best to toss them. Enjoy your delicious maple roasted Brussels sprouts while they are still fresh!
FAQs
What is the best temperature for roasting Brussels sprouts?
The best temperature for roasting Brussels sprouts is 400°F (200°C). At this heat, the sprouts get crispy and caramelized. This temperature helps balance the sweet maple syrup with the savory flavor of the sprouts. Roasting at a lower heat may lead to soggy results, while a higher heat can burn them. Aim for that golden-brown color for the perfect bite!
Can I prepare Brussels sprouts ahead of time?
Yes, you can prepare Brussels sprouts in advance! Trim and halve them a day before. Store them in an airtight container in the fridge. If you mix the sprouts with oil and spices, do it right before roasting. This keeps the flavor fresh. You can also roast them ahead of time and reheat them later. Just remember to warm them gently to keep them crispy.
Are Brussels sprouts healthy?
Brussels sprouts are very healthy! They are low in calories and high in fiber. This veggie is packed with vitamins C and K. They also contain antioxidants that help protect your body. Eating Brussels sprouts can support heart health and digestion. They are a great choice for a nutritious side dish or snack. Enjoy their health benefits while savoring their delicious taste!
This blog post explored how to make tasty maple roasted Brussels sprouts. We covered the ingredients, step-by-step instructions, and handy tips. You learned about mixing, roasting, and adding texture with pecans. We discussed fun variations and smart storage methods.
Remember, these sprouts are not just healthy; they’re versatile. You can make them sweet, savory, or even spicy. So, give this recipe a try and enjoy your delicious creation!


![- 2 medium zucchinis, grated - 1 can (15 oz) black beans, drained and rinsed - 1 cup corn kernels (fresh or frozen) - 1 small red onion, finely chopped - 2 cloves garlic, minced - 1 teaspoon ground cumin - 1 teaspoon smoked paprika - 1 cup enchilada sauce (store-bought or homemade) - 8 whole wheat tortillas - 1 cup shredded cheese (cheddar or a vegan alternative) - 2 tablespoons olive oil - Salt and pepper, to taste - Fresh cilantro, chopped, for garnish - Cooking timeline (Prep time: 15 mins, Total time: 40 mins) - Serving Size information (Servings: 4) When I gather ingredients for zucchini and black bean enchiladas, I love how simple it is. Fresh zucchinis are key for flavor and texture. Black beans add protein and fiber. You can use frozen corn or fresh, depending on what you have. A small red onion gives a sweet taste, while garlic adds a nice kick. Spices like cumin and smoked paprika bring warmth and depth to the dish. I like using enchilada sauce from the store to save time, but homemade is always a treat. Whole wheat tortillas provide a hearty base, and shredded cheese ties everything together. Olive oil helps cook the veggies and adds richness. Adding salt and pepper to taste is important. Finally, a sprinkle of fresh cilantro on top makes the dish pop with color and flavor. For the full recipe, check out the details above. - Step 1: Preheat your oven to 375°F (190°C). This helps your enchiladas cook evenly. - Step 2: Heat 2 tablespoons of olive oil in a skillet over medium heat. Add 1 small red onion, finely chopped. Sauté for about 3-4 minutes, until the onion turns soft and clear. - Step 3: Add 2 cloves of minced garlic to the skillet. Cook for 1 minute, stirring often. The garlic should smell strong but not brown. - Step 4: Mix in 2 medium zucchinis, grated, 1 can of black beans (drained and rinsed), and 1 cup of corn. Sprinkle in 1 teaspoon of ground cumin, 1 teaspoon of smoked paprika, salt, and pepper. Cook this mix for 5-7 minutes. The zucchini should be tender and well mixed. - Step 5: Remove the skillet from heat. Stir in half of the 1 cup of enchilada sauce, making sure everything is coated well. - Step 6: Take a whole wheat tortilla and place it flat. Spoon some of the zucchini mixture down the center. Roll it tightly, then place it seam-side down in a baking dish. Repeat this for all tortillas. - Step 7: Once all tortillas are rolled, pour the remaining enchilada sauce evenly over the top. - Step 8: Sprinkle 1 cup of shredded cheese over the enchiladas. Make sure to cover them well. - Step 9: Cover the baking dish with foil. Bake for 20 minutes to let the flavors blend. - Step 10: Remove the foil and bake for another 10 minutes. The cheese should be melted and slightly golden. Feel free to check the Full Recipe for more details and tips! To keep your zucchini filling just right, follow these tips. First, grate your zucchini and then salt it lightly. Let it sit for about ten minutes. This step helps draw out excess moisture. After that, squeeze the zucchini to remove the water. This way, your filling stays firm, not soggy. Next, adjust the seasoning to match your taste. Start with the suggested spices, but feel free to add more cumin or paprika if you want a stronger flavor. A dash of lime juice can also brighten up the dish. When serving these enchiladas, presentation is key. Use a colorful plate to make the dish pop. A sprinkle of fresh cilantro on top adds a nice touch. You can also add a wedge of lime for extra flair. Pair these enchiladas with a simple salad or some fluffy rice. Both options complement the flavors well. Try a side of avocado or a dollop of sour cream to make it even better. Avoid overstuffing the tortillas. If you pack too much filling in, they may tear. Just a good spoonful is enough. Also, let the enchiladas cool for a few minutes after baking. This step helps them set up nicely. If you serve them too hot, the filling may spill out. Trust me, waiting a bit is worth it! If you want the full recipe, remember to check out the [Full Recipe]. {{image_4}} You can change the beans in this dish. Pinto or kidney beans work great too. They add a different taste while keeping it healthy. You can also add other veggies. Bell peppers or spinach can give your enchiladas a new twist. Just chop them up and mix them in with the other filling. If you need gluten-free options, you can use corn tortillas instead of wheat ones. They taste great and work well with the filling. For a dairy-free version, try vegan cheese. It melts nicely and keeps the dish creamy without the dairy. Want more kick? Add spices or hot sauce to the filling. A bit of chili powder or cayenne can spice things up. You can also try different types of enchilada sauce. Green sauce or mole sauce can change the whole flavor profile. Experiment to find what you love best! To keep your zucchini and black bean enchiladas fresh, store them in the fridge. Place them in an airtight container. This will help seal in flavors and moisture. If you have a lot of leftovers, you can freeze them too. Wrap each enchilada tightly in plastic wrap, then place them in a freezer-safe bag. This method prevents freezer burn and keeps them tasty. When it comes to reheating, I recommend using the oven. Preheat it to 350°F (175°C). Place the enchiladas in a baking dish. Cover them with foil to keep the moisture in. Heat for about 20 minutes. This way, they won’t dry out. You can also use a microwave, but they might lose some texture. If you use the microwave, heat in short bursts to check the warmth. In the fridge, these enchiladas last for about 3 to 4 days. Make sure to eat them before then for the best taste. If you freeze them, they can last for up to 3 months. Just remember to label your bags with dates. This helps you keep track of how long they’ve been there. For the best flavor, try to eat frozen enchiladas within that time frame. You can prep the filling in advance. Just cook the zucchini, black beans, and spices as described in the recipe. Allow it to cool, then store it in the fridge for up to two days. When you’re ready to eat, just assemble the enchiladas with the tortillas and sauce. You can also roll the enchiladas and place them in the baking dish. Cover them tightly and refrigerate. Bake them when you're ready to serve. This method saves time and keeps flavors fresh. Yes, you can. To make cheese-free enchiladas, simply skip the cheese or use a plant-based option. You can add extra veggies or a sprinkle of nutritional yeast for a cheesy flavor. Another option is to serve guacamole or a creamy avocado sauce on top after baking. This adds richness and pairs well with the enchiladas. There are several great options! For a low-carb choice, use large lettuce leaves like romaine or kale. You can also use thinly sliced zucchini or eggplant as a gluten-free alternative. If you want something heartier, try using corn tortillas or even large portobello mushrooms. Each option gives a unique flavor and texture to the dish. Yes, you can use frozen zucchini. Just remember to thaw it first and drain any excess water. This helps keep your filling from becoming too watery. Frozen zucchini is convenient and still delivers great taste in the enchiladas. Just follow the same cooking steps as fresh zucchini. It’s an easy way to enjoy this dish anytime. For the full recipe, refer to the earlier section. In this post, we explored how to make tasty zucchini and black bean enchiladas. I shared a simple recipe, with clear steps and helpful tips. You learned about ingredient choices, cooking methods, and ways to store leftovers. Always remember to check the filling, so it stays moist but not soggy. These enchiladas are not just easy to make; they also fit various diets. Enjoy creating your own version and delight in the flavors! Your kitchen adventure starts here.](https://dishtreats.com/wp-content/uploads/2025/07/2cd92dac-f668-457e-8990-b41595643bf1-768x768.webp)


