Maple Glazed Pumpkin Donuts Irresistibly Delicious Treat

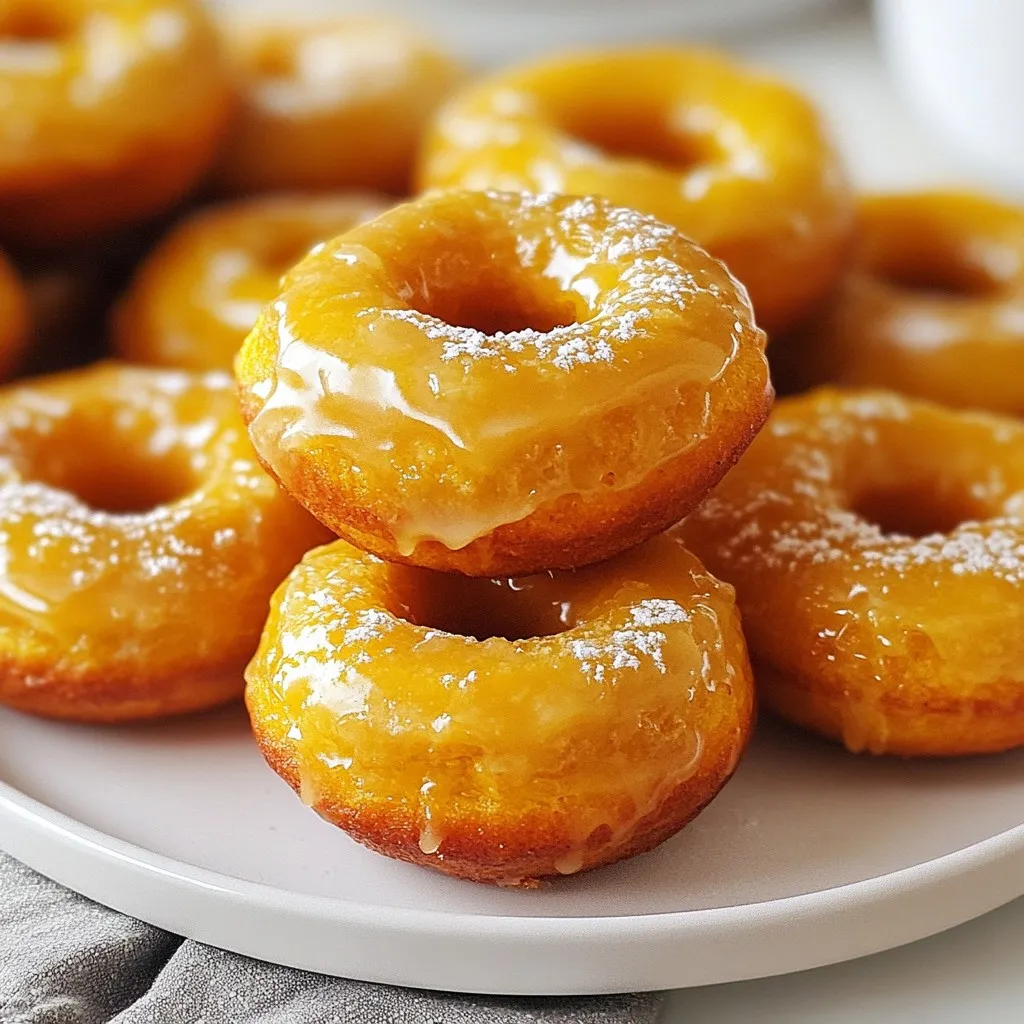
Imagine biting into a soft, sweet donut with a hint of pumpkin and maple. These Maple Glazed Pumpkin Donuts are simple to make and perfect for fall. Whether you crave a warm breakfast treat or a tasty snack, this recipe delivers both flavor and comfort. Let’s dive into the ingredients, step-by-step instructions, and tips to make these donuts your new favorite. Ready to impress your taste buds?
Why I Love This Recipe
- Comforting Flavors: The combination of pumpkin, warm spices, and maple syrup creates a cozy taste that’s perfect for fall.
- Easy to Make: This recipe comes together quickly and requires minimal ingredients, making it perfect for both novice and experienced bakers.
- Healthier Alternative: Baked instead of fried, these donuts provide a lighter option without sacrificing flavor.
- Versatile Treat: These donuts can be enjoyed for breakfast, as a snack, or even as a dessert, making them a versatile addition to any menu.
Ingredients
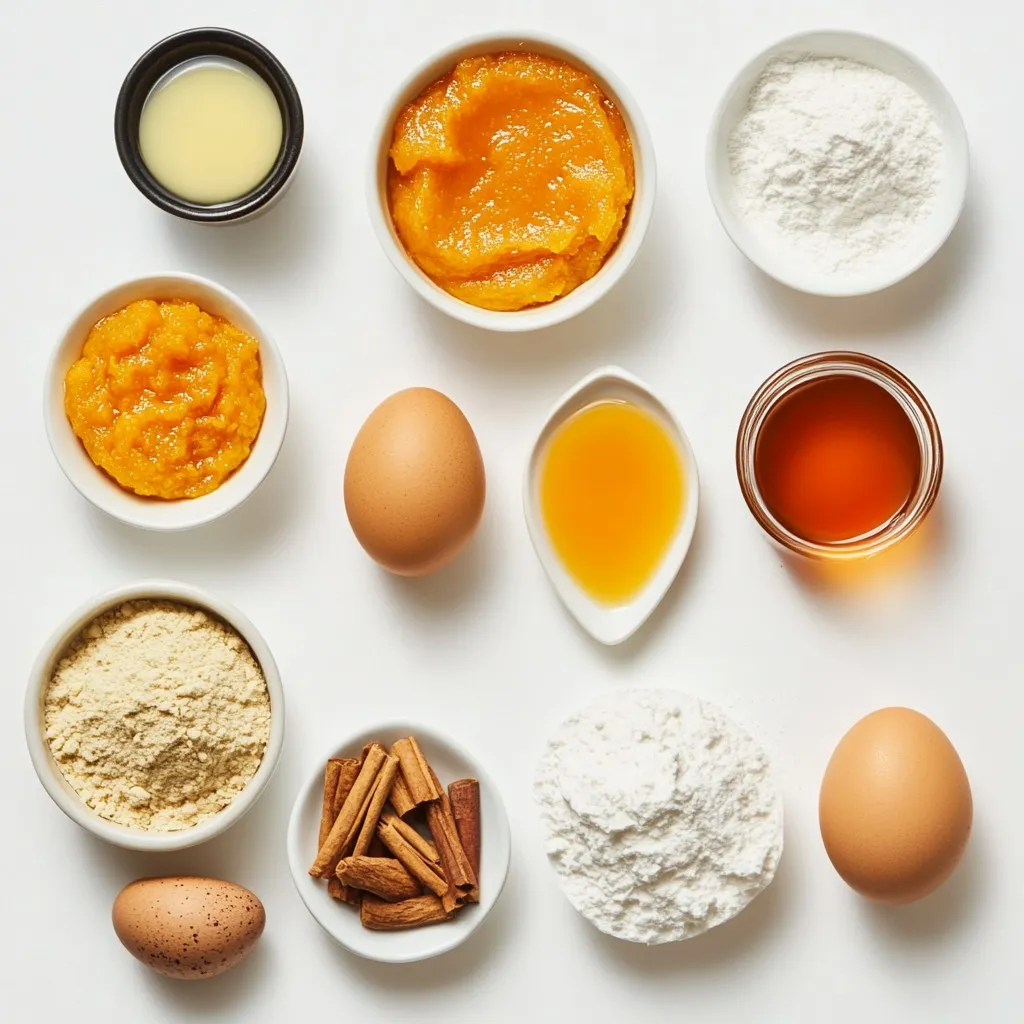
List of Ingredients for Maple Glazed Pumpkin Donuts
- 1 cup pumpkin puree (canned or freshly made)
- 1/2 cup granulated sugar
- 1/4 cup packed brown sugar
- 1/4 cup vegetable oil
- 2 large eggs
- 1 teaspoon pure vanilla extract
- 1 1/2 cups all-purpose flour
- 1 teaspoon baking powder
- 1/2 teaspoon baking soda
- 1/2 teaspoon fine sea salt
- 1 teaspoon ground cinnamon
- 1/2 teaspoon ground nutmeg
- 1/4 teaspoon ground ginger
- 1/2 cup pure maple syrup (for the glaze)
- 1 cup powdered sugar (for the glaze)
Description of Key Ingredients
Pumpkin puree adds moisture and a rich flavor. You can use canned or fresh. The spices—cinnamon, nutmeg, and ginger—bring warmth and a hint of fall. The sugars give the donuts sweetness and help them caramelize. The combination of vegetable oil and eggs keeps the donuts soft and fluffy. Finally, maple syrup in the glaze adds a sweet touch that pairs perfectly with pumpkin.
Suggested Replacement Ingredients
For a gluten-free option, use a gluten-free all-purpose flour blend. Instead of eggs, you can use flaxseed meal mixed with water or applesauce. This will keep the donuts moist. If you prefer a lower sugar option, try using a sugar substitute like stevia or monk fruit in the same amounts.

Step-by-Step Instructions
Preheating the Oven and Preparing the Donut Pan
First, heat your oven to 350°F (175°C). While it warms up, grab your donut pan. Spray it well with non-stick cooking spray. This helps the donuts come out easily after baking.
Combining Wet Ingredients
In a large bowl, mix together the pumpkin puree, granulated sugar, brown sugar, vegetable oil, eggs, and vanilla extract. Use a whisk to blend everything until it looks smooth. This mix gives your donuts a rich pumpkin flavor.
Mixing Dry Ingredients
In another bowl, whisk together the all-purpose flour, baking powder, baking soda, sea salt, cinnamon, nutmeg, and ginger. This step spreads out the dry ingredients evenly. It helps the donuts rise nicely and taste great.
Combining Wet and Dry Ingredients
Now, slowly add the dry mix to the wet mix. Stir gently until just combined. Be careful not to overmix, as this can make your donuts heavy instead of light.
Filling the Donut Pan
Spoon the batter into the donut pan. Fill each mold about three-quarters full. This gives the donuts space to rise while they bake.
Baking and Cooling Process
Put the donut pan in the oven. Bake for 10 to 12 minutes. To check if they are done, insert a toothpick into the center of a donut. If it comes out clean, they are ready. Let the donuts cool in the pan for about 5 minutes, then transfer them to a wire rack to cool completely.
Preparing the Maple Glaze
In a medium bowl, whisk together the maple syrup and powdered sugar. Keep mixing until it is smooth and shiny. This glaze adds a sweet finish to your donuts.
Glazing the Donuts
Once the donuts are cool, dip each one into the maple glaze. Let any extra glaze drip back into the bowl. Place the glazed donuts back on the wire rack to let the glaze set. This makes them look nice and tasty.
Serving Suggestions
Serve the donuts warm or at room temperature. For a fun touch, sprinkle a little ground cinnamon on top. You can also arrange them on a festive platter with mini pumpkins for a lovely display. Enjoy every bite of these delicious maple glazed pumpkin donuts!
Tips & Tricks
Ensuring Donut Softness and Moisture
To keep your donuts soft and moist, use fresh pumpkin puree. Canned puree works too, but make sure it’s not too watery. Mixing the wet ingredients well is key. Don’t overmix when adding the dry mix. This keeps the donuts fluffy. Also, bake them just until a toothpick comes out clean. Overbaking can dry them out.
Common Mistakes to Avoid
One common mistake is overfilling the donut pan. Fill each mold just three-quarters full. This allows room for rising. Another mistake is using too much flour. Always measure flour correctly. Spoon and level it in the cup. Lastly, avoid skipping the cooling step before glazing. Glazing while hot can make it slide off.
Equipment Recommendations
A good donut pan is essential. I prefer a non-stick pan for easy release. A sturdy whisk helps mix ingredients well. You will also need a large mixing bowl and a smaller bowl for the glaze. A toothpick is handy for checking doneness. Finally, a wire rack is great for cooling and glazing.
Pro Tips
- Use Fresh Pumpkin: For a richer flavor, consider using freshly roasted pumpkin instead of canned puree. Just make sure to drain any excess moisture before using.
- Don’t Overmix: Mix the batter until just combined to ensure your donuts remain light and fluffy. Overmixing can lead to a dense texture.
- Cool Completely: Allow the donuts to cool completely before glazing. This helps the glaze set properly and prevents it from sliding off.
- Experiment with Spices: Feel free to adjust the spices in the batter according to your taste. A pinch of cloves or allspice can add an extra layer of warmth and flavor.

Variations
Flavor Variations
You can mix things up with different flavors for your maple glazed pumpkin donuts. For a chocolate twist, add 1/3 cup of cocoa powder to the dry mix. This change gives a rich, deep taste. If you love chai, add 1 teaspoon of chai spice blend. This will bring warm, cozy notes to the donuts. You can even play with citrus by adding a bit of orange zest for a fresh touch. Each variation makes a new treat to enjoy.
Healthier Options
If you want a healthier donut, there are easy swaps. You can cut the sugar by using half the amount. Try substituting half of the granulated sugar with applesauce. This keeps sweetness but adds moisture. For those who want to avoid sugar entirely, consider using maple sugar or a sugar substitute. You can also use whole wheat flour instead of all-purpose flour. This change adds fiber and keeps the taste delicious.
Seasonal Adaptations
Seasonal changes can inspire fun additions to your donuts. In fall, add dried cranberries or chopped pecans to the batter for a festive crunch. You can also mix in some apple pieces for a sweeter taste. In winter, a hint of peppermint extract in the glaze gives a holiday feel. During spring, try mixing in fresh berries for bright flavors. Each season brings new ideas to make your maple glazed pumpkin donuts special.
Storage Info
Best Storage Practices for Maple Glazed Donuts
To keep your maple glazed pumpkin donuts fresh, let them cool completely. Use an airtight container to store them. If you stack them, place parchment paper between layers. This prevents them from sticking together. Store the container at room temperature for up to three days. For longer storage, consider refrigerating them. Just remember, refrigeration can change their texture.
How to Reheat Leftover Donuts
To enjoy your leftover donuts, reheat them to restore warmth and softness. You can use a microwave, but be careful. Heat each donut for about 10 to 15 seconds. This warms them without making them tough. If you want a crispy outside, use an oven. Preheat it to 350°F (175°C) and warm the donuts for about 5 minutes. They will taste fresh again!
Freezing Instructions and Tips
Freezing is a great way to keep these donuts longer. Start by wrapping each cooled donut in plastic wrap. Then, place them in a freezer-safe bag. Remove as much air as possible to prevent freezer burn. You can freeze them for up to three months. When you’re ready to eat, thaw them in the fridge overnight. Reheat them as described above for the best flavor. Enjoy your delicious treats even after a few months!
FAQs
Can I use fresh pumpkin instead of canned pumpkin puree?
Yes, you can use fresh pumpkin. Just cook and puree the pumpkin until smooth. Fresh pumpkin adds a rich flavor to your donuts. It may be a bit more watery, so make sure to drain any excess liquid.
How can I store the maple glaze?
Store the maple glaze in an airtight container. Keep it in the fridge for up to one week. Before using, let it sit at room temperature for a bit. You can also re-whisk it to regain its smooth texture.
What can I use instead of eggs in the recipe?
You can use applesauce or mashed bananas as egg substitutes. Use 1/4 cup of either per egg you replace. This will keep the donuts moist and add a hint of sweetness.
How do I know when the donuts are done baking?
Stick a toothpick in the center of a donut. If it comes out clean, they are done. They should also spring back when lightly touched. Keep an eye on the time; it’s usually 10 to 12 minutes.
Can I make these donuts without a donut pan?
Yes, you can use a muffin pan instead. Just fill the cups about two-thirds full. The baking time may change, so check for doneness around the same time. You’ll have delicious pumpkin muffins instead of donuts!
In this post, we explored how to make delicious maple glazed pumpkin donuts. We covered key ingredients like pumpkin puree and spices, as well as helpful replacements for different diets. The step-by-step guide made it easy to follow, while tips ensured your donuts turn out soft and moist. Don’t forget the fun variations and storage tips for leftovers. You’ll enjoy these donuts fresh or as a treat later. Try making them for yourself or to share with friends. Happy bakin

Maple Glazed Pumpkin Donuts
Ingredients
- 1 cup pumpkin puree (canned or freshly made)
- 1/2 cup granulated sugar
- 1/4 cup packed brown sugar
- 1/4 cup vegetable oil
- 2 large eggs
- 1 teaspoon pure vanilla extract
- 1 1/2 cups all-purpose flour
- 1 teaspoon baking powder
- 1/2 teaspoon baking soda
- 1/2 teaspoon fine sea salt
- 1 teaspoon ground cinnamon
- 1/2 teaspoon ground nutmeg
- 1/4 teaspoon ground ginger
- 1/2 cup pure maple syrup (for the glaze)
- 1 cup powdered sugar (for the glaze)
Instructions
- Start by preheating your oven to 350°F (175°C). While the oven heats up, generously grease a donut pan with non-stick cooking spray to ensure easy release after baking.
- In a large mixing bowl, combine the pumpkin puree, granulated sugar, brown sugar, vegetable oil, eggs, and vanilla extract. Using a whisk, blend the mixture until it's smooth and uniform in texture.
- In a separate bowl, whisk together the all-purpose flour, baking powder, baking soda, fine sea salt, ground cinnamon, ground nutmeg, and ground ginger. This will help to evenly distribute the leavening agents and spices throughout the batter.
- Gradually add the dry ingredients to the wet mixture, stirring gently until just combined. Be cautious not to overmix, as this can lead to dense donuts.
- Carefully spoon the batter into the prepared donut pan, filling each mold about three-quarters full to allow for rising while baking.
- Place the donut pan in the oven and bake for 10 to 12 minutes, or until a toothpick inserted into the center of a donut comes out clean.
- Once baked, let the donuts cool in the pan for about 5 minutes. Then, transfer them to a wire rack to cool completely.
- For the glaze, in a medium-sized bowl, whisk together the maple syrup and powdered sugar until you achieve a smooth and glossy consistency.
- Dip each cooled donut into the maple glaze, allowing any excess glaze to drip back into the bowl. Place the glazed donuts on a wire rack to let the glaze set for a few minutes.
- Serve the donuts warm or at room temperature, and enjoy the delightful flavors of maple and pumpkin in each bite.


![To make the best ever lemon blueberry muffins, you need: - 2 cups all-purpose flour - 1 cup granulated sugar - 1 tablespoon baking powder - 1/2 teaspoon baking soda - 1/2 teaspoon salt - Zest of 1 large lemon - Juice of 1 large lemon (about 1/4 cup) - 1/2 cup unsalted butter, melted - 1 cup buttermilk (substitute: milk with 1 tablespoon lemon juice added) - 2 large eggs, at room temperature - 1 teaspoon pure vanilla extract - 1 1/2 cups fresh blueberries (or frozen, if out of season) - Optional: Extra blueberries and lemon zest for decoration These ingredients create a bright, fluffy muffin. Each bite bursts with lemon and blueberry flavor. If you can't find a specific ingredient, here are some good substitutes: - All-purpose flour: Use whole wheat flour for a nutty taste. - Granulated sugar: Coconut sugar works well for a deeper flavor. - Buttermilk: Mix regular milk with lemon juice for a quick fix. - Unsalted butter: Use coconut oil for a dairy-free option. These swaps keep your muffins tasty and fun, even if you lack some ingredients. Want to enhance your muffins? Consider these tasty add-ins: - Nuts: Chopped walnuts or pecans add crunch. - Spices: A pinch of cinnamon or nutmeg adds warmth. - Coconut: Shredded coconut gives a tropical twist. - Chocolate chips: For a sweet touch, add white or dark chocolate. These options let you personalize your muffins for any occasion. Enjoy creating your perfect lemon blueberry muffin! Start by gathering your ingredients. You will need the following: - 2 cups all-purpose flour - 1 cup granulated sugar - 1 tablespoon baking powder - 1/2 teaspoon baking soda - 1/2 teaspoon salt - Zest of 1 large lemon - Juice of 1 large lemon (about 1/4 cup) - 1/2 cup unsalted butter, melted - 1 cup buttermilk - 2 large eggs, at room temperature - 1 teaspoon pure vanilla extract - 1 1/2 cups fresh blueberries First, preheat your oven to 375°F (190°C). Prepare your muffin tin with paper liners or non-stick spray. This step helps you remove the muffins easily after baking. In a large bowl, mix the flour, sugar, baking powder, baking soda, and salt. This will be your dry mix. In another bowl, blend the melted butter, buttermilk, eggs, lemon zest, lemon juice, and vanilla extract. Whisk until smooth. Now, pour the wet mixture into the dry mix. Stir gently until just combined; some lumps are okay. This keeps your muffins light and fluffy. Next, fold in the blueberries carefully, saving some for the top. Use a spoon or ice cream scoop to fill the muffin cups about 3/4 full. This allows room for rising. Top each muffin with the saved blueberries and a sprinkle of lemon zest for flair. Place the muffin tin in the preheated oven. Bake for 18-20 minutes. Check with a toothpick; it should come out clean. Keep an eye on them near the end to avoid overbaking. Once they are done, let the muffins cool in the tin for about 5 minutes. This helps them set. Then, transfer them to a wire rack to cool completely. This prevents sogginess and keeps them fresh. If you have leftovers, store them in an airtight container. You can also freeze them for longer freshness. Enjoy these muffins warm with a cup of tea or coffee for a delightful treat! For the complete recipe, check out the Full Recipe link. To get that perfect muffin texture, follow a few key steps. First, measure your flour carefully. Too much flour can make muffins dense. Use the spoon and level method for accuracy. Next, mix the batter gently. Overmixing creates tough muffins. Stir until just combined. Some lumps are okay! Lastly, let your muffins cool for a few minutes in the tin. This helps them set and makes them easier to remove. To ensure every bite is bursting with flavor, add the lemon zest early. It infuses the batter, making each muffin bright and zesty. When folding in blueberries, toss them in a bit of flour first. This prevents them from sinking to the bottom. Also, consider mixing some blueberries into the batter and saving a few for the top. This creates a beautiful and flavorful muffin. If your muffins are too dry, check your measurements. Too much flour or not enough liquid can cause this. If they are too wet, bake them a little longer. Just watch them closely so they don’t burn. For flat muffins, make sure your baking powder is fresh. Old leavening agents can lead to sad, flat muffins. Always check expiration dates when baking. For the best results, follow the full recipe closely. {{image_4}} You can make these muffins gluten-free. Use a 1:1 gluten-free flour blend instead of all-purpose flour. Look for blends that include xanthan gum for better texture. This will help keep your muffins soft and fluffy. The rest of the recipe stays the same. You still get that bright lemon and sweet blueberry flavor. You can mix it up with different fruits. Try raspberries, strawberries, or blackberries. Each fruit adds its own twist. For a tropical flair, use diced mango or pineapple. Just keep the ratio of fruit similar to the blueberries in the recipe. This way, you maintain great texture and taste. Want to boost the flavor? Add spices like cinnamon or nutmeg. Just a pinch can add warmth. You can also use other citrus zests. Try lime or orange for a unique taste. These small changes can make your muffins stand out. Don't forget to check the [Full Recipe] for the base muffin instructions. To keep your muffins fresh, store them in an airtight container. This will help keep moisture in and prevent them from drying out. If you plan to eat them within two days, place them at room temperature. For longer storage, refrigeration is a good option. Just remember to let them cool completely before sealing. Freezing muffins is a smart way to save any extras. First, let the muffins cool down. Wrap each muffin tightly in plastic wrap or aluminum foil. Then, place them in a freezer bag. You can freeze them for up to three months. When you want to enjoy one, take it out and let it thaw at room temperature or warm it in the microwave. To bring back the fresh-baked taste, reheat your muffins. You can use the oven or microwave. For the oven, preheat it to 350°F (175°C). Place the muffin on a baking sheet for about 5-10 minutes. For the microwave, heat each muffin for about 15-20 seconds. Keep an eye on them to avoid overheating. Enjoy your warm, delicious muffins! To cut down on sweetness, use less sugar. You can reduce the sugar by up to 1/4 cup. Another option is to add more lemon juice. The tart flavor balances the sweetness. You could also use a sugar substitute if you prefer. Yes, you can use frozen blueberries! They work well in this recipe. Just toss them in a bit of flour before adding them to the batter. This helps prevent them from sinking. Remember, frozen berries may make the muffins a bit more moist, so adjust your baking time slightly. If you don't have buttermilk, you can make a quick substitute. Use 1 cup of milk with 1 tablespoon of lemon juice added. Let it sit for about 5 minutes before using. This mixture will mimic the tangy flavor of buttermilk well. Check the muffins around the 18-minute mark. Insert a toothpick into the center of a muffin. If it comes out clean, they are ready. If there’s batter on it, give them a few more minutes. Keep an eye on them to avoid overbaking. In this post, I shared how to make the best lemon blueberry muffins. We talked about key ingredients, cool swaps, and tasty add-ins. I walked you through making, baking, and storing your muffins. Tips helped you master texture and flavor. Plus, we explored fun variations and answered common questions. Now, you have all the tools to create delicious muffins at home. Enjoy the baking process and share your tasty results!](https://dishtreats.com/wp-content/uploads/2025/07/01ebfef5-11c2-4c5e-aff7-696639161096-768x768.webp)


. First, preheat your oven to 400°F (200°C). This sets the perfect baking temp for our scones. While the oven heats up, line a baking sheet with parchment paper. This keeps the scones from sticking and makes cleanup easy. In a large bowl, mix the dry ingredients. Add 2 cups of flour, 1/3 cup of sugar, 1 tablespoon of baking powder, and 1/2 teaspoon of salt. Whisk these together until they are well blended. Next, add in 1/2 cup of cold, diced butter. Use your fingers or a pastry cutter to mix the butter in until it looks like coarse crumbs. Now, add 1 cup of blueberries and the zest of 1 lemon. Gently fold these into the mix without squishing the berries. In another bowl, prepare the wet ingredients. Whisk together 1/4 cup of heavy cream, 1 large egg, 1 teaspoon of vanilla extract, and 1 tablespoon of fresh lemon juice. Once mixed, pour this into the dry mix. Stir gently until the dough just comes together. It should feel a bit sticky. Turn the dough out onto a floured surface. Knead it gently a few times, just until it holds together. Pat the dough into a round shape about 1 inch thick. Use a sharp knife to cut the dough into 8 wedges. Place these on your lined baking sheet, leaving space between them. Now, they are ready for the oven. For the full recipe, check the details provided above. Enjoy making your lemon blueberry scones! To make your scones fluffy and flaky, keep your butter cold. When you mix the butter with the dry ingredients, it should stay in small chunks. This creates pockets of steam while baking, giving you that perfect texture. Also, avoid overmixing the dough. Mix just until everything comes together. A little stickiness is okay. One common mistake is using warm butter. Always use chilled butter for best results. Another mistake is overworking the dough. If you knead too much, your scones may become tough. Lastly, don’t skip chilling the dough before baking. This helps the scones hold their shape. You can boost the flavor of your scones easily. Try adding a pinch of cinnamon for warmth. Diced strawberries or raspberries can replace some blueberries for a twist. For more zing, add a teaspoon of lemon zest to the wet mix. You can also mix in some chopped nuts for crunch. These small changes can elevate your Lemon Blueberry scones and make them even more delightful. For the complete recipe, check out the Full Recipe section. {{image_4}} You can change the flavor by using other fruits. Raspberries, strawberries, or blackberries work well. Just swap them for the blueberries in the recipe. Each fruit adds a unique twist. For a mixed berry scone, combine different berries together. This gives you a colorful and tasty treat. If you need a gluten-free option, use a 1:1 gluten-free flour blend. Make sure it has xanthan gum for the right texture. The process stays the same, and you can enjoy scones that fit your diet. The taste will still be delightful and fresh. You can also spice things up with flavors. A pinch of cinnamon or nutmeg adds warmth to your scones. If you like nuts, try adding chopped walnuts or pecans. These add a nice crunch and depth of flavor. Mix these ingredients in when you add the blueberries and lemon zest. For more ideas, check the Full Recipe to explore how you can make these scones your own! To keep your leftover scones fresh, place them in an airtight container. This helps them stay soft and moist. You can add a slice of bread to the container. The bread helps keep the scones from drying out. If you want to freeze your scones, wrap each one tightly in plastic wrap. Then, place them in a freezer bag. Press out any extra air before sealing the bag. You can freeze them for up to three months. When you're ready to eat them, just thaw them in the fridge overnight. To reheat your scones, preheat your oven to 350°F (175°C). Place the scones on a baking sheet and warm them for about 5 to 10 minutes. This makes them soft and fresh again. You can also use a microwave. Heat them for about 15 to 20 seconds. Enjoy your warm lemon blueberry scones with a cup of tea! For the full recipe, check out the earlier section. Fluffy scones come from the right balance of dry and wet ingredients. You need to use cold butter and avoid overmixing. The butter creates air pockets as it melts, which helps the scones rise. Baking powder also plays a key role. It gives the scones lift during baking, making them light and airy. Yes, you can make these scones ahead. Prepare the dough and cut it into wedges. Then, wrap them well and place them in the fridge for up to 24 hours. When you're ready to bake, just pop them in the oven. If you want to freeze them, wrap the unbaked scones tightly and store them for up to three months. Bake straight from the freezer; they may need a few extra minutes. Serve these scones warm for the best taste. You can add a drizzle of glaze made with powdered sugar and lemon juice. Pair them with butter or clotted cream for a rich flavor. For a fun twist, enjoy them with fresh fruit or a dollop of jam. These scones shine as a breakfast treat or afternoon snack. Scones come from the UK, with roots in Scotland. People often served them with tea. The lemon blueberry version is a modern twist that adds bright flavor. This combination reflects a love for fresh fruit and citrus in baked goods. Now, you can find these scones in cafes and bakeries worldwide, making them a beloved treat for many. This blog post covers all you need for perfect lemon blueberry scones. We discussed ingredients, offering substitutes when needed. I shared steps for mixing and shaping your dough, plus tips for a flaky texture. You learned how to store and reheat your scones. Enjoy the flexibility of variations and try different fruits or gluten-free options. Baking should be fun, so don’t stress about mistakes. With practice, you’ll create sunny, delicious scones every time. Now, gather your ingredients and get baking!](https://dishtreats.com/wp-content/uploads/2025/06/d51723ca-834e-49ab-95e6-d1b73b522f9f-768x768.webp)
