Maple Cinnamon Roasted Sweet Potatoes Delightful Dish

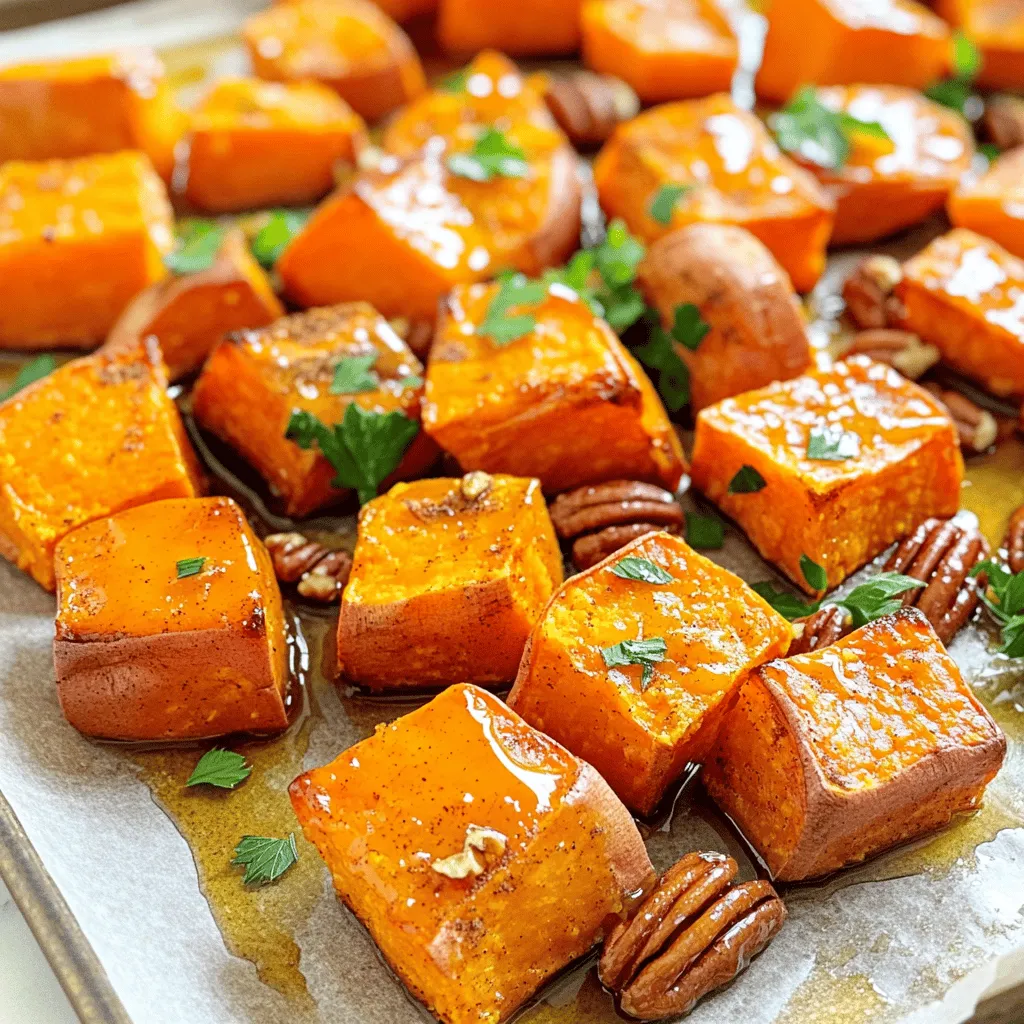
Looking for a cozy, delicious side dish? Maple Cinnamon Roasted Sweet Potatoes are the perfect choice! With their sweet and spicy flavor, they can brighten any meal. I’ll guide you through simple ingredients and easy steps to create this delightful dish. Whether you’re a cooking novice or a foodie, you’ll find tips and tricks for perfecting this recipe. Let’s dive into tasty flavors today!
Ingredients
List of Ingredients
- 4 medium sweet potatoes, peeled and cut into bite-sized cubes
- 3 tablespoons pure maple syrup
- 2 tablespoons extra virgin olive oil
- 1 teaspoon ground cinnamon
- 1/2 teaspoon ground nutmeg
- Sea salt, to taste
- 1/4 cup pecans, finely chopped (optional)
- Fresh parsley, chopped, for garnish (optional)
Preparation Tips for Ingredients
Choosing the best sweet potatoes
Look for sweet potatoes that are firm and smooth. Avoid any with cracks or soft spots. The color should be vibrant and deep orange or purple.
How to properly peel and cut sweet potatoes
Start by washing the sweet potatoes under cold water. Use a vegetable peeler to remove the skin. Cut them into even cubes, about one inch each. This helps them cook evenly.
Suggested brands of maple syrup
Look for pure maple syrup, not imitation. Brands like Grade A or B syrup are great choices. They offer rich flavor and depth for your dish.
Step-by-Step Instructions
Preheating and Preparing the Oven
Start by preheating your oven to 400°F (200°C). This temperature works well for roasting sweet potatoes. Next, line a large baking sheet with parchment paper. This step makes cleanup easier and helps the sweet potatoes roast evenly.
Mixing the Ingredients
In a large bowl, add the cubed sweet potatoes. Pour in the olive oil and maple syrup. Then, sprinkle in the ground cinnamon, nutmeg, and a pinch of sea salt. Toss everything well. Make sure each piece of sweet potato is coated. This ensures every bite bursts with flavor.
Roasting Tips
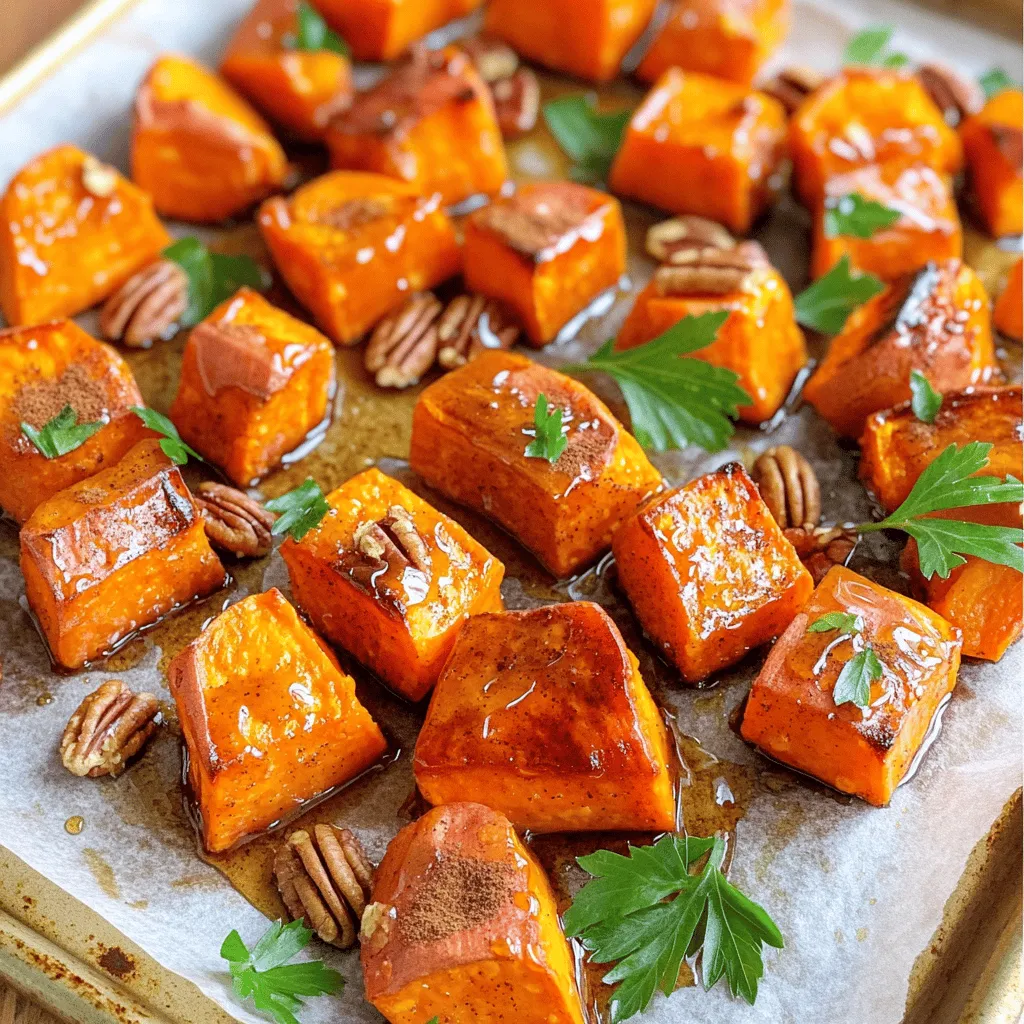
Spread the sweet potatoes on the baking sheet in a single layer. Avoid crowding them. This helps them roast properly. Halfway through roasting, stir the sweet potatoes. This promotes even cooking and gives them a nice caramelized finish.
Tips & Tricks
Achieving the Perfect Texture
To know when sweet potatoes are done roasting, look for golden edges. They should be soft when you pierce them with a fork. If they begin to brown too much, lower the heat slightly. Stir them halfway through cooking to help them caramelize evenly. This keeps them from burning while enhancing their sweet flavor.
Enhancing Flavor
To make your sweet potatoes even better, try adding spices like ginger or allspice. These can add warmth and depth to the dish. Balancing sweetness is key. A pinch of sea salt helps cut through the sweet notes. You might also try adding a splash of balsamic vinegar for a tangy twist.
Serving Suggestions
Maple Cinnamon Roasted Sweet Potatoes pair well with savory dishes. Try serving them alongside roasted chicken or grilled pork. For a colorful presentation, place them on a bed of fresh greens. You could also sprinkle some feta cheese on top for a creamy touch. This dish looks great in a nice bowl, garnished with fresh parsley.

Variations
Alternative Ingredients
You can swap maple syrup for honey. Honey gives a sweet twist. It also adds its own unique flavor. You might also want to try different nuts or seeds. Walnuts and almonds work well. They add crunch and extra nutrients.
Modifications for Dietary Needs
For a vegan option, use agave syrup instead of maple syrup. This keeps the dish plant-based. If you need gluten-free, this recipe is already safe. Sweet potatoes are naturally gluten-free. Just check any labels on nuts or oils to be sure.
Combining with Other Vegetables
Mix in carrots or Brussels sprouts for added flavor. They roast well alongside sweet potatoes. You can even try seasonal vegetables like squash in fall. This keeps your dish fresh and exciting all year.
Storage Info
How to Store Leftovers
To store your Maple Cinnamon Roasted Sweet Potatoes, use an airtight container. Glass or plastic containers work well. Ensure the sweet potatoes cool down first. This helps keep them fresh longer. Place the container in the fridge. They will stay good for about three to four days.
Reheating Methods
For the best results, reheat in the oven. Preheat your oven to 350°F (175°C). Spread the sweet potatoes on a baking sheet. Heat them for about 10 to 15 minutes. This keeps their texture nice and crispy. If you are short on time, use the microwave. However, this may make them a bit soggy. Heat in 30-second bursts until warm.
Freezing the Dish
To freeze Maple Cinnamon Roasted Sweet Potatoes, let them cool completely. Then, place them in a freezer-safe bag or container. Remove as much air as possible to prevent freezer burn. They can last up to three months. When you are ready to eat, thaw them overnight in the fridge. Reheat in the oven for the best texture.
FAQs
What temperature should I roast sweet potatoes?
You should roast sweet potatoes at 400°F (200°C). This temperature helps them cook evenly. It allows the sweet potatoes to become tender while getting a nice caramelized edge. Always preheat your oven before adding your sweet potatoes.
Can I make this recipe ahead of time?
Yes, you can make this recipe ahead of time. You can prepare the sweet potatoes and toss them in the mixture. Then, store them in the fridge for up to a day. When you’re ready, simply roast them as directed. This saves time and makes serving easier.
Is this dish healthy?
Absolutely! Maple cinnamon roasted sweet potatoes are healthy. Sweet potatoes are packed with vitamins and fiber. Maple syrup adds a touch of sweetness without refined sugar. When you use healthy fats like olive oil, it makes the dish even better for you.
How long do roasted sweet potatoes last in the fridge?
Roasted sweet potatoes will last about 3 to 5 days in the fridge. Store them in an airtight container to keep them fresh. Make sure they cool first before putting them in the fridge. This helps prevent moisture build-up.
Can I replace the pecans with another nut?
Yes, you can easily replace pecans with another nut. Walnuts or almonds work well too. Just chop them finely and add them during the last few minutes of roasting. This will give you great crunch and flavor in your dish.
In this blog post, we covered how to make flavorful Maple Cinnamon Roasted Sweet Potatoes. We discussed the best ingredients, preparation tips, and cooking methods for perfect texture. You can try various versions and storage tips for leftovers too. Sweet potatoes are not only tasty but also healthy. Enjoy making this dish by following the steps provided. You’ll impress family and friends with your cooking skills!


![- 4 large bell peppers (any color) - 1 lb ground chicken - 2 cups fresh spinach, roughly chopped - 1 cup cooked quinoa (or rice) - 1 cup mozzarella cheese, shredded - 1 small onion, finely minced - 2 cloves garlic, minced - 1 teaspoon Italian seasoning blend - ½ teaspoon red pepper flakes - Salt and pepper to taste - 1 tablespoon olive oil - Fresh basil leaves for garnish When I make chicken and spinach stuffed peppers, I love using fresh ingredients. The bell peppers can be red, green, yellow, or orange. Each color adds a fun touch and a slight flavor difference. Ground chicken gives a light taste and pairs well with spinach. I usually chop the spinach roughly. This keeps some texture in the filling. Quinoa or rice adds a nice base and helps the stuffing stick together. I recommend using cooked quinoa for a nutty flavor and added protein. Mozzarella cheese brings creaminess and melts beautifully on top. The minced onion and garlic create a fragrant base. I often sauté these first to build flavor. The Italian seasoning and red pepper flakes bring warmth and depth. Adjust the red pepper flakes to suit your taste. Lastly, a sprinkle of salt and pepper enhances all the flavors. The olive oil adds richness and helps everything cook evenly. I often finish with fresh basil leaves for a bright and fresh touch. You can find the full recipe to make these delicious stuffed peppers! - Preheat your oven to 375°F (190°C). - Prepare the bell peppers by removing the tops and seeds. Start by heating your oven. This ensures it’s hot for your peppers. While waiting, grab your bell peppers. Cut off the tops and scoop out the seeds inside. You want them ready to hold all that tasty filling. A little olive oil on the outside adds flavor and color. - Sauté onion and garlic in olive oil. - Add ground chicken and cook thoroughly. - Stir in spinach, quinoa, and spices. Now, heat olive oil in a large skillet over medium heat. Add the finely minced onion and sauté for about 3-4 minutes. You want them soft and clear. Then, toss in your minced garlic and cook for one more minute. It will smell amazing! Next, add the ground chicken. Use a spoon to break it apart as it cooks. This should take about 6-8 minutes. Make sure the chicken is brown and fully cooked. Then, mix in the chopped spinach, cooked quinoa, Italian seasoning, red pepper flakes, salt, and pepper. Cook for another 2-3 minutes until the spinach wilts and blends in. - Mix in mozzarella and stuff peppers. - Bake covered and then uncovered until cooked. Remove the skillet from heat. Now, add half of the shredded mozzarella cheese to the filling. Stir until it melts and mixes well. Carefully spoon this tasty mixture into each pepper. Press it down to fill them well. Finally, sprinkle the remaining mozzarella over the tops of each pepper. Cover your dish tightly with foil and place it in the oven. Bake for 25 minutes. This helps the peppers cook through. After that, take off the foil and bake for another 10-15 minutes. Look for tender peppers and bubbly, golden cheese. Your Chicken and Spinach Stuffed Peppers are almost ready! - Choosing the right peppers for optimal flavor: I love using bell peppers in various colors. Each color brings a unique taste. Red peppers are sweet, while green ones are more bitter. Choose your favorite or mix them for a colorful dish. - Ensuring even cooking of the filling: To cook the filling evenly, chop the spinach and onion small. This helps them blend well with the ground chicken. Stir often while cooking to make sure everything heats up at the same time. - Plates and garnishes for serving: Use bright plates to showcase your stuffed peppers. A white plate makes the colors pop. Add fresh basil leaves on top for a nice touch. It adds color and flavor. - Drizzling options for added flavor: Consider drizzling a balsamic reduction over the peppers. This gives a sweet and tangy kick. You can also use olive oil or a bit of hot sauce if you like spice. - Low-calorie ingredient options: If you want to cut calories, use ground turkey instead of chicken. You can also skip the cheese or use a low-fat version. This keeps the rich taste without the extra calories. - Gluten-free substitutes: For a gluten-free option, use quinoa or rice as a base. Both are great alternatives. Make sure your seasonings are also gluten-free to keep the dish safe for everyone. For the full recipe, check out the details above. {{image_4}} You can switch the protein in your stuffed peppers. Ground turkey works great as a leaner choice. It has a mild flavor that blends well with the spices. Ground beef is another option. It adds richness and depth to the dish. If you want a vegetarian option, try black beans or chickpeas. They add protein and fiber. You can mash them for a creamy texture or leave them whole for a nice bite. Spicing up your stuffed peppers can elevate the dish. Add cumin or smoked paprika for a smoky flavor. You can also try chili powder for a bit of heat. If you love sauces, think about adding salsa or barbecue sauce to the filling. A drizzle of ranch or yogurt on top can enhance the taste too. These simple tweaks can really make your meal pop. Stuffed peppers pair well with many sides. A fresh salad with greens and a lemon vinaigrette works nicely. You can also serve them with rice or quinoa on the side. For meal prep, these stuffed peppers are great to make ahead. They store well and taste even better the next day. Leftovers can be enjoyed cold or reheated easily, making them perfect for quick lunches. If you want to impress, plate them on colorful dishes and garnish with fresh herbs. For the full recipe, check [Full Recipe]. After you make your chicken and spinach stuffed peppers, let them cool. Place leftovers in an airtight container. This keeps them fresh and tasty. You can store them in the fridge for up to three days. When you want to enjoy them again, simply reheat in the oven or microwave. If using the oven, cover with foil to keep the moisture in. Heat at 350°F (175°C) for about 15-20 minutes. If using a microwave, heat in one-minute bursts until hot. If you want to save some for later, freezing is a great option. Wrap each stuffed pepper in plastic wrap. Then put them in a freezer-safe bag. This keeps them from getting freezer burn. You can freeze them for up to three months. When you’re ready to eat, take them out and let them thaw in the fridge overnight. You can bake them from frozen, but it will take longer. Bake at 375°F (190°C) for about 40-50 minutes. Make sure they are hot all the way through. Enjoy the convenience of having these delicious meals ready to go! How long do stuffed peppers last in the fridge? Stuffed peppers can last up to four days in the fridge. Store them in an airtight container. Can I use frozen spinach instead of fresh? Yes, you can use frozen spinach. Just thaw and drain it first to remove excess water. What can I substitute for quinoa in this recipe? You can use rice instead of quinoa. Brown rice or white rice works well for this dish. Are stuffed peppers healthy? Yes, stuffed peppers are healthy. They are full of protein, fiber, and vitamins. How can I tell when the peppers are done cooking? Peppers are done when they are tender and the cheese is bubbly and golden. Can I prep these ahead of time? Yes, you can prep them a day in advance. Just store the stuffed peppers in the fridge. What sides pair well with stuffed peppers? Great sides include a light salad, garlic bread, or steamed veggies. Enjoy your meal! In this article, we explored a tasty recipe for chicken and spinach stuffed peppers. We covered detailed ingredients, step-by-step instructions, cooking tips, and variations to try. Stuffed peppers are fun to make and easy to adapt. You can even store leftovers or freeze them for later. This dish is not only healthy but also full of flavor that everyone will enjoy. Try it out and get creative!](https://dishtreats.com/wp-content/uploads/2025/06/8d5b3b7f-ae7d-4f86-a3ac-77abf09c6433-768x768.webp)


![Here’s what you need for a creamy, dreamy mac and cheese: - 1 lb elbow macaroni - 4 cups water - 2 tablespoons unsalted butter, divided - 1 teaspoon garlic powder - 1 teaspoon onion powder - ½ teaspoon smoked paprika - Salt and pepper, to taste - 2 cups sharp cheddar cheese, shredded - 1 cup mozzarella cheese, shredded - ½ cup cream cheese, softened - ½ cup whole milk Gather these ingredients to make your Instant Pot creamy mac and cheese. The elbow macaroni cooks perfectly in the Instant Pot, soaking up all the flavors. The two types of cheese give a rich taste. Cream cheese adds smoothness, while whole milk makes it extra creamy. Each spice, like garlic and paprika, adds a nice touch. Want to make your mac and cheese even better? Try these add-ins: - Cooked bacon for a salty crunch - Steamed broccoli for a healthy twist - Diced tomatoes for freshness - Jalapeños for heat Feel free to mix and match! You can make it just how you like. For the full recipe, check out the detailed cooking steps. Gather all your ingredients. You will need: - 1 lb elbow macaroni - 4 cups water - 2 tablespoons unsalted butter, divided - 1 teaspoon garlic powder - 1 teaspoon onion powder - ½ teaspoon smoked paprika - Salt and pepper, to taste - 2 cups sharp cheddar cheese, shredded - 1 cup mozzarella cheese, shredded - ½ cup cream cheese, softened - ½ cup whole milk Measure everything out before you start. This makes cooking easier and faster. Pour 4 cups of water into your Instant Pot. Add the elbow macaroni, 1 tablespoon of unsalted butter, garlic powder, onion powder, smoked paprika, and a pinch of salt. Stir this mix well to coat the pasta. Now, close the lid and set the valve to sealing. Choose the manual cooking option and set the timer to cook on high pressure for 4 minutes. Once the time is up, do a quick release by moving the valve to venting. Open the lid once the steam has escaped. Add the remaining tablespoon of unsalted butter, shredded cheddar cheese, shredded mozzarella cheese, softened cream cheese, and whole milk. Stir everything together with a spatula until it’s creamy. If it’s too thick, add a little more milk for a smoother texture. Season with salt and pepper to your liking. Stir again to mix in the flavors. For the complete recipe, check out the Full Recipe. Enjoy your creamy mac and cheese! To make your mac and cheese super creamy, use a mix of cheeses. I love combining sharp cheddar and mozzarella. The cheddar gives a bold flavor, while mozzarella adds stretchiness. Cream cheese also helps create a rich texture. If it's too thick, add a splash of whole milk. This will help achieve the creamy consistency you want. Here are some great cheese combos: - Sharp cheddar - Mozzarella - Cream cheese - Gruyere - Fontina Mixing these cheeses gives depth and flavor. Try different amounts to find your favorite mix. You can also add a bit of parmesan for a salty kick. Common mistakes can ruin your dish. First, don't overcook the pasta. Set your timer for 4 minutes. Overcooked pasta becomes mushy. Second, be careful when releasing steam. Always use a kitchen towel for safety. Lastly, remember to season well. Taste your mac and cheese before serving. Add more salt and pepper if needed. For more details, check out the Full Recipe. {{image_4}} You can make your mac and cheese heartier by adding protein. Cooked chicken or crispy bacon works great. Simply chop the cooked chicken or crumble the bacon into pieces. Stir it in after mixing the cheese. This adds flavor and makes it a full meal. For a vegan twist, swap the dairy for plant-based ingredients. Use cashew cream or coconut milk in place of whole milk. Replace the cheese with vegan cheese or nutritional yeast for a cheesy taste. This keeps the dish creamy while making it dairy-free. Add extra flavor by mixing in spices and herbs. A dash of cayenne pepper gives it a kick. Fresh herbs like basil or thyme add brightness. Try Italian seasoning for a different twist. You can also add mustard powder for depth. Experiment to find your favorite mix. For the full recipe, check out [Full Recipe]. To store your creamy mac and cheese, let it cool first. Place it in an airtight container. You can keep it in the fridge for up to three days. Make sure it is sealed tightly to keep it fresh. If you want to enjoy it later, consider freezing it. When you want to reheat mac and cheese, use the microwave or stovetop. If using the microwave, place your serving in a bowl. Add a splash of milk to keep it creamy. Heat it in short bursts, stirring in between. For the stovetop, warm it in a pot over low heat. Stir well and add milk if needed. This helps it regain its creamy texture. To freeze mac and cheese, use an airtight container or freezer bag. Make sure it is cool before you put it in. It can last in the freezer for up to three months. When you are ready to eat it, thaw it overnight in the fridge. Then, reheat using one of the methods above. This way, you can enjoy that yummy flavor again! For the full recipe, check the details above. Yes, you can use gluten-free pasta in this recipe. Just choose your favorite brand. Cook times may vary slightly, so check the package instructions. Gluten-free pasta can be just as creamy and tasty as regular pasta. To spice up your mac and cheese, add cayenne pepper or red pepper flakes. Start with a small amount, like 1/4 teaspoon, and taste as you go. You can also mix in some diced jalapeños for a fresh kick. Adjust it based on your spice level preference. Any Instant Pot model works well for this creamy mac and cheese. I recommend using a model with at least a 6-quart capacity. This size gives enough room for the pasta and water. The Instant Pot Duo or Ultra are popular choices, offering great features for beginners and pros alike. For the full recipe, check the link. This blog has shared everything you need for perfect mac and cheese in your Instant Pot. We covered the needed ingredients, cooking steps, and tips to avoid mistakes. You learned how to make it creamy and flavorful, even with variations. Remember to store leftovers properly for later. Keep experimenting with flavors and ingredients to find what you enjoy. Each recipe can be a new adventure. Enjoy your cooking journey!](https://dishtreats.com/wp-content/uploads/2025/07/aef5e05b-bf60-4c96-8d62-11668510c0c6-768x768.webp)
