Mango Avocado Salsa Fresh and Flavorful Delight

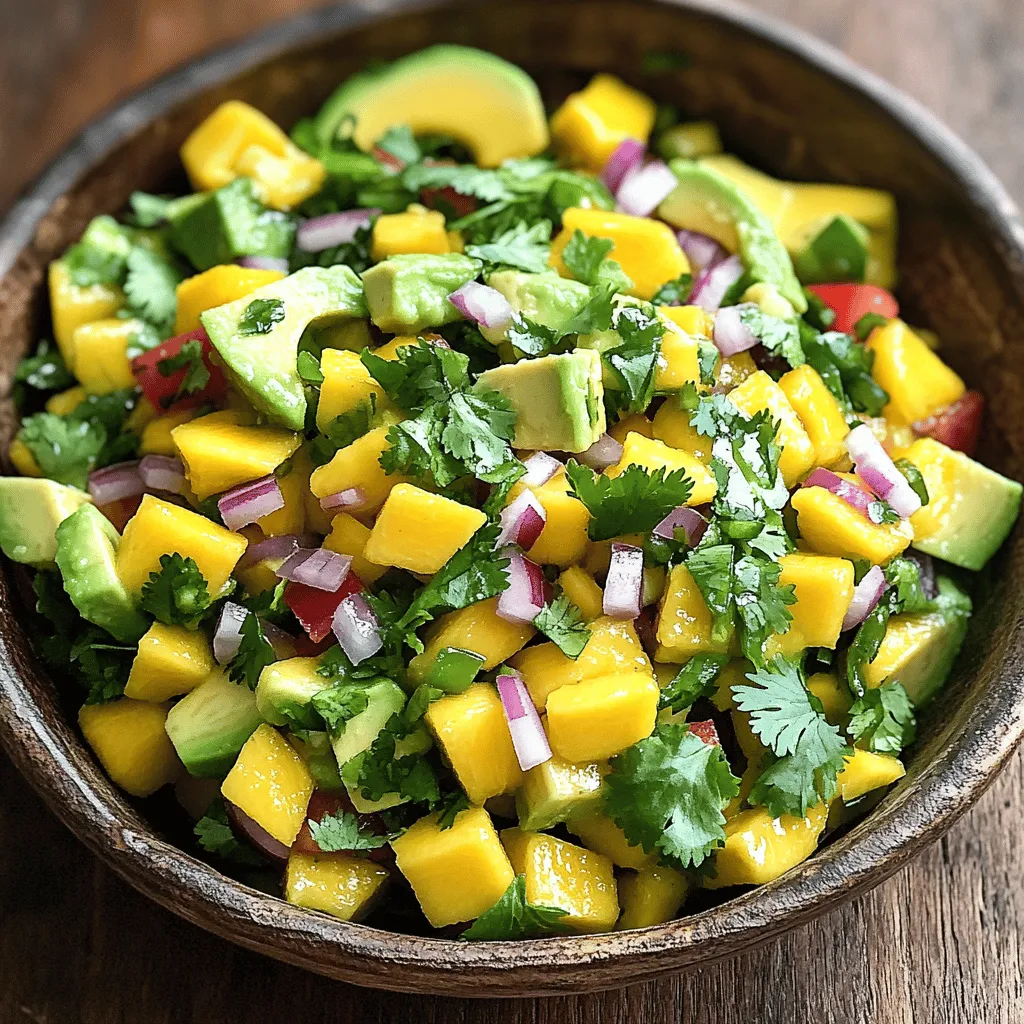
Are you ready to make a fresh and tasty Mango Avocado Salsa that will wow your friends? This delightful mix of ripe mango, creamy avocado, and zesty flavors makes the perfect dip or topping. In this post, I’ll share my favorite tips on selecting ripe ingredients and step-by-step instructions to achieve that perfect texture. Let’s dive into this vibrant recipe that will brighten any meal!
Ingredients
Complete List of Ingredients
- 1 perfectly ripe mango, diced into bite-sized cubes
- 2 ripe avocados, peeled and diced
- 1/2 medium red onion, finely chopped
- 1 red bell pepper, diced into small pieces
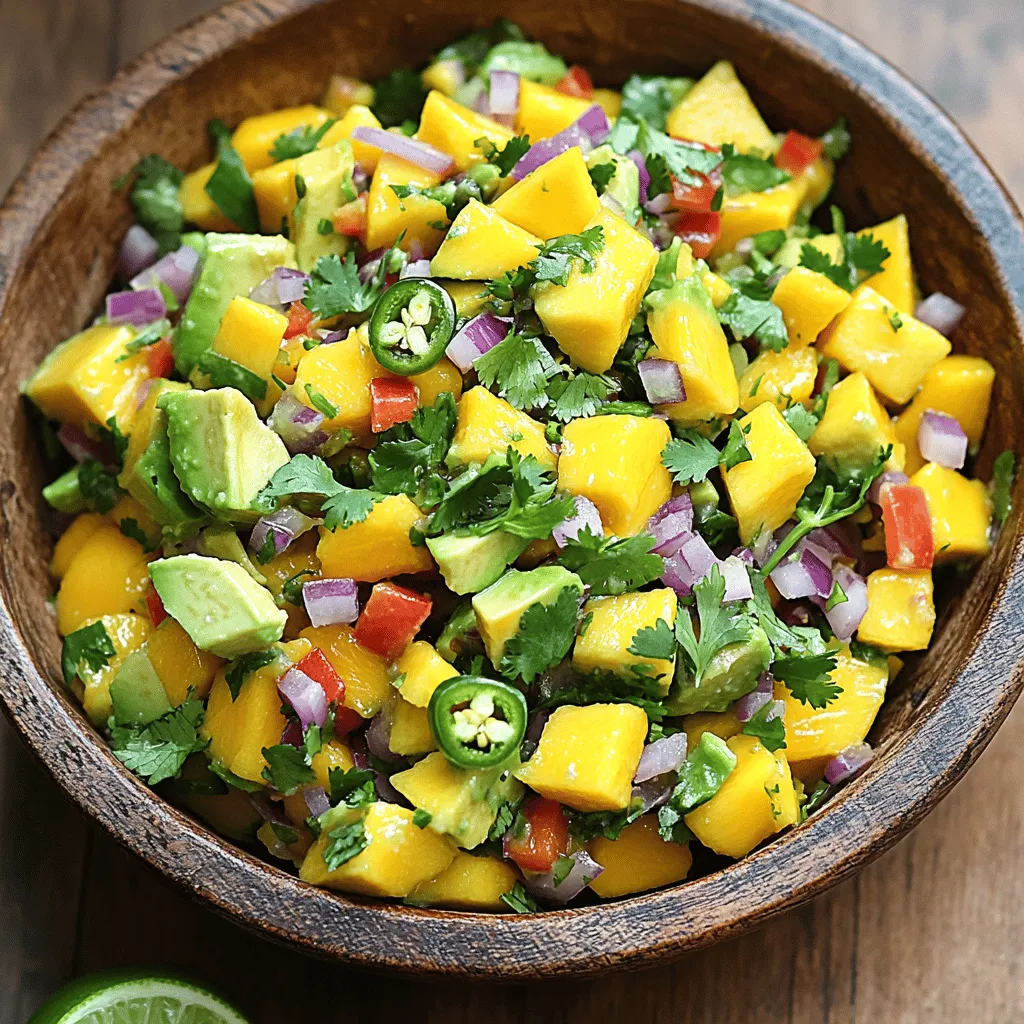
- 1 fresh jalapeño, deseeded and minced
- Juice of 2 fresh limes
- 1/4 cup fresh cilantro leaves, roughly chopped
- Salt and freshly cracked pepper, to taste
Tips for Choosing Ripe Ingredients
When picking a mango, look for one that feels slightly soft. It should have a sweet smell. For avocados, gently squeeze the skin. It should give a little but not be mushy. Red onions should be firm and smooth. Choose a bell pepper that looks bright and shiny. For jalapeños, pick ones that are firm with a rich green color. Fresh cilantro should smell strong and look vibrant.
Explanation of Key Ingredients and Their Roles
Mango adds sweetness and a juicy texture. Avocado brings creaminess, making every bite rich. Red onion adds a sharp crunch that balances the sweetness. The bell pepper adds color and a mild taste. Jalapeño brings heat, and you can adjust the amount for your spice level. Lime juice brightens the flavors and keeps the avocados from turning brown. Cilantro adds a fresh, herbaceous note. Salt and pepper enhance all the flavors, making the dish pop.
Step-by-Step Instructions
Preparation Steps for Mango and Avocado
First, gather all your ingredients. This makes the process smooth and easy. Start with the mango. Carefully peel it and cut it into bite-sized cubes. A ripe mango should feel soft but not mushy. Next, take the avocados. Peel and dice them the same way as the mango. The size of the pieces matters for texture.
Chop the red onion finely. Aim for small pieces, so they blend well. Dice the red bell pepper into small bits. Then, prepare the jalapeño. Cut it in half and remove the seeds. Mince it finely, adjusting the amount based on your spice preference.
Mixing and Seasoning Instructions
Now that all your ingredients are ready, take a large mixing bowl. Combine the diced mango, avocado, red onion, red bell pepper, and jalapeño. Stir gently to mix everything without mashing the avocado.
Next, squeeze the juice of two fresh limes right over the mix. This adds flavor and keeps the avocado bright green. Then, fold in the chopped cilantro. Use a spatula for this step to preserve the avocado’s texture.
Finally, season with salt and freshly cracked pepper. Taste and adjust as needed. This step is key for enhancing the flavors.
Tips for Achieving the Perfect Texture
To keep a great texture, handle the ingredients gently. Avoid mashing the avocado; it should stay chunky. If you want to prep ahead, add lime juice earlier to prevent browning.
Let the salsa sit for 10-15 minutes at room temperature. This allows the flavors to combine. For the best presentation, serve it in a colorful bowl. Garnish with cilantro and lime wedges for a bright touch. Enjoy this fresh salsa with chips or on grilled dishes!
Tips & Tricks
How to Keep Avocados Fresh
To keep your avocados fresh, store them whole. Wrap them in plastic wrap to reduce air exposure. If you slice one, use lemon or lime juice on the flesh. This juice slows browning. Store cut avocados in an airtight container. You can add onion to the container, too. It helps keep them green.
Flavor Enhancements and Spice Level Adjustments
To enhance the flavor, consider adding more lime juice. It brightens the salsa. You can also add garlic for a savory touch. If you want more heat, include more jalapeño slices. For a milder salsa, use half a jalapeño or add extra bell pepper. Taste as you go to find your perfect balance.
Serving Suggestions and Pairings
Mango avocado salsa shines with tortilla chips. Serve it as a dip for parties. You can also use it on grilled fish or chicken. It adds a fresh twist to tacos and burritos. For a light meal, pair it with fresh greens or serve it over rice. Enjoy the burst of flavors in every bite!

Variations
Add-Ins for Extra Flavor
To make your mango avocado salsa pop, consider adding extra ingredients. You might try diced pineapple for sweetness or black beans for protein. Fresh corn can add a nice crunch. If you like herbs, fresh mint or basil can offer a new twist. You could also try a dash of hot sauce for an extra kick. Each of these add-ins can change the flavor profile and give you a fun surprise.
Alternative Ingredients and Substitutions
You can swap any ingredient if you need to. If you don’t have mango, try peaches or nectarines. These fruits will give a similar sweetness. For avocados, you can use ripe peaches or even diced cucumbers for a lighter touch. If red onion is not your favorite, try green onions or shallots for a milder taste. Keep in mind that lime juice is key for flavor, but lemon juice can work in a pinch.
Seasonal Variants
Mango avocado salsa can change with the seasons. In summer, add fresh local tomatoes for a juicy burst. In fall, diced apples can lend a crisp texture and sweetness. During winter, consider citrus fruits like oranges or grapefruit, which add a bright flavor. Each season brings new choices, so feel free to experiment and make your salsa unique!
Storage Info
Best Practices for Storing Leftovers
To keep your mango avocado salsa fresh, store it in an airtight container. This helps block air that can spoil the flavors. Place a piece of plastic wrap directly on the surface of the salsa before sealing the container. This extra step helps prevent browning. Always keep the salsa in the fridge. The cool temperature keeps it fresh longer.
How Long Does Mango Avocado Salsa Last?
When stored properly, mango avocado salsa lasts about 1 to 2 days in the fridge. The avocados can brown quickly, so enjoy it soon after making it. If you notice browning, you can scrape the top layer off. The flavors will still be good underneath.
Freezing Instructions
Freezing mango avocado salsa is not ideal, as the texture of avocados changes when frozen. If you still want to freeze it, do so without the avocados. Prepare the salsa with all the other ingredients, then freeze in a freezer-safe container. When ready to use, thaw it in the fridge overnight. Add fresh diced avocado just before serving for the best taste and texture.
FAQs
Can I prepare Mango Avocado Salsa in advance?
Yes, you can make Mango Avocado Salsa ahead of time. However, it’s best to serve it fresh. If you prepare it in advance, the avocado may brown. To slow this down, add lime juice to the salsa. Store it in an airtight container in the fridge. Use it within a day for the best taste.
What can I serve with Mango Avocado Salsa?
You can serve Mango Avocado Salsa with many dishes. Try it with tortilla chips for a tasty snack. It makes a great topping for grilled chicken or fish. You can also add it to tacos or burritos. This salsa adds color and flavor to any meal.
How do I make the salsa spicier or milder?
To make the salsa spicier, add more jalapeño. You can also try adding diced serrano peppers for extra heat. If you want it milder, use less jalapeño or remove the seeds. Taste as you go to find the right balance for you.
Mango avocado salsa is simple and fun to make. We covered key ingredients, preparation steps, and valuable tips. Choosing ripe fruit ensures great taste. Mixing and seasoning lead to a fresh and bright flavor. Storing leftovers properly keeps your salsa tasty. Feel free to experiment with variations to keep it exciting. With these easy steps, you can enjoy and share this delicious dish anytime. Update your meals with this tasty salsa!


![- 2 cups canned chickpeas - Fresh herbs: parsley and cilantro - Key spices: cumin and coriander To make crispy baked falafel, start with the main ingredients. The base is 2 cups of canned chickpeas. They give falafel a wonderful texture. Fresh herbs like parsley and cilantro add bright flavors. Using both gives a fresh taste. Spices are key too. Ground cumin and coriander bring warmth and depth. They create a balance that makes falafel special. - Aromatics: onion and garlic - Binding ingredients: tahini and breadcrumbs - Optional: olive oil for drizzling Next, we have additional ingredients. Aromatics like onion and garlic make the falafel smell great. They add a savory note that enhances the dish. Binding ingredients are also important. Tahini helps hold everything together. Breadcrumbs add crunch and structure. If you want a golden and crispy finish, drizzle olive oil on top. It helps the falafel bake evenly and get that perfect crunch. For the full recipe, check out the detailed instructions provided. 1. Preheat your oven to 400°F (200°C). 2. Line a baking sheet with parchment paper. This helps prevent sticking and ensures even cooking. 3. In a food processor, add the drained chickpeas, chopped onion, minced garlic, parsley, cilantro, cumin, coriander, baking powder, salt, black pepper, lemon juice, and tahini. 4. Pulse the mixture. You want it well combined but still chunky, like a paste. 1. Transfer the mixture to a mixing bowl. 2. Fold in the breadcrumbs. If it feels wet, add more breadcrumbs until it holds together. 3. Use your hands to shape the mixture into small balls or patties, about the size of golf balls. 4. Place them evenly on the prepared baking sheet. 1. Drizzle a good amount of olive oil over the falafel balls. This helps them get crispy. 2. Bake in the oven for about 20 minutes. Flip them halfway through for even browning. 3. Look for a golden brown color and a crispy outside. 4. Let the falafel cool for a few minutes before serving. This enhances their flavor and texture. For the full recipe, check the detailed instructions provided earlier. To make your falafel crispy, olive oil plays a key role. It adds flavor and helps create a golden crust. I suggest drizzling olive oil on top of your falafel before baking. This not only enhances the taste but also promotes even cooking. Baking techniques matter too. Preheat your oven to 400°F (200°C) for the best results. Use parchment paper on your baking sheet to prevent sticking. This will help the falafel stay intact and crisp up nicely. Adjusting the breadcrumbs is also important. If your mixture feels too wet, add more breadcrumbs until it holds together. If you want extra crunch, consider using panko breadcrumbs. They give a delightful texture that enhances the overall experience. For a beautiful presentation, arrange your crispy baked falafel on a colorful platter. Pair it with a creamy tahini sauce and a fresh cucumber-tomato salad. This adds both flavor and visual appeal. You might also want to serve it with warm pita bread. Add a side of hummus or tzatziki for a fun dip. These flavors complement the falafel well and make for a tasty meal. One common mistake is not achieving the right consistency. If your falafel falls apart during baking, it may be too wet. Always ensure your mixture holds together well. Adjust breadcrumbs as needed to fix this. Another mistake is overcrowding the baking sheet. Give each falafel space to bake evenly. This helps them crisp up nicely. Flip them halfway through baking for even browning. Finally, don’t skip the cooling step. Let the falafel cool for a few minutes after baking. This enhances their flavor and texture, making your dish even more delightful. For the full recipe, you can refer to the detailed guide above. {{image_4}} You can make falafel even more exciting by adding spices. Try mixing in smoked paprika for a warm, smoky flavor. If you want a brighter taste, add some zest from a lemon. You might also enjoy using fresh herbs like mint or dill for a fresh twist. Each region has its own spin, so feel free to experiment! For those who need gluten-free options, you can swap breadcrumbs with ground oats or almond flour. Both work well and keep the falafel together. If you want to make it vegan, just skip the tahini or use sunflower seed butter instead. This way, everyone can enjoy these tasty bites! While baking gives falafel a nice crunch, you can try air frying them for a quicker option. Air-frying uses less oil and cooks them evenly. You can also pan-fry them in a little oil for golden-brown goodness. Just make sure to keep an eye on them so they don’t burn. For the full recipe, check out the detailed steps above to make your crispy baked falafel! To store leftover falafel, place them in an airtight container. This helps keep them fresh. If you have sauce, store it separately. Leftover falafel stays tasty for about three to four days in the fridge. For freezing, let the falafel cool completely first. Then, space them on a baking sheet and freeze until solid. Once frozen, transfer them to a freezer bag. This way, they won’t stick together. To reheat, bake them directly from the freezer. Heat at 375°F (190°C) for about 15-20 minutes until warm and crispy. In the fridge, your leftover falafel will last about three to four days. If frozen, they can last up to three months. Just remember to seal them well to avoid freezer burn. Enjoy your crispy baked falafel whenever you want with these easy storage tips. For the full recipe, check back to create these delicious bites! Crispy baked falafel pairs well with many sides. You can serve it with: - Hummus for a creamy dip - Tahini sauce for added flavor - Tzatziki sauce for a cool touch - Fresh salads like cucumber-tomato salad - Pita bread for a classic wrap These options enhance the meal and add fresh tastes. To achieve extra crispy falafel, follow these tips: - Use panko breadcrumbs instead of regular ones. They add more crunch. - Drizzle olive oil generously over the falafel before baking. This helps with browning. - Bake at 400°F (200°C) for the best crispiness. Flip them halfway for even cooking. These small changes can make a big difference in texture. Yes, you can use dried chickpeas! Here’s how: - Soak 1 cup of dried chickpeas overnight in water. This softens them. - Drain and rinse the chickpeas before using them in the recipe. - Cook them in boiling water for about 1 hour until tender. Using dried chickpeas gives a fresher taste but takes more time. For the complete details on making crispy baked falafel, check out the [Full Recipe]. Baked falafel is easy and fun to make. By using canned chickpeas, fresh herbs, and key spices like cumin, you create a tasty dish. Follow the steps for perfect shapes, timing, and crunch. Remember to use olive oil and adjust breadcrumbs for crispiness. Play with flavors and storage tips to maximize your enjoyment. With this guide, you can make falafel that delights and satisfies. Now, you're ready to impress friends and family with your delicious creation!](https://dishtreats.com/wp-content/uploads/2025/06/049364cc-9d10-4f08-b8d2-88a9c6614eda-768x768.webp)
![- Firm tofu (14 oz, pressed and cubed) - Panko breadcrumbs (1 cup) - Cornstarch (1/4 cup) - Soy sauce (1 tablespoon) - Nutritional yeast (optional, 1 tablespoon) - Garlic powder (1 teaspoon) - Onion powder (1 teaspoon) - Dried oregano (1 teaspoon) - Salt and freshly ground black pepper - Air fryer - Mixing bowls - Cooking spray When making crispy air fryer tofu nuggets, the right ingredients matter. Start with firm tofu. Firm tofu holds its shape well and gives a satisfying bite. Press it to remove extra moisture. This step is crucial. It helps the tofu absorb sauces and seasonings better. Next, panko breadcrumbs add crunch. They are lighter than regular breadcrumbs. This texture makes your nuggets crispy and fun to eat. The cornstarch helps create a crispy coating. For seasonings, soy sauce gives a rich flavor. Nutritional yeast adds a cheesy taste, but it is optional. Garlic powder and onion powder enhance the savory notes. Dried oregano adds a nice herbal touch. Always season with salt and pepper to taste. Gather your cooking supplies. An air fryer is key for even cooking and crispiness. Mixing bowls help combine ingredients well. Don't forget cooking spray! It ensures a golden crust on your tofu nuggets. For the full recipe, check the detailed instructions above. Happy cooking! - Preheat air fryer to 400°F (200°C). This helps the nuggets get crispy. - Toss cubed tofu in soy sauce. Make sure every piece is well-coated. - Combine dry ingredients in a bowl. Use panko, cornstarch, and spices. - Coat each tofu cube in the breadcrumb mixture. Press gently to stick well. - Arrange nuggets in a single layer in the air fryer. Space is key for even cooking. - Mist with cooking spray and cook for 12-15 minutes. Shake the basket halfway for best results. Enjoy your crispy air fryer tofu nuggets! Check out the Full Recipe for more tips. To get crispy tofu nuggets, preheat your air fryer to 400°F (200°C). This helps the nuggets cook evenly and become perfectly crunchy. While cooking, use cooking spray. A light mist on the nuggets before frying ensures they get that golden finish. You can change the taste of your tofu nuggets easily. Swap the seasonings for different flavors. Try adding chili powder for heat or smoked paprika for a rich flavor. You can also use other types of breadcrumbs. Regular breadcrumbs or crushed cornflakes can work well. Pair your crispy nuggets with tasty dipping sauces. Sweet chili sauce or spicy mayo works great. For a fun presentation, garnish your dish with fresh cilantro or thinly sliced green onions. This adds color and makes your meal look appealing. Try these tips, and your tofu nuggets will impress everyone! {{image_4}} You can easily make this recipe vegan. If you want to skip the nutritional yeast, that’s fine. The tofu will still taste great. You can also change the seasonings to fit your taste. Try using paprika, cumin, or even curry powder for a unique twist. If you need a gluten-free snack, swap the regular breadcrumbs for gluten-free ones. You should also check the soy sauce. Some brands add gluten, so look for a gluten-free option. This way, everyone can enjoy your crispy tofu nuggets. Feel free to mix in some veggies or spices. Chopped bell peppers or green onions can add a nice crunch. You could also use cheese alternatives. Adding these can create an extra layer of flavor and keep things exciting. To store your crispy air fryer tofu nuggets, let them cool down first. Place them in an airtight container. This keeps them fresh and tasty. They can last in the fridge for 3 to 4 days. Make sure to check for any signs of spoilage before eating. You can freeze cooked tofu nuggets if you want to save some for later. Arrange them in a single layer on a baking sheet. Freeze them for about 1 hour until solid. Then, transfer them to a freezer bag or container. They can stay in the freezer for up to 3 months. When you want to eat them, thaw them in the fridge overnight. To keep your nuggets crispy, use an air fryer or an oven to reheat them. Preheat the air fryer to 350°F (175°C) and cook for about 5 to 7 minutes. If using an oven, place them on a baking sheet and heat at 350°F (175°C) for 10 to 15 minutes. Avoid using a microwave, as it can make them soggy. Enjoy your crispy air fryer tofu nuggets again! To make sure your air fryer tofu nuggets are crispy, follow these tips: - Press your tofu: Remove excess moisture by pressing your tofu. This helps it soak up flavors and become crispier. - Use panko breadcrumbs: Panko gives a better crunch than regular breadcrumbs. - Preheat the air fryer: Always preheat your air fryer to 400°F (200°C) before cooking. This step is key for crispiness. - Don't overcrowd the basket: Place nuggets in a single layer, leaving space between them. This ensures hot air can circulate. - Mist with cooking spray: A light spray helps create a golden, crispy surface. - Shake halfway through: Give the basket a shake halfway through cooking for even crispiness. Yes, you can use different types of tofu for this recipe: - Firm tofu: This works best for nuggets. It holds its shape and crisps well. - Extra firm tofu: This is also a great choice. It will be very crispy and satisfying. - Silken tofu: I do not recommend this type for nuggets. It will crumble and not hold its shape during cooking. To add some heat to your tofu nuggets, try these suggestions: - Add cayenne pepper: Mix cayenne pepper into your breadcrumb mixture for a kick. - Use spicy sauce: Toss the tofu in a spicy sauce before coating with breadcrumbs. - Include chili powder: Mix chili powder into your dry ingredients for a warm flavor. - Serve with hot sauce: Pair your nuggets with a spicy dipping sauce like sriracha or hot chili sauce. For the full recipe and more details on making crispy air fryer tofu nuggets, check out the [Full Recipe]. These tofu nuggets are easy and fun to make. You prep the tofu, coat it, and air fry it for a tasty snack. You can adjust the seasonings and even use different breadcrumbs for variety. Store leftovers well for later enjoyment. In the end, these nuggets are a great meal or snack choice. Explore different flavors and share them with friends. Enjoy your cooking adventures!](https://dishtreats.com/wp-content/uploads/2025/06/79817f14-b7a2-45e9-a748-387ee13ee939-768x768.webp)
