Looking for a tasty snack that’s also healthy? You’ll love my Lemon Garlic Roasted Chickpeas! They’re crispy, flavorful, and packed with great nutrients. With just a few simple ingredients like canned chickpeas, garlic, and lemon, you can whip up this easy treat in no time. Let’s dive into my step-by-step guide and discover how to make these delicious bites that everyone will enjoy!
Why I Love This Recipe
- Healthier Snack Option: These crispy chickpeas are packed with protein and fiber, making them a nutritious alternative to chips or sugary snacks.
- Flavor Explosion: The combination of lemon, garlic, and spices creates an irresistible flavor that will keep you coming back for more.
- Easy to Make: With just a few simple steps and minimal prep time, you can whip up a batch of these delicious chickpeas in no time.
- Versatile Topping: These roasted chickpeas not only make a great snack but can also be used as a crunchy topping for salads, soups, or grain bowls.
Ingredients
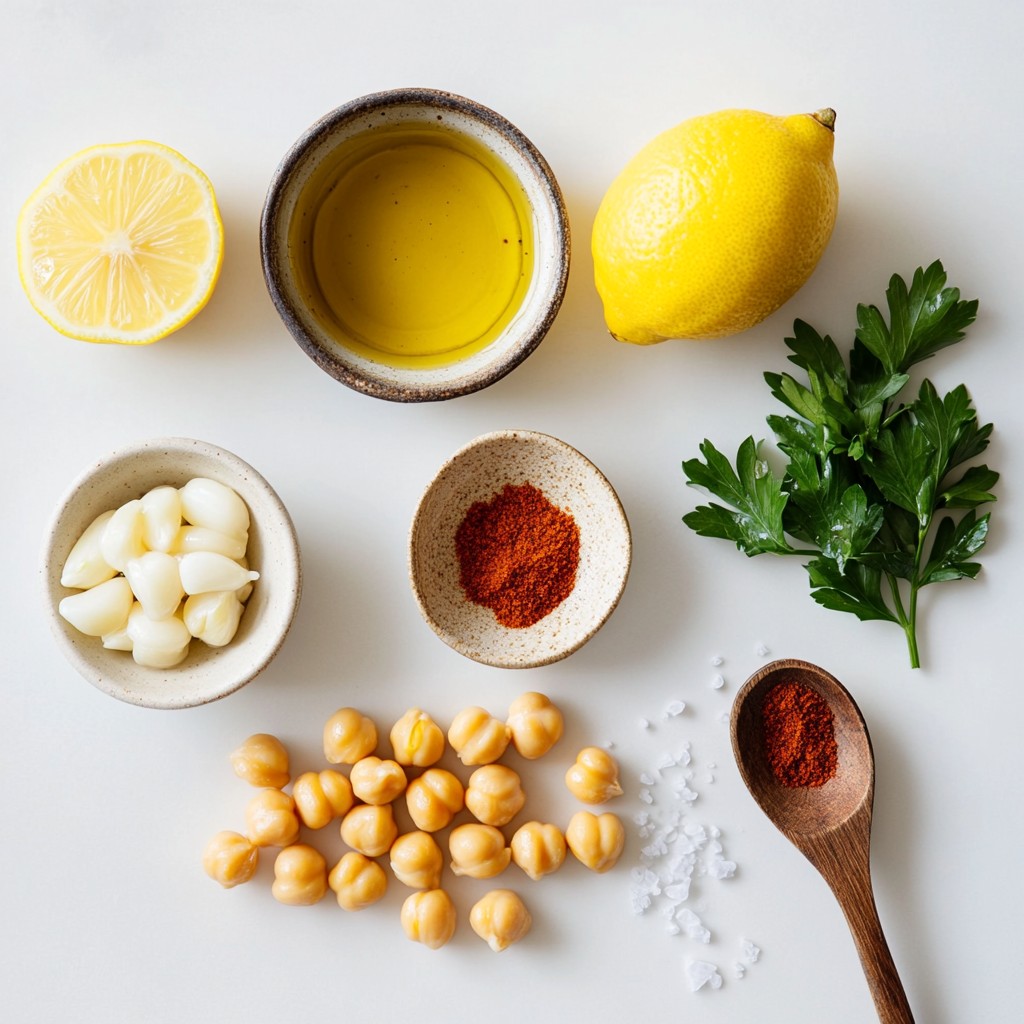
To make Lemon Garlic Roasted Chickpeas, you need a few key items. Gather these ingredients for the best flavor:
- Canned chickpeas
- Olive oil
- Garlic
- Lemon zest and juice
- Spices: smoked paprika, cumin
- Seasoning: sea salt, black pepper
- Garnish: fresh parsley
Each ingredient plays a role. Canned chickpeas are easy to use and save time. Olive oil adds richness. Garlic gives a savory kick. Lemon zest and juice brighten the dish. Smoked paprika and cumin add warm, earthy notes. Sea salt and black pepper enhance the taste, while fresh parsley brings color and freshness.
Make sure to choose good quality ingredients. This will help you create a tasty and satisfying snack.
Step-by-Step Instructions
Preheat Oven and Prepare Baking Sheet
First, preheat your oven to 400°F (200°C). This heat makes the chickpeas crispy. Next, line a baking sheet with parchment paper. This step helps with easy cleanup.
Prepare Chickpeas for Roasting
Drain and rinse one can of chickpeas. Then, spread them out on a clean towel. Pat them gently to remove any water. Dry chickpeas get crispier when roasted.
Mix Ingredients and Season Chickpeas
In a mixing bowl, add the dried chickpeas. Pour in two tablespoons of olive oil. Next, add three minced garlic cloves, the zest and juice of one lemon, one teaspoon of smoked paprika, and one teaspoon of ground cumin. Season with sea salt and black pepper. Mix everything well so each chickpea gets coated.
Roast the Chickpeas
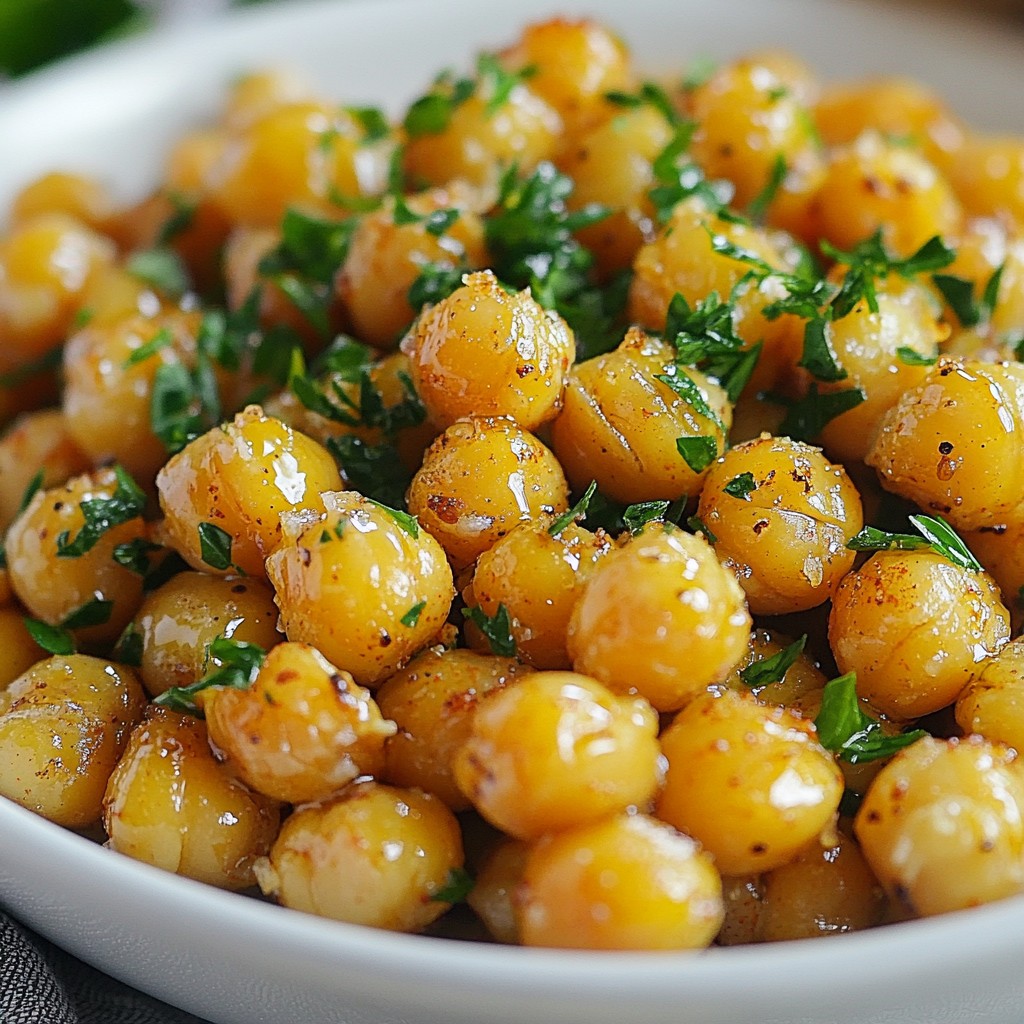
Spread the seasoned chickpeas on the lined baking sheet. Make sure they are in a single layer. Place the baking sheet in the oven. Roast for 25 to 30 minutes. Stir the chickpeas halfway through to help them roast evenly. They are done when golden and crunchy.
Cool and Garnish
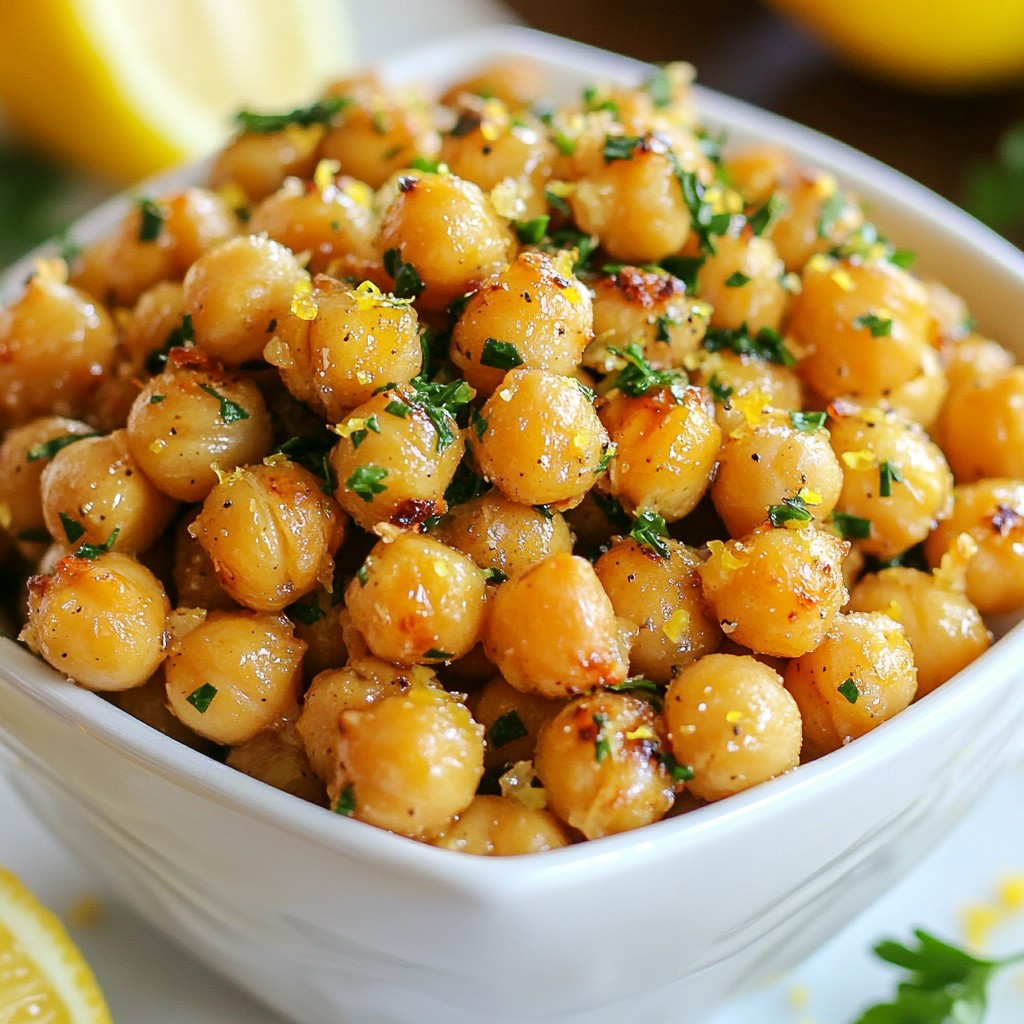
When the chickpeas are roasted, take them out of the oven. Let them cool on the pan for a few minutes. They will get crunchier as they cool. Finally, transfer the chickpeas to a serving dish. Sprinkle with chopped parsley for a fresh touch. Enjoy your tasty, healthy snack!
Tips & Tricks
Achieving Crispy Chickpeas
To get those crispy chickpeas, start by drying them well. Use a clean towel or paper towels. Pat them gently until no moisture remains. This step helps them crisp up in the oven. Spread them on a baking sheet in a single layer. This way, they roast evenly and do not steam.
Proper Seasoning Techniques
Seasoning is key to tasty chickpeas. Use fresh garlic for the best flavor. I love adding lemon zest and juice for brightness. Smoked paprika gives a nice smoky touch, while cumin adds depth. Don’t forget sea salt and black pepper; they enhance all the flavors. Toss the chickpeas well so every piece gets coated. You want an even distribution of the seasonings.
Serving Suggestions and Pairings
These roasted chickpeas are great as a snack. You can also add them to salads for crunch. Try them in grain bowls or as a topping on soups. They add protein and texture to any dish. For an extra pop of flavor, sprinkle some feta cheese on top before serving. Enjoy them warm or at room temperature.
Pro Tips
- Dry Chickpeas Thoroughly: Removing moisture from the chickpeas is essential for achieving that crispy texture. Pat them dry with a towel before seasoning.
- Adjust Seasoning to Taste: Feel free to modify the spices and seasoning according to your preference. A pinch of cayenne pepper can add a delightful kick!
- Store for Freshness: If you have leftovers, store them in an airtight container at room temperature to maintain their crunchiness. Avoid refrigerating them!
- Experiment with Flavors: Don’t hesitate to try different seasonings like curry powder or Italian herbs to create unique flavor profiles for your chickpeas.
Variations
Different Flavor Profiles (spicy, herb-infused)
You can easily change the taste of your roasted chickpeas. For a spicy kick, add cayenne pepper or chili powder. A dash of red pepper flakes can also boost the heat. If you love herbs, try using dried oregano or thyme. Mix in a teaspoon of Italian seasoning for a fresh twist. These flavors will make your dish pop!
Ingredient Substitutions (e.g., oil alternatives)
If you want to swap out olive oil, try avocado oil or coconut oil. Both work well for roasting. You can also use vegetable broth for a lighter option. Instead of lemon, lime juice adds a fun zing. Feel free to play with different spices too. Curry powder or garlic powder can add unique tastes.
Dietary-Friendly Options (vegan, gluten-free)
Lemon garlic roasted chickpeas are naturally vegan and gluten-free. They fit into many diets. If you're looking for low-sodium options, use less salt or skip it entirely. You can also use low-sodium chickpeas. These roasted delights are perfect for everyone, no matter their dietary needs. Enjoy them guilt-free!
Storage Info
Best Practices for Storage
To keep your Lemon Garlic Roasted Chickpeas crispy, store them in an airtight container. Make sure the container is dry before adding the chickpeas. I like to use glass jars or resealable bags. Keep them at room temperature, away from heat and moisture. This helps maintain their crunchiness.
Reheating Instructions
If you need to reheat your roasted chickpeas, preheat your oven to 350°F (175°C). Spread the chickpeas on a baking sheet in a single layer. Heat them for about 10 minutes or until warm. This method helps restore their crispiness. Avoid using the microwave, as it can make them soggy.
Shelf Life of Roasted Chickpeas
Roasted chickpeas can last for up to one week when stored properly. If you find they start to lose their crunch, you can always reheat them. For the best flavor and texture, enjoy them within the first few days.
FAQs
How can I make Lemon Garlic Roasted Chickpeas spicier?
To add heat, try using cayenne pepper. Just a pinch can spice things up. You can also mix in chili powder or red pepper flakes for more heat. Adjust to your taste. Spicy chickpeas pair well with creamy dips or fresh salads.
Can I use dried chickpeas instead of canned?
Yes, you can use dried chickpeas. However, you must soak and cook them first. Soaking overnight and boiling until tender is a must. This process adds time but can enhance flavor and texture. Be sure to drain and dry them well before roasting.
What dishes pair well with Lemon Garlic Roasted Chickpeas?
These chickpeas are great as a snack or a salad topper. They also complement grain bowls and soups. Try them with hummus or yogurt sauce for a tasty dip. Their crunch adds a nice contrast to soft dishes.
How do I prevent chickpeas from getting soggy?
To keep your chickpeas crispy, dry them well after rinsing. Use a kitchen towel or paper towels. Roast them at a high temperature, stirring halfway through. This method helps to avoid sogginess and keeps them crunchy.
You learned how to create crispy, flavorful Lemon Garlic Roasted Chickpeas. We covered all the key ingredients, step-by-step instructions, and helpful tips. I shared storage information and variations for your recipe.
In closing, this dish is tasty, simple, and great for various diets. Experiment with flavors and enjoy your delicious creation!