Lemon Blueberry Greek Yogurt Pancakes Delightful Recipe

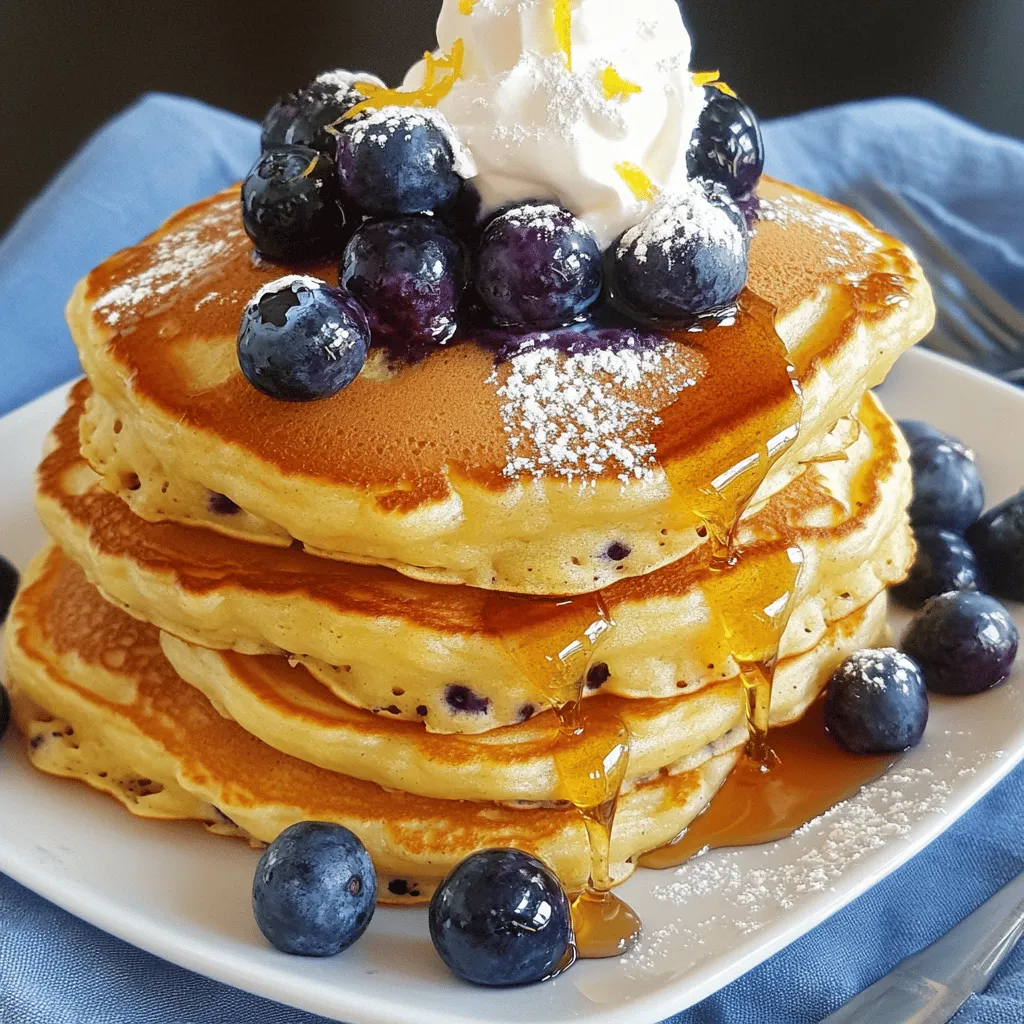
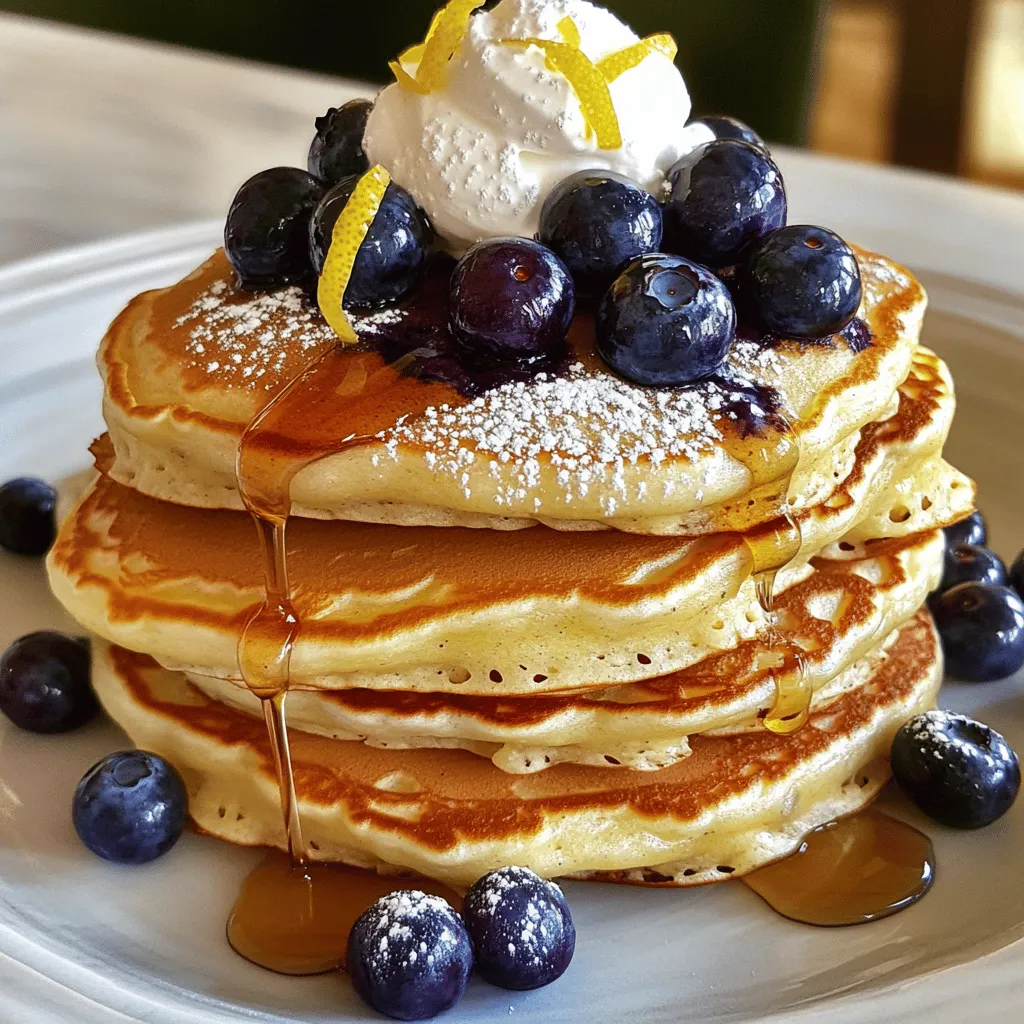
Start your morning off right with my Lemon Blueberry Greek Yogurt Pancakes. This delightful recipe combines fresh flavors and healthy ingredients for a tasty breakfast. You’ll feel good about indulging in these fluffy pancakes that are easy to make. In this post, I’ll share tips on ingredients, cooking techniques, and even some fun variations to try. Let’s dive into how you can whip up this delicious meal!
Ingredients
Main Ingredients List
To make Lemon Blueberry Greek Yogurt Pancakes, you need the following:
- 1 cup all-purpose flour
- 1/2 cup plain Greek yogurt
- 1/2 cup milk (regular or almond)
- 2 large eggs
- 1/4 cup granulated sugar
- Zest of 1 lemon
- 2 tablespoons freshly squeezed lemon juice
- 1 teaspoon baking powder
- 1/2 teaspoon baking soda
- 1/4 teaspoon salt
- 1 cup fresh blueberries (you can use frozen, thawed)
- Butter or oil for cooking
Substitute Options for Healthier Choices
You can easily make some swaps for healthier options:
- Use whole wheat flour instead of all-purpose for added fiber.
- Swap Greek yogurt for low-fat or non-fat versions to cut calories.
- Replace granulated sugar with honey or maple syrup for a natural sweetener.
- Use almond milk or oat milk for a dairy-free option.
Tips for Choosing Quality Blueberries
When selecting blueberries, look for these signs of quality:
- Choose berries that are plump, firm, and smooth.
- Check for a deep blue color; a hint of purple is okay.
- Avoid berries that are shriveled or have green spots.
- Smell the blueberries; they should have a sweet, fresh aroma.
- If buying frozen, ensure they are individually quick-frozen for better texture.
These tips help you pick the best blueberries for your pancakes, ensuring a tasty experience!
Step-by-Step Instructions
Preparing the Dry Ingredients
First, we need to gather our dry ingredients. Grab a medium bowl and sift together:
- 1 cup all-purpose flour
- 1 teaspoon baking powder
- 1/2 teaspoon baking soda
- 1/4 teaspoon salt
Sifting helps mix these ingredients well. It also adds air, making our pancakes light and fluffy. After sifting, set the bowl aside for now.
Combining Wet Ingredients Effectively
Next, we turn to our wet ingredients. In a larger bowl, mix together:
- 1/2 cup plain Greek yogurt
- 1/2 cup milk (regular or almond)
- 2 large eggs
- 1/4 cup granulated sugar
- Zest of 1 lemon
- 2 tablespoons freshly squeezed lemon juice
Whisk these ingredients together until smooth. The Greek yogurt gives our pancakes a rich flavor and nice texture.
Cooking Techniques for Perfect Pancakes
Now, let’s combine everything. Gradually add the dry ingredients to the wet mix. Use a spatula or spoon to gently fold the batter. It’s okay if a few lumps remain; don’t over-mix.
Once mixed, carefully fold in:
- 1 cup fresh blueberries
Make sure to distribute them evenly without crushing them.
Next, heat a non-stick skillet or griddle over medium heat. Add a small pat of butter or a splash of oil. For each pancake, pour about 1/4 cup of batter onto the skillet. Cook until bubbles appear, about 2-3 minutes. Then, flip the pancake and cook for another 2-3 minutes until golden brown.
When done, transfer the pancakes to a warm plate. Cover them with a clean kitchen towel to keep them warm. Repeat with the remaining batter. Enjoy your delicious Lemon Blueberry Greek Yogurt Pancakes!
Tips & Tricks
How to Achieve Fluffy Pancakes
To make fluffy pancakes, always use fresh baking powder. It helps the pancakes rise well. Mix the dry ingredients first. This step ensures even distribution of leavening agents. When you add the wet mix to the dry, do not over-mix. A few lumps are okay. Over-mixing can lead to tough pancakes. You want light and airy bites.
Best Practices for Mixing Batter
When mixing the batter, use a gentle touch. Start by whisking the wet ingredients in a large bowl. Then, add the dry mixture slowly. This method helps keep the batter light. Fold in the blueberries last. This way, you avoid crushing them. Remember, the batter should be slightly lumpy. It’s a sign that your pancakes will be fluffy.
Avoiding Common Pancake Mistakes
One common mistake is cooking on too high heat. This can burn the outside while leaving the inside raw. Keep your skillet at medium heat. Always grease the pan lightly with butter or oil. Another mistake is pouring too much batter. Use about 1/4 cup for each pancake. This size will cook evenly. Lastly, don’t flip too soon. Wait for bubbles to form on the surface. This trick ensures perfectly cooked pancakes every time.

Variations
Adding Nuts or Seeds for Extra Crunch
You can add nuts or seeds to your pancakes. Chopped walnuts or pecans work great. You can also use chia seeds or flaxseeds for health benefits. Mix in about 1/4 cup of your chosen nuts or seeds into the batter. This gives your pancakes a nice crunch and makes them even more filling. Plus, it adds a fun texture!
Creative Flavor Additions
Want to jazz up your pancakes? Try adding a splash of vanilla extract. Just a teaspoon can boost the flavor. You can also sprinkle in some ground cinnamon. About 1/2 teaspoon gives a warm, cozy taste. If you love lemon, add more lemon zest for a stronger lemon flavor. Get creative and find your favorite mix!
Making Vegan or Gluten-Free Versions
You can easily make these pancakes vegan. Swap the eggs for flax eggs. Mix one tablespoon of ground flaxseed with three tablespoons of water and let it sit for a few minutes. For a gluten-free option, use a gluten-free flour blend instead of all-purpose flour. Both versions taste great and keep the same fluffy texture!
Storage Info
Best Practices for Refrigerating Leftovers
Store leftover pancakes in an airtight container. Make sure they cool completely first. This keeps them fresh and tasty. They will last for about three days in the fridge. When ready to eat, just take out the number you need.
Freezing Pancakes for Later Use
To freeze pancakes, stack them with parchment paper between each layer. This prevents them from sticking together. Place the stack in a freezer bag or airtight container. They can be frozen for up to two months. This way, you can enjoy them anytime!
Reheating Tips for Optimal Taste and Texture
Reheat pancakes in a microwave for about 30 seconds. You can also use the stovetop. Just warm them in a non-stick skillet over low heat. For a crispy edge, try this method! Serve hot with your favorite toppings. Enjoy the fresh taste!
FAQs
Can I use different types of yogurt?
Yes, you can use different types of yogurt. Greek yogurt gives a nice thickness. If you want a lighter pancake, try regular yogurt. You can also use flavored yogurt for extra taste. Keep in mind that flavored yogurt may add sweetness. If you change the yogurt, adjust the sugar in the recipe.
How can I make the pancakes dairy-free?
To make these pancakes dairy-free, use plant-based yogurt and milk. Almond milk or oat milk works great. Choose a dairy-free yogurt that is thick, like coconut yogurt. This will keep the pancakes fluffy. You can also add a bit of lemon juice to enhance the flavor.
What’s the best way to prevent pancakes from sticking to the pan?
To prevent pancakes from sticking, use a non-stick skillet or griddle. Preheat it well before adding the batter. A small bit of butter or oil will help. Make sure to spread it evenly. If you notice sticking, check the heat. Too high heat can cause sticking. Adjust as needed for perfect pancakes.
This blog covered how to make delicious pancakes with fresh blueberries. We explored key ingredients, healthy substitutes, and tips for choosing quality blueberries. You learned step-by-step instructions, from preparing the dry ingredients to cooking techniques. We shared tips to ensure fluffy pancakes and avoid common mistakes. Variations included adding nuts, seeds, or making gluten-free options. Lastly, we discussed proper storage and reheating methods. Use these tips to enjoy tasty pancakes anytime. Happy cooking!


![- 2 cups watermelon, diced into bite-sized cubes - 1 cup fresh pineapple, diced - 1 cup ripe mango, peeled and diced - 1 cup strawberries, hulled and sliced - 1 cup plump blueberries - 1 tablespoon pure honey - 2 tablespoons freshly squeezed lime juice - 1 teaspoon finely grated lime zest - Fresh mint leaves, for a lovely garnish When picking fruits, look for bright colors and firm textures. Choose watermelon that feels heavy for its size. Make sure the skin is smooth and free from blemishes. For pineapple, smell the base; a sweet scent means it's ripe. Ripe mangoes should yield slightly when you press them. Strawberries should be bright red, without white tips. Pick blueberries that are firm and plump, with a deep color. This fruit salad is not just tasty; it’s also packed with nutrients. Watermelon is hydrating and low in calories. Pineapple provides vitamin C and enzymes that aid digestion. Mango is rich in antioxidants and vitamins A and C. Strawberries boost heart health due to their high fiber and vitamin C content. Blueberries are known for their powerful antioxidants. The honey adds a natural sweetness, while lime juice helps with vitamin C and adds a zesty kick. Each bite not only delights your taste buds but also nourishes your body. First, gather all your fruits. You will need watermelon, pineapple, mango, strawberries, and blueberries. Wash each fruit well to remove any dirt. Dice the watermelon into cubes. Cut the pineapple and mango into small pieces. Hull and slice the strawberries. Finally, add the blueberries. Place all the fruit into a large mixing bowl. Be gentle while mixing to keep the fruit intact. In a separate small bowl, combine one tablespoon of honey with two tablespoons of freshly squeezed lime juice. Add one teaspoon of finely grated lime zest for extra flavor. Whisk the mixture together until it is smooth and well-blended. This honey lime dressing will add a sweet and tangy flavor to your salad. Now, drizzle the honey lime dressing over the fruit. Make sure to cover every piece of fruit for the best taste. Use a gentle motion to toss the salad. This helps the dressing coat all the fruit without mashing it. Let the salad sit for about 10 minutes. This resting time allows the flavors to blend well. When ready to serve, garnish with fresh mint leaves. This adds a lovely touch to your fruit salad. Enjoy your Honey Lime Fruit Salad Delight! For a full recipe, visit the [Full Recipe]. Cutting fruit can be fun and easy. Start with a sharp knife for safety. For watermelon, slice it in half. Then, cut each half into thick wedges. Remove the rind and dice the flesh into cubes. Pineapple is best peeled and cored first. Cut the fruit into thick slices, then dice. For strawberries, remove the green tops and slice them. Keep your cuts even for a pretty look. You can add more fun to the salad. Try adding a splash of orange juice. This will give it a citrus twist. You can also mix in a pinch of cinnamon for warmth. Chopped nuts like almonds or walnuts add crunch. If you like creamy, add a dollop of yogurt. These extra flavors make the salad pop! Make your fruit salad shine with great presentation. Use a clear glass bowl to show off the colors. You can layer the fruits for a rainbow effect. Garnish with mint leaves on top for a fresh touch. A few extra blueberries scattered around add visual flair. Serve with colorful spoons for added fun. Remember, we eat with our eyes first! {{image_4}} You can switch up fruits in your Honey Lime Fruit Salad. Try using peaches or nectarines for a juicy twist. Grapes add a nice pop, and kiwi brings a tart flavor. You might also add oranges for an extra citrus kick. Mix and match based on your taste! Change your fruit salad with the seasons. In summer, use berries and stone fruits for freshness. Fall is great for apples and pears, while winter calls for citrus fruits like clementines and grapefruits. Spring gives you the chance to add strawberries and rhubarb for a bright taste. Add nuts or seeds for a crunchy texture. Almonds and walnuts are perfect options. If you prefer seeds, sprinkle in some pumpkin or sunflower seeds. These additions not only improve texture, but they also boost the nutrition of your salad. Enjoy the added flavor and health benefits! Store leftover honey lime fruit salad in an airtight container. This keeps the fruit fresh and tasty. If you can, eat it within a day or two. The longer it sits, the softer the fruit may get. I recommend using glass or plastic containers with tight-fitting lids. These help lock in moisture and prevent spills. If you have smaller portions, use smaller containers for easy access. The salad stays fresh for about two days in the fridge. Keep it away from foods with strong odors. To refresh the taste, add a little more honey or lime juice before serving. If you notice any browning, remove those pieces before enjoying. For the full recipe, make sure to check the main article! Yes, you can make Honey Lime Fruit Salad a few hours ahead. However, I recommend serving it fresh. If you prepare it too early, the fruit may get soft and lose its crunch. If you decide to make it ahead, store it in the fridge. This keeps it cool and fresh. Just remember to add the dressing right before serving to keep the fruit juicy. The best fruits for Honey Lime Fruit Salad are those that are ripe and sweet. I love using: - Watermelon - Pineapple - Mango - Strawberries - Blueberries These fruits blend well together, creating a vibrant and tasty mix. You can also try using kiwi or grapes for extra flavor. The key is to choose fruits that you enjoy and that are in season. Yes, you can use another sweetener if you prefer. Options include agave syrup or maple syrup. These sweeteners work great in the dressing. Just keep in mind that the flavor may change slightly. I suggest starting with the same amount as the honey. You can always adjust it to your taste. For a sugar-free option, consider using a sugar substitute that you like. In this blog post, we explored how to make a tasty Honey Lime Fruit Salad. We discussed the key ingredients, tips for selecting fresh fruits, and the nutritional benefits they offer. You learned step-by-step instructions for preparation, dressing, and serving. We also shared tips for cutting fruits and enhancing flavor. Plus, variations for using different fruits and tips for storage were provided. Creating this salad is simple and rewarding. Enjoy it yourself or share it with friends. It’s a fun and healthy treat everyone will love.](https://dishtreats.com/wp-content/uploads/2025/07/a7fe8aa9-0619-4c4c-8a63-94d099c8a4d2-768x768.webp)


. Can I use dark chocolate instead of semi-sweet? Yes, you can use dark chocolate. It adds a richer flavor. Dark chocolate makes the bars less sweet. This change gives you a nice balance in taste. If you love dark chocolate, go for it! What can I substitute for eggs in this recipe? You can use applesauce or mashed bananas. Use 1/4 cup for each egg. This keeps the bars moist. It also adds a bit of natural sweetness. Another option is flaxseed meal mixed with water. Mix 1 tablespoon of flaxseed meal with 2.5 tablespoons of water. Let it sit for five minutes before using. How do I know when the cookie bars are done baking? Check the edges for a golden brown color. The center should look set but may be soft. Insert a toothpick in the center. If it comes out clean or with a few crumbs, they are done. Let them cool before cutting for the best results. You now know how to make delicious chocolate chip cookie bars from scratch. We covered essential ingredients, step-by-step instructions, and expert tips. You learned about gluten-free and vegan options, plus how to store them well. Remember, measuring accurately and not overmixing are key for the best results. Enjoy your baking journey. Share these tips with friends so everyone can enjoy these tasty treats!](https://dishtreats.com/wp-content/uploads/2025/05/88326a6b-fa01-43d4-bb00-6171d5f3f1c3-768x768.webp)