Lemon Basil Pasta Salad Fresh and Flavorful Delight

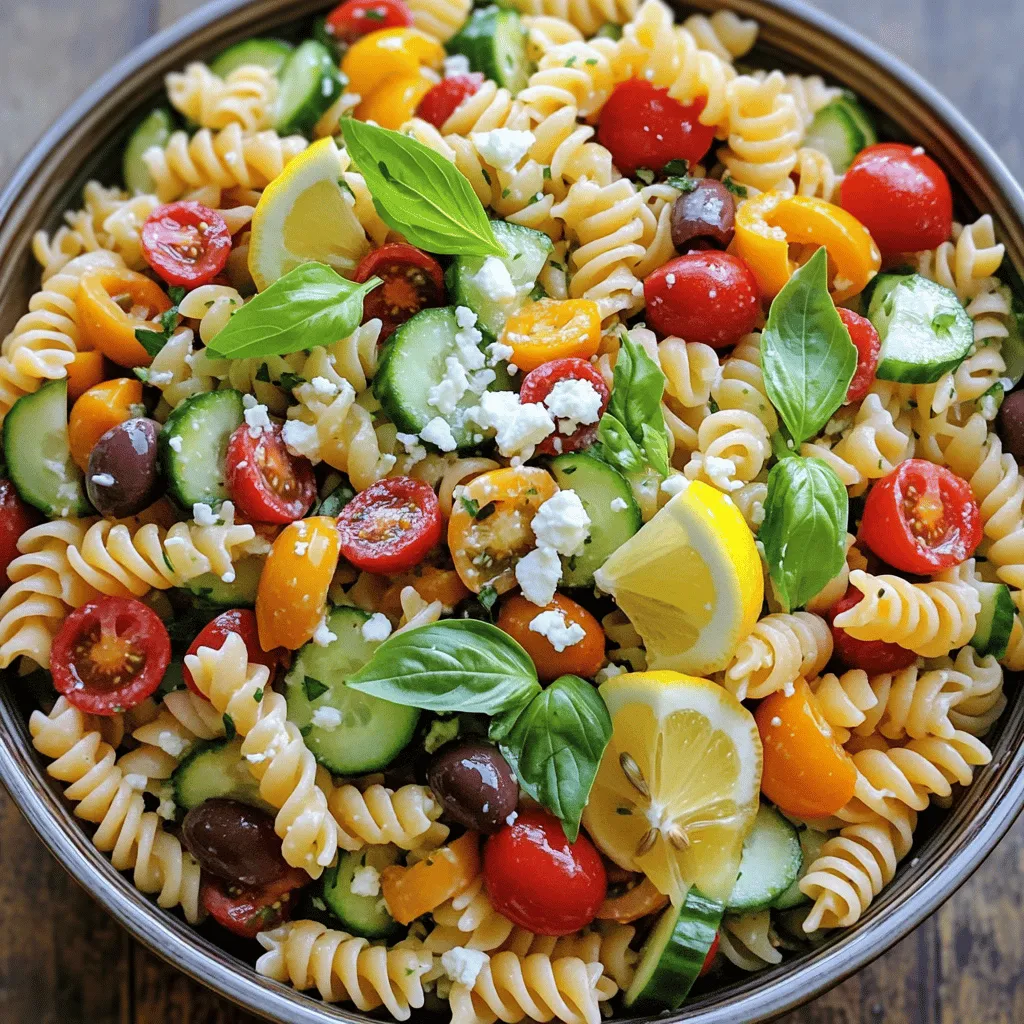
Looking for a fresh and tasty dish? Lemon Basil Pasta Salad is your answer! This bright, zesty salad brings together vibrant vegetables and perfectly cooked pasta. It’s simple to make, perfect for potlucks, or a light meal. In this article, I’ll guide you through every step, from choosing the best ingredients to serving suggestions. Get ready to enjoy a flavor-packed delight that’ll brighten your table!
Ingredients
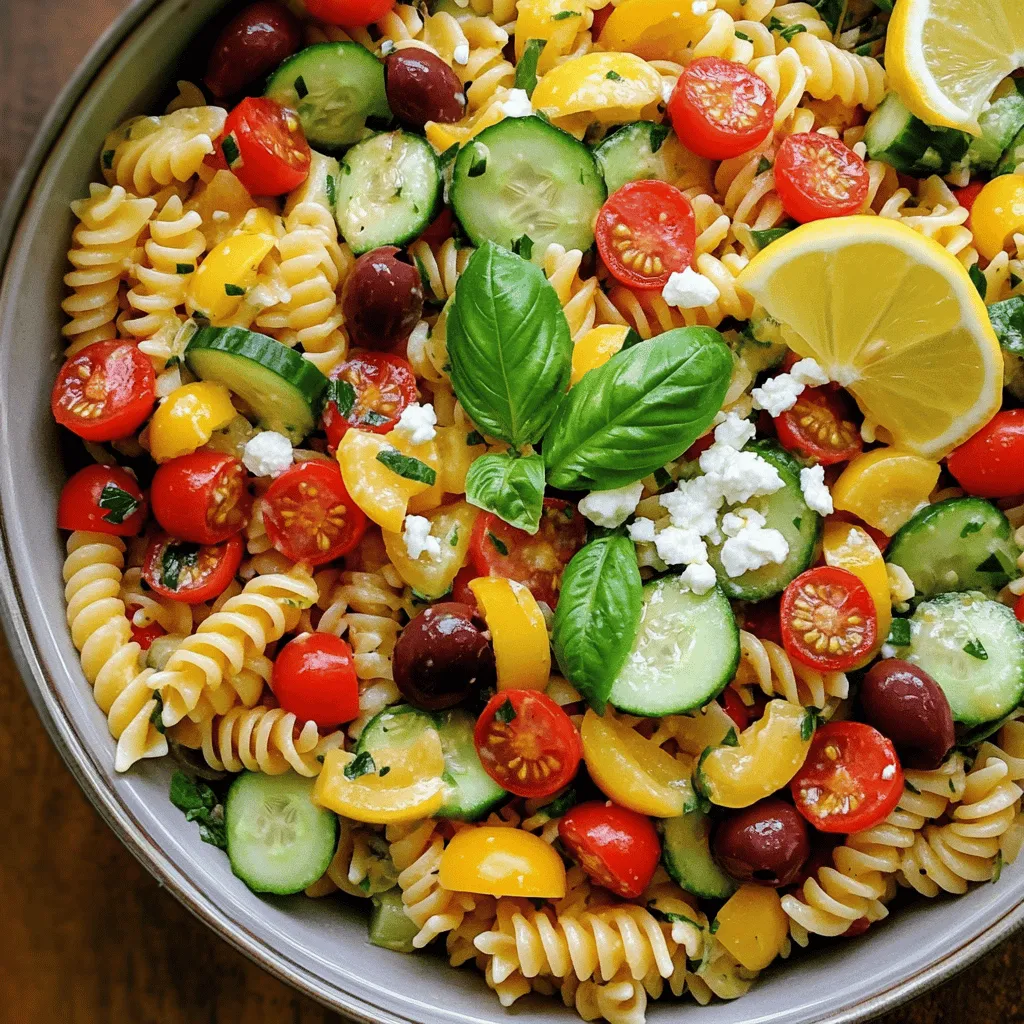
Main Ingredients for Lemon Basil Pasta Salad
- Fresh Basil
- Pasta (Fusilli or Rotini)
- Vegetables:
- 1 cup cherry tomatoes, halved
- 1 cup cucumber, diced
- 1/2 cup red bell pepper, diced
- 1/4 cup red onion, finely chopped
The heart of this salad lies in the freshness of the ingredients. Fresh basil gives a bright flavor and aroma. When choosing pasta, I like fusilli or rotini. Their shapes hold the dressing and veggies well. The colorful vegetables add crunch and taste. Cherry tomatoes burst with sweetness. Cucumber adds a refreshing bite. Red bell pepper brings sweetness, and red onion offers a mild sharpness.
Optional Ingredients
- Kalamata Olives
- Feta Cheese
- Honey or Maple Syrup
For a tasty twist, add Kalamata olives. They bring a salty flavor that contrasts well with the sweet veggies. Crumbled feta cheese adds creaminess and a tangy kick. I often use honey or maple syrup in the dressing. This small amount of sweetness balances the tartness of the lemon.
Dressing Components
- Extra Virgin Olive Oil
- Fresh Lemon Juice
- Lemon Zest
The dressing is where the magic happens. I use extra virgin olive oil for its rich flavor. Fresh lemon juice brightens the salad. Adding lemon zest enhances the citrus notes. This trio creates a light and zesty dressing that coats the pasta and veggies perfectly.
Step-by-Step Instructions
Cooking the Pasta
1. Boil the Water: Start with a big pot. Fill it with water and add salt. Bring it to a full boil.
2. Cooking Time for Al Dente: Add your fusilli or rotini pasta. Cook it for 8 to 10 minutes. You want it to be firm but not hard.
3. Rinsing the Pasta: Once done, drain the pasta. Rinse it under cold water. This stops the cooking and cools it down.
Preparing the Vegetables
1. Chopping Techniques: Use a sharp knife to chop your veggies. Cut cherry tomatoes in halves. Dice cucumber, bell pepper, and onion into small pieces.
2. Mixing the Vegetables: Take a large bowl. Add all your chopped vegetables. Gently toss them together to mix.
Making the Lemon Basil Dressing
1. Whisking Ingredients Together: In a small bowl, combine olive oil, lemon juice, lemon zest, and honey. Whisk them until well combined.
2. Seasoning the Dressing: Add salt and black pepper. Taste it and adjust if needed. The dressing should be bright and fresh.
Combining the Salad
1. Adding Ingredients Together: Once the pasta is cool, add it to the bowl with veggies. Pour the dressing over everything.
2. Tossing Techniques: Use a large spoon to gently toss all the ingredients. Make sure everything is coated in the dressing.
Incorporating Fresh Ingredients
1. Folding in Basil: Tear fresh basil leaves and gently fold them into the salad. This adds a burst of flavor.
2. Adding Feta Cheese: If you like, sprinkle in crumbled feta cheese. It gives a nice salty taste and creamy texture.
Chilling the Salad
1. Importance of Refrigeration: Cover the salad bowl tightly. Place it in the fridge for at least 30 minutes. Chilling allows the flavors to blend.
2. Presentation Tips: Serve the salad in a big bowl or on plates. Garnish with more basil or lemon wedges. This makes it look fresh and inviting.Enjoy your cooking!
Tips & Tricks
Selecting the Best Ingredients
- Freshness of Basil: Always choose bright green basil. Look for leaves that are firm and fragrant. Avoid wilted or brown leaves. Fresh basil gives the best taste and aroma to your salad.
- Choosing Quality Olive Oil: Use extra virgin olive oil for its rich flavor. Look for oils in dark bottles to protect them from light. A good olive oil enhances the taste of the dressing.
Cooking Tips
- Avoiding Overcooked Pasta: Cook the pasta until it’s al dente. This means it should be firm to the bite. If you overcook it, the pasta becomes mushy. Rinse it with cold water to stop cooking.
- Balancing Flavors in the Salad: Taste as you mix. Add salt, pepper, or lemon juice to adjust flavors. Aim for a balance between tangy and savory. This makes each bite a delight.
Serving Suggestions
- Ideal Pairings: Lemon basil pasta salad pairs well with grilled chicken or fish. It also goes nicely with a crisp green salad. Serve it alongside crusty bread for a complete meal.
- Best Temperature for Serving: Serve the salad chilled. This enhances the fresh flavors. For best results, refrigerate it for at least 30 minutes before serving. Enjoy your salad fresh and flavorful!

Variations
Additions and Substitutions
You can customize your Lemon Basil Pasta Salad by adding proteins or changing veggies.
- Protein Options: Chicken or tuna works great in this salad. Grilled chicken gives a nice flavor boost. Tuna adds a savory touch. Both options make the dish more filling.
- Different Vegetables: You can use avocado for creaminess or spinach for extra greens. These swaps add variety and nutrition. Feel free to mix and match your favorite vegetables.
Flavor Enhancements
To elevate your Lemon Basil Pasta Salad, think about different dressings or spices.
- Alternative Dressings: Try a balsamic vinaigrette for a tangy twist, or a creamy dressing for richness. These changes can create a whole new flavor profile.
- Spice Up with Chili Flakes: If you enjoy some heat, add chili flakes. They give a nice kick and balance the freshness of the salad.
Dietary Adjustments
You can easily adapt this salad to fit different dietary needs.
- Gluten-Free Pasta Options: Use gluten-free pasta if you need it. There are many good choices available that taste great.
- Vegan Modifications: To make it vegan, skip the feta cheese. You can also use maple syrup instead of honey. This keeps the salad light and fresh without losing flavor.
Storage Info
Refrigeration Guidelines
To keep your Lemon Basil Pasta Salad fresh, store it in an airtight container. This helps to seal in flavors and moisture. I suggest letting the salad chill for at least 30 minutes before serving. You can enjoy it for up to three days in the fridge.
- Best Practices for Storing Leftovers
- Use airtight containers.
- Keep salad away from strong-smelling foods.
- Avoid mixing in fresh basil until serving.
- Duration of Freshness
- Enjoy the salad within three days for best taste.
- Check for signs of spoilage, like off smells or slimy textures.
Freezing Tips
While I recommend eating the pasta salad fresh, you can freeze it if needed. However, the texture may change. Freezing can affect the fresh vegetables and basil.
- Can Lemon Basil Pasta Salad be Frozen?
- Yes, but it’s not ideal.
- The pasta may become mushy after thawing.
- Best Way to Thaw
- Move the salad to the fridge overnight.
- Once thawed, mix in fresh basil and any additional dressing for a burst of flavor.
FAQs
How long does Lemon Basil Pasta Salad last?
Lemon Basil Pasta Salad lasts about three to five days in the fridge. Store it in a sealed container. The flavors improve over time, but it’s best when fresh. Freezing is not ideal for this salad, as the texture may change. If you freeze it, thaw it in the fridge before eating.
Can I make this salad ahead of time?
Yes! You can prepare this salad a day in advance. Just store it in the fridge. Making it ahead allows the flavors to blend nicely. This is a great option for gatherings or meal prep.
What can I substitute for Basil?
If you don’t have basil, try using parsley or cilantro. Both herbs add a fresh taste. Mint is another option for a unique twist. Each herb will change the flavor slightly, so choose according to your taste.
Can I use dried herbs instead of fresh?
You can use dried herbs, but fresh is better. Dried herbs have a stronger taste. Use about one-third of the amount when substituting. The salad might taste different, so adjust based on your preference.
What kind of pasta works best?
Fusilli and rotini are great choices. Their shapes hold the dressing and veggies well. You can also use penne or farfalle for variety. Choose a pasta that you enjoy, as it will impact the final dish.
How to serve Lemon Basil Pasta Salad?
Serve the salad in a large bowl for gatherings. For individual servings, use attractive plates. Add fresh basil leaves and lemon wedges on top for a nice touch. This makes the salad visually appealing and fresh.
Is this recipe suitable for meal prep?
Absolutely! This salad is perfect for meal prep. It stores well and is easy to make in bulk.Enjoy it cold as a quick lunch or dinner option.
Lemon Basil Pasta Salad is fresh, tasty, and easy to make. We highlighted key ingredients and steps for perfecting it. Remember to choose fresh produce and quality olive oil. Adjust flavors and add proteins or veggies to fit your taste. Store leftovers properly for later enjoyment. You can easily make this salad ahead of time or serve it warm or cold. With these tips, enjoy a delightful dish that brings flavors together. Happy cooking!


![To make this dish, you will need: - 1 lb Brussels sprouts, trimmed and halved - 3 tablespoons extra virgin olive oil - 1/4 cup pure maple syrup - 1 tablespoon balsamic vinegar - 1 teaspoon garlic powder - Salt and freshly ground black pepper to taste These ingredients come together to create a sweet and savory glaze. The maple syrup adds sweetness, while the balsamic vinegar gives tanginess. The olive oil helps with roasting, making the sprouts tender and tasty. You can add these optional ingredients for extra flavor and texture: - 1/4 cup chopped walnuts - Fresh thyme leaves for garnish Walnuts add a nice crunch, while thyme gives a fresh aroma. Both options enhance the dish without overpowering it. This dish is not just tasty; it’s also good for you. Here’s a quick look at the nutrition per serving: - Calories: About 180 - Protein: 3g - Carbohydrates: 25g - Fat: 8g - Fiber: 4g Brussels sprouts are rich in vitamins C and K. The maple syrup provides natural sugars, making this dish a healthy choice. You get great flavors and health benefits in one meal. For the complete recipe, check the Full Recipe section above! First, we need to preheat the oven to 400°F (200°C). This heat is perfect for roasting. A hot oven ensures crispy edges and tender centers for your Brussels sprouts. Next, gather your ingredients. You will need: - 1 lb Brussels sprouts, trimmed and halved - 3 tablespoons extra virgin olive oil - 1/4 cup pure maple syrup - 1 tablespoon balsamic vinegar - 1 teaspoon garlic powder - Salt and freshly ground black pepper to taste - 1/4 cup chopped walnuts (optional for crunch) - Fresh thyme leaves for garnish (optional for aroma and color) In a large bowl, mix the halved Brussels sprouts with olive oil, maple syrup, balsamic vinegar, garlic powder, salt, and pepper. Toss everything well. Make sure every sprout gets coated in the sweet and savory sauce. This step is key for flavor. Prepare your baking sheet by lining it with parchment paper. This makes cleaning easy and helps prevent sticking. Spread the Brussels sprouts in a single layer on the sheet. Give them space to roast well. Now, place the baking sheet in the hot oven. Roast the sprouts for 25 minutes. Halfway through, stir them to promote even cooking. You want them to get tender and brown. If you add walnuts, toss them on the sheet during the last 5 minutes. This will give them a nice toast and extra crunch. Once done, take the Brussels sprouts out and let them cool for a minute. Transfer them to a serving dish. For a finishing touch, sprinkle fresh thyme leaves on top. This adds a nice pop of color and aroma to your dish. Enjoy this full recipe for a delicious treat! To get that perfect glaze, start with good maple syrup. Use pure maple syrup for the best flavor. Mix it well with olive oil and balsamic vinegar; this combo really shines. Make sure to coat the Brussels sprouts evenly. This helps each piece get that sweet, sticky glaze. Toss them well in the bowl before roasting. Roasting Brussels sprouts needs some care. First, preheat your oven to 400°F (200°C). This hot oven helps them caramelize. Spread the sprouts on a baking sheet in a single layer. If they are crowded, they won't brown well. Stir them halfway through cooking to ensure even roasting. You want them golden brown and tender, about 25 minutes in the oven. When ready to serve, think about how to make them look nice. Place the roasted sprouts on a large platter. You can arrange them in a circle for a pretty look. If you added walnuts, sprinkle them on top for crunch. Fresh thyme leaves also add color and smell great. This makes the dish not just tasty but beautiful too. For the full recipe, check out the details above. {{image_4}} You can switch up the sweetener for a twist. Try honey or agave syrup. These will add their own unique flavors. You can also use coconut sugar for a richer taste. If you like a kick, add some chili flakes for heat. A dash of orange juice can also brighten up the sweetness. This recipe is already vegetarian. To make it vegan, ensure the maple syrup is pure. You can also use almond oil instead of olive oil for a different flavor. For creaminess, add a dollop of vegan sour cream on top before serving. This adds a lovely tang that pairs well with the sweetness. Seasonal swaps can make this dish even better. In spring, add fresh peas for color and sweetness. During fall, toss in some diced apples for a sweet crunch. In winter, try adding roasted chestnuts for a nutty flavor. These changes keep the dish fresh and exciting every time you make it. For the full recipe, you can refer back to the detailed instructions provided. After enjoying your maple glazed Brussels sprouts, store any leftovers in an airtight container. This keeps them fresh and prevents odors. Let them cool first before sealing. Place the container in the fridge. They stay good for about 3 to 5 days. If you want to keep them longer, consider freezing. Reheating your Brussels sprouts can be quick and easy. You can use the oven or stovetop. If you use the oven, preheat it to 350°F (175°C). Spread the sprouts on a baking sheet and heat for about 10-15 minutes. Stir halfway through to ensure even warming. If you prefer the stovetop, heat a pan over medium heat. Add a bit of olive oil and toss the sprouts until warmed through. Freezing Brussels sprouts is a smart way to save them for later. First, blanch them in boiling water for 3 minutes. Then, cool them in ice water. This keeps their bright color and flavor. Drain and dry the sprouts, then place them in a freezer bag. Remove as much air as you can before sealing. They can last up to 6 months in the freezer. When you're ready to use them, just thaw and reheat! Enjoy your deliciously roasted maple glazed Brussels sprouts from [Full Recipe] and savor every bite! Yes, you can prep Brussels sprouts in advance. Trim and halve them a day before. Store them in an airtight container in the fridge. When you're ready, mix them with the other ingredients from the Full Recipe. This helps save time and makes cooking easier. Maple glazed Brussels sprouts pair well with many dishes. Here are some great options: - Roast chicken for a savory touch. - Grilled salmon for a healthy protein. - Quinoa salad for a hearty side. - Mashed potatoes for comfort food lovers. These options balance the sweet and savory flavors of the sprouts. To make this dish vegan, swap out the maple syrup for agave nectar. This keeps the sweetness intact. You can also use vegetable oil instead of olive oil if you prefer. Follow the Full Recipe as is, making those simple swaps. Enjoy the same great taste with a vegan twist! In this blog post, we covered how to make maple glazed Brussels sprouts. We discussed the key ingredients and provided step-by-step instructions. Tips helped you achieve the perfect glaze and roasting method. You also learned about variations, storage, and common questions. Now, you have all the tools to enjoy this dish. Experiment with flavors and enjoy your cooking!](https://dishtreats.com/wp-content/uploads/2025/06/8ccc11bb-56ad-4722-8e0d-cbebb28a9ca5-768x768.webp)


![To make a delicious strawberry banana smoothie, you need fresh ingredients. Here’s what to gather: - 1 cup fresh strawberries, hulled - 1 ripe banana, sliced into rounds - 1 cup Greek yogurt (can be plain or flavored) - 1 cup almond milk (or any milk of your choice) - 1 tablespoon honey (optional, can be adjusted to taste) - 1 tablespoon chia seeds - 1 teaspoon pure vanilla extract - A handful of ice cubes These ingredients pack a punch of flavor and nutrients. The strawberries give a sweet and tangy taste. The banana adds creaminess and natural sweetness. Greek yogurt provides protein and a smooth texture. Almond milk keeps it light. You can customize your smoothie with optional add-ins. Here are a few ideas: - Spinach or kale for added greens - Protein powder for an extra boost - Nut butter for richness and healthy fats - Flax seeds for more fiber - Coconut flakes for tropical flavor Feel free to mix and match these to fit your taste. Each add-in changes the flavor and nutrition a bit. To make your smoothie, you don't need much. Here’s what I recommend: - A high-speed blender for a smooth mix - A measuring cup for accurate amounts - A knife for slicing the banana - A cutting board for easy prep This simple equipment makes the process quick and fun. You’ll enjoy making your strawberry banana smoothie with these tools! For the full recipe, check out the Berry Bliss Banana Smoothie section. First, rinse your strawberries under cold water. This removes any dirt. Next, hull the strawberries by taking off the green tops. This step makes them sweet and tasty. Slice your banana into small rounds. The smaller pieces make blending easier. They also help release more sweetness. Grab a high-speed blender. Add the hulled strawberries and banana slices. Next, include Greek yogurt and almond milk. If you want extra sweetness, add honey. Don't forget your chia seeds and vanilla extract. Measure everything well for the best taste. Now, toss in a handful of ice cubes. This will chill your smoothie and make it refreshing. Blend on high until smooth and creamy. If it’s too thick, add a little more almond milk. Taste your smoothie and adjust the honey if you like it sweeter. Pour it into your favorite glasses. For a great look, add a fresh strawberry slice on the rim. You can also sprinkle some chia seeds on top. Enjoy your drink with colorful straws for a fun touch! To get the best smoothie texture, start with ripe fruit. Ripe strawberries and bananas blend smoothly and taste sweeter. Use a high-speed blender to mix all ingredients well. If your smoothie is too thick, add more almond milk slowly. Keep blending until it’s creamy and smooth. This ensures no chunks remain, giving you that perfect sip. Many people make simple mistakes when making smoothies. One common error is not measuring ingredients. Accurate measurements give a balanced flavor. Another mistake is adding too much ice. Ice is great for chill, but too much can make it watery. Always blend your smoothie long enough to mix all ingredients well. If you skip this step, you might end up with a grainy texture. You can boost the flavor and nutrition of your smoothie easily. Add a spoonful of nut butter for richness and protein. A sprinkle of cinnamon can add warmth and depth. If you want more nutrients, try adding spinach or kale. These greens blend well and don’t change the taste much. For sweetness, adjust the honey to your liking. Following these tips can make your drink even more enjoyable while keeping it healthy. For the complete recipe, check the Full Recipe section. {{image_4}} You can switch up the fruits in your smoothie for fun. If you want, try mango or blueberries instead. These fruits add new flavors and colors. You can also mix in some spinach or kale. This adds nutrients without changing the taste much. Just remember to keep the same amount of fruit for balance. If you want a dairy-free smoothie, it's easy! Use coconut yogurt instead of Greek yogurt. Almond milk works great too, but you can choose oat or soy milk as well. These options keep your smoothie creamy while being kind to your tummy. Check the labels for any added sugars if you're watching your intake. Want to boost your smoothie’s health? Add a scoop of protein powder for energy. You can also toss in flax seeds or hemp seeds for omega-3s. For fiber, try adding oats. They blend well and keep you full longer. You can find these extras at local stores or online. Just remember, keep your total additions balanced to maintain that delicious taste from the [Full Recipe]. If you have leftover smoothie, pour it into a container. Seal it tightly. Refrigerate the smoothie. It stays fresh for up to 24 hours. Just remember, smoothies can separate. Give it a good shake before you drink it again. Freezing smoothies is easy and smart! Pour your smoothie into ice cube trays. Once frozen, pop the cubes into a freezer bag. They last for about three months. You can blend them later with a bit of milk for a quick treat. Use glass jars or BPA-free plastic containers for storage. They help keep the smoothie fresh. Choose containers with tight lids to prevent spills. Make sure they are easy to clean for hassle-free use. Yes, you can use frozen strawberries and bananas. They make the smoothie colder and creamier. Frozen fruit also lasts longer and is easy to keep on hand. Just remember to adjust the amount of almond milk if it gets too thick. To make a thicker smoothie, use less liquid. You can also add more yogurt or fruit. Frozen bananas work well for thickness. If you want a creamier texture, try adding avocado or a scoop of nut butter. This smoothie packs many health benefits. Strawberries are rich in vitamin C and antioxidants. Bananas provide potassium and fiber, which is good for digestion. Greek yogurt adds protein, making it filling. Chia seeds are great for omega-3s and help keep you full longer. Enjoy this smoothie as a tasty way to fuel your day! For the complete recipe, check out the Full Recipe section above. In this blog post, we explored how to make a great smoothie. We discussed fresh ingredients, optional add-ins, and the tools you need. I gave step-by-step instructions on preparing fruits, blending, and adding final touches. You learned tips to get the best texture and how to avoid common mistakes. I shared variations and storage tips for smoothies too. Smoothies are fun, easy, and healthy. With the right steps, you can create flavors you love!](https://dishtreats.com/wp-content/uploads/2025/06/52d7bf2d-2fe9-4d4d-9d05-04ba55bebe58-768x768.webp)

