Jalapeno Popper Wonton Cups Tasty Party Snack Idea

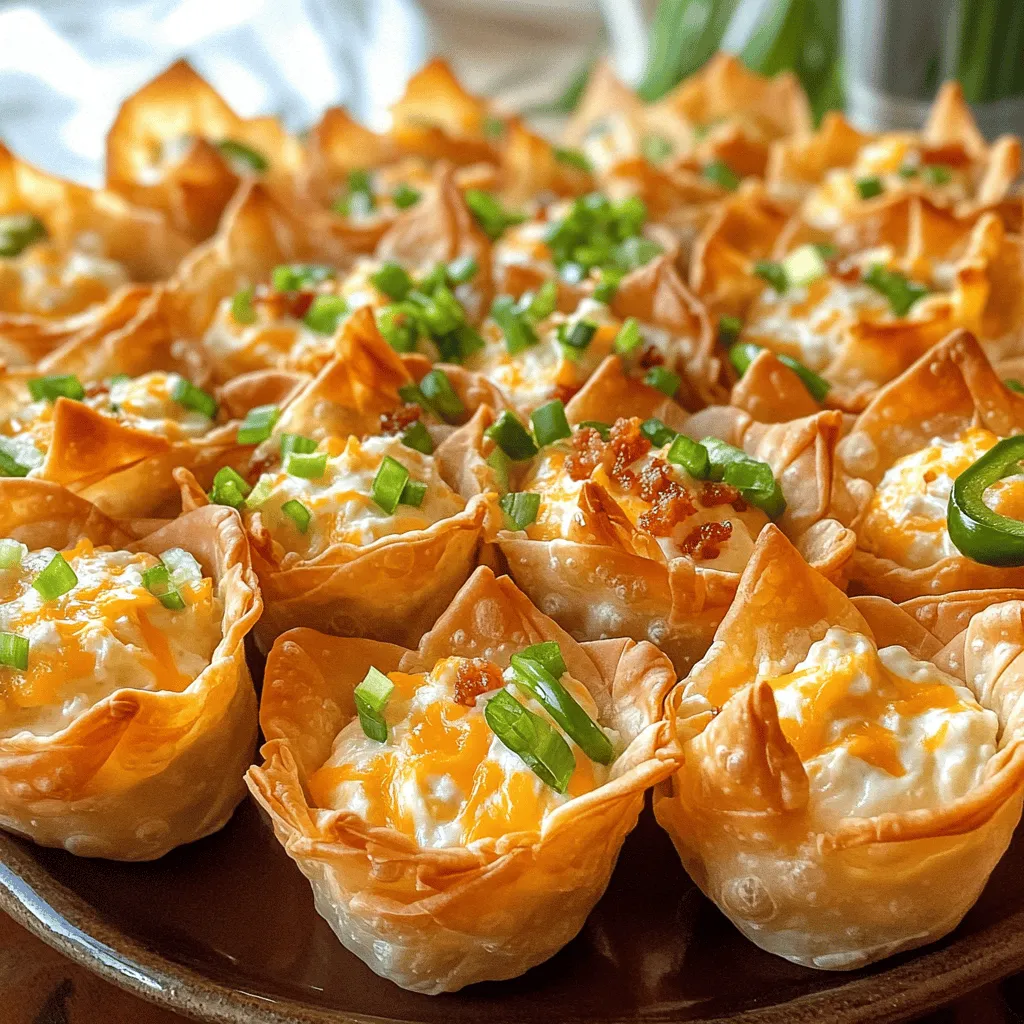
Looking for a crowd-pleasing snack for your next party? Jalapeno Popper Wonton Cups are delicious, easy to make, and sure to impress! I’ll guide you step-by-step through choosing the right ingredients, baking, and serving tips. Whether you’re a spice lover or seeking a new twist on appetizers, these wonton cups can be tailored to your taste. Let’s dive into making this tasty treat that everyone will love!
Ingredients
Required Ingredients for Jalapeno Popper Wonton Cups
To make these tasty snacks, gather these key ingredients:
- 1 package of wonton wrappers
- 1 cup cream cheese, softened
- 1/2 cup shredded sharp cheddar cheese
- 1/4 cup diced jalapeños
- 1/4 cup green onions, finely chopped
- 1/2 teaspoon garlic powder
- 1/2 teaspoon smoked paprika
- Salt and pepper, to taste
- Cooking spray or olive oil
Optional Ingredients for Variation
You can add fun twists to your wonton cups with these options:
- Crumbled bacon for a savory touch
- Extra cheese, like pepper jack for more spice
- Chopped tomatoes for freshness
- A sprinkle of cilantro for a bright flavor
Ingredient Substitutions
If you run out of something, here are some swaps:
- Use ricotta or goat cheese instead of cream cheese.
- Try mozzarella cheese in place of cheddar.
- Use roasted red peppers if you want a different taste.
- For a vegan option, choose plant-based cream cheese.Enjoy making these fun and delicious jalapeno popper wonton cups!
Step-by-Step Instructions
Prepping the Oven and Muffin Tin
Start by preheating your oven to 375°F (190°C). This step is key for crispy wonton cups. While the oven heats, grab a muffin tin. Lightly spray it with cooking spray or brush it with olive oil. This will help the cups release easily after baking.
Shaping and Baking the Wonton Cups
Take each wonton wrapper and carefully press it into the greased muffin cups. Make sure it molds well to the shape. For extra strength, you can layer two wrappers in each cup. This will help them stay sturdy. Bake the wonton cups in the oven for about 8-10 minutes. Watch for them to turn golden brown. Once done, take them out and let them cool slightly.
Making and Filling the Cream Cheese Mixture
In a mixing bowl, combine the softened cream cheese, shredded cheddar, diced jalapeños, and chopped green onions. Add garlic powder, smoked paprika, salt, and pepper. Mix everything well until it’s smooth and creamy. This mixture is what makes the cups so tasty!
Final Baking and Serving Tips
Spoon the creamy filling generously into each baked wonton cup. Make sure to fill them to the top. Put the filled cups back in the oven for another 10-15 minutes. You want the cheese to melt and bubble. If you like, add crumbled bacon on top during the last few minutes for extra crunch. Once they’re done, cool them for a few minutes before serving. Enjoy this tasty party snack!
Tips & Tricks
Common Mistakes to Avoid
Making Jalapeno Popper Wonton Cups is fun, but some common mistakes can happen. Here are a few to watch for:
- Overfilling: Don’t pack the filling too high. It can spill over during baking.
- Underbaking the Cups: Bake until they are golden brown. This ensures they are crispy and not soggy.
- Skipping the Grease: Always grease the muffin tin. This keeps the cups from sticking.
Best Practices for Crispiness
To get those perfect crispy cups, follow these tips:
- Layering Wrappers: Use two wonton wrappers per cup. This adds strength and helps them stay crisp.
- Preheat the Oven: Always preheat your oven. A hot oven makes a big difference in baking.
- Use Cooking Spray: Spray or brush oil on the wrappers. This helps them brown up nicely.
Serving Suggestions for Jalapeno Popper Wonton Cups
Once your cups are baked, it’s time to serve! Here are some fun ideas:
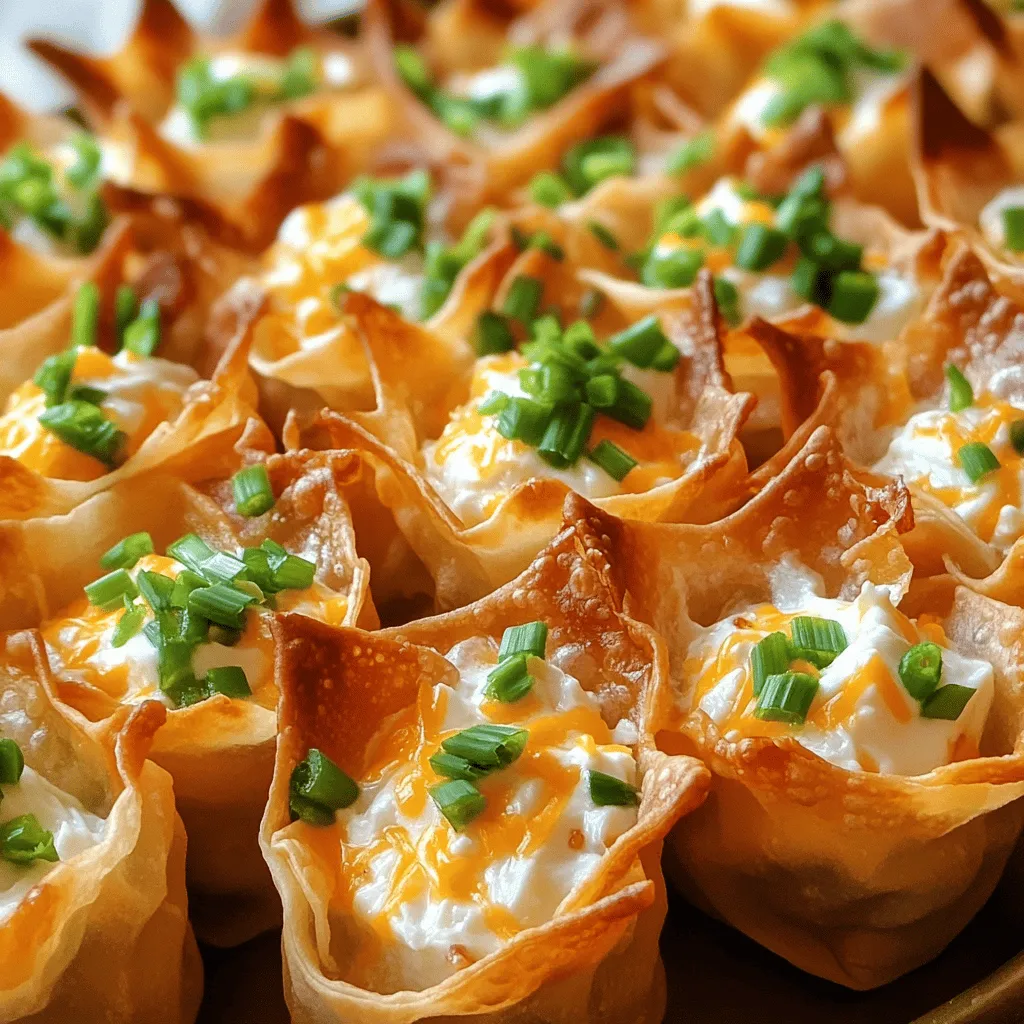
- Garnish with Green Onions: Add chopped green onions on top for a fresh touch.
- Serve with Dipping Sauce: Pair with ranch or sour cream for a cool contrast.
- Display on a Platter: Arrange the cups on a big platter for a festive look.

Variations
Vegetarian Options for Wonton Cups
You can easily make these wonton cups vegetarian. Just skip the bacon. This change still keeps all the creamy goodness. Use the same filling recipe, and it will taste just as great. You might also add black beans or corn for extra texture and flavor. These additions make the cups hearty and filling.
Different Cheese Combos
Cheese is key in these popper cups. While sharp cheddar is classic, feel free to mix it up. Try pepper jack for a spicy twist. Or go with mozzarella for a milder taste. Cream cheese blends well with many cheeses, so don’t hold back. You can even use a mix of cheeses. This makes each bite a new experience.
Flavor Additions for Extra Kick
Want to spice things up? Add more jalapeños or use spicy cheese. For a smoky flavor, try adding chipotle powder. You could also mix in some diced bell peppers for a crunch. If you love herbs, fresh cilantro or parsley can brighten up the filling. Experimenting with these ingredients can lead to fun new flavors.
Storage Info
How to Store Leftover Wonton Cups
To keep your leftover wonton cups fresh, place them in a container. Use an airtight container to avoid sogginess. You can stack them, but separate layers with parchment paper. Store them in the fridge for up to three days.
Reheating Instructions
When you want to enjoy your leftover wonton cups, preheat your oven to 350°F (175°C). Place the cups on a baking sheet. Heat them for about 10 minutes, or until they are warm and crispy again. Avoid using the microwave, as it makes them soggy.
Freezing and Thawing Tips
You can freeze the unbaked wonton cups for later use. Just shape them and place them in a freezer-safe container. They can stay frozen for up to three months. To bake, thaw them in the fridge overnight.Enjoy your tasty party snack anytime!
FAQs
Can I make Jalapeno Popper Wonton Cups ahead of time?
Yes, you can prepare the filling ahead. Store it in the fridge for up to two days. Assemble the wonton cups just before baking. This keeps them crispy and fresh. If you bake them early, they may get soggy.
Are there gluten-free options for wonton wrappers?
Yes, you can find gluten-free wonton wrappers at many stores. Look for brands made with rice flour. This way, you can enjoy the same tasty flavors without gluten. Just remember to check the package for any allergens.
What dips pair well with Jalapeno Popper Wonton Cups?
These wonton cups are great alone, but some dips add more flavor. Sour cream or ranch dressing works well. You can also serve them with a spicy salsa or guacamole for a fun twist. Each dip complements the spicy and creamy filling nicely.
How to adjust the spice level for different preferences?
To lower the spice, use fewer jalapeños. You can also substitute with mild peppers. If you want more heat, add diced serrano or habanero peppers. Another option is to add hot sauce to the cream cheese mixture. Adjust to suit your taste!
In this article, I covered how to make Jalapeno Popper Wonton Cups. You learned about the key ingredients and some great variations. I shared step-by-step instructions to guide you through the cooking process. You also picked up tips for serving and storage.
These wonton cups are fun to make and taste amazing. Experiment with flavors and enjoy the process! Whether for a party or a snack, you can’t go wrong with this tasty treat. Happy cooking!


![To create the Roasted Beet and Goat Cheese Salad, you will need the following ingredients: - 4 medium beets, scrubbed and trimmed - 2 tablespoons extra virgin olive oil, divided - Sea salt and freshly ground black pepper to taste - 4 cups mixed greens (arugula, spinach, and kale) - 1/2 cup creamy goat cheese, crumbled - 1/4 cup walnuts, toasted and roughly chopped - 1/4 cup dried cranberries - 2 tablespoons balsamic vinegar - 1 tablespoon pure honey - Fresh herbs (basil or parsley) for garnish Each ingredient adds not just flavor, but also nutrition. Beets are rich in vitamins and minerals. They help boost your energy levels. Goat cheese brings a creamy texture and a tangy taste. It pairs well with the sweetness of beets and cranberries. Walnuts add crunch and healthy fats, while mixed greens provide fiber. The dressing of balsamic vinegar and honey ties all the flavors together. You can find the Full Recipe for step-by-step instructions to make this delightful salad. 1. Preheat the oven: Set your oven to 400°F (200°C). This makes sure the beets roast well. 2. Wrap the beets: Take each beet and wrap it in foil. Drizzle 1 tablespoon of olive oil on them. Add sea salt and black pepper for flavor. Seal the foil tightly. 3. Roast the beets: Place the wrapped beets on a baking sheet. Roast them in the oven for 45-60 minutes. They are done when a fork easily pierces them. 1. Peel and slice the beets: Let the beets cool a bit. Then, peel off the skin. I recommend wearing gloves to avoid stains. Cut the beets into wedges for a nice look. 2. Combine salad ingredients: In a large mixing bowl, add the mixed greens, sliced roasted beets, crumbled goat cheese, toasted walnuts, and dried cranberries. Gently mix everything together. 1. Prepare the dressing: In a small bowl, whisk together the balsamic vinegar, the last tablespoon of olive oil, and honey. Stir well until combined. Taste it and add salt and pepper as needed. 2. Dress the salad: Drizzle the dressing over the salad. Toss everything gently to coat the greens and other ingredients. 3. Serve the salad: Plate the salad right away. Garnish with fresh herbs for a pop of color and extra flavor. For the full recipe, check out the Beet the Ordinary: Roasted Beet and Goat Cheese Salad. - Choosing the right beet size for even cooking: I recommend using medium beets. They cook evenly and are easy to handle. If you use larger beets, they may take longer to roast, leading to uneven texture. Smaller beets cook too quickly and may dry out. - How to properly season the beets: Before wrapping the beets in foil, drizzle them with olive oil. Add a generous pinch of sea salt and freshly ground black pepper. This simple seasoning enhances their natural sweetness and flavor during roasting. - Creative ways to plate the salad: For a stunning presentation, use a large, flat platter. Layer mixed greens as a base. Fan out the roasted beet wedges on top and sprinkle crumbled goat cheese and walnuts over the salad. This method creates a colorful and inviting look. - Garnishing tips to elevate the dish: Fresh herbs can add color and flavor. A sprinkle of chopped basil or parsley brightens the dish. You can also use edible flowers for a special touch, making it perfect for gatherings or celebrations. - Best practices for prepping ingredients in advance: You can roast the beets a day ahead. Once cooled, wrap them in plastic to keep fresh. Store the mixed greens and other ingredients separately. This way, you can quickly assemble your salad just before serving, keeping everything crisp and tasty. For the complete recipe, see [Full Recipe]. {{image_4}} You can switch up the greens in your salad to make it special. Try using arugula for a peppery kick or romaine for a crisp bite. Each green offers a different taste and texture, giving your salad a new vibe. If you want to change the cheese, feta or blue cheese can work wonders. Feta adds a salty flavor, while blue cheese brings a bold touch. Both complement the sweetness of the beets nicely. The right dressing can elevate your salad. A citrus vinaigrette adds a bright and zesty flavor. Mix fresh lemon juice with olive oil for a quick option. If you want something creamy, a yogurt dressing is perfect. It pairs well with the tang of goat cheese and makes the salad feel lush. Don’t hesitate to experiment with different dressings to find your favorite. Add protein to make your salad more filling. Grilled chicken is a great choice, giving the salad a hearty feel. For a plant-based option, chickpeas work well. They add protein and texture. You can also sprinkle seeds, like pumpkin or sunflower seeds, for some crunch. Fresh fruit, such as sliced pears or apples, can add a sweet note. Each add-in brings its own charm to the dish, making it unique every time. Don’t forget to check out the Full Recipe for more inspiration! To keep your roasted beet and goat cheese salad fresh, store it in an airtight container. Place any leftovers in the fridge. The salad will stay good for about three days. Make sure to keep the dressing separate until you are ready to eat. This helps keep the greens crisp and fresh. If you want to store beets for longer, you can freeze them. First, roast the beets as in the Full Recipe. Let them cool, then peel and slice them. Place the slices in a freezer-safe bag, removing as much air as possible. Beets can last up to six months in the freezer. However, I do not recommend freezing the prepared salad. The greens won't hold up well after thawing. When it's time to eat your stored salad, you can reheat the beets if you like. Just warm them in the microwave for about 30 seconds. Toss the salad again after reheating. This helps mix the flavors back together. If you stored the salad dressed, consider adding a bit more dressing before serving. This keeps everything tasty and vibrant. How long do roasted beets last in the fridge? Roasted beets can last up to five days in your fridge. Store them in an airtight container. This way, they stay fresh and tasty for your salads. Can I use pre-cooked beets for this recipe? Yes, you can use pre-cooked beets. They are a great time-saver. Just cut them into wedges and add them to your salad. They will still taste delicious! What type of goat cheese is best for salads? A creamy goat cheese works best for this salad. It adds a nice richness and tang. Look for soft, crumbled varieties for easy mixing. Can I substitute goat cheese with a dairy-free option? Absolutely! You can use a dairy-free cheese made from nuts. Look for a creamy cashew cheese or tofu-based option. Both will provide a nice flavor. What are the health benefits of beet and goat cheese salad? This salad is packed with nutrients. Beets are high in fiber and antioxidants. Goat cheese adds protein and calcium. Together, they support heart health and digestion. How many calories are in a serving of this salad? One serving of this salad has about 300 calories. This includes the beets, goat cheese, nuts, and dressing. It’s a great balance of flavors and nutrients without too many calories. For the complete recipe, check out the Full Recipe. This salad combines roasted beets, fresh greens, and tangy goat cheese. You learned how to roast beets and mix vibrant ingredients for a delicious dish. Remember to choose the right beet size and season well for great texture. Don't hesitate to try different greens or dressings to make it your own. Salad prep can be easy, helping you save time. Enjoy this healthy meal that packs flavor and nutrients. Make it today and impress yourself with your cooking skills!](https://dishtreats.com/wp-content/uploads/2025/06/a3a0567a-1f00-4857-8ef4-d1e9b38b024f-768x768.webp)
![Creating a Grilled Peach Caprese Salad is simple and fun. Here’s what you need: - Ripe peaches - Fresh mozzarella - Mixed greens - Cherry tomatoes - Fresh basil leaves - Balsamic glaze - Extra virgin olive oil - Salt and black pepper Each ingredient plays a key role in this dish. Ripe peaches bring sweetness. Fresh mozzarella adds creaminess. Mixed greens provide a nice crunch. Cherry tomatoes add color and flavor. Fresh basil contributes a fragrant touch. The balsamic glaze adds a tangy finish. Extra virgin olive oil enhances the taste. Lastly, salt and pepper bring everything together. For the full recipe, check out the steps to make this tasty salad. Trust me, your taste buds will thank you! - Preheat the grill to medium-high heat. This helps create great grill marks. - Ensure your grill grates are clean and lightly oiled. This prevents sticking. - Start by cutting the peaches in half and removing the pit. - Brush the cut sides of the peach halves with olive oil. This adds flavor and helps them grill well. - Place the peach halves cut side down on the grill. Grill for about 3-4 minutes. You want those nice grill marks. - Once they soften slightly, remove them. Let them cool for a couple of minutes. - Grab a large serving platter. Create a bed of mixed greens in the center. - Place the grilled peach halves on top of the greens. Spread them out for a nice look. - Next, add slices of fresh mozzarella around the peaches. Then scatter halved cherry tomatoes. - Tear fresh basil leaves and sprinkle them over the salad. This adds a lovely aroma. - Finally, drizzle balsamic glaze over the salad. Add salt and black pepper to taste. - For the best flavor, serve the salad right away. You can chill it a bit if you prefer. For the complete recipe, check out the [Full Recipe]. To get perfect grill marks on your peaches, heat your grill to medium-high. Brush the cut sides of each peach half with olive oil. This helps prevent sticking and adds flavor. Look for ripe peaches that yield slightly when pressed. They should be fragrant and have a bright color. Presentation matters! Try arranging your salad in a spiral pattern. You can also layer the ingredients in single servings. This makes each plate look special. Pair your salad with a crisp white wine or a light red. Both will enhance the flavors of the dish. Want to mix things up? Try using different dressings like a lemon vinaigrette or honey mustard. Fresh herbs like mint or dill can add a twist. You could also sprinkle some chili flakes for a little heat. These simple changes will keep your salad exciting. For the full recipe, check here: [Full Recipe]. {{image_4}} You can change up your Grilled Peach Caprese Salad by swapping fruits. Try using ripe nectarines or plums instead of peaches. These fruits provide a sweet touch and work well on the grill. You can also use strawberries or even grilled pineapple for a fun twist. For cheese, fresh mozzarella is the classic choice. However, you can try burrata for a creamier texture. Feta cheese adds a salty punch, while goat cheese gives a tangy flavor. Each cheese brings its own flair to the dish. To make this salad vegan, skip the cheese and use a plant-based alternative. Cashew cheese or tofu can work well. Drizzle a vegan balsamic glaze for that sweet touch. If you need a gluten-free option, this salad is naturally gluten-free. Just make sure your balsamic glaze is gluten-free as well. Enjoy fresh ingredients without any worries. For the best flavor, pick peaches in late summer. They are sweet and juicy in this season. In spring, try using asparagus or snap peas for a fresh crunch. In winter, roasted root vegetables like beets can replace fresh greens. Add some nuts for extra texture and flavor. Adapt your salad to fit the season and enjoy a fresh taste year-round. For the complete recipe of Grilled Peach Caprese Salad, check the Full Recipe. To keep your Grilled Peach Caprese Salad fresh, store it properly. First, separate the components. This way, the flavors stay bright and fresh. - Peaches: Place grilled peaches in a sealed container. Store them in the fridge for up to three days. - Salad Greens: Keep mixed greens in a dry, airtight container. This keeps them crisp and fresh. - Cheese and Tomatoes: Store mozzarella and cherry tomatoes in separate containers. This helps prevent sogginess. - Balsamic Glaze: Keep the glaze in a small jar. It can last for weeks in the fridge. You might wonder if you should reheat grilled peaches. I recommend enjoying them cold. Their flavor shines best this way. But if you prefer warm peaches, here’s how to heat them: - Microwave: Place peaches on a microwave-safe plate. Heat for about 10-20 seconds. Check them often to avoid overheating. - Stovetop: Heat a non-stick pan over low heat. Add a dash of olive oil and warm the peaches for a minute. For other salad ingredients, like mozzarella and tomatoes, it’s best to enjoy them cold too. Mixing warm and cold can lead to a fun flavor contrast in your dish. To make this dish, follow these simple steps: 1. Preheat your grill to medium-high heat. 2. Brush cut sides of halved peaches with olive oil. 3. Grill peach halves cut side down for 3-4 minutes. 4. On a platter, spread mixed greens for a base. 5. Place grilled peaches on top of the greens. 6. Add mozzarella slices and halved cherry tomatoes around the peaches. 7. Scatter torn basil leaves over the salad. 8. Drizzle balsamic glaze on top, then season with salt and pepper. 9. Serve right away or chill slightly before serving. Fresh mozzarella is the classic choice for Caprese salad. Its creamy texture balances the sweetness of grilled peaches. You can also try burrata for extra creaminess. Feta adds a tangy twist, while goat cheese can give a bold flavor. Choose based on your taste preferences to enhance your salad. You can prep parts of the salad ahead of time. Grill the peaches and store them in the fridge. Wash and dry the greens and tomatoes, keeping them fresh. Assemble everything just before serving to maintain flavor and texture. This way, your salad stays fresh and tasty. Check the [Full Recipe] for more details. This blog shared how to make a Grilled Peach Caprese Salad. You learned about choosing ripe peaches, grilling them, and assembling the salad. Tips on serving and variations helped you create your own version. Remember to store leftovers properly to keep them fresh. With these insights, you can enjoy a delicious, refreshing salad anytime. Trust that your skills will shine. Enjoy experimenting with flavors and ingredients to make it uniquely yours. Your summer gatherings will never be the same!](https://dishtreats.com/wp-content/uploads/2025/06/c765deb6-47e2-46b1-bbfc-9b058c8c2a51-768x768.webp)


