Instant Pot Creamy Chicken Parmesan Pasta Delight

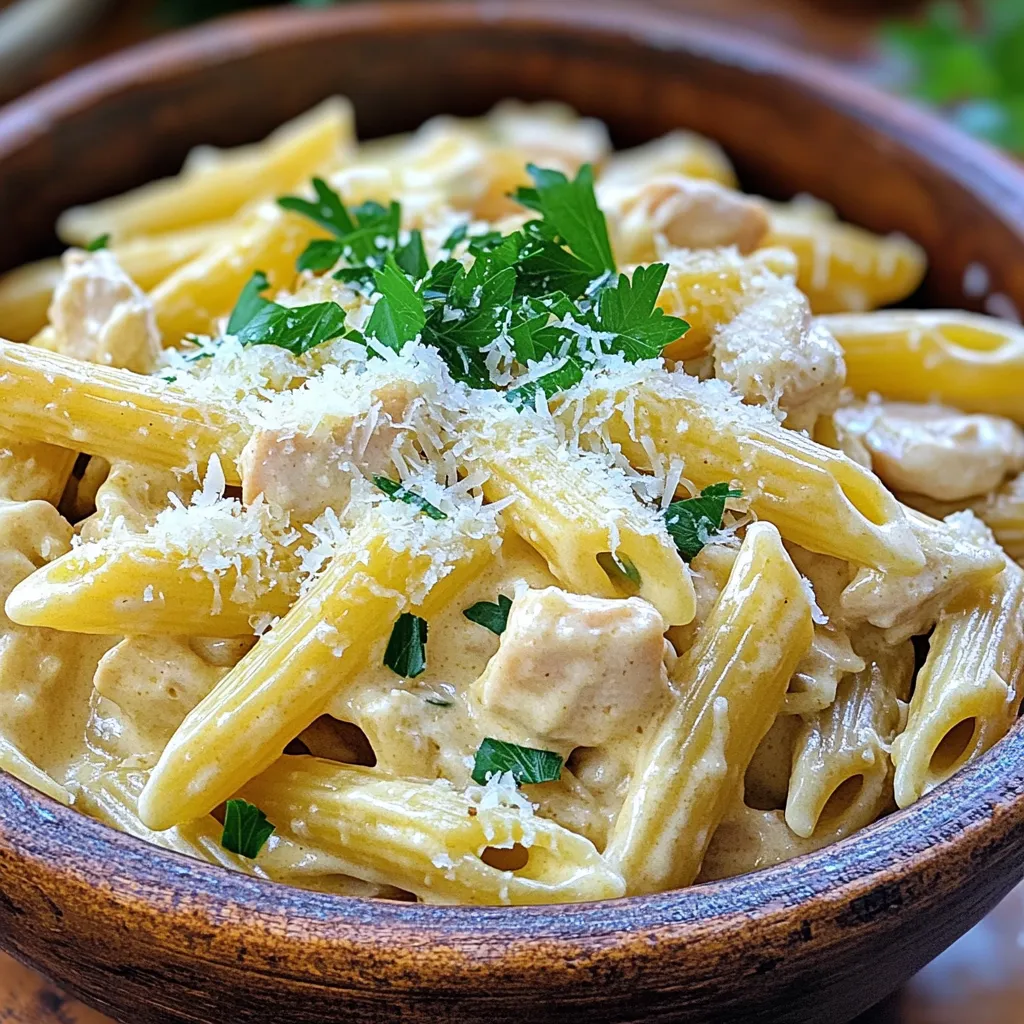
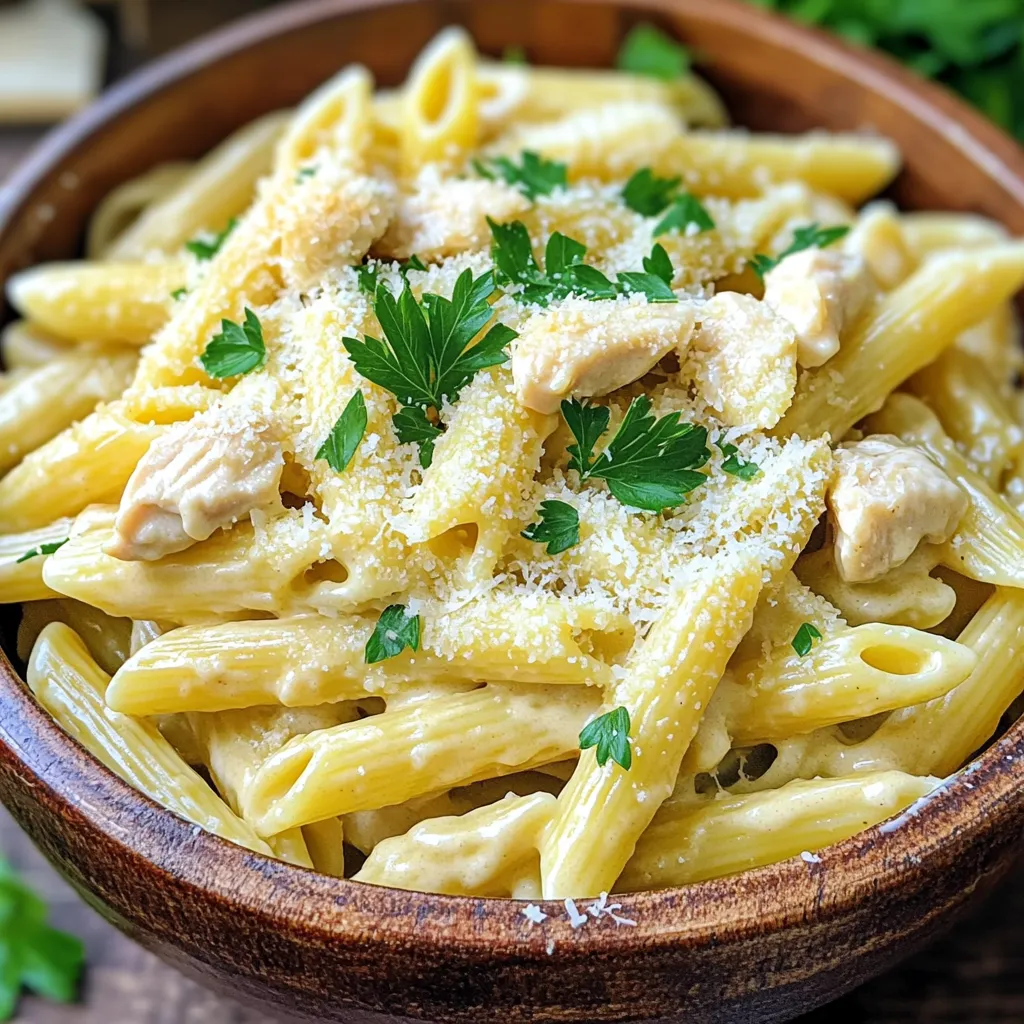
Looking for a quick, tasty meal that feels special? My Instant Pot Creamy Chicken Parmesan Pasta Delight is the answer! With just a few ingredients and simple steps, you can whip up a creamy, cheesy dish in no time. I’ll guide you through each stage, from sautéing the chicken to stirring in that rich cream. Ready to impress your taste buds and your family? Let’s get cooking!
Ingredients
List of Necessary Ingredients
- 2 tablespoons olive oil
- 1 pound boneless, skinless chicken breasts, cut into bite-sized pieces
- 1 teaspoon garlic powder
- 1 teaspoon onion powder
- Salt and freshly cracked pepper, to taste
- 2 cups low-sodium chicken broth
- 12 ounces penne pasta (or your favorite pasta shape)
- 1 cup heavy cream
- 1 cup freshly grated Parmesan cheese
- 1 teaspoon dried Italian herbs (such as basil, oregano, or a blend)
- 2 tablespoons fresh parsley, finely chopped (for garnish)
Gathering these ingredients is the first step. Each one plays an important role in the flavor and texture of the dish. The olive oil helps to sauté the chicken, adding richness. The chicken breasts are the star protein, providing a hearty base.
I use garlic powder and onion powder for quick flavor without chopping. Salt and pepper enhance all the other flavors. The chicken broth adds moisture, making the pasta creamy.
Penne pasta holds the sauce well, but feel free to swap it for your favorite shape. Heavy cream is key for that luscious texture. Freshly grated Parmesan brings a sharp taste, while Italian herbs add warmth. Lastly, fresh parsley brightens each bowl with color and freshness.
With all these ingredients ready, you can create a delightful meal with ease.
Step-by-Step Instructions
Initial Preparation
1. Sauté Chicken: Start by turning on your Instant Pot. Select the Sauté function. Pour in 2 tablespoons of olive oil. Let it heat for a moment. Add 1 pound of diced chicken pieces. Season with 1 teaspoon of garlic powder, 1 teaspoon of onion powder, salt, and freshly cracked pepper. Sauté the chicken for about 5-7 minutes. Stir occasionally until it turns lightly browned and is mostly cooked.
2. Seasoning Tips for Maximum Flavor: Use fresh cracked pepper for the best taste. You can also add a pinch of Italian herbs at this stage. This will deepen flavors and make your dish pop.
Cooking the Pasta and Chicken
1. Adding Chicken Broth and Pasta: Carefully pour in 2 cups of low-sodium chicken broth. Make sure to scrape up any browned bits from the bottom of the pot. This adds flavor. Next, add 12 ounces of penne pasta on top. Ensure the pasta is fully submerged in the broth.
2. Setting the Instant Pot Correctly: Close the lid tightly. Set the steam valve to the sealing position. Select the Manual or Pressure Cook function. Adjust the timer to 4 minutes.
Final Touches
1. Stirring in Cream and Cheese: Once the cooking cycle ends, perform a quick release by turning the valve to vent. Be careful of the hot steam. After the pressure releases, unlock the lid. Stir in 1 cup of heavy cream and 1 cup of freshly grated Parmesan cheese. Mix well until the cheese melts and the sauce becomes creamy.
2. How to Adjust Seasoning Before Serving: Taste the dish and adjust the seasoning as needed. Add more salt or pepper if you want to boost the flavors. This is your chance to make it just right before serving.
Tips & Tricks
Cooking Tips
To get the best flavor from your chicken, start by sautéing it well. Heat the olive oil in the Instant Pot until it shimmers. Add your chicken pieces and season with garlic powder, onion powder, salt, and pepper. Cook for about 5-7 minutes. Stir occasionally until the chicken is lightly browned. This step adds a lot of flavor to your dish.
Scraping the bottom of the pot is key too. When you add the chicken broth, use a wooden spoon to scrape the browned bits off the bottom. These bits are packed with flavor. This simple act boosts the taste of your creamy chicken Parmesan pasta.
Seasoning Suggestions
Adjust the seasonings to match your taste. If you love garlic, add more garlic powder. If you prefer a spicier dish, sprinkle in some red pepper flakes. You can also swap out the dried Italian herbs for fresh ones if you have them. Fresh herbs can bring a vibrant taste to your meal.
Some alternative seasonings to try include smoked paprika for a smoky flavor or lemon zest for a fresh kick. Be creative and make the dish your own!

Variations
Pasta Shape Alternatives
You can swap out penne for many other pasta shapes. Try using fusilli, farfalle, or even spaghetti. Each shape holds sauce differently, which can change the dish’s feel. Fusilli twists catch more sauce, while farfalle adds a fun look. Spaghetti offers a classic touch. Just remember that cooking time may vary slightly based on the pasta you choose.
Healthier Options
To make this dish healthier, consider using low-fat cream or cheese. You will still get a creamy texture, but with fewer calories. Also, you can add veggies like spinach, bell peppers, or zucchini. These not only boost nutrition but also add color and flavor. Just chop them up and toss them in with the chicken. This keeps the meal balanced and tasty.
Storage Info
Refrigeration Guidelines
To store leftovers, let the pasta cool first. Place it in an airtight container. Make sure to seal it well to keep air out. It can stay fresh in the fridge for up to three days. If you want to keep it longer, consider freezing it. Use a freezer-safe container and keep it for up to three months. Label the container with the date for easy tracking.
Reheating Instructions
When you’re ready to enjoy the leftovers, reheat the pasta gently. The best way is to use the stovetop. Add a splash of chicken broth or milk to the pan. This will help bring back creaminess. Stir often over low heat until warm. You can also use the microwave. Place the pasta in a microwave-safe bowl and cover it with a lid. Heat it in short bursts, stirring in between, until hot. Avoid overheating, as it can dry out the dish. Enjoy your creamy chicken Parmesan pasta just as delicious as the first time!
FAQs
How long does it take to cook pasta in the Instant Pot?
Cooking pasta in the Instant Pot takes about 4 minutes under pressure. This time is fast, and it helps the pasta absorb flavors from the dish.
Can I use frozen chicken for this recipe?
Yes, you can use frozen chicken. Just make sure to adjust the cooking time. Cook it for about 10-12 minutes instead of 4 minutes. Always ensure the chicken is fully cooked before serving.
What can I serve with creamy chicken Parmesan pasta?
You can serve this dish with a side salad or garlic bread. Both add freshness and texture. A light dessert, like fruit, can complement the meal well.
Is it possible to make this dish dairy-free?
Yes, you can make it dairy-free. Use coconut cream instead of heavy cream and nutritional yeast in place of Parmesan cheese. These swaps still give a creamy texture and nice flavor.
This recipe for creamy chicken Parmesan pasta is a winner. You need simple ingredients and an Instant Pot. Start by sautéing the chicken, adding broth, and cooking the pasta all in one pot. Don’t forget the cream and cheese for that rich flavor.
Remember to save some for later and reheat it right. Whether you prefer healthier options or different pasta shapes, this dish can adapt to your taste. Enjoy making it and sharing with friends!


![- 1 cup all-purpose flour - 1 cup whole wheat flour - 1 tablespoon baking powder - 1/2 teaspoon baking soda - 1/4 teaspoon salt I love using both all-purpose and whole wheat flour. The all-purpose flour gives the muffins a light texture. The whole wheat adds a nutty flavor and a bit of extra fiber. Mixing these flours helps balance taste and nutrition. - 1 cup plain Greek yogurt - 1/2 cup granulated sugar - 1/4 cup honey - 2 large eggs - 1 teaspoon vanilla extract - Zest of 1 lemon - Juice of 1 lemon Greek yogurt is key for moisture. It makes the muffins rich and creamy. The combination of sugar and honey gives a nice sweetness. The eggs help bind everything together. Lemon juice and zest brighten the flavor, making each bite fresh and zesty. - 1 cup fresh or frozen blueberries - 2 tablespoons melted coconut oil or butter Blueberries are the star of this recipe. They burst with flavor and add a great texture. You can use fresh or frozen. If you use frozen, they still work well! The melted coconut oil or butter adds richness, but you can skip it if you prefer a lighter muffin. You can find the full recipe for these delightful muffins online. Happy baking! First, preheat your oven to 375°F (190°C). This step is key for even baking. Next, prepare your muffin tin by lining it with paper liners or greasing the cups. This helps with easy muffin removal later. Now, let’s mix the dry ingredients. In a large bowl, combine: - 1 cup all-purpose flour - 1 cup whole wheat flour - 1 tablespoon baking powder - 1/2 teaspoon baking soda - 1/4 teaspoon salt Whisk these dry ingredients well. Make sure there are no lumps. In another bowl, add the wet ingredients. You will need: - 1 cup plain Greek yogurt - 1/2 cup granulated sugar - 1/4 cup honey - 2 large eggs - 1 teaspoon vanilla extract - Zest of 1 lemon - Juice of 1 lemon Whisk these until smooth. This helps blend all the flavors together. Now, it’s time to combine the two mixtures. Gently fold the wet ingredients into the dry ones using a spatula. Stir slowly. This helps keep your muffins light and fluffy. Don’t overmix! Overmixing makes the muffins dense. Once you see a few floury spots, stop mixing. Next, it’s time for the blueberries. Add: - 1 cup fresh or frozen blueberries - 2 tablespoons melted coconut oil or butter Fold these in gently. You want to keep the blueberries whole for bursts of flavor. Now, scoop the batter into your prepared muffin cups. Fill each cup about two-thirds full. This allows space for the muffins to rise. Place the muffin tin in your preheated oven. Bake for 18-20 minutes. To check for doneness, insert a toothpick into the center of a muffin. If it comes out clean, they are ready! After baking, let the muffins cool in the tin for about 5 minutes. This helps them set. Then, move them to a wire rack to cool completely. These steps will lead you to a batch of delicious Blueberry Lemon Yogurt Muffins. For the complete recipe, see [Full Recipe]. To get the best muffins, do not overmix the batter. Mixing too much can make the muffins tough. When you mix, just combine until you see no dry flour. This way, your muffins stay light and fluffy. When folding in the blueberries, do it gently. If you stir too hard, the berries will burst and color the batter. Just use a spatula and fold them in lightly. This keeps the berries whole and gives you lovely pops of flavor in each bite. You can add even more flavor to your muffins. Consider adding lemon zest for a bright taste. You might like to include nuts, like walnuts or pecans, for crunch. When it comes to blueberries, fresh berries taste great, but frozen ones work too. If you use frozen berries, do not thaw them first. This helps keep your batter cold, giving you a better rise. Using the right tools helps a lot. A non-stick muffin tin is your best bet. You can also use paper liners for easy cleanup. For mixing, a large bowl works well. I suggest a sturdy spatula for folding the batter. This combo makes mixing fun and easy. With the right tools, your baking will be smooth and enjoyable. For the full recipe, check out the details above. {{image_4}} You can make these muffins gluten-free. Simply replace the all-purpose flour with a gluten-free flour blend. Many blends work well, so pick one you like. Just ensure it has a good balance of starches and protein to mimic regular flour. This way, you can enjoy the same tasty muffins without the gluten. Want to mix it up? Try adding chocolate chips or walnuts for a delightful twist. They add a nice crunch and richness. You can also use other fruits like raspberries or cranberries. They pair well with the lemon and blueberry flavors. Each fruit adds its own unique taste, making each batch special. You can switch up the yogurt too. Use flavored yogurts like vanilla or lemon for extra taste. If you prefer dairy-free options, there are many great alternatives available. Look for coconut or almond-based yogurts. They keep the muffins moist and tasty, making it fun to experiment with flavors. For the full recipe, check out the details above. To keep your blueberry lemon yogurt muffins fresh, store them in an airtight container. This will keep them moist and tasty. You can keep them at room temperature for up to three days. If you want them to last longer, put them in the fridge. They can stay fresh for about a week in the refrigerator. Freezing muffins is a great way to keep them longer. To freeze, let the muffins cool completely. Then, wrap each muffin in plastic wrap. Place them in a freezer bag or container. This method helps prevent freezer burn. You can enjoy them for up to three months. When you're ready to eat a frozen muffin, take it out and let it sit at room temperature for about 30 minutes. For a warm treat, heat it in the microwave for 15-20 seconds. This will make it soft and delicious again. Blueberry lemon yogurt muffins are perfect for any time of day. I love having them for breakfast or as a snack. They also make a great dessert. To make it even better, try pairing these muffins with yogurt or a drizzle of honey. This adds a nice touch and enhances the flavor. Enjoy your muffins fresh from the oven or at room temperature! If you want to explore more recipes, check out the Full Recipe for even more delicious ideas. Blueberry lemon yogurt muffins stay fresh for about 2 to 3 days at room temperature. Keep them in an airtight container to maintain their moisture. If you store them in the fridge, they can last for up to a week. Just make sure to seal them well to prevent them from drying out. Yes, you can easily swap ingredients. If you want less sugar, use less granulated sugar or honey. For flour, you can mix all-purpose flour with whole wheat flour or use a gluten-free blend. You can also use flavored yogurt instead of plain yogurt for a fun taste twist. If your muffins turn out dense, check your mixing technique. Overmixing can cause this issue. Make sure to mix just until combined. You can also try adding a bit more baking powder or soda to lighten the texture. Lastly, ensure your ingredients are fresh, especially baking powder. To make these muffins healthier, reduce the sugar by a third. You can also replace some all-purpose flour with whole wheat flour to add fiber. Adding oats or ground flaxseed can boost nutrition without changing the flavor much. Enjoy these muffins while keeping health in mind! For the full recipe, refer to the earlier section. This blog post covered how to make delicious Blueberry Lemon Yogurt Muffins. We explored ingredients, step-by-step instructions, and tips for perfect texture. Variations like gluten-free options and different mix-ins add fun twists. Proper storage helps keep your muffins fresh. These muffins are a tasty way to enjoy healthy snacks or breakfast. Remember, baking is about having fun and experimenting. Enjoy every bite!](https://dishtreats.com/wp-content/uploads/2025/06/d36ee35c-287f-4b25-b661-333d5a68e192-768x768.webp)


. To make your soup even tastier, think about adding spices. A pinch of smoked paprika gives a nice depth. You can also try a dash of red pepper flakes for some heat. Fresh herbs like thyme or dill can brighten the flavors. To get the best creaminess, use full-fat coconut milk. It adds a rich texture. If you prefer cashew cream, blend soaked cashews with water until smooth. This makes a wonderful base too. If you want a thicker soup, let it simmer longer. This lets more water evaporate. You can also blend in some cooked potatoes for extra creaminess. To make it more nutritious, add veggies like carrots or spinach. Just chop them small and add them early in the cooking process. They will soften and blend well with the soup. You can also stir in cooked lentils for added protein and texture. {{image_4}} You can change the type of tomatoes you use. Fresh tomatoes add brightness. Canned tomatoes provide convenience and consistent flavor. Both work well in this soup. Choose what suits your taste and time best. For cream alternatives, coconut milk is my favorite. It gives a smooth and rich flavor. You can also use cashew cream or almond milk for a lighter option. Each choice offers a unique taste. Want to add protein? Beans or lentils are great options. They boost nutrition and make the soup heartier. Try adding white beans for a creamy texture or lentils for a bit of bite. You can mix and match until you find your favorite blend. Pair this soup with a side salad or sandwich. A fresh green salad balances the rich soup. A grilled cheese sandwich adds comfort and crunch. Both choices enhance your meal experience. For a fun twist, serve the soup in bread bowls. You can hollow out a crusty loaf and fill it. This adds a delicious element to your meal. Top the soup with fresh basil or a drizzle of olive oil for extra flair. These simple touches make the dish special. I encourage you to explore these ideas to create your own version of Vegan Creamy Tomato Soup. Check out the Full Recipe for all the details to get started! To keep your Vegan Creamy Tomato Soup fresh, store it in airtight containers. This helps prevent spoilage. Make sure the soup cools down before sealing the container. You can keep it in the fridge for up to five days. If you want to save it longer, consider freezing it. Pour the cooled soup into freezer-safe bags or containers. Leave some space at the top, as the soup will expand when frozen. This soup can last for up to three months in the freezer. When you want to enjoy your soup again, reheating it properly is key. The best method is to use the stovetop. Pour the soup into a pot and heat it over low to medium heat. Stir it often to keep it from sticking. This way, you keep the flavor and creaminess intact. If you prefer to use a microwave, pour the soup into a microwave-safe bowl. Heat it in short bursts, stirring in between, to ensure even warming. Be careful not to overheat, as this can change the texture. How to make Vegan Creamy Tomato Soup spicier? You can add red pepper flakes or a pinch of cayenne. Start with a small amount. Taste the soup after mixing. This way, you can control the heat. Another option is to add diced jalapeños. These will give your soup a nice kick! Can I substitute coconut milk with another plant-based milk? Yes, you can use almond milk, soy milk, or oat milk. Just ensure it is unsweetened. Coconut milk adds creaminess, but other milks work too. Each will change the flavor slightly, but they will still taste great. How long does the soup last in the fridge? The soup lasts about 3 to 5 days in the fridge. Store it in an airtight container. Always check for any changes in smell or color before eating. What is the best method to puree the soup? An immersion blender works best for pureeing. It keeps the soup in the pot, and it’s easy to use. If you don’t have one, use a regular blender. Just blend in small batches to avoid spills. Can I use fresh tomatoes instead of canned for this recipe? Yes, fresh tomatoes can be used! You will need about 2 pounds of ripe tomatoes. Blanch them first to remove the skins. This adds a fresh flavor to your soup. What garnishes pair well with Vegan Creamy Tomato Soup? Fresh basil leaves are a great choice. They add color and flavor. You can also drizzle some extra coconut milk on top. Croutons or a sprinkle of nutritional yeast also work well! This blog post covers how to make Vegan Creamy Tomato Soup. We broke down the needed ingredients, their nutritional value, and suggested substitutes. I provided step-by-step instructions for preparation and cooking. Tips for flavor, thickness adjustments, and variations helped enhance your soup. You'll find storage and reheating info to keep your leftovers fresh. With these insights, you can enjoy a delicious, creamy soup that's easy to make, healthy, and versatile. Get creative and have fun experimenting!](https://dishtreats.com/wp-content/uploads/2025/06/e1561612-3c52-470f-b0a5-4bd51ef2e908-768x768.webp)