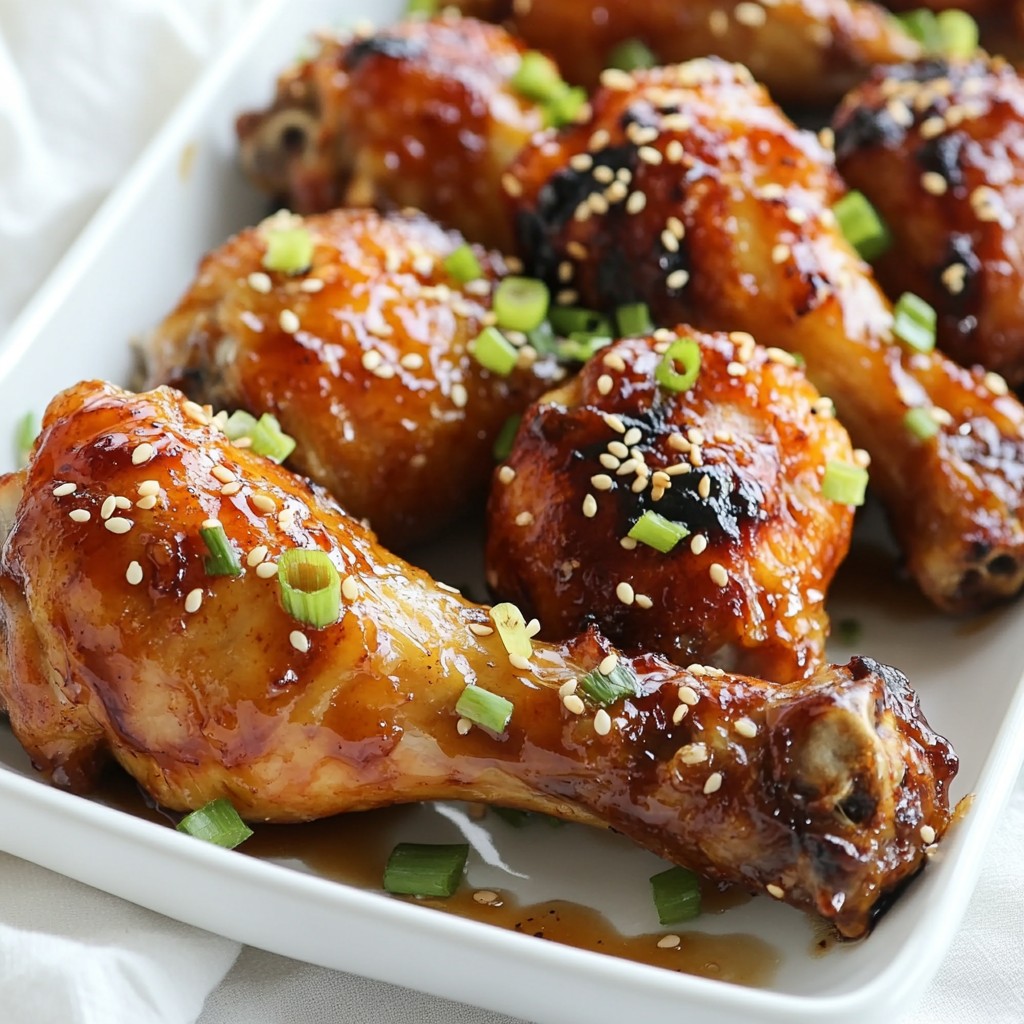
Looking for a dinner that packs a sweet and savory punch? Honey Soy Glazed Drumsticks are your answer! This dish offers juicy chicken with a sticky glaze that will make your taste buds dance. In this post, I’ll guide you through simple ingredients and steps to create this flavor-packed delight. Let’s dive in and make your next meal a memorable one!
Why I Love This Recipe
- Sweet and Savory Balance: The combination of honey and soy sauce creates a perfect blend of sweetness and umami that tantalizes your taste buds.
- Easy to Prepare: With minimal prep and simple ingredients, this recipe is perfect for busy weeknights or casual gatherings.
- Versatile Dish: These drumsticks can be served as a main dish, appetizer, or even in a salad, making them a great option for any meal.
- Garnish for Extra Flavor: The finishing touch of sesame seeds and green onions adds a delightful crunch and fresh flavor to each bite.
Ingredients
List of Required Ingredients
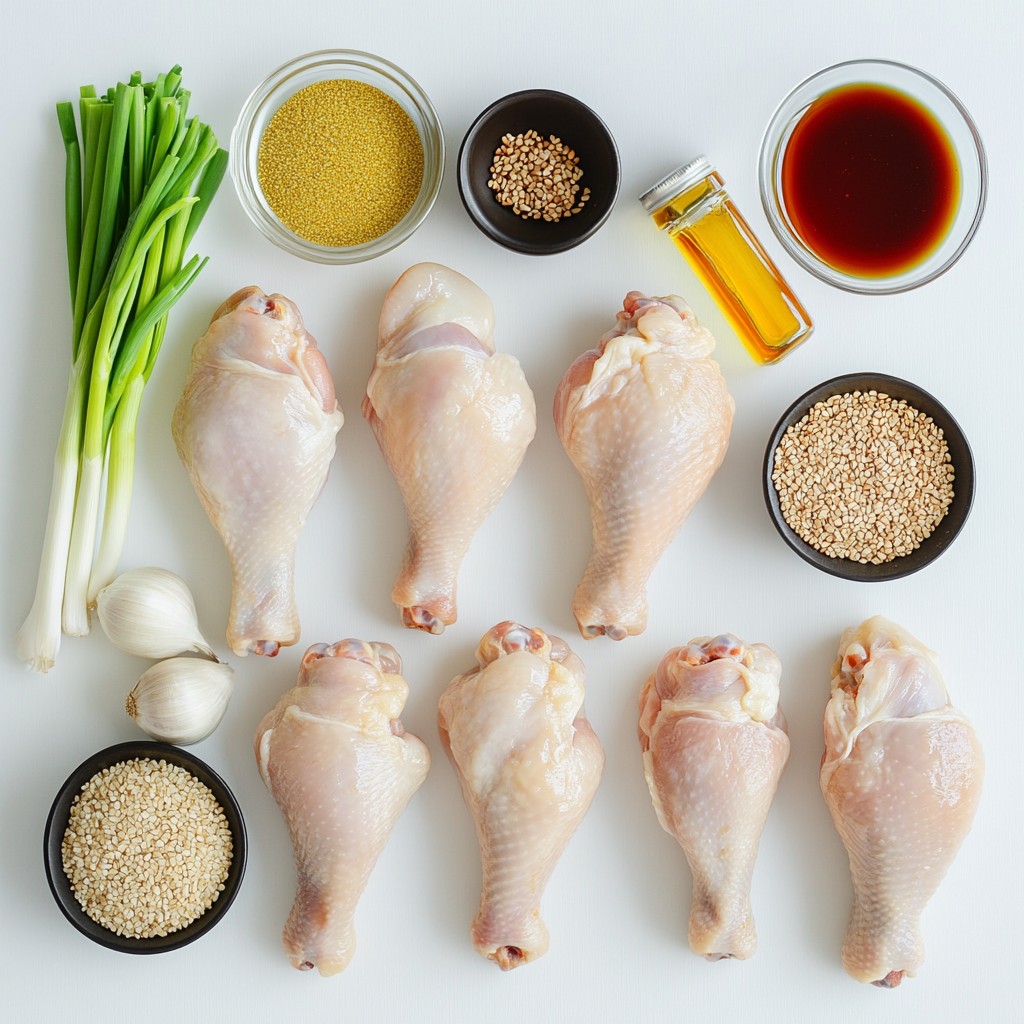
To make honey soy glazed drumsticks, you will need:
- 10 chicken drumsticks
- 1/3 cup honey
- 1/3 cup low-sodium soy sauce
- 2 tablespoons rice vinegar
- 2 tablespoons sesame oil
- 4 cloves garlic, minced
- 1 teaspoon fresh ginger, grated
- 1 teaspoon ground black pepper
- 1 tablespoon sesame seeds (for garnish)
- 2 green onions, finely chopped (for garnish)
Ingredient Notes and Substitutions
You can swap low-sodium soy sauce with regular soy sauce if you prefer a stronger flavor. For a sweeter touch, use maple syrup instead of honey. If you want a bit of heat, add a teaspoon of red pepper flakes or sriracha to the marinade. Rice vinegar can be replaced with apple cider vinegar if needed. Fresh ginger is best, but ground ginger works in a pinch.
Tips for Selecting Fresh Chicken
When buying chicken drumsticks, look for meat that is pink and moist, not slimy or discolored. The skin should be smooth and free from blemishes. Always check the sell-by date. If you can, buy chicken from a trusted source that practices good animal welfare. If you have a chance, buy organic or free-range chicken for better flavor and quality.
Step-by-Step Instructions
Marinating the Drumsticks
Start by making the marinade. In a big bowl, mix together the honey, soy sauce, rice vinegar, sesame oil, minced garlic, grated ginger, and black pepper. Whisk it until smooth. Add the drumsticks and coat them well. Cover the bowl with plastic wrap and place it in the fridge. Let them marinate for at least one hour, but overnight works best. This step makes the chicken juicy and packed with flavor.
Preparing the Baking Pan
While the chicken marinates, get your baking pan ready. Line a baking sheet with aluminum foil. This helps with easy cleanup. Place a wire rack on top of the foil. The rack allows hot air to flow around the drumsticks. This way, they cook evenly and get crispy.
Baking and Glazing the Drumsticks
Now, it’s time to bake. Preheat your oven to 400°F (200°C). After marinating, take the drumsticks out of the bowl. Keep the marinade for later. Arrange the drumsticks on the wire rack. Make sure they are not touching each other. This helps them brown well.
Bake the drumsticks for 25-30 minutes. Use a meat thermometer to check. The chicken should reach 165°F (74°C). The skin should look golden brown and crispy.
Achieving the Perfect Crispy Skin
For crispy skin, make sure the drumsticks are dry before baking. Pat them with a paper towel. Also, placing them on a wire rack helps. This keeps them off the pan and allows air to circulate.
Tips for Measuring Internal Temperature
To know when the chicken is ready, use a meat thermometer. Insert it into the thickest part of the drumstick, avoiding the bone. When it reads 165°F (74°C), your chicken is safe to eat. This ensures it is cooked well but still juicy.
Tips & Tricks
Best Cooking Techniques for Chicken Drumsticks
To cook chicken drumsticks well, start with marinating them. This step adds flavor and moisture. Use a mix of honey, soy sauce, garlic, and ginger for the best taste. Marinate for at least one hour, but overnight works even better. It helps the flavors sink in.
When baking, set your oven to 400°F (200°C). This temperature crisps the skin while keeping the meat juicy. Use a wire rack over a baking sheet. This lets hot air circulate, cooking all sides evenly.
Flavor Enhancements and Pairing Suggestions
You can boost the flavor of your honey soy glazed drumsticks in fun ways. Try adding some chili flakes for a bit of heat. A splash of lime juice can brighten the flavors too.
Pair these drumsticks with rice or stir-fried veggies. The glaze goes well with both. For a fresh touch, serve with a side salad.
Common Mistakes to Avoid When Cooking Drumsticks
One common mistake is not marinating long enough. Short marinating time means less flavor. Another mistake is crowding the drumsticks on the baking sheet. This can lead to uneven cooking.
Always check the internal temperature. Drumsticks should reach 165°F (74°C) to be safe. If you skip this, you might serve undercooked chicken. Lastly, do not skip the glaze step; it adds a delicious finish to your drumsticks.
Pro Tips
- Marinate Longer for More Flavor: For the best results, marinate the drumsticks overnight. This allows the flavors to penetrate the meat more deeply, resulting in a juicier and more flavorful chicken.
- Check for Doneness: Use a meat thermometer to check that the internal temperature of the drumsticks reaches 165°F (74°C). This ensures they are cooked thoroughly and safe to eat.
- Use Fresh Ingredients: Fresh garlic and ginger will enhance the flavor of your glaze. If possible, avoid using pre-minced or powdered versions for the best taste.
- Broil for Extra Crispiness: If you want an extra crispy skin, broil the drumsticks for an additional 2-3 minutes after glazing. Just watch them closely to prevent burning!
Variations
Honey Soy Glazed Drumsticks with Pineapple
You can add pineapple to the honey soy glaze for a fruity twist. The sweet and tangy taste of pineapple brightens the dish. To do this, chop fresh pineapple into small chunks. Add them to the marinade along with the drumsticks. The pineapple will caramelize during cooking, giving a sweet finish. You can also grill the pineapple slices to serve as a side. This makes a colorful and tasty plate.
Spicy Honey Soy Drumsticks Variation
If you like heat, try spicy honey soy drumsticks. Add red pepper flakes or sriracha to the marinade for a kick. Start with half a teaspoon and adjust to your taste. This adds depth to the sweet and salty flavors. You can also serve with a side of cooling yogurt sauce. This balance makes every bite exciting.
Alternative Cooking Methods (Grilling, Air Frying)
You can cook honey soy glazed drumsticks in different ways. Grilling gives a smoky flavor. Preheat your grill, then cook the marinated drumsticks over direct heat. Turn them often for even cooking.
Air frying is another great option. It uses hot air to make the chicken crispy. Set your air fryer to 375°F (190°C) and cook for about 25 minutes. Shake the basket halfway through for the best results.
Both methods keep the chicken juicy while adding unique flavors. Enjoy experimenting with these variations!
Storage Info
How to Store Leftover Drumsticks
To store leftover drumsticks, let them cool first. Place them in an airtight container. You can also wrap them tightly in plastic wrap. Store them in the fridge for up to four days. If you want to keep them longer, freezing is a great option.
Reheating Instructions
When ready to enjoy your leftovers, preheat your oven to 350°F (175°C). Place the drumsticks on a baking sheet. Heat them for about 15-20 minutes or until they reach an internal temperature of 165°F (74°C). This keeps them juicy and flavorful.
Freezing and Thawing Tips
To freeze drumsticks, make sure they are fully cooled. Wrap each drumstick in plastic wrap, then place them in a freezer bag. Squeeze out as much air as you can. Drumsticks can last in the freezer for up to three months. When you're ready to eat, thaw them in the fridge overnight. Reheat using the oven method for the best results.
FAQs
What is the cooking time for honey soy glazed drumsticks?
You will need about 25 to 30 minutes to bake the drumsticks. Set your oven to 400°F (200°C). The chicken should reach an internal temperature of 165°F (74°C). This ensures the meat is safe to eat and juicy.
Can I use skinless drumsticks for this recipe?
Yes, you can use skinless drumsticks. The glaze will still add flavor. However, skin-on drumsticks get crispy and hold more moisture. If you prefer skinless, adjust the cooking time as needed. Skinless drumsticks may cook a bit faster.
How do I know when chicken drumsticks are fully cooked?
Use a meat thermometer to check the temperature. Insert it into the thickest part of the drumstick. When it reads 165°F (74°C), the chicken is done. The meat should look opaque and juices should run clear.
Is there a vegetarian alternative to this recipe?
Yes! You can replace the chicken with firm tofu or tempeh. Marinate them in the same honey soy mix. Bake them for about 20-25 minutes, until golden. This gives you a tasty vegetarian option with similar flavors.
This guide covered all you need to make perfect chicken drumsticks. We talked about key ingredients, marinating, and achieving crispy skin. I shared tips to avoid common mistakes and enhance flavors. You learned about fun variations and how to store leftovers too.
Cooking drumsticks can be easy and tasty with the right steps. Get ready to impress your family with delicious results!