Honey Orange Glazed Salmon Savory and Flavorful Dish

Looking for a delicious dinner option? Honey Orange Glazed Salmon is your answer! This dish combines sweet honey and zesty orange for a flavor explosion. I’ll guide you through simple steps to make this savory meal perfect every time. With fresh ingredients and easy cooking tips, you’ll impress your family or friends in no time. Dive in to discover the secrets behind this tasty recipe!
Ingredients
To create a tasty honey orange glazed salmon, you will need the following ingredients:
- 4 salmon fillets (approximately 6 oz each)
- 1/4 cup honey
- 1/4 cup freshly squeezed orange juice
- Zest of 1 orange (finely grated)
- 2 tablespoons soy sauce (or tamari for a gluten-free option)
- 1 tablespoon Dijon mustard
- 1 clove garlic (minced)
- 1 teaspoon fresh ginger (grated)
- 2 tablespoons olive oil
- Salt and pepper to taste
- Fresh parsley or cilantro (chopped, for garnish)
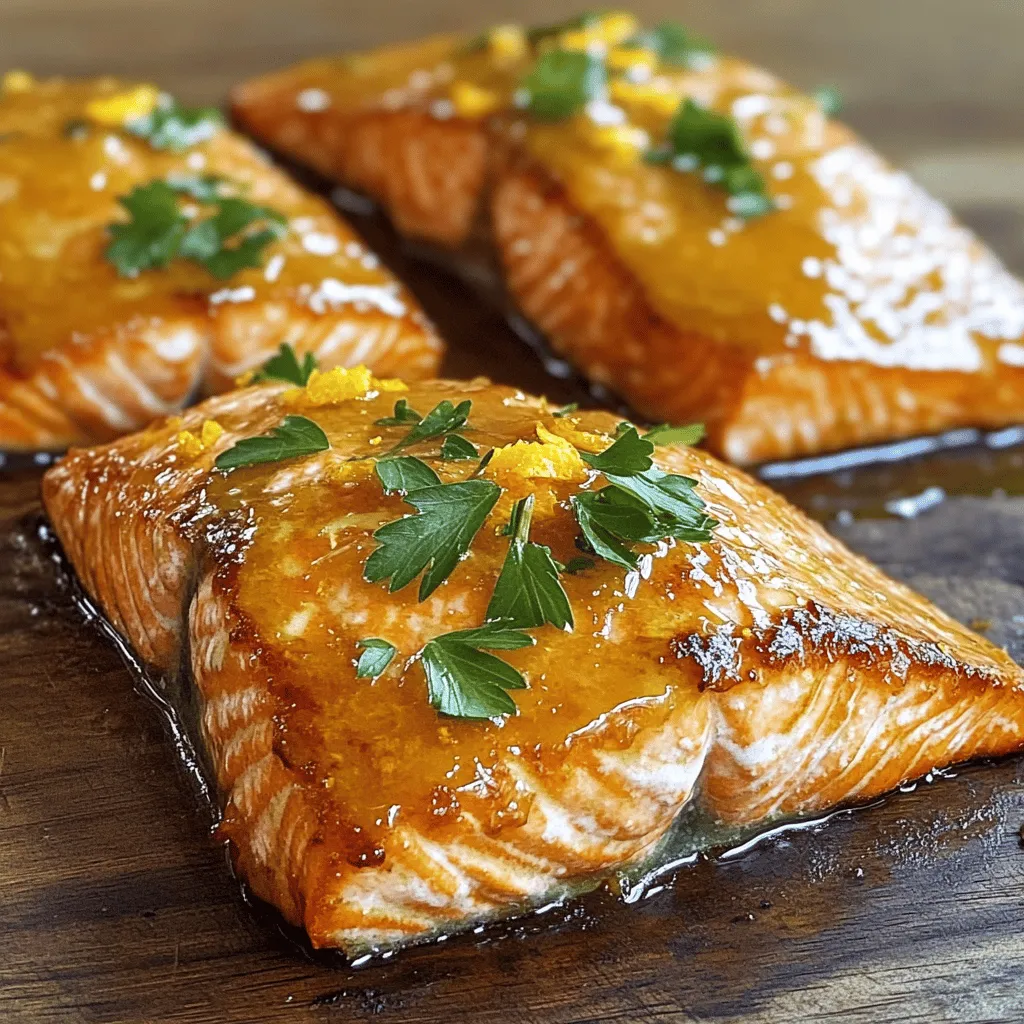
These ingredients combine to give the salmon a sweet and tangy flavor. The honey brings a natural sweetness, while the orange juice and zest add bright citrus notes. Soy sauce, garlic, and ginger complete the flavor profile, creating a delicious glaze that elevates the dish.
When shopping for salmon, look for fresh fillets with bright color and firm texture. Fresh ingredients will always give you the best taste. Don’t forget to have some parsley or cilantro ready for garnish. It adds a nice touch and flavor boost to your finished meal. Enjoy cooking!
Step-by-Step Instructions
Preparation of Glaze
To make the glaze, start by gathering your ingredients. You need honey, orange juice, orange zest, soy sauce, Dijon mustard, minced garlic, and fresh ginger.
- In a medium mixing bowl, whisk together:
- 1/4 cup honey
- 1/4 cup freshly squeezed orange juice
- Zest of 1 orange
- 2 tablespoons soy sauce
- 1 tablespoon Dijon mustard
- 1 clove garlic (minced)
- 1 teaspoon fresh ginger (grated)
Whisk until all ingredients blend smoothly. A smooth mixture is key for even coating on the salmon.
Prepping the Salmon
Next, prepare your salmon fillets. This step is crucial for a crispy skin.
- Use paper towels to gently pat the salmon fillets dry.
- Season both sides with salt and pepper.
This drying helps the skin crisp up when cooking.
Cooking Process
Now, let’s cook the salmon.
- Preheat your oven to 400°F (200°C).
- In an oven-safe skillet, heat 2 tablespoons of olive oil over medium-high heat.
- Once the oil is shimmering, carefully place the salmon fillets in the skillet, skin-side down.
Sear the salmon for about 3-4 minutes. You want the skin golden and crispy.
- When the skin gets crispy, carefully flip each fillet to the flesh side.
- Pour the honey orange glaze over the salmon. Make sure each fillet gets coated well.
Now, transfer the skillet to the oven. Bake for 8-10 minutes or until the salmon flakes easily with a fork.
- For an extra touch, turn on the broiler for 1-2 minutes. This caramelizes the top. Watch closely to avoid burning, as broiling cooks fast.
After cooking, remove the skillet from the oven. Let the salmon rest for about 1 minute. This step keeps it moist and flavorful.
Serve the salmon warm, drizzled with any remaining glaze. Garnish with freshly chopped parsley or cilantro for color and freshness.
Tips & Tricks
Achieving Perfect Glaze
To get a great glaze on your salmon, follow these steps:
- Coat evenly: Use a brush to spread the glaze. This helps cover the salmon well.
- Avoid burning: Broil the salmon for just 1-2 minutes at the end. Keep a close eye to prevent burning.
Enhancing Flavor
To take your dish to the next level, consider these tips:
- Try marinades: Experiment with ginger or garlic marinades. These add depth to the flavor.
- Use fresh ingredients: Fresh oranges and herbs make a big difference. High-quality components boost your dish’s taste.

Variations
Alternative Ingredients
You can make Honey Orange Glazed Salmon your own by using different ingredients. If you need a gluten-free option, swap soy sauce with tamari. Tamari has a similar taste but is safe for gluten-free diets. This small change keeps your dish tasty and accessible.
You can also try different types of fish. Salmon is rich and flavorful, but you can use trout or even halibut. Both options work well with the glaze. Each fish offers a unique taste and texture, making your meal exciting.
Flavor Additions
To boost the flavor, think about adding herbs and spices. Fresh herbs like thyme or rosemary can add depth. A sprinkle of chili flakes can give your dish a kick. Experiment with flavors to find what you like best.
You can also play with other citrus options. Instead of just orange, think about adding lime or lemon juice. These fruits give a fresh twist to the glaze. Mixing citrus can enhance the taste and make the dish pop.
Storage Info
Storing Leftovers
To keep your honey orange glazed salmon fresh, store it in the fridge. Use an airtight container to prevent air exposure. This helps keep the salmon moist. It will last about 3 to 4 days in the fridge.
For longer storage, you can freeze the salmon. Wrap each fillet tightly in plastic wrap. Then, place them in a freezer-safe bag. This helps prevent freezer burn. The salmon can stay frozen for up to 3 months.
Reheating Recommendations
When you want to enjoy your salmon again, reheating is key. Use the oven for the best results. Preheat your oven to 350°F (175°C). Place the salmon on a baking sheet. Cover it with foil to keep it from drying out. Heat for about 10 minutes or until warmed through.
You can also use the microwave. Place the salmon on a microwave-safe plate. Cover it with a damp paper towel. Heat in short bursts of 30 seconds. Check often to avoid drying it out.
These methods keep the salmon juicy and tasty for your next meal.
FAQs
Can I use frozen salmon fillets?
Yes, you can use frozen salmon fillets. Start by thawing them in the fridge overnight. If you need to thaw them faster, place the sealed fillets in cold water for about 30 minutes. Once thawed, pat them dry with paper towels. This step keeps the skin crispy. Keep in mind that you may need to increase the cooking time by 1-2 minutes. Always check that the fish flakes easily with a fork.
What to serve with Honey Orange Glazed Salmon?
Honey orange glazed salmon pairs well with several side dishes. Here are some great options:
- Steamed broccoli
- Roasted asparagus
- Quinoa or rice
- Mashed sweet potatoes
- Mixed green salad
These sides complement the sweet and savory flavors of the salmon.
How can I make this dish spicier?
To add heat to your honey orange glaze, consider these options:
- Mix in red pepper flakes for a mild kick.
- Add a dash of cayenne pepper for more heat.
- Include minced jalapeños or serrano peppers for a fresh, spicy touch.
Adjust the spice level to your taste. Enjoy experimenting with flavors!
This article walked you through making Honey Orange Glazed Salmon. We covered ingredients, preparation steps, cooking methods, and storage tips. You learned how to enhance the flavor and avoid common mistakes.
Incorporating fresh ingredients is key for the best results. You can enjoy this dish with different sides or spice it up as desired. Now, you’re ready to make a delicious meal that will impress anyone.


![- 2 ripe avocados - 1 cup cherry tomatoes, halved - 1 teaspoon balsamic vinegar - 1 tablespoon extra virgin olive oil - 1 small garlic clove, finely minced - 1 tablespoon fresh basil leaves, chopped - Salt and freshly cracked pepper to taste - Optional: A pinch of red pepper flakes - 4 slices of your favorite whole grain or sourdough bread For this avocado and tomato toast, I love using fresh and ripe ingredients. Ripe avocados give a creamy texture that blends well with the juicy tomatoes. The balsamic vinegar adds a sweet and tangy kick. You can also use high-quality extra virgin olive oil for richness. Minced garlic adds a nice bite, while fresh basil brightens the flavors. Salt and cracked pepper help bring out the taste of each ingredient. If you want a little heat, sprinkle on red pepper flakes. When it comes to bread, I recommend whole grain or sourdough. These options add a hearty crunch and a lovely flavor. Toasting the bread perfectly is key to a satisfying bite. For the full recipe, you can check out Avocado Bliss & Tomato Magic Toast. This recipe is not just easy to make; it’s also packed with nutrition and flavor. Enjoy your fresh flavor fix! First, grab your ripe avocados. Cut them in half and scoop out the flesh. Place the avocado in a bowl. Mash it with a fork until it’s creamy but still a bit chunky. Now, add the minced garlic and olive oil. Season with salt and pepper. Mix well until everything blends together nicely. Next, take your halved cherry tomatoes. In a separate bowl, mix them with balsamic vinegar and chopped basil. Add a little salt and pepper for taste. Gently toss to coat the tomatoes. Let them sit for about 10 minutes. This step lets the flavors combine and taste great. While the tomatoes marinate, it’s time to toast your bread. Preheat your toaster or skillet to medium heat. Place the bread slices in the toaster or skillet. Toast them until they're golden brown and crispy. This should take around 3 to 5 minutes, depending on your method. Now comes the fun part—putting it all together! Take the toasted bread and spread the creamy avocado mix on each slice. Be generous! Then, pile those marinated cherry tomatoes on top. Let the juices drizzle over the avocado. This makes the toast extra tasty! To finish, add some fresh basil leaves on top. Drizzle a little olive oil for richness. If you like heat, sprinkle on some red pepper flakes. Serve your delicious avocado and tomato toast right away for the best flavor. Enjoy this fresh flavor fix! For the full recipe, check [Full Recipe]. How to select ripe avocados: To find a ripe avocado, gently squeeze it in your palm. It should feel slightly soft but not mushy. Look for dark green to black skin. Avoid any ones with large dark spots. Best varieties for toast: I love using Hass avocados. They are creamy and rich. If you can find Bacon avocados, they are also a good choice. They have a lighter flavor and a smooth texture. Skillet vs. toaster for optimal crunch: I prefer using a skillet for toasting bread. It gives a nice, even crunch. Heat the skillet over medium heat. You can also use a toaster if you want a quick option. Tips for even browning: Make sure to flip the bread halfway through toasting. This helps achieve an even golden color. If using a skillet, keep an eye on the bread to avoid burning. Suggestions for extra toppings: Try adding sliced radishes or a sprinkle of feta cheese. They add great texture and flavor. You can also include a poached egg on top for more protein. Alternate seasonings for added zest: Add a squeeze of fresh lemon or lime juice for brightness. A pinch of smoked paprika can also enhance the flavor. Don't forget a dash of salt and pepper to bring it all together. For the full recipe and more detailed steps, check the Full Recipe. {{image_4}} To make your avocado and tomato toast more plant-based, skip any cheese and enjoy the creamy avocado. If you crave richness, consider nut butters like almond or cashew. They add great flavor and texture. You can even blend a bit of nutritional yeast into your avocado spread for a cheesy taste without dairy. You can mix in other veggies, like radishes or cucumbers, for a fresh crunch. Thinly sliced radishes add a peppery kick. Cucumbers give a cool, crisp texture. For extra flavor, try adding herbs like cilantro or dill. Spices like smoked paprika or cumin can elevate your toast, making it a fun twist on the classic dish. For gluten-free options, choose bread made from almond flour or coconut flour. Sourdough is often gluten-free, so read labels carefully. You can also make your own gluten-free bread at home. Adapting the recipe is easy; just ensure your bread is crisp and your toppings are fresh. This makes it suitable for all diets while still being delicious. For the full recipe, check out the Avocado Bliss & Tomato Magic Toast. To keep avocados fresh, store them in the fridge. Wrap them tightly in plastic wrap. This helps slow down browning. For tomatoes, keep them at room temperature. Sunlight can cause them to spoil fast. If you cut a tomato, cover the cut side with plastic wrap and eat it within a day. For bread, put it in a sealed bag. This helps keep it fresh. If you have extra slices, freeze them. Just toast them straight from the freezer later. You can prep the avocado spread and marinated tomatoes ahead of time. Store the avocado mix in an airtight container. Add a bit of lemon juice to help it stay green. Keep the tomatoes in a separate container. This way, they stay fresh and tasty. When you are ready to eat, toast the bread. Assemble the toast right before serving. Avoid storing it fully assembled. The bread can get soggy if left too long. In the fridge, ripe avocados last about 2-3 days. Cut avocados should be eaten within a day. Cherry tomatoes can last about a week. Keep an eye on them for any signs of spoilage. Look for soft spots or wrinkled skin on tomatoes. For avocados, if they feel mushy, they may be bad. Always check for a smell—bad avocados often have a sour odor. Enjoy your avocado and tomato toast, knowing how to store and prep it right! For the full recipe, check out the details above. Yes, you can make components ahead of time. I suggest storing the avocado spread and marinated tomatoes separately. Keep them in airtight containers in the fridge. Toast the bread just before serving. This keeps everything fresh and tasty. If you want a different taste, try red wine vinegar or apple cider vinegar. Both add a nice tang. Red wine vinegar is a bit stronger, while apple cider vinegar has a milder flavor. Experiment to find your favorite! To keep your avocado fresh, use lemon juice or lime juice. The acid helps slow down browning. Also, store any leftover avocado in an airtight container. Press plastic wrap directly onto the surface to limit air exposure. Absolutely! Adding a poached egg on top is a great choice. You can also use chickpeas or black beans for a plant-based option. They add protein and make the toast more filling. Pair your toast with a fresh salad or a side of fruit. A light soup, like tomato basil, complements it well. For drinks, enjoy a refreshing iced tea or a smooth smoothie. This blog post covered how to make a delicious avocado and tomato toast. You learned about the key ingredients and step-by-step instructions. We explored tips for perfecting your toast and variations to suit your tastes. Remember, the right ingredients and methods make all the difference. Enjoy mixing flavors and creating tasty meals. Your options are endless, whether you want to stay classic or try something new. Happy cooking!](https://dishtreats.com/wp-content/uploads/2025/06/20a8b7cc-cc3e-420d-bfd4-ab317546e8bf-768x768.webp)


