Honey Garlic Butter Shrimp Tasty and Simple Recipe
 for all the details! How can I ensure my shrimp don't overcook? To avoid overcooking shrimp, watch the color. When they turn pink, they are close to done. Cook for about 2-3 minutes on each side. Remove them from heat as soon as they are opaque. This helps keep them tender and juicy. Can I use frozen shrimp for this recipe? Yes, you can use frozen shrimp. Just thaw them first. Place them in cold water for about 15-20 minutes. Pat them dry before cooking. This ensures they cook evenly and absorb the sauce well. What can I substitute for soy sauce? If you need a substitute for soy sauce, try coconut aminos. It has a similar flavor and is often gluten-free. You can also use tamari for a gluten-free option. Both choices will still give you that umami taste. How to make the dish gluten-free? To make this dish gluten-free, use tamari instead of soy sauce. Ensure that all other ingredients, like butter and honey, are also gluten-free. This way, you can enjoy the same great flavor without gluten. What side dishes pair well with honey garlic butter shrimp? Honey garlic butter shrimp tastes great with rice or quinoa. You can also serve it with steamed veggies or a fresh salad. These sides balance the rich flavors of the dish, making a perfect meal. Can this recipe be scaled up for larger servings? Yes, you can easily scale up this recipe. Just double or triple the ingredients based on how many servings you need. Make sure your skillet is large enough, or use two pans to cook everything evenly. This keeps the shrimp from overcrowding and helps them cook well. This blog post offered a complete guide on making honey garlic butter shrimp. We explored each ingredient's role and shared cooking tips to ensure success. I highlighted variations and storage advice for leftovers. In conclusion, with fresh shrimp and the right techniques, you can create a flavorful dish. Explore your options and enjoy your culinary journey. Trust me, this recipe is worth trying!](https://dishtreats.com/wp-content/uploads/2025/07/4796c05b-30f7-4441-b7cb-ba0299151dfe.webp)
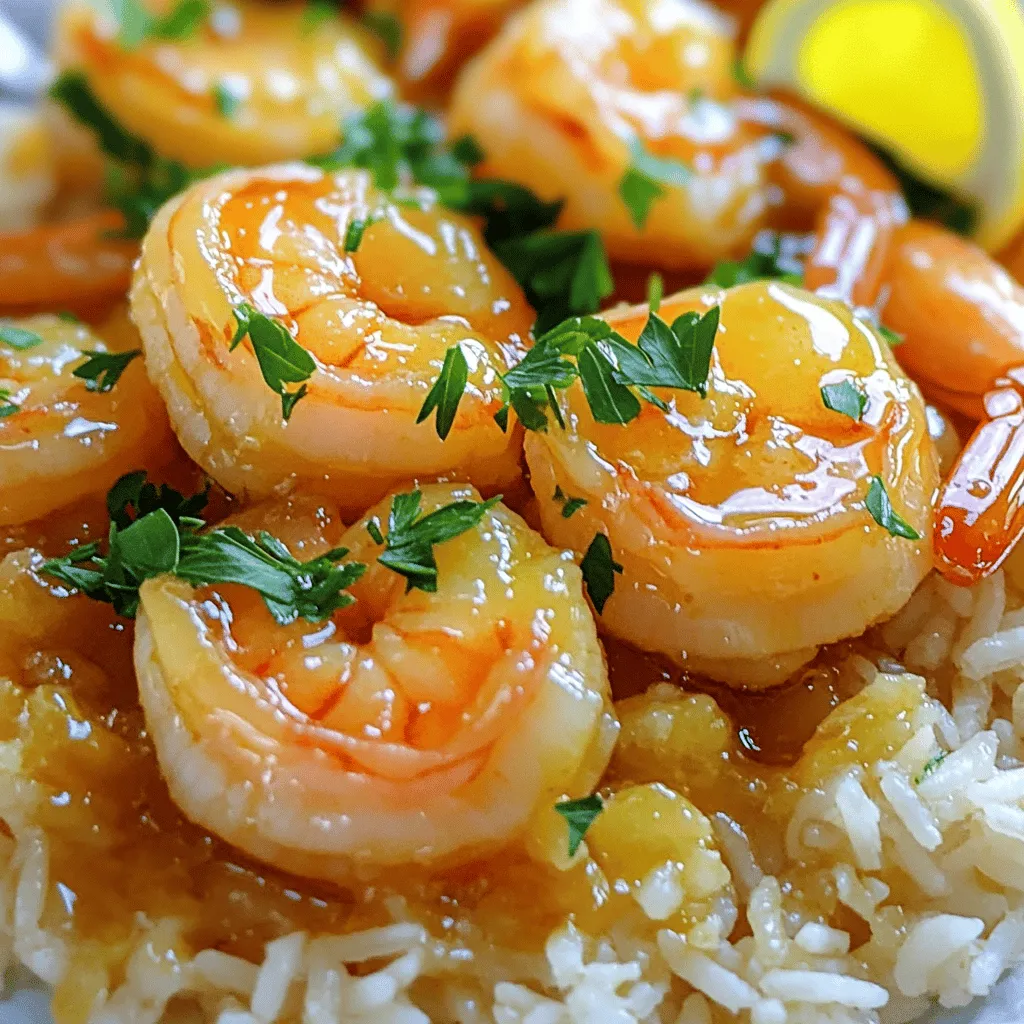
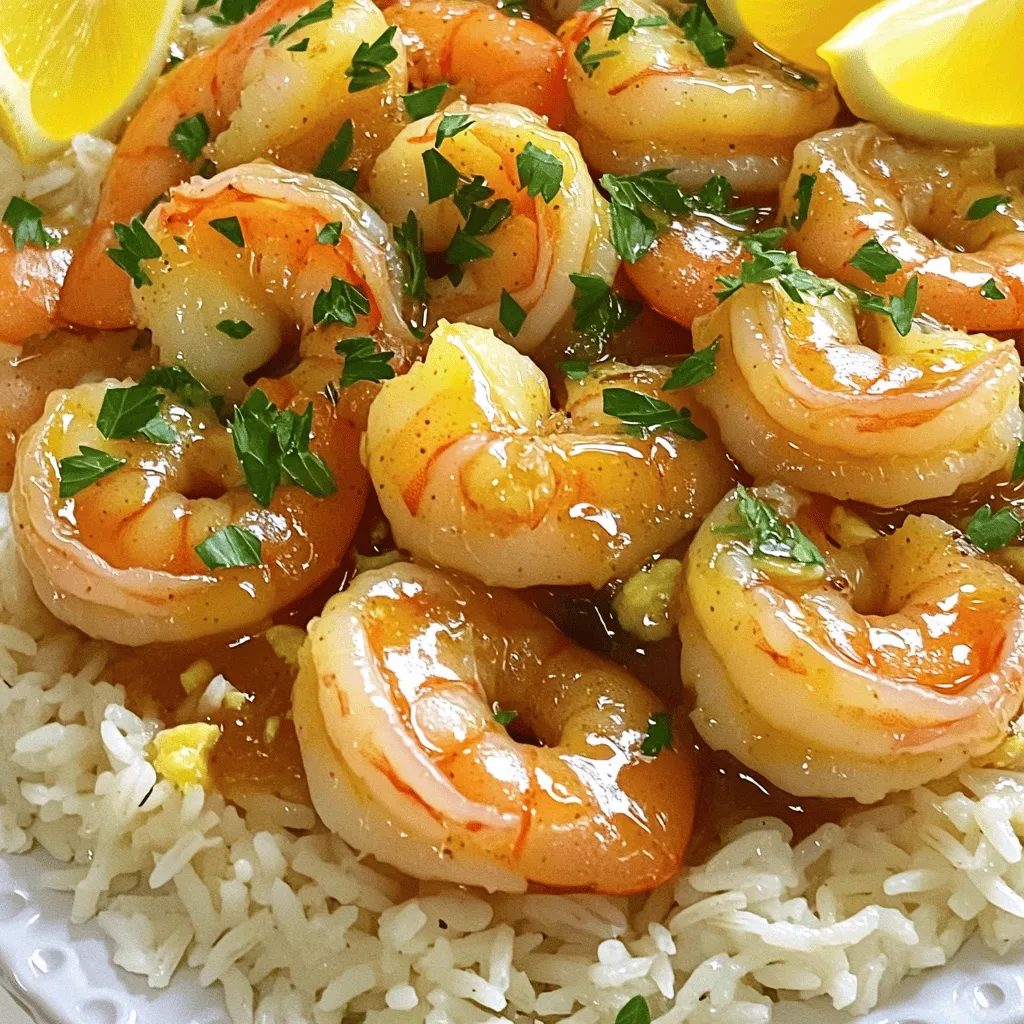
Looking for a quick and tasty meal that impresses? You’ve come to the right place! This Honey Garlic Butter Shrimp recipe is simple, uses fresh ingredients, and takes just minutes to whip up. Packed with sweet and savory flavors, it will make your taste buds dance. Whether you’re a busy parent or a cooking newbie, this dish is for you. Let’s dive into the deliciousness!
Ingredients
List of Ingredients
- 1 pound large shrimp, peeled and deveined
- 3 tablespoons unsalted butter
- 4 cloves garlic, finely minced
- 1/4 cup honey
- 2 tablespoons low-sodium soy sauce
- 1 tablespoon freshly squeezed lemon juice
- Salt and freshly cracked black pepper, to taste
- Fresh parsley, chopped, for garnish
Ingredient Notes
Fresh shrimp are key for this dish. They taste better and cook more evenly. Look for shrimp that smell clean and have a firm texture.
I recommend using organic honey and soy sauce. These options often have better flavor and are healthier. Organic honey is rich and sweet, while organic soy sauce has a pure taste.
If you don’t have fresh lemon juice, try using a vinegar like rice vinegar. It adds a nice tang, but fresh lemon juice brightens the dish.
Step-by-Step Instructions
Preparation Steps
1. Start by gathering all your ingredients. You will need 1 pound of large shrimp, 3 tablespoons of unsalted butter, 4 cloves of minced garlic, 1/4 cup of honey, 2 tablespoons of low-sodium soy sauce, 1 tablespoon of fresh lemon juice, salt, pepper, and fresh parsley for garnish.
2. Heat a spacious skillet over medium heat. Add the butter and let it melt. Make sure it gets bubbly but not browned.
3. Once the butter melts, add the minced garlic. Sauté it for about 1 minute. Stir it constantly. You want it fragrant but not burnt. Burnt garlic can ruin the dish.
4. Pour in the honey, soy sauce, and lemon juice. Stir well until everything mixes into a smooth sauce.
5. Increase the heat slightly. Let the sauce simmer gently for about 2 minutes. This makes the sauce thicken and boosts its flavor.
6. Carefully add the shrimp. Make sure they are well coated in the sauce. Season with salt and pepper.
7. Cook the shrimp for about 2-3 minutes on one side. They should turn bright pink. Then flip them and cook for another 2-3 minutes. They are done when they are opaque and firm.
8. Remove the skillet from the heat. Sprinkle chopped parsley over the shrimp for color and freshness.
Timing Tips
- The total time for this recipe is 20 minutes, with 10 minutes for prep and 10 minutes for cooking.
- To save time, prep your ingredients before you start cooking. This helps the cooking process flow smoothly.
Tips & Tricks
Cooking Techniques
To get a great sauce, start by melting butter over medium heat. It should bubble gently, not brown. Add minced garlic and sauté for just one minute. Watch it closely to avoid burning, as burnt garlic can ruin the dish. After that, mix in honey, soy sauce, and lemon juice. Stir until combined. Increase the heat to a gentle simmer for about two minutes. This helps the sauce thicken while boosting flavor.
When cooking shrimp, avoid overcooking. Cook them for 2-3 minutes on each side. You’ll know they’re done when they turn bright pink and opaque. Remove them from heat right away to keep them tender.
Flavor Enhancements
To make your dish pop, try adding spices like paprika, cayenne, or black pepper. Mix these in with the sauce for extra warmth. Fresh herbs like basil or cilantro can also add depth.
If you want heat, sprinkle in some chili flakes while cooking. This gives the dish a nice kick without overpowering the sweet honey flavor. You can adjust the amount based on your taste.

Variations
Recipe Modifications
To give your honey garlic butter shrimp a spicy kick, add red pepper flakes. Start with 1/2 teaspoon and adjust to your taste. You can also use sriracha or a dash of hot sauce for heat. If you want to switch up the sweetness, try maple syrup or agave nectar instead of honey. These options can add unique flavors while still keeping the dish delicious.
Serving Suggestions
Pair this shrimp with jasmine rice or a fresh salad for a light meal. For something heartier, serve it over pasta, like angel hair or fettuccine. You can toss in some steamed broccoli or snap peas to add color and nutrients. This dish also works well with grilled vegetables, offering a nice contrast to the sweet and savory shrimp. Try mixing in some zucchini or bell peppers for extra crunch and flavor.
Storage Info
Refrigeration Guidelines
To store your leftovers, place the honey garlic butter shrimp in an airtight container. Make sure the shrimp cool down before putting them in the fridge. This keeps them fresh and tasty. The shrimp lasts up to three days in the fridge. After three days, the quality may decline. Always check for any off smells or changes in texture before eating.
Freezing Instructions
If you want to save the shrimp for later, freezing is a great option. First, let the shrimp cool completely. Then, place them in a freezer-safe bag or container. Remove as much air as possible to prevent freezer burn. The shrimp can last up to three months in the freezer.
When you’re ready to eat, thaw the shrimp overnight in the fridge. To reheat, put them in a skillet on low heat. Add a splash of water or broth to keep them moist. Stir gently to maintain their texture. Enjoy your delicious dish even after some time!
FAQs
Common Questions
How can I ensure my shrimp don’t overcook?
To avoid overcooking shrimp, watch the color. When they turn pink, they are close to done. Cook for about 2-3 minutes on each side. Remove them from heat as soon as they are opaque. This helps keep them tender and juicy.
Can I use frozen shrimp for this recipe?
Yes, you can use frozen shrimp. Just thaw them first. Place them in cold water for about 15-20 minutes. Pat them dry before cooking. This ensures they cook evenly and absorb the sauce well.
What can I substitute for soy sauce?
If you need a substitute for soy sauce, try coconut aminos. It has a similar flavor and is often gluten-free. You can also use tamari for a gluten-free option. Both choices will still give you that umami taste.
How to make the dish gluten-free?
To make this dish gluten-free, use tamari instead of soy sauce. Ensure that all other ingredients, like butter and honey, are also gluten-free. This way, you can enjoy the same great flavor without gluten.
User Queries
What side dishes pair well with honey garlic butter shrimp?
Honey garlic butter shrimp tastes great with rice or quinoa. You can also serve it with steamed veggies or a fresh salad. These sides balance the rich flavors of the dish, making a perfect meal.
Can this recipe be scaled up for larger servings?
Yes, you can easily scale up this recipe. Just double or triple the ingredients based on how many servings you need. Make sure your skillet is large enough, or use two pans to cook everything evenly. This keeps the shrimp from overcrowding and helps them cook well.
This blog post offered a complete guide on making honey garlic butter shrimp. We explored each ingredient’s role and shared cooking tips to ensure success. I highlighted variations and storage advice for leftovers.
In conclusion, with fresh shrimp and the right techniques, you can create a flavorful dish. Explore your options and enjoy your culinary journey. Trust me, this recipe is worth trying!
 for all the details! How can I ensure my shrimp don't overcook? To avoid overcooking shrimp, watch the color. When they turn pink, they are close to done. Cook for about 2-3 minutes on each side. Remove them from heat as soon as they are opaque. This helps keep them tender and juicy. Can I use frozen shrimp for this recipe? Yes, you can use frozen shrimp. Just thaw them first. Place them in cold water for about 15-20 minutes. Pat them dry before cooking. This ensures they cook evenly and absorb the sauce well. What can I substitute for soy sauce? If you need a substitute for soy sauce, try coconut aminos. It has a similar flavor and is often gluten-free. You can also use tamari for a gluten-free option. Both choices will still give you that umami taste. How to make the dish gluten-free? To make this dish gluten-free, use tamari instead of soy sauce. Ensure that all other ingredients, like butter and honey, are also gluten-free. This way, you can enjoy the same great flavor without gluten. What side dishes pair well with honey garlic butter shrimp? Honey garlic butter shrimp tastes great with rice or quinoa. You can also serve it with steamed veggies or a fresh salad. These sides balance the rich flavors of the dish, making a perfect meal. Can this recipe be scaled up for larger servings? Yes, you can easily scale up this recipe. Just double or triple the ingredients based on how many servings you need. Make sure your skillet is large enough, or use two pans to cook everything evenly. This keeps the shrimp from overcrowding and helps them cook well. This blog post offered a complete guide on making honey garlic butter shrimp. We explored each ingredient's role and shared cooking tips to ensure success. I highlighted variations and storage advice for leftovers. In conclusion, with fresh shrimp and the right techniques, you can create a flavorful dish. Explore your options and enjoy your culinary journey. Trust me, this recipe is worth trying!](https://dishtreats.com/wp-content/uploads/2025/07/4796c05b-30f7-4441-b7cb-ba0299151dfe-300x300.webp)


![To make tasty roasted veggie grain bowls, gather these items: - 1 cup quinoa, thoroughly rinsed - 2 cups vegetable broth - 1 zucchini, diced into bite-sized pieces - 1 red bell pepper, diced - 1 cup cherry tomatoes, halved - 1 cup broccoli florets, cut into small pieces - 2 tablespoons olive oil - 1 teaspoon garlic powder - 1 teaspoon smoked paprika - Salt and freshly cracked black pepper, to taste - 1 avocado, halved and sliced - ¼ cup tahini - 2 tablespoons freshly squeezed lemon juice - Fresh herbs (such as parsley or cilantro) for garnish Fresh ingredients make a big difference. Choose bright, firm veggies for the best flavor. Here are some tips to ensure freshness: - Look for vibrant colors: Fresh veggies should be bright and appealing. - Check for firmness: Avoid soft or wrinkled produce. - Buy local when possible: Seasonal veggies taste better and last longer. You can swap some ingredients based on your taste or what you have. Here are easy swaps: - Quinoa: Use farro, rice, or barley instead. - Veggies: Try carrots, asparagus, or sweet potatoes. - Tahini: Substitute with yogurt or nut butter for a different sauce. - Herbs: Use basil, dill, or chives for fresh flavor. Explore these options to make your roasted veggie grain bowls unique! For the complete recipe, check the Full Recipe. Start by preheating your oven to 425°F (220°C). This heat is perfect for roasting. While the oven warms, prepare the quinoa. In a medium saucepan, bring 2 cups of vegetable broth to a boil. Once boiling, add 1 cup of rinsed quinoa. Lower the heat, cover, and let it simmer for about 15 minutes. The quinoa will soak up the broth and become fluffy. After cooking, let it rest for 5 minutes. Fluff it with a fork before serving. While the quinoa cooks, prepare your veggies. Grab a large baking sheet and add the diced zucchini, red bell pepper, halved cherry tomatoes, and broccoli florets. Drizzle 2 tablespoons of olive oil over these veggies. Then, sprinkle 1 teaspoon of garlic powder, 1 teaspoon of smoked paprika, salt, and freshly cracked black pepper. Mix everything well to coat the veggies. Place the baking sheet in the oven and roast for 20-25 minutes. Halfway through, stir the veggies to ensure even cooking. They are done when tender and slightly caramelized. For the tahini sauce, combine ¼ cup of tahini and 2 tablespoons of freshly squeezed lemon juice in a small bowl. Whisk them together until smooth. Add a pinch of salt for flavor. If the sauce seems too thick, thin it out with a little water. Adjust it until you reach your desired consistency. You can check the [Full Recipe] for more details. When making roasted veggie grain bowls, avoid overcooking your vegetables. They should be tender but not mushy. Also, don't skip the seasoning. A little salt and pepper make a big difference. Lastly, ensure the quinoa is fluffed well after cooking. This helps the grains mix nicely with the veggies. To boost flavor, try marinating the veggies in olive oil and spices before roasting. You can add herbs like thyme or rosemary for a fresh taste. For texture, consider adding nuts or seeds. Toasted sunflower seeds or crunchy almonds add a nice bite. Roasted veggie grain bowls are great for a filling meal. Pair them with a side salad for more greens. You can also add a protein like grilled chicken or chickpeas for extra nutrition. For a wow factor, drizzle more tahini sauce on top or sprinkle with feta cheese. Check out the Full Recipe for more ideas! {{image_4}} You can switch up the grains in your bowl. Try brown rice, farro, or barley. Each grain brings a different taste and texture. Quinoa is great, but experimenting keeps it fun. You can also use millet for a unique twist. These grains offer more fiber and nutrients. Explore different cooking times for each grain to get them just right. Seasonal veggies make your grain bowl fresh and vibrant. In spring, use asparagus and peas. Summer calls for corn and eggplant. Fall brings sweet potatoes and kale. In winter, think about Brussels sprouts and root vegetables. Each season gives you new flavors and colors. Using fresh, local produce can boost taste and nutrition. Toppings can elevate your bowl. Consider adding nuts or seeds for crunch. Roasted chickpeas add protein and flavor. You might also try feta cheese for a salty kick. Fresh herbs like basil or cilantro can brighten the dish. A squeeze of lime or lemon juice adds freshness. For a spicy touch, drizzle hot sauce or sprinkle red pepper flakes. Each addition brings a new layer of flavor to your meal. Check out the Full Recipe for more ideas! To keep your roasted veggie grain bowls fresh, store them in airtight containers. Make sure to let the bowls cool down before sealing them. This helps prevent moisture buildup, which can make your veggies soggy. You can keep them in the fridge for up to four days. When you’re ready to enjoy your leftovers, reheat them gently. Use the microwave for quick heating. Heat in short bursts, stirring in between, to avoid hot spots. You can also warm them in a pan over low heat. Add a splash of water or broth to keep them moist. Meal prepping is a great way to save time. You can make extra quinoa and roast a variety of veggies. Store them separately in the fridge for easy access. This way, you can mix and match different flavors throughout the week. Just assemble the bowls when you're ready to eat. For a detailed recipe, check the Full Recipe for all the steps! Roasted veggie grain bowls are healthy meals filled with grains and vegetables. They combine cooked grains, like quinoa, with roasted veggies. This mix creates a tasty and colorful dish. You get fiber, vitamins, and minerals in every bite. The flavors blend well, making each bowl satisfying and fun to eat. To make roasted veggie grain bowls, follow these steps: 1. Preheat your oven to 425°F (220°C). 2. Cook 1 cup of quinoa in 2 cups of vegetable broth. Let it simmer until fluffy. 3. Prepare your veggies: dice zucchini, red bell pepper, and halve cherry tomatoes. Add broccoli florets. 4. Toss the veggies with olive oil, garlic powder, smoked paprika, salt, and pepper. 5. Roast the veggies for 20-25 minutes until tender and slightly caramelized. 6. Mix tahini with lemon juice, adding water if needed for the right texture. 7. Assemble the bowls with quinoa, roasted veggies, and avocado slices on top. 8. Drizzle with tahini sauce and add fresh herbs for garnish. You can find the full recipe above for more detailed steps. Yes, you can customize this recipe. Use different grains like brown rice or farro. Change the veggies based on what you like or what is in season. You can also add proteins like chickpeas or grilled chicken. Experiment with different sauces or toppings to make the dish your own. This flexibility makes roasted veggie grain bowls perfect for everyone. This blog covered how to make delicious roasted veggie grain bowls. We discussed key ingredients, focusing on freshness and substitutions. I shared step-by-step instructions for prepping, roasting, and creating a tasty tahini sauce. You learned helpful tips to avoid mistakes and enhance flavor. Variations allowed you to experiment with grains and veggies. Lastly, I provided storage tips to keep leftovers fresh. Roasted veggie grain bowls are flexible and fun. You can mix and match to fit your taste. Enjoy experimenting!](https://dishtreats.com/wp-content/uploads/2025/07/945baa8c-ba42-4ceb-8d11-39d9a326283a-768x768.webp)

![To make this tasty dip, you need a few key items: - 1 medium head of cauliflower, broken into bite-sized florets - 1 cup plain Greek yogurt (preferably full-fat for creaminess) - 1/2 cup shredded sharp cheddar cheese - 1/4 cup cream cheese, softened at room temperature - 1/4 cup buffalo sauce (adjust based on your heat preference) - 2 cloves garlic, finely minced - 1/2 teaspoon onion powder - 1/2 teaspoon smoked paprika for extra depth - Salt and freshly ground black pepper to taste These ingredients blend together to create a creamy, spicy dip that you will love. While the dip is great on its own, you can add some fun toppings. Here are some ideas: - Chopped green onions (scallions) for a fresh pop of color - Celery sticks for a crunchy contrast - Crispy tortilla chips for dipping These add-ons enhance both the look and taste of your dish. This dip is not just delicious; it's also packed with nutrients. Here’s a quick look at what you get: - Cauliflower: Low in calories, high in fiber - Greek yogurt: Good source of protein and probiotics - Cheese: Adds calcium and flavor Each serving is a great choice for a snack or appetizer. You can enjoy this dish without guilt! First, preheat your oven to 375°F (190°C). This step helps the dip cook well. Take a medium head of cauliflower and break it into bite-sized florets. Next, fill a large pot halfway with water and bring it to a boil. Once boiling, place a steamer basket inside the pot and add the cauliflower florets. Steam them for 8 to 10 minutes. You want them tender enough to pierce easily with a fork. After steaming, remove the florets from heat and let them cool for a few minutes. In a food processor, add the steamed cauliflower, 1 cup of plain Greek yogurt, 1/4 cup of softened cream cheese, and 1/4 cup of buffalo sauce. You can adjust the buffalo sauce to control the heat. Also, include 2 cloves of minced garlic, 1/2 teaspoon of onion powder, 1/2 teaspoon of smoked paprika, salt, and black pepper to taste. Blend until smooth and creamy. Scrape down the sides as needed. Then, gently fold in 1/2 cup of shredded sharp cheddar cheese. This adds great flavor and texture to the dip. Now, transfer the cauliflower mixture to your greased baking dish. Spread it out evenly using a spatula. Place it in the oven and bake for 20 to 25 minutes. You want the dip to be hot and the top to turn a light golden-brown color. When done, carefully take the dish out of the oven and let it cool for about 5 minutes. This rest time allows the flavors to blend. Don’t forget to garnish with chopped green onions before serving! Enjoy your warm dip with crunchy celery sticks and crispy tortilla chips. For the Full Recipe, you can refer back to the ingredients and instructions. To get the best flavor and texture from your dip, use fresh cauliflower. Steam it until it's tender but not mushy. This keeps the dip thick and creamy. Use full-fat Greek yogurt and cream cheese for added richness. They blend well and give a nice mouthfeel. Don't skip the garlic; it adds a punch of flavor. For spice lovers, adjust the buffalo sauce to your taste. You can easily modify this dip for different diets. For a vegan option, swap Greek yogurt and cream cheese for cashew cream or coconut yogurt. Use nutritional yeast for that cheesy flavor without dairy. If you want a low-carb option, serve it with sliced veggies instead of chips. This way, everyone can enjoy it without feeling left out. This dip works for many occasions. For game days, serve it warm with crispy tortilla chips. At parties, set it out with celery sticks and carrot sticks for a colorful platter. If you're hosting a casual dinner, pair it with toasted bread or pita chips. This dip can fit into any setting, making it a versatile choice. You can find the full recipe to make it just right! {{image_4}} To make a vegan version, swap Greek yogurt for cashew cream or vegan yogurt. Use vegan cream cheese instead of regular cream cheese. You can also choose nutritional yeast for a cheesy taste without dairy. Adjust the buffalo sauce based on your heat level. This version keeps the flavor while being plant-based. If you love heat, add extra buffalo sauce or some diced jalapeños. For a cheesier dip, mix in more shredded vegan cheese or cheddar. You can even top it with cheese before baking for a bubbly, golden finish. This variation will delight cheese lovers and spice fans alike. While celery sticks and tortilla chips are classic, try using sliced bell peppers or cucumber sticks. Pita chips or even crispy veggies add a nice crunch. For a fun twist, serve with mini pretzels for a salty kick. These options keep it fresh and exciting! For the full recipe, visit the [Full Recipe] page. To store leftover dip, let it cool first. Place it in an airtight container. This keeps the dip fresh for up to three days. You can also cover it tightly with plastic wrap. Make sure no air gets in, as this can spoil the dip. When you're ready to enjoy it again, scoop out what you need. Reheat in the oven for best results. Preheat your oven to 350°F (175°C). Place the dip in an oven-safe dish and cover it with foil. Heat for about 15-20 minutes, or until it's warm. You can also use the microwave. Heat in short bursts, about 30 seconds, stirring in between until hot. You can freeze Cauliflower Buffalo Dip for up to three months. Use a freezer-safe container. Leave some space at the top, as the dip may expand. To thaw, move it to the fridge overnight. Reheat it as mentioned above. The texture may change slightly, but the taste remains delicious. Enjoy this tasty dip anytime! Yes, you can use various cheeses. Creamy cheeses like goat cheese or ricotta work well. You could also try mozzarella for a milder taste. Each cheese changes the dip's flavor and texture. Mixing cheeses can create a unique taste. Just keep the total amount the same as the recipe calls for. You have many fun options for serving this dip. Here are a few ideas: - Crispy tortilla chips - Fresh celery sticks - Carrot sticks - Pita bread or chips - Crackers These choices add crunch and flavor. You can even make a veggie platter for a colorful spread. The dip's spice level depends on the buffalo sauce you use. Some sauces are very hot, while others are mild. If you like less heat, use less buffalo sauce. You can taste and adjust as you mix. This way, you control the spice to suit your taste. In this blog post, I covered how to make tasty Cauliflower Buffalo Dip. You learned about the key ingredients, how to prepare, and bake the dip. I shared tips for the best flavor and texture, plus easy variations to try. Storage tips ensure your leftovers stay fresh. Cauliflower Buffalo Dip is great for any party. Enjoy experimenting with flavors and tweaks. I hope you make this dish and share it with others. It’s sure to be a hit!](https://dishtreats.com/wp-content/uploads/2025/07/091f7212-5f30-4b51-84f4-e8795fa9d64a-768x768.webp)

![To make Classic Sloppy Joes, you need some simple, fresh ingredients. Here’s what you will need: - 1 lb ground beef (or turkey) - 1 small onion, finely chopped - 1/2 green bell pepper, finely chopped - 2 cloves garlic, minced - 1 cup tomato sauce - 2 tablespoons ketchup - 1 tablespoon brown sugar - 1 tablespoon Worcestershire sauce - 1 teaspoon mustard - Salt and pepper to taste - 4 hamburger buns - 1 cup shredded cheddar cheese (optional) - Fresh parsley for garnish These ingredients come together to create a rich and tasty filling. The ground beef or turkey serves as a hearty base. The onion and bell pepper add a nice crunch and sweetness. Garlic gives it a punch of flavor. You can also adjust the recipe. If you want a lighter dish, use turkey. For a cheesy twist, add cheddar on top. Fresh parsley adds color and a hint of freshness. This Classic Sloppy Joes recipe is quick and easy. You can find the full recipe [Full Recipe]. Enjoy cooking! First, heat a large skillet over medium heat. This step is key to getting a nice sear. Once the skillet is hot, add 1 lb ground beef or turkey. Use a wooden spoon to break the meat apart as it cooks. This helps it brown evenly. Cook until the meat is browned throughout. Be sure to drain any excess fat from the pan. This keeps your Sloppy Joes from being greasy. Next, add 1 small finely chopped onion, 1/2 green bell pepper, and 2 cloves minced garlic to the skillet. Stir the mixture well. Cook for about 5 minutes or until the veggies soften and smell great. They add a nice flavor to your dish. Now it’s time to make the sauce. Stir in 1 cup tomato sauce, 2 tablespoons ketchup, 1 tablespoon brown sugar, 1 tablespoon Worcestershire sauce, and 1 teaspoon mustard. Mix everything well until the sauce blends with the meat and veggies. Bring the mixture to a gentle simmer. This step helps all the flavors meld together. Lower the heat to maintain a gentle simmer. Let the mixture cook for about 10 minutes, stirring occasionally. If it gets too thick, add a splash of water. This keeps it from becoming dry. Stirring helps prevent sticking and keeps the mixture smooth. Taste the mixture and season it with salt and pepper to your liking. This is your chance to adjust the flavors. While the sloppy joe filling simmers, toast 4 hamburger buns. You can use a hot skillet or toaster. Toast them until they are golden brown and slightly crisp. This adds a nice crunch to your meal. To serve, take a toasted bun and spoon the savory filling onto it. For a cheesy twist, add 1 cup shredded cheddar cheese on top. Finish with a sprinkle of chopped parsley for a pop of color and flavor. This makes your Sloppy Joes look and taste amazing. Enjoy this delightful dish with your family! For the full recipe, check the recipe section above. To enhance flavor, try adjusting the ketchup or brown sugar. If you like it sweeter, add more brown sugar. For a tangy kick, a splash of vinegar works wonders. The sauce should be rich but not too thick. If it gets too thick, add a little water or extra tomato sauce. This keeps it juicy and fun to eat. You can cook Sloppy Joes on the stovetop or in a slow cooker. The stovetop is quick and easy. Sauté the meat and veggies, then let it simmer. In a slow cooker, mix everything and let it cook for hours. This method deepens the flavor. You can also swap the meat. Ground turkey or chicken are great lighter options. For a twist, try lentils for a vegetarian dish. Sloppy Joes pair well with crispy fries or a fresh coleslaw. The crunch of the coleslaw balances the softness of the sandwich. For drinks, a cold soda or iced tea is perfect. You can also enjoy them with a light beer if you prefer. These pairings make your meal fun and complete. {{image_4}} You can spice up your Sloppy Joes with fun twists. For a veggie option, try lentils or black beans instead of meat. They give a hearty texture and soak up the sauce well. Another twist is BBQ Sloppy Joes. Just add your favorite BBQ sauce to the meat mixture for a sweet and tangy flavor. Toppings can make your Sloppy Joes even more amazing. You might want to add different types of cheese. Try provolone or pepper jack for a kick. You can also mix in various sauces. A drizzle of ranch or hot sauce adds a nice touch. Different places have their own takes on Sloppy Joes. In Mexico, they use spices and jalapeños for a spicy version. In the Philippines, they might add sweet sauce and serve it with rice. Exploring these options shows how versatile this dish can be. To keep your Sloppy Joes fresh, store them in an airtight container. Place the cooled mixture in the fridge. Make sure to separate any extra buns to avoid sogginess. You can keep the leftovers for up to three days. If you want to keep them longer, freezing is a great option. When you reheat Sloppy Joes, the stovetop is best. Place the mixture in a skillet over low heat. Stir often to keep it juicy. If using the microwave, cover it with a damp paper towel to keep moisture in. For buns, you can toast them lightly on a skillet or wrap them in foil and warm them in the oven. This way, they stay soft and tasty. To freeze the Sloppy Joe mixture, let it cool first. Then, transfer it to a freezer-safe bag. Remove as much air as possible before sealing. This helps prevent freezer burn. You can freeze it for up to three months. When ready to eat, thaw it in the fridge overnight. Reheat on the stove until hot. Enjoy your Sloppy Joes just like the first time! Making Classic Sloppy Joes is quick and easy. You need about 10 minutes for prep. Cooking takes another 15 minutes. In total, you can have dinner ready in just 25 minutes. Yes, you can use ground turkey as a lighter choice. Turkey has fewer calories and less fat than beef. The flavor will be milder, so you might want to adjust your spices. It’s a great way to make a healthier Sloppy Joe. Sloppy Joes pair well with many sides. Here are some tasty options: - French fries - Coleslaw - Potato chips - Corn on the cob - Salad These sides add nice crunch and freshness to your meal. You can definitely make Sloppy Joes ahead of time. Just cook the meat and sauce, then store it in the fridge. It will last for three days. When you’re ready to eat, heat it up and serve on toasted buns. This makes meal prep easy and saves time. For longer storage, you can freeze the mixture. Just thaw and reheat when ready. You’ll still enjoy great flavor! In this blog post, we covered how to make Classic Sloppy Joes. We explored the ingredients, cooking steps, and tips for flavoring. I also shared variations and storage methods. Sloppy Joes are simple to make, versatile, and fun to eat. Don't hesitate to explore your options by trying new ingredients or toppings. Enjoy your meal and share it with friends for a delicious time!](https://dishtreats.com/wp-content/uploads/2025/06/3a095a95-3efb-4397-8f70-4189d4d50cab-768x768.webp)