Honey Butter Cornbread Delightful and Easy Recipe

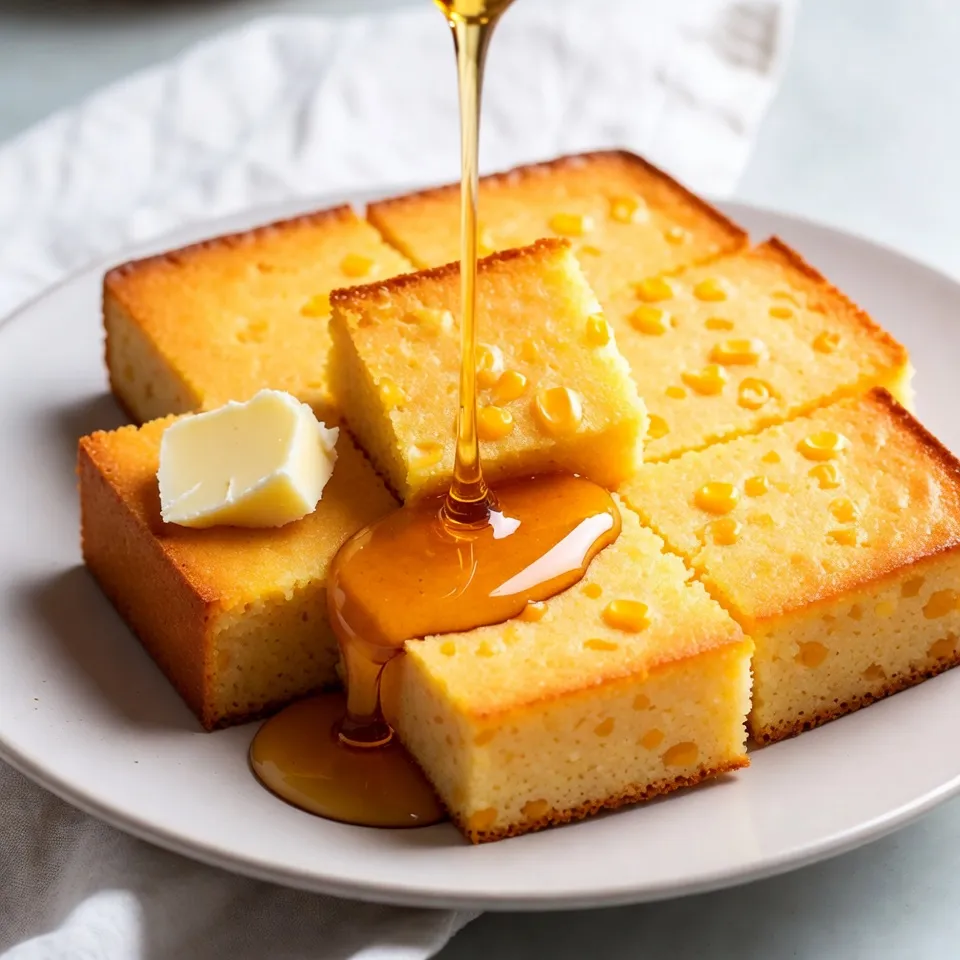
Get ready to savor a slice of heaven with my Honey Butter Cornbread! This delightful recipe combines sweet honey and rich butter with the comforting crunch of cornmeal. Perfect for cozy dinners or gatherings, it’s easy to make and pairs beautifully with your favorite dishes. Let’s dive into the simple ingredients and easy steps that will have everyone asking for seconds! Your new favorite cornbread awaits!
Why I Love This Recipe
- Sweet and Savory Combination: This cornbread perfectly balances the sweetness of honey with the savory flavor of cornmeal, making it a delightful addition to any meal.
- Easy to Make: The recipe is straightforward with minimal steps, making it accessible for both novice and experienced bakers alike.
- Versatile Serving Options: Whether served warm with butter, alongside chili, or as a breakfast treat, this cornbread adapts to various occasions effortlessly.
- Comfort Food at Its Best: There’s something incredibly comforting about freshly baked cornbread, especially when it fills the kitchen with its warm aroma.
Ingredients
List of Ingredients
- 1 cup all-purpose flour
- 1 cup cornmeal
- 1/4 cup granulated sugar
- 1 tablespoon baking powder
- 1/2 teaspoon fine sea salt
- 1 cup whole milk
- 1/4 cup unsalted butter
- 1/4 cup liquid honey
- 2 large eggs
- 1/2 cup corn kernels
- 1/4 teaspoon ground cinnamon (optional)
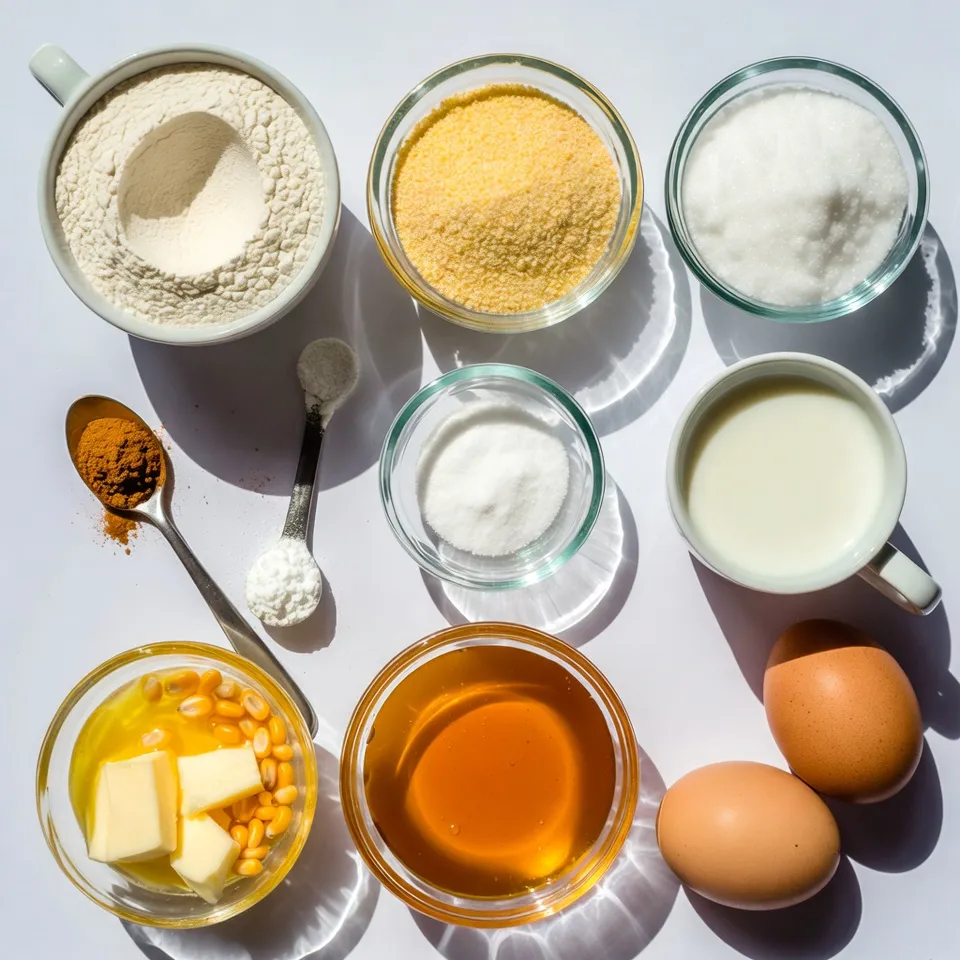
For this honey butter cornbread, I choose simple, fresh ingredients. Each item plays a key role in creating a tasty dish.
First, I use all-purpose flour and cornmeal for the base. They give the cornbread that classic, soft texture. The granulated sugar adds just the right amount of sweetness. Baking powder helps it rise.
Next, I add fine sea salt to balance the flavors. Whole milk makes the cornbread moist and rich. Unsalted butter adds a lovely creaminess, while honey gives it a sweet touch.
I include large eggs for binding. Corn kernels add a nice crunch and a burst of flavor. If you want extra warmth, a hint of ground cinnamon works well, too.
Gather these ingredients, and you’ll be ready to whip up this delightful treat!

Step-by-Step Instructions
Preheat and Prepare the Baking Pan
First, set your oven to 400°F (200°C). This high heat helps the cornbread rise well. Next, grab an 8-inch square baking pan or a cast iron skillet. Grease it with nonstick spray or butter. This step ensures your cornbread releases easily once baked.
Combine Dry Ingredients
In a large mixing bowl, add 1 cup of all-purpose flour, 1 cup of cornmeal, and 1/4 cup of granulated sugar. Also, add 1 tablespoon of baking powder and 1/2 teaspoon of fine sea salt. If you like, you can include 1/4 teaspoon of ground cinnamon for extra flavor. Use a whisk to mix these dry ingredients well. Whisking removes lumps and combines everything evenly.
Mix Wet Ingredients
In another bowl, pour in 1 cup of whole milk, 1/4 cup of melted unsalted butter, and 1/4 cup of liquid honey. Crack in 2 large eggs. Whisk this mixture until it becomes frothy. This frothy blend helps the cornbread stay light and fluffy.
Combine Wet and Dry Ingredients
Now, pour your wet mixture into the bowl with the dry ingredients. Use a spatula or wooden spoon to fold them together. Be gentle; you want to mix just until you see a few streaks of flour left. Overmixing can lead to tough cornbread.
Add Corn Kernels
Next, take 1/2 cup of corn kernels. These can be fresh, frozen, or canned (just drain them first). Gently fold the corn into the batter. This step ensures every bite has a bit of sweet corn flavor.
Bake the Cornbread
Pour your batter into the prepared baking pan. Smooth the top with your spatula. Bake in your preheated oven for 20-25 minutes. To check if it’s done, insert a toothpick into the center. If it comes out clean, your cornbread is ready. It should also have a lovely golden-brown color.
Tips & Tricks
Achieving the Perfect Texture
To get the best texture, precise measurements matter. Use a kitchen scale if you have one. This helps you avoid using too much flour or cornmeal. Room temperature ingredients also play a key role. Eggs and milk blend better when they’re not cold. This makes your batter smooth and fluffy.
Enhancing Flavor
You can boost the flavor of your cornbread in many ways. Try adding spices like paprika or cayenne for a kick. You can also mix in herbs like thyme or rosemary for a fresh taste. Want it sweeter? Swap out granulated sugar for brown sugar or maple syrup. Each sweetener brings a new twist to the flavor.
Serving Suggestions
Presentation can make a big difference. Serve your cornbread warm, drizzled with honey on top. Add a pat of butter to the side for extra richness. For a pop of color, sprinkle more corn kernels on top. Pair it with chili or soup for a comforting meal.
Pro Tips
- Use Room Temperature Ingredients: Allow your eggs and milk to come to room temperature before mixing. This helps create a smoother batter and leads to a better rise in the cornbread.
- Choose the Right Cornmeal: For the best texture, opt for medium or fine-ground cornmeal. Coarse cornmeal can result in a gritty texture that may not be as pleasant in cornbread.
- Don’t Overmix: When combining wet and dry ingredients, mix just until combined. Overmixing can lead to dense cornbread instead of fluffy and light results.
- Store Properly: Keep any leftover cornbread in an airtight container at room temperature for up to 2 days, or refrigerate for up to a week. For longer storage, freeze wrapped slices for up to 3 months.

Variations
Gluten-Free Honey Butter Cornbread
You can make this cornbread gluten-free with a few changes. Instead of all-purpose flour, use a gluten-free flour blend. Look for blends that have xanthan gum or add 1 teaspoon if not included. This helps bind the ingredients. You can also use almond flour or coconut flour, but adjust the liquid to get the right texture. These options keep your cornbread tasty and fluffy.
Sweet vs. Savory Additions
You can change the flavor by adding cheese or herbs. Try sharp cheese like cheddar for a savory twist. Fresh herbs like rosemary or thyme add a nice touch too. For a spicy kick, add jalapeños or red pepper flakes. These options let you play with flavors, making your cornbread unique every time.
Seasonal Ingredients
Using seasonal veggies or fruits can brighten your cornbread. In summer, add fresh corn or zucchini. In fall, try pumpkin or apples. These ingredients add moisture and flavor. They also make your cornbread stand out during special occasions or holidays. Enjoy experimenting with what’s fresh and in season!
Storage Info
Storing Leftover Cornbread
To keep your cornbread fresh, let it cool first. Then, wrap it tightly in plastic wrap or aluminum foil. This prevents it from drying out. Store it in the fridge for up to five days. Use a container with a lid if you prefer. A glass or plastic container works well.
Freezing Cornbread
For longer storage, freezing is a great option. Cut the cornbread into squares. Wrap each piece in plastic wrap. Place the wrapped pieces in a freezer-safe bag. Make sure to remove as much air as possible. Cornbread can last up to three months in the freezer. To thaw, move the cornbread to the fridge overnight. You can also use the microwave for quick thawing.
Reheating Instructions
When ready to enjoy your cornbread again, reheating is key. You can use an oven or microwave. For the oven, preheat to 350°F (175°C). Place the cornbread on a baking sheet. Cover it with foil to keep it soft. Heat for about 10-15 minutes. If using a microwave, place the cornbread on a plate. Cover it with a damp paper towel. Heat in 15-second intervals until warm. This keeps the cornbread moist and tasty.
FAQs
What makes cornbread sweet?
Cornbread gets its sweetness from honey and sugar. The sugar adds a nice touch of flavor. Honey brings a rich, floral note to the cornbread. Together, they create a perfect balance. You can adjust the amount of honey or sugar to suit your taste. If you like it sweeter, add a bit more honey.
Can I make cornbread without eggs?
Yes, you can make cornbread without eggs! Use substitutes like applesauce or mashed banana. These work well to bind the ingredients. You can also use yogurt or buttermilk. Each substitute has a slight effect on taste. Applesauce adds sweetness, while yogurt gives a tangy flavor.
How can I make my cornbread less crumbly?
To make cornbread less crumbly, add moisture. Use extra milk or oil in the batter. You can also include more corn kernels for added moisture. Another tip is to avoid overbaking. Keep an eye on the baking time. When a toothpick comes out clean, it’s done.
In this blog post, we covered all the essentials for making delicious cornbread. We went over the ingredients, step-by-step instructions, and even tips for the best texture. You learned how to enhance flavor and explore exciting variations. Storing and reheating cornbread were also discussed. Now, you have all the tools to create the perfect dish. Remember, the key lies in the details and experimenting with flavors. Enjoy baking your cornbread and impressing everyone with your skill

Sweet & Buttery Honey Cornbread
Ingredients
- 1 cup all-purpose flour
- 1 cup cornmeal
- 1/4 cup granulated sugar
- 1 tablespoon baking powder
- 1/2 teaspoon fine sea salt
- 1 cup whole milk
- 1/4 cup unsalted butter, melted and slightly cooled
- 1/4 cup liquid honey
- 2 large eggs, at room temperature
- 1/2 cup corn kernels (fresh, frozen, or canned and drained)
- 1/4 teaspoon ground cinnamon (optional)
Instructions
- Preheat your oven to 400°F (200°C). Grease an 8-inch square baking pan or a cast iron skillet with nonstick spray or butter to ensure easy removal of the cornbread after baking.
- In a large mixing bowl, combine the all-purpose flour, cornmeal, sugar, baking powder, fine sea salt, and ground cinnamon (if using). Whisk these dry ingredients together until they are well blended, ensuring there are no lumps.
- In a separate bowl, mix together the whole milk, melted butter, liquid honey, and eggs. Whisk vigorously until the mixture becomes frothy and well combined.
- Pour the wet mixture into the bowl of dry ingredients. With a spatula or wooden spoon, gently fold the ingredients together. Be careful not to overmix; stop once there are just a few streaks of flour remaining.
- Gently fold in the corn kernels, distributing them evenly throughout the batter for added flavor and texture.
- Transfer the batter into the prepared baking pan, smoothing the top with a spatula to ensure an even surface.
- Bake in the preheated oven for 20-25 minutes, or until a toothpick inserted into the center of the cornbread comes out clean, and the top is a lovely golden-brown color.
- Once baked, remove the cornbread from the oven and let it cool in the pan for about 5-10 minutes. Then, slice into squares or wedges for serving.


![- 1 lb beef sirloin, thinly sliced against the grain - 1 medium onion, finely chopped - 2 cloves garlic, minced - 8 oz mushrooms, sliced (cremini or button) - 1 cup beef broth (preferably low-sodium) - 1 cup sour cream (or Greek yogurt for a lighter option) - 2 tablespoons all-purpose flour - 2 tablespoons olive oil - 1 teaspoon Dijon mustard - Salt and freshly ground black pepper to taste - 12 oz egg noodles (or your favorite pasta) The beef sirloin is the star of the dish. It should be tender and flavorful. Use fresh onions and garlic to build a tasty base. The mushrooms add a nice earthiness. A good beef broth gives depth to the sauce. The sour cream adds creaminess and tang. If you want a lighter dish, Greek yogurt works well too. - Greek yogurt instead of sour cream - Alternative pasta types If you do not have sour cream, Greek yogurt is a great swap. It gives a similar creamy texture while being a bit healthier. You can also try different pasta types, like fettuccine or penne, based on your preference. - 1 teaspoon Dijon mustard - Salt and freshly ground black pepper - Fresh parsley, finely chopped for garnish Dijon mustard adds a subtle kick and depth of flavor. Salt and pepper are key for bringing out the taste in all the ingredients. A sprinkle of fresh parsley on top makes the dish look bright and fresh. It is a simple way to enhance the visual appeal. - Start by boiling salted water in a large pot. - Once boiling, add 12 oz of egg noodles. - Cook them until al dente, following package instructions. - When ready, drain the noodles and set them aside. - Toss the noodles with a drop of olive oil to keep them from sticking. - Heat 2 tablespoons of olive oil in a large skillet over medium-high heat. - Add 1 lb of thinly sliced beef sirloin to the hot pan. - Season the beef with salt and freshly ground black pepper. - Cook for about 3 to 4 minutes until the beef is browned. - Use a slotted spoon to remove the beef and place it on a plate. - In the same skillet, add the remaining olive oil. - Once hot, stir in 1 medium chopped onion and 2 minced garlic cloves. - Sauté for 2 to 3 minutes until the onion is soft and clear. - Next, add 8 oz of sliced mushrooms, cooking for another 4 to 5 minutes. - When the mushrooms are golden, sprinkle 2 tablespoons of flour over the mix. - Slowly pour in 1 cup of beef broth, whisking constantly. - Keep stirring until the mixture thickens, about 3 to 4 minutes. - Lower the heat to medium-low, then stir in 1 cup of sour cream. - Add 1 teaspoon of Dijon mustard for extra flavor. - Return the beef to the skillet, mixing well in the sauce. - Warm it through for 2 to 3 minutes without boiling. - Taste and adjust the seasoning as needed. - For plating, place a generous portion of noodles on each plate. - Ladle the creamy beef stroganoff over the noodles. - Finish by garnishing with finely chopped fresh parsley. - This adds a pop of color and freshness to your dish. For the full recipe, check out the [Full Recipe]. Enjoy this comforting meal! To make a smooth sauce, avoid lumps. When you add flour, stir it well before adding beef broth. This will help mix everything perfectly. Keep the heat low. You want to see gentle bubbles, not a rolling boil. A simmer will thicken your sauce without breaking it down. Slice your beef against the grain. This makes it tender and easy to chew. If you cut with the grain, the beef will be tough. Pay attention to the mushrooms too. Cook them until they are golden brown. This brings out their flavor and gives a nice texture. About 4-5 minutes should do the trick. Serve your beef stroganoff in shallow bowls. This allows the sauce to spread out and look rich. Add a sprinkle of fresh parsley on top for color. A bit of greenery makes the dish pop. It also adds a fresh taste to each bite. {{image_4}} You can make a tasty vegetarian beef stroganoff. Simply swap the beef for mushrooms or tofu. Mushrooms give a great, meaty flavor. Tofu adds protein and absorbs the sauce well. For a creamy mushroom stroganoff, follow these steps: - Use 16 oz of sliced mushrooms instead of beef. - Cook the mushrooms until they are soft and browned. - Add 1 cup of vegetable broth instead of beef broth. - Stir in the same sour cream for creaminess. If you want a lighter option, try using chicken or turkey. Both cook quickly and taste great in stroganoff. Use diced chicken breast or turkey breast instead of beef. Adjust the cooking time to about 5-7 minutes. Ensure the chicken or turkey is cooked through before adding the sauce. To elevate the flavor, consider adding Worcestershire sauce or a splash of red wine. These ingredients add depth and richness. You can also include fresh herbs like thyme or rosemary. They bring a nice aroma and complement the creamy sauce. A teaspoon of Worcestershire sauce or a ¼ cup of red wine can make a big difference. After enjoying your beef stroganoff, you may have some leftovers. Store them in an airtight container. Refrigerate the stroganoff within two hours of cooking. It will stay fresh for about three to four days. When you reheat, warm it gently over low heat. This keeps the sauce creamy. Stir often to avoid burning. You can also use a microwave. Heat it in short bursts, stirring in between. This method helps the dish heat evenly. If you want to keep beef stroganoff longer, freezing is a great option. To freeze, let the dish cool completely. Then, transfer it to a freezer-safe container. Leave some space at the top for expansion. Seal it tightly to prevent freezer burn. For thawing, the best method is overnight in the fridge. This keeps the flavor and texture nice. If you need it fast, you can use the microwave. Set it to defrost and check every few minutes. After thawing, reheat as I mentioned before, ensuring it warms evenly. You can find the full recipe for this comforting dish above. Enjoy every bite! You can enjoy Classic Beef Stroganoff with several tasty sides. Here are some great options: - Steamed green beans - Roasted broccoli - Mashed potatoes - A fresh garden salad - Garlic bread Each side adds a nice touch. Steamed veggies give color and crunch. Mashed potatoes soak up the sauce well. A salad offers a refreshing contrast. Classic Beef Stroganoff lasts about 3 to 4 days in the fridge. Store it in an airtight container. Always cool the dish before sealing it up. Check for any signs of spoilage before eating. If it smells off or looks strange, throw it away. Yes, you can prepare parts of Classic Beef Stroganoff ahead of time. Cook the beef and sauce, then store them separately from the noodles. When you’re ready to eat, heat the beef and sauce. Cook the noodles fresh for best results. This way, you keep everything tasty and warm. Classic Beef Stroganoff is not gluten-free due to the flour in the sauce. You can make it gluten-free by using cornstarch or gluten-free flour. Be sure to check that your beef broth and noodles are also gluten-free. This way, everyone can enjoy this delicious meal. For the full recipe, check my earlier section. You learned about the key ingredients for Classic Beef Stroganoff, including beef sirloin and egg noodles. We discussed how to cook the noodles, sauté the beef, and prepare a rich sauce. You also saw tips for perfecting the dish and its various options for customization, like vegetarian alternatives. In summary, you can make a delicious meal everyone will enjoy. Remember, cooking is about creativity. Feel free to experiment with flavors and ingredients until it’s just right for you. Enjoy your cooking journey!](https://dishtreats.com/wp-content/uploads/2025/06/f14c56cb-cc13-4cc3-a3ff-e0f76ee8bdb9-768x768.webp)


