Homemade Margherita Pizza Simple and Flavorful Slice

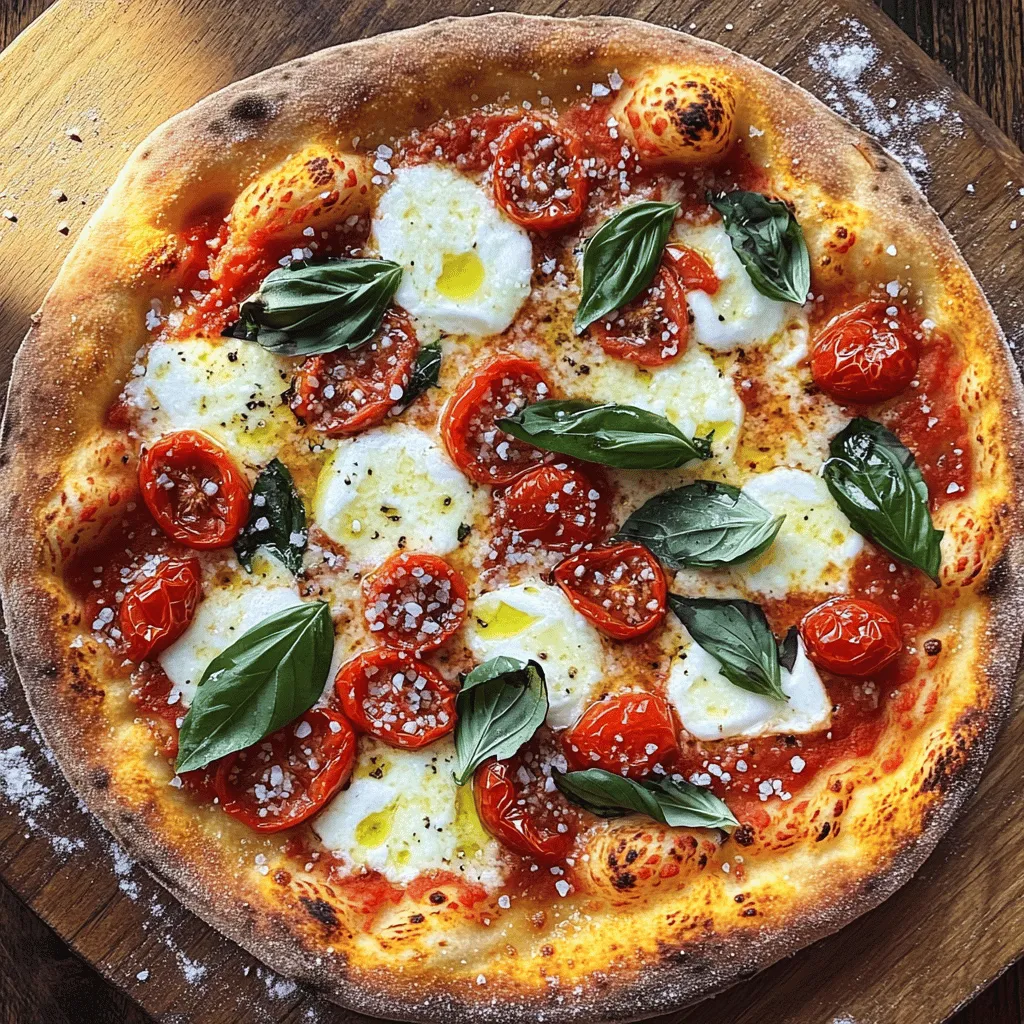
Are you craving a slice of homemade Margherita pizza that’s bursting with flavor? You’re in the right place! In my guide, I’ll walk you through simple steps to create fresh dough, rich sauce, and the perfect toppings. Each bite of this pizza is not only delicious but also a breeze to make. Let’s dive into the world of homemade pizza and impress your taste buds!
Ingredients
Essential Ingredients for the Dough
- 2 cups all-purpose flour
- 1 teaspoon active dry yeast
- ¾ cup warm water
- 1 teaspoon sugar
- 1 teaspoon salt
- 1 tablespoon olive oil
Making the dough is the first step. I love using simple ingredients that create a great base. All-purpose flour gives the right texture. Active dry yeast helps the dough rise. Warm water activates the yeast. Sugar feeds the yeast to help it work. Salt adds flavor and controls the yeast’s growth. Olive oil gives the dough a nice richness.
Ingredients for the Sauce
- 1 cup crushed San Marzano tomatoes
- 1 teaspoon dried oregano
- Salt and freshly cracked black pepper
The sauce is key to a great pizza. I use crushed San Marzano tomatoes for their sweet flavor. Dried oregano adds a classic Italian touch. Salt and black pepper balance the taste. Mixing these together gives you a fresh sauce that shines on the pizza.
Toppings
- 8 ounces fresh mozzarella cheese
- Fresh basil leaves
- Extra olive oil for drizzling
Toppings complete the pizza. Fresh mozzarella melts beautifully and adds creaminess. I love adding fresh basil leaves for a burst of flavor. A drizzle of olive oil enhances everything. These simple toppings make the pizza taste fresh and vibrant.
Step-by-Step Instructions
Making the Dough
To start, you need to make the dough. First, dissolve the sugar and yeast in warm water. This step wakes up the yeast. Let it sit until it gets frothy, which takes about 5-10 minutes. Next, combine the flour and salt in a big bowl. Then, mix in the yeast mixture and olive oil. Stir until the dough starts to come together.
Kneading and Rising
Now it’s time to knead. Place the dough on a floured surface. Knead the dough for 8-10 minutes until it feels smooth and elastic. This action develops the gluten. Shape the dough into a ball and place it in a greased bowl. Cover it with a damp towel and let it rise in a warm spot for about 1 hour. The dough should double in size.
Preparing the Sauce and Shaping the Pizza
While the dough rises, prepare the sauce. Mix the crushed San Marzano tomatoes with dried oregano. Season with salt and black pepper to taste. This sauce is simple but full of flavor. Next, preheat your oven to 475°F (245°C). If you have a pizza stone, place it in the oven to heat. Once the dough has risen, gently punch it down. Transfer it to a floured surface and shape it into a 12-inch circle. Now you’re ready to assemble your pizza!
Tips & Tricks
Achieving the Perfect Dough
To make great pizza, the dough is key. Here are some tips:
- Kneading: Knead the dough for about 8 to 10 minutes. Use your palms to push it down and fold it over. This builds strong gluten, which is vital for a chewy crust.
- Rising: After kneading, place the dough in a greased bowl. Cover it with a damp cloth. Let it rise in a warm spot until it doubles in size, about 1 hour. This helps the dough become light and airy.
- Consistency: The dough should feel smooth and slightly tacky but not sticky. If it sticks too much, add a little flour.
Sauce Preparation Tips
The sauce is just as important as the dough. Here’s how to make it shine:
- Flavor Boost: Mix crushed tomatoes with dried oregano, salt, and pepper. This simple blend brings out the natural sweetness of the tomatoes.
- San Marzano Tomatoes: Always use San Marzano tomatoes. They are sweeter and less acidic than other types. Their rich flavor makes your sauce stand out.
Baking Techniques
Baking your pizza correctly is essential for a perfect slice.
- Oven Settings: Preheat your oven to 475°F (245°C). A hot oven creates a crispy crust and bubbly cheese. Place a pizza stone or an upside-down baking sheet inside to heat up.
- Knowing When It’s Done: Bake the pizza for 10 to 12 minutes. Look for a golden-brown crust and bubbly cheese. If the cheese is slightly browned, you’re ready to slice!
These tips will help you craft a Margherita pizza that is simple yet full of flavor.

Variations
Cheese Alternatives
You can switch up the cheese on your Margherita pizza. Using burrata adds a creamy twist. Burrata has a soft center that melts beautifully. Ricotta is another great choice. It adds a light, fluffy texture that complements the sauce.
If you want a dairy-free option, try cashew cheese or vegan mozzarella. These options melt well and give a nice flavor. You can also use nutritional yeast for a cheesy taste without dairy.
Sauce Variations
The sauce is key to a tasty pizza. You can try using pesto instead of the classic tomato sauce. Pesto brings a fresh, herby taste. Another great option is arrabbiata sauce. This sauce adds a spicy kick with garlic and chili peppers.
For more depth, add minced garlic or onions to your sauce. These ingredients boost the flavor and aroma, making each bite even better.
Topping Ideas
Don’t be afraid to play with toppings! Seasonal vegetables are a fantastic choice. Try adding zucchini, bell peppers, or even arugula for a fresh touch.
You can also experiment with flavored oils. Drizzling garlic-infused olive oil adds a nice kick. Alternative herbs, like oregano or thyme, can change the flavor profile. Each variation makes your pizza unique and exciting.
Storage Info
Storing Leftover Pizza
To keep leftover Margherita pizza fresh, follow these best practices:
- Refrigerate promptly: Place the pizza in the fridge within two hours of baking.
- Use an airtight container: Store slices in a container or wrap them tightly in foil.
- Layer with parchment paper: If stacking slices, add parchment paper between them to avoid sticking.
If you want to freeze your pizza:
- Cool before freezing: Let the pizza cool completely before wrapping.
- Wrap tightly: Use plastic wrap, then foil to prevent freezer burn.
- Label and date: Mark the package with the date for easy tracking.
Reheating Tips
To enjoy your pizza again, use these recommended methods:
- Oven method: Preheat to 375°F (190°C). Place the pizza on a baking sheet and heat for about 10 minutes.
- Skillet method: Heat a skillet over medium heat. Add the pizza and cover. Cook for 5–7 minutes until the cheese melts.
To avoid sogginess:
- Skip the microwave: Microwaving makes the crust rubbery.
- Use a baking sheet: This keeps the crust crisp during reheating.
Duration for Freshness
In the fridge, your Margherita pizza lasts about 3–4 days.
Watch for these signs that your pizza has gone bad:
- Off smell: A sour or strange odor is a clear sign.
- Mold: Any visible mold means it’s time to toss the pizza.
- Texture changes: If the crust feels very hard or soggy, it’s better not to eat it.
FAQs
How can I make Margherita pizza gluten-free?
To make gluten-free Margherita pizza, use gluten-free flour blends. Look for blends that contain rice flour or almond flour. These substitutes work well in the dough. You may need to adjust the water amount since gluten-free flour can absorb more moisture. Test the dough until it feels right.
What type of oven is best for baking pizza?
I recommend using a pizza stone or baking steel in your oven. A pizza stone holds heat well and gives a crisp crust. It helps the bottom cook evenly. A baking sheet is easier but may not give the same results. Preheat your oven with the stone or steel inside for the best effect.
Can I prepare the dough in advance?
Yes, you can prep the dough ahead of time. After kneading, let it rise until doubled. Then, cover it and store in the fridge for up to 3 days. You can also freeze it. Just thaw it in the fridge overnight before using. This makes it easy for busy days.
What are the essential tools for making pizza at home?
Here are some helpful tools for making pizza:
- Mixing bowl
- Rolling pin or hands for shaping
- Pizza stone or baking sheet
- Pizza peel for transferring
- Sharp knife or pizza cutter for slicing
These tools help you create a tasty pizza with ease. Enjoy your pizza-making journey!
Making Margherita pizza at home is a fun and rewarding process. You learned about essential ingredients for the dough, sauce, and toppings. I shared step-by-step instructions to help you master the dough and bake the perfect pizza. Tips and tricks can improve your pizza game, from achieving the best dough to exploring variations in cheese and sauce. Finally, knowing how to store and reheat leftovers keeps your pizza fresh. Enjoy creating your own delicious Margherita pizza and sharing it with loved ones!


![To make this dish, you will need: - 1 lb Brussels sprouts, trimmed and halved - 3 tablespoons extra virgin olive oil - 1/4 cup pure maple syrup - 1 tablespoon balsamic vinegar - 1 teaspoon garlic powder - Salt and freshly ground black pepper to taste These ingredients come together to create a sweet and savory glaze. The maple syrup adds sweetness, while the balsamic vinegar gives tanginess. The olive oil helps with roasting, making the sprouts tender and tasty. You can add these optional ingredients for extra flavor and texture: - 1/4 cup chopped walnuts - Fresh thyme leaves for garnish Walnuts add a nice crunch, while thyme gives a fresh aroma. Both options enhance the dish without overpowering it. This dish is not just tasty; it’s also good for you. Here’s a quick look at the nutrition per serving: - Calories: About 180 - Protein: 3g - Carbohydrates: 25g - Fat: 8g - Fiber: 4g Brussels sprouts are rich in vitamins C and K. The maple syrup provides natural sugars, making this dish a healthy choice. You get great flavors and health benefits in one meal. For the complete recipe, check the Full Recipe section above! First, we need to preheat the oven to 400°F (200°C). This heat is perfect for roasting. A hot oven ensures crispy edges and tender centers for your Brussels sprouts. Next, gather your ingredients. You will need: - 1 lb Brussels sprouts, trimmed and halved - 3 tablespoons extra virgin olive oil - 1/4 cup pure maple syrup - 1 tablespoon balsamic vinegar - 1 teaspoon garlic powder - Salt and freshly ground black pepper to taste - 1/4 cup chopped walnuts (optional for crunch) - Fresh thyme leaves for garnish (optional for aroma and color) In a large bowl, mix the halved Brussels sprouts with olive oil, maple syrup, balsamic vinegar, garlic powder, salt, and pepper. Toss everything well. Make sure every sprout gets coated in the sweet and savory sauce. This step is key for flavor. Prepare your baking sheet by lining it with parchment paper. This makes cleaning easy and helps prevent sticking. Spread the Brussels sprouts in a single layer on the sheet. Give them space to roast well. Now, place the baking sheet in the hot oven. Roast the sprouts for 25 minutes. Halfway through, stir them to promote even cooking. You want them to get tender and brown. If you add walnuts, toss them on the sheet during the last 5 minutes. This will give them a nice toast and extra crunch. Once done, take the Brussels sprouts out and let them cool for a minute. Transfer them to a serving dish. For a finishing touch, sprinkle fresh thyme leaves on top. This adds a nice pop of color and aroma to your dish. Enjoy this full recipe for a delicious treat! To get that perfect glaze, start with good maple syrup. Use pure maple syrup for the best flavor. Mix it well with olive oil and balsamic vinegar; this combo really shines. Make sure to coat the Brussels sprouts evenly. This helps each piece get that sweet, sticky glaze. Toss them well in the bowl before roasting. Roasting Brussels sprouts needs some care. First, preheat your oven to 400°F (200°C). This hot oven helps them caramelize. Spread the sprouts on a baking sheet in a single layer. If they are crowded, they won't brown well. Stir them halfway through cooking to ensure even roasting. You want them golden brown and tender, about 25 minutes in the oven. When ready to serve, think about how to make them look nice. Place the roasted sprouts on a large platter. You can arrange them in a circle for a pretty look. If you added walnuts, sprinkle them on top for crunch. Fresh thyme leaves also add color and smell great. This makes the dish not just tasty but beautiful too. For the full recipe, check out the details above. {{image_4}} You can switch up the sweetener for a twist. Try honey or agave syrup. These will add their own unique flavors. You can also use coconut sugar for a richer taste. If you like a kick, add some chili flakes for heat. A dash of orange juice can also brighten up the sweetness. This recipe is already vegetarian. To make it vegan, ensure the maple syrup is pure. You can also use almond oil instead of olive oil for a different flavor. For creaminess, add a dollop of vegan sour cream on top before serving. This adds a lovely tang that pairs well with the sweetness. Seasonal swaps can make this dish even better. In spring, add fresh peas for color and sweetness. During fall, toss in some diced apples for a sweet crunch. In winter, try adding roasted chestnuts for a nutty flavor. These changes keep the dish fresh and exciting every time you make it. For the full recipe, you can refer back to the detailed instructions provided. After enjoying your maple glazed Brussels sprouts, store any leftovers in an airtight container. This keeps them fresh and prevents odors. Let them cool first before sealing. Place the container in the fridge. They stay good for about 3 to 5 days. If you want to keep them longer, consider freezing. Reheating your Brussels sprouts can be quick and easy. You can use the oven or stovetop. If you use the oven, preheat it to 350°F (175°C). Spread the sprouts on a baking sheet and heat for about 10-15 minutes. Stir halfway through to ensure even warming. If you prefer the stovetop, heat a pan over medium heat. Add a bit of olive oil and toss the sprouts until warmed through. Freezing Brussels sprouts is a smart way to save them for later. First, blanch them in boiling water for 3 minutes. Then, cool them in ice water. This keeps their bright color and flavor. Drain and dry the sprouts, then place them in a freezer bag. Remove as much air as you can before sealing. They can last up to 6 months in the freezer. When you're ready to use them, just thaw and reheat! Enjoy your deliciously roasted maple glazed Brussels sprouts from [Full Recipe] and savor every bite! Yes, you can prep Brussels sprouts in advance. Trim and halve them a day before. Store them in an airtight container in the fridge. When you're ready, mix them with the other ingredients from the Full Recipe. This helps save time and makes cooking easier. Maple glazed Brussels sprouts pair well with many dishes. Here are some great options: - Roast chicken for a savory touch. - Grilled salmon for a healthy protein. - Quinoa salad for a hearty side. - Mashed potatoes for comfort food lovers. These options balance the sweet and savory flavors of the sprouts. To make this dish vegan, swap out the maple syrup for agave nectar. This keeps the sweetness intact. You can also use vegetable oil instead of olive oil if you prefer. Follow the Full Recipe as is, making those simple swaps. Enjoy the same great taste with a vegan twist! In this blog post, we covered how to make maple glazed Brussels sprouts. We discussed the key ingredients and provided step-by-step instructions. Tips helped you achieve the perfect glaze and roasting method. You also learned about variations, storage, and common questions. Now, you have all the tools to enjoy this dish. Experiment with flavors and enjoy your cooking!](https://dishtreats.com/wp-content/uploads/2025/06/8ccc11bb-56ad-4722-8e0d-cbebb28a9ca5-768x768.webp)

![To create the Roasted Beet and Goat Cheese Salad, you will need the following ingredients: - 4 medium beets, scrubbed and trimmed - 2 tablespoons extra virgin olive oil, divided - Sea salt and freshly ground black pepper to taste - 4 cups mixed greens (arugula, spinach, and kale) - 1/2 cup creamy goat cheese, crumbled - 1/4 cup walnuts, toasted and roughly chopped - 1/4 cup dried cranberries - 2 tablespoons balsamic vinegar - 1 tablespoon pure honey - Fresh herbs (basil or parsley) for garnish Each ingredient adds not just flavor, but also nutrition. Beets are rich in vitamins and minerals. They help boost your energy levels. Goat cheese brings a creamy texture and a tangy taste. It pairs well with the sweetness of beets and cranberries. Walnuts add crunch and healthy fats, while mixed greens provide fiber. The dressing of balsamic vinegar and honey ties all the flavors together. You can find the Full Recipe for step-by-step instructions to make this delightful salad. 1. Preheat the oven: Set your oven to 400°F (200°C). This makes sure the beets roast well. 2. Wrap the beets: Take each beet and wrap it in foil. Drizzle 1 tablespoon of olive oil on them. Add sea salt and black pepper for flavor. Seal the foil tightly. 3. Roast the beets: Place the wrapped beets on a baking sheet. Roast them in the oven for 45-60 minutes. They are done when a fork easily pierces them. 1. Peel and slice the beets: Let the beets cool a bit. Then, peel off the skin. I recommend wearing gloves to avoid stains. Cut the beets into wedges for a nice look. 2. Combine salad ingredients: In a large mixing bowl, add the mixed greens, sliced roasted beets, crumbled goat cheese, toasted walnuts, and dried cranberries. Gently mix everything together. 1. Prepare the dressing: In a small bowl, whisk together the balsamic vinegar, the last tablespoon of olive oil, and honey. Stir well until combined. Taste it and add salt and pepper as needed. 2. Dress the salad: Drizzle the dressing over the salad. Toss everything gently to coat the greens and other ingredients. 3. Serve the salad: Plate the salad right away. Garnish with fresh herbs for a pop of color and extra flavor. For the full recipe, check out the Beet the Ordinary: Roasted Beet and Goat Cheese Salad. - Choosing the right beet size for even cooking: I recommend using medium beets. They cook evenly and are easy to handle. If you use larger beets, they may take longer to roast, leading to uneven texture. Smaller beets cook too quickly and may dry out. - How to properly season the beets: Before wrapping the beets in foil, drizzle them with olive oil. Add a generous pinch of sea salt and freshly ground black pepper. This simple seasoning enhances their natural sweetness and flavor during roasting. - Creative ways to plate the salad: For a stunning presentation, use a large, flat platter. Layer mixed greens as a base. Fan out the roasted beet wedges on top and sprinkle crumbled goat cheese and walnuts over the salad. This method creates a colorful and inviting look. - Garnishing tips to elevate the dish: Fresh herbs can add color and flavor. A sprinkle of chopped basil or parsley brightens the dish. You can also use edible flowers for a special touch, making it perfect for gatherings or celebrations. - Best practices for prepping ingredients in advance: You can roast the beets a day ahead. Once cooled, wrap them in plastic to keep fresh. Store the mixed greens and other ingredients separately. This way, you can quickly assemble your salad just before serving, keeping everything crisp and tasty. For the complete recipe, see [Full Recipe]. {{image_4}} You can switch up the greens in your salad to make it special. Try using arugula for a peppery kick or romaine for a crisp bite. Each green offers a different taste and texture, giving your salad a new vibe. If you want to change the cheese, feta or blue cheese can work wonders. Feta adds a salty flavor, while blue cheese brings a bold touch. Both complement the sweetness of the beets nicely. The right dressing can elevate your salad. A citrus vinaigrette adds a bright and zesty flavor. Mix fresh lemon juice with olive oil for a quick option. If you want something creamy, a yogurt dressing is perfect. It pairs well with the tang of goat cheese and makes the salad feel lush. Don’t hesitate to experiment with different dressings to find your favorite. Add protein to make your salad more filling. Grilled chicken is a great choice, giving the salad a hearty feel. For a plant-based option, chickpeas work well. They add protein and texture. You can also sprinkle seeds, like pumpkin or sunflower seeds, for some crunch. Fresh fruit, such as sliced pears or apples, can add a sweet note. Each add-in brings its own charm to the dish, making it unique every time. Don’t forget to check out the Full Recipe for more inspiration! To keep your roasted beet and goat cheese salad fresh, store it in an airtight container. Place any leftovers in the fridge. The salad will stay good for about three days. Make sure to keep the dressing separate until you are ready to eat. This helps keep the greens crisp and fresh. If you want to store beets for longer, you can freeze them. First, roast the beets as in the Full Recipe. Let them cool, then peel and slice them. Place the slices in a freezer-safe bag, removing as much air as possible. Beets can last up to six months in the freezer. However, I do not recommend freezing the prepared salad. The greens won't hold up well after thawing. When it's time to eat your stored salad, you can reheat the beets if you like. Just warm them in the microwave for about 30 seconds. Toss the salad again after reheating. This helps mix the flavors back together. If you stored the salad dressed, consider adding a bit more dressing before serving. This keeps everything tasty and vibrant. How long do roasted beets last in the fridge? Roasted beets can last up to five days in your fridge. Store them in an airtight container. This way, they stay fresh and tasty for your salads. Can I use pre-cooked beets for this recipe? Yes, you can use pre-cooked beets. They are a great time-saver. Just cut them into wedges and add them to your salad. They will still taste delicious! What type of goat cheese is best for salads? A creamy goat cheese works best for this salad. It adds a nice richness and tang. Look for soft, crumbled varieties for easy mixing. Can I substitute goat cheese with a dairy-free option? Absolutely! You can use a dairy-free cheese made from nuts. Look for a creamy cashew cheese or tofu-based option. Both will provide a nice flavor. What are the health benefits of beet and goat cheese salad? This salad is packed with nutrients. Beets are high in fiber and antioxidants. Goat cheese adds protein and calcium. Together, they support heart health and digestion. How many calories are in a serving of this salad? One serving of this salad has about 300 calories. This includes the beets, goat cheese, nuts, and dressing. It’s a great balance of flavors and nutrients without too many calories. For the complete recipe, check out the Full Recipe. This salad combines roasted beets, fresh greens, and tangy goat cheese. You learned how to roast beets and mix vibrant ingredients for a delicious dish. Remember to choose the right beet size and season well for great texture. Don't hesitate to try different greens or dressings to make it your own. Salad prep can be easy, helping you save time. Enjoy this healthy meal that packs flavor and nutrients. Make it today and impress yourself with your cooking skills!](https://dishtreats.com/wp-content/uploads/2025/06/a3a0567a-1f00-4857-8ef4-d1e9b38b024f-768x768.webp)


. To make your soup even tastier, think about adding spices. A pinch of smoked paprika gives a nice depth. You can also try a dash of red pepper flakes for some heat. Fresh herbs like thyme or dill can brighten the flavors. To get the best creaminess, use full-fat coconut milk. It adds a rich texture. If you prefer cashew cream, blend soaked cashews with water until smooth. This makes a wonderful base too. If you want a thicker soup, let it simmer longer. This lets more water evaporate. You can also blend in some cooked potatoes for extra creaminess. To make it more nutritious, add veggies like carrots or spinach. Just chop them small and add them early in the cooking process. They will soften and blend well with the soup. You can also stir in cooked lentils for added protein and texture. {{image_4}} You can change the type of tomatoes you use. Fresh tomatoes add brightness. Canned tomatoes provide convenience and consistent flavor. Both work well in this soup. Choose what suits your taste and time best. For cream alternatives, coconut milk is my favorite. It gives a smooth and rich flavor. You can also use cashew cream or almond milk for a lighter option. Each choice offers a unique taste. Want to add protein? Beans or lentils are great options. They boost nutrition and make the soup heartier. Try adding white beans for a creamy texture or lentils for a bit of bite. You can mix and match until you find your favorite blend. Pair this soup with a side salad or sandwich. A fresh green salad balances the rich soup. A grilled cheese sandwich adds comfort and crunch. Both choices enhance your meal experience. For a fun twist, serve the soup in bread bowls. You can hollow out a crusty loaf and fill it. This adds a delicious element to your meal. Top the soup with fresh basil or a drizzle of olive oil for extra flair. These simple touches make the dish special. I encourage you to explore these ideas to create your own version of Vegan Creamy Tomato Soup. Check out the Full Recipe for all the details to get started! To keep your Vegan Creamy Tomato Soup fresh, store it in airtight containers. This helps prevent spoilage. Make sure the soup cools down before sealing the container. You can keep it in the fridge for up to five days. If you want to save it longer, consider freezing it. Pour the cooled soup into freezer-safe bags or containers. Leave some space at the top, as the soup will expand when frozen. This soup can last for up to three months in the freezer. When you want to enjoy your soup again, reheating it properly is key. The best method is to use the stovetop. Pour the soup into a pot and heat it over low to medium heat. Stir it often to keep it from sticking. This way, you keep the flavor and creaminess intact. If you prefer to use a microwave, pour the soup into a microwave-safe bowl. Heat it in short bursts, stirring in between, to ensure even warming. Be careful not to overheat, as this can change the texture. How to make Vegan Creamy Tomato Soup spicier? You can add red pepper flakes or a pinch of cayenne. Start with a small amount. Taste the soup after mixing. This way, you can control the heat. Another option is to add diced jalapeños. These will give your soup a nice kick! Can I substitute coconut milk with another plant-based milk? Yes, you can use almond milk, soy milk, or oat milk. Just ensure it is unsweetened. Coconut milk adds creaminess, but other milks work too. Each will change the flavor slightly, but they will still taste great. How long does the soup last in the fridge? The soup lasts about 3 to 5 days in the fridge. Store it in an airtight container. Always check for any changes in smell or color before eating. What is the best method to puree the soup? An immersion blender works best for pureeing. It keeps the soup in the pot, and it’s easy to use. If you don’t have one, use a regular blender. Just blend in small batches to avoid spills. Can I use fresh tomatoes instead of canned for this recipe? Yes, fresh tomatoes can be used! You will need about 2 pounds of ripe tomatoes. Blanch them first to remove the skins. This adds a fresh flavor to your soup. What garnishes pair well with Vegan Creamy Tomato Soup? Fresh basil leaves are a great choice. They add color and flavor. You can also drizzle some extra coconut milk on top. Croutons or a sprinkle of nutritional yeast also work well! This blog post covers how to make Vegan Creamy Tomato Soup. We broke down the needed ingredients, their nutritional value, and suggested substitutes. I provided step-by-step instructions for preparation and cooking. Tips for flavor, thickness adjustments, and variations helped enhance your soup. You'll find storage and reheating info to keep your leftovers fresh. With these insights, you can enjoy a delicious, creamy soup that's easy to make, healthy, and versatile. Get creative and have fun experimenting!](https://dishtreats.com/wp-content/uploads/2025/06/e1561612-3c52-470f-b0a5-4bd51ef2e908-768x768.webp)