Herbed Garlic Pull Apart Bread Simple and Tasty Treat

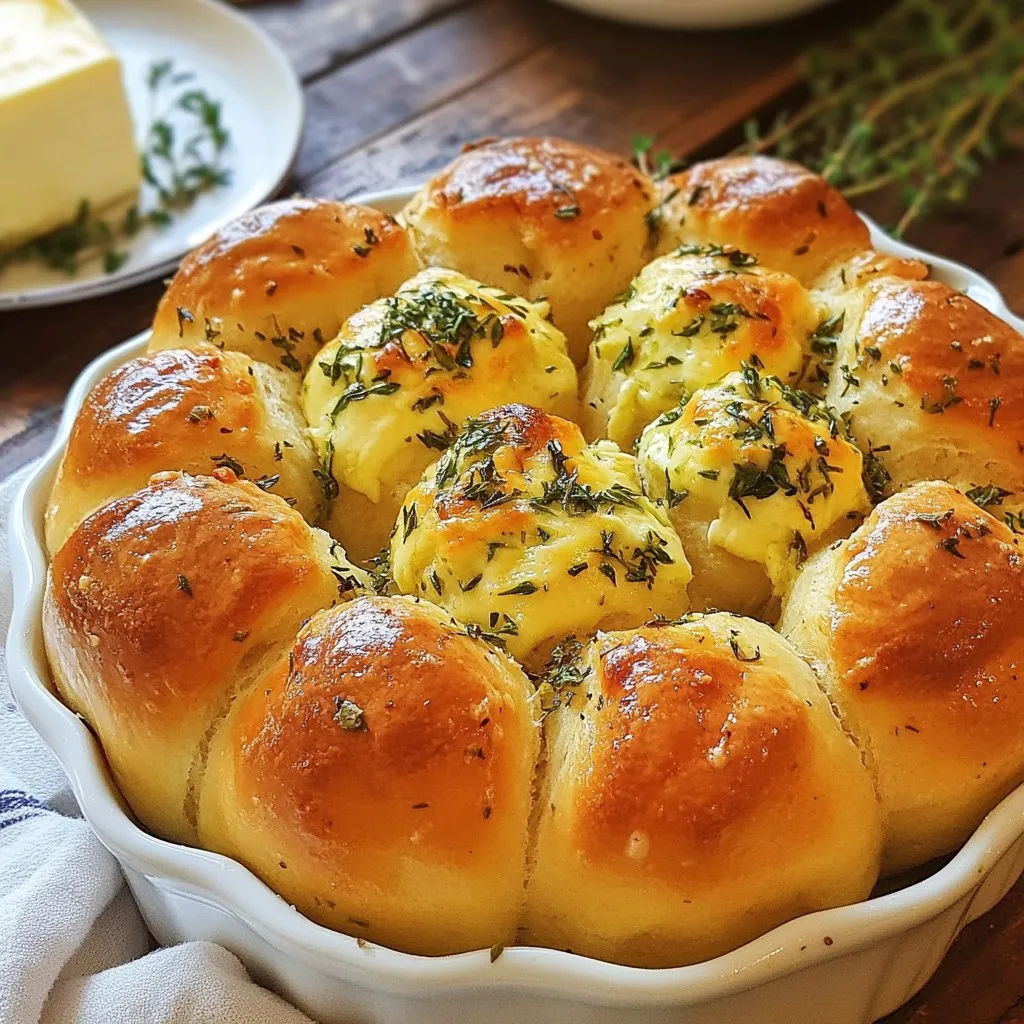
If you love warm, tasty bread, then you need to try my Herbed Garlic Pull Apart Bread! It’s simple to make and pairs well with soups or salads. In this post, I’ll guide you through easy steps from mixing the dough to adding your favorite herbs. You’ll also learn some tips to perfect your bread and variations to impress your guests. Let’s dive into this delicious journey together!
Why I Love This Recipe
- Delicious Flavor Combination: The blend of fresh herbs and garlic creates an irresistible aroma and taste that elevates your bread game.
- Fun to Make: Shaping the dough into balls and filling them with herbed garlic is a fun and interactive cooking experience for all ages.
- Perfect for Sharing: This pull-apart bread is ideal for gatherings, allowing guests to easily enjoy warm, cheesy pieces straight from the pan.
- Customizable: You can easily adapt the filling with your favorite herbs or cheeses, making it a versatile recipe for any occasion.
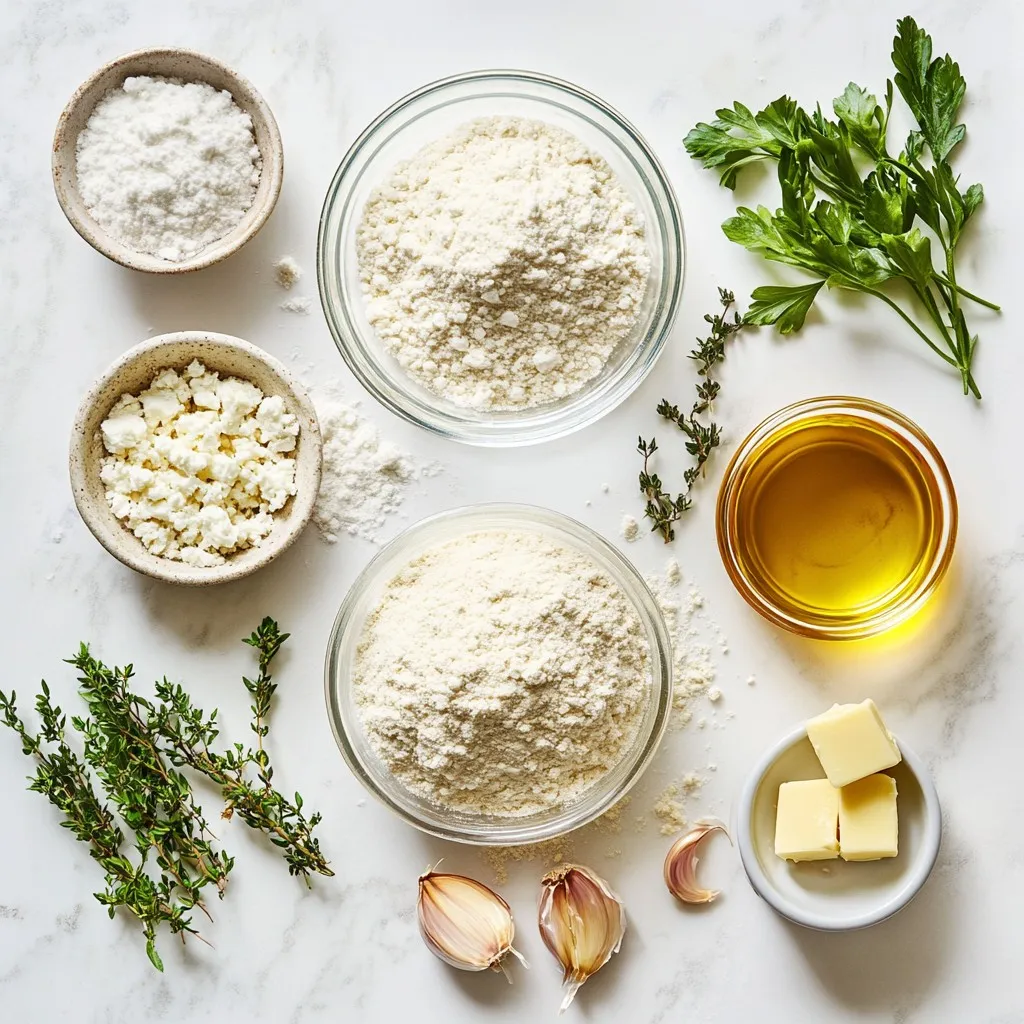
Ingredients
Main Ingredients
- 3 cups all-purpose flour
- 2 teaspoons instant yeast
- 1 cup warm water (about 110°F)
- 1 teaspoon salt
- 1 teaspoon sugar
- 1/4 cup unsalted butter, melted
The main ingredients form the base of your Herbed Garlic Pull Apart Bread. All-purpose flour gives the bread structure. Yeast helps it rise and become fluffy. Warm water wakes up the yeast, making it active. Salt adds flavor while sugar feeds the yeast, helping it work.
Herbs and Seasoning
- 3-4 cloves garlic, finely minced
- 2 tablespoons fresh parsley, finely chopped
- 1 tablespoon fresh thyme leaves
- 1 tablespoon fresh rosemary, finely chopped
- 1 teaspoon dried oregano
For flavor, I love using fresh and dried herbs. Garlic brings a strong taste that pairs well with bread. Fresh parsley, thyme, and rosemary add brightness. Dried oregano gives a warm, earthy note. Salt is key for balance, enhancing all these flavors.
Optional Add-ins
- 1/2 cup grated mozzarella cheese
- Olive oil for brushing
Cheese is a fun add-in. Grated mozzarella melts beautifully, giving a gooey texture. You can also add other cheeses like cheddar or feta. Olive oil brushes on top creates a golden crust while keeping the bread moist. Feel free to get creative with flavors!

Step-by-Step Instructions
Preparing the Dough
To start, we need to activate the yeast. In a large bowl, mix 1 cup of warm water with 1 teaspoon of sugar and 2 teaspoons of instant yeast. Let it rest for about 5 minutes. You want it to get frothy and bubbly. This shows the yeast is alive.
Next, add 1 teaspoon of salt and 1/4 cup of melted unsalted butter to the yeast mix. Stir it well until combined. Now, slowly add 3 cups of all-purpose flour. Use a wooden spoon or spatula. Mix until a rough dough forms.
Transfer the dough to a floured surface. Knead it for 8 to 10 minutes. You want it smooth and elastic. This step is key for great texture.
Rising Process
Now it’s time for the dough to rise. Place your kneaded dough in a lightly greased bowl. Cover it with a damp cloth or plastic wrap. Let it rise in a warm spot for about 1 hour. It should double in size.
While the dough rises, prepare the herbed garlic mixture. In a small bowl, combine 3-4 cloves of finely minced garlic, 2 tablespoons of chopped fresh parsley, 1 tablespoon of fresh thyme leaves, 1 tablespoon of finely chopped fresh rosemary, 1 teaspoon of dried oregano, and a pinch of salt. Mix it well so the flavors combine.
Shaping and Baking
After the dough has risen, punch it down to release the air. Transfer it back to the floured surface. Divide the dough into about 16 equal portions. Shape each piece into a small ball.
Gently flatten each ball. Place about 1 teaspoon of the herbed garlic mixture and a sprinkle of 1/2 cup of grated mozzarella cheese in the center. Fold the dough over the filling and pinch it to seal.
Arrange the filled dough balls tightly in a greased bundt pan or round cake pan. They should be close together for that pull-apart effect. Brush the tops with olive oil and sprinkle any leftover herbed garlic mixture on top. Cover the pan with a cloth and let it rise for another 30 minutes.
Preheat your oven to 375°F (190°C) while the dough rises. Once the second rise is done, bake the bread for 25 to 30 minutes. Look for a golden brown top. When it’s done, let it cool in the pan for a few minutes before serving.
Tips & Tricks
Perfecting Your Bread
Ensuring proper yeast activation
To get the best rise, check your yeast. Use warm water, not hot. The right temp is about 110°F. Mix the yeast with water and sugar. Let it sit until it bubbles, usually 5 minutes. This shows your yeast is alive and ready.
Ideal kneading techniques
Kneading is key for good bread. Use your hands to fold and press the dough. Do this for about 8-10 minutes. You want a smooth and elastic dough. If it sticks, add a bit more flour. This helps develop gluten, making your bread chewy and soft.
Serving Suggestions
Best dips and accompaniments
Serve your pull-apart bread warm. It goes great with olive oil for dipping. You can also try herb-infused butter. These dips enhance the flavors and make it more fun to eat. Pair it with a fresh salad for a complete meal.
Presentation tips for serving
Make your bread look inviting. Use a nice platter and arrange the bread neatly. Add fresh herbs, like parsley or rosemary, for color. You can also sprinkle some extra cheese on top. This makes your bread visually appealing and tasty.
Troubleshooting Common Issues
What to do if the dough doesn’t rise
If your dough does not rise, check the yeast. It may be old or not activated. Try letting it sit in a warmer spot. If all else fails, start over with fresh yeast.
Fixing overly dry or crumbly bread
If your bread is dry, it may need more water or butter. Next time, be careful with the flour. Sometimes, adding a bit more moisture can help. When baking, check for doneness early. Overbaking can also dry it out.
Pro Tips
- Tip Title: Use Fresh Herbs: Fresh herbs will provide a more vibrant flavor compared to dried. Ensure to use them for the best taste experience.
- Tip Title: Kneading Technique: Knead the dough until it’s smooth and elastic. This develops the gluten, giving your bread a better structure and chew.
- Tip Title: Second Rise Importance: Allowing the dough to rise a second time helps develop the flavor and texture of the bread. Don’t skip this step!
- Tip Title: Serve Warm: This bread is best enjoyed warm, as the cheese is melty and the flavors are at their peak. Serve immediately for maximum enjoyment.

Variations
Different Herb Combinations
You can change the herbs in this bread for fun flavors. Italian herbs bring a classic taste. They include basil, oregano, and thyme. A Mediterranean blend adds a twist with herbs like dill and mint. You can also use seasonal herbs. In summer, fresh basil and chives work great. In fall, try sage or rosemary for a warm feel.
Adding Additional Flavors
Want to spice things up? Add sun-dried tomatoes for a burst of tangy flavor. Chopped olives can also give the bread an exciting taste. If you like heat, add some red pepper flakes. This will give your bread a nice kick. You can mix and match these flavors to make it unique.
Alternative Cheeses
You can switch out the cheese to fit your taste. Mozzarella is creamy and melts well, but try other cheeses too. Cheddar adds sharpness, while feta gives a salty bite. For those avoiding dairy, use vegan cheese or nutritional yeast. These options keep the flavor while making the bread suitable for everyone.
Storage Info
Storing Leftovers
For best results, wrap leftover herbed garlic pull apart bread in plastic wrap. This keeps the bread soft. You can also place it in an airtight container. If you store it in the fridge, use it within 3-4 days. For longer storage, freeze the bread. It stays fresh for up to 3 months in the freezer. Just make sure to wrap it tightly in foil or freezer bags.
Reheating Instructions
To reheat the bread, the oven works best. Preheat it to 350°F (175°C). Place the bread on a baking sheet and cover it with foil. This helps keep it moist. Warm for about 10-15 minutes. You can also use a microwave. Just heat it for 15-20 seconds. If using the microwave, it may not stay crispy, so be careful.
Preventing Staleness
To keep your bread fresh longer, store it in a cool, dry place. Avoid direct sunlight and heat. Always check for signs of spoilage. If you see mold or an off smell, it’s time to toss it. Stale bread can also feel hard to the touch. If this happens, you can try to slice it and toast it for a tasty crunch.
FAQs
Can I make Herbed Garlic Pull Apart Bread ahead of time?
Yes, you can prepare this bread ahead of time. You can make the dough and let it rise. After shaping the dough balls, place them in the pan. Cover the pan and refrigerate it overnight. The next day, let it come to room temperature before baking. This saves time and helps with flavor.
What should I do if I don’t have fresh herbs?
If you lack fresh herbs, you can use dried herbs instead. Use about one-third of the amount of dried herbs. For example, if the recipe calls for 1 tablespoon of fresh herbs, use 1 teaspoon of dried herbs. This keeps the flavors strong while making it easy to prepare.
How can I make this recipe vegan?
To make Herbed Garlic Pull Apart Bread vegan, replace the butter with a plant-based alternative. You can use coconut oil or vegan butter. Ensure the cheese is vegan too. There are many plant-based cheeses available that work well in this recipe.
Can I use bread flour instead of all-purpose flour?
Yes, you can use bread flour instead of all-purpose flour. Bread flour has a higher protein content. This can make your bread chewier and give it a nice texture. Just remember to adjust the water if needed since bread flour absorbs more moisture.
Herbed garlic pull-apart bread is easy to make and delicious. We covered the key ingredients, from flour to spices. I walked you through the dough, rising, and baking steps. Helpful tips and variations let you customize your bread to your taste. Remember to store leftovers well and reheat them right. With these skills, you can impress anyone with your baking. Enjoy making this bread, and share it with friends and family. Your kitchen will smell amazing, and everyone will love the results. Happy bakin

Herbed Garlic Pull Apart Bread
Ingredients
- 3 cups all-purpose flour
- 2 teaspoons instant yeast
- 1 teaspoon salt
- 1 teaspoon sugar
- 1 cup warm water (about 110°F)
- 1 4 cup unsalted butter, melted
- 3 cloves garlic, finely minced
- 2 tablespoons fresh parsley, finely chopped
- 1 tablespoon fresh thyme leaves
- 1 tablespoon fresh rosemary, finely chopped
- 1 teaspoon dried oregano
- 1 2 cup grated mozzarella cheese
- cups additional flour for dusting
- cups olive oil for brushing
Instructions
- In a large mixing bowl, combine the warm water, sugar, and instant yeast. Allow the mixture to rest for approximately 5 minutes or until it becomes frothy and bubbly.
- Gently stir in the salt and the melted butter into the yeast mixture until well combined.
- Gradually add the flour, mixing with a wooden spoon or spatula until a rough dough begins to form. Transfer the dough onto a floured surface and knead it for about 8-10 minutes until it is smooth and elastic.
- Place the kneaded dough into a lightly greased bowl, cover it with a damp cloth or plastic wrap, and let it rise in a warm area for about 1 hour, or until it has doubled in size.
- While the dough is rising, prepare the herbed garlic mixture. In a small bowl, combine the minced garlic, chopped parsley, thyme, rosemary, oregano, and a pinch of salt. Mix until the herbs are evenly distributed.
- After the dough has risen, punch it down to release the air, then transfer it back to the floured surface. Divide the dough into approximately 16 equal portions and shape each into small balls.
- Gently flatten each ball and place about a teaspoon of the herbed garlic mixture along with a sprinkle of mozzarella cheese in the center of each. Fold the dough over the filling and pinch to seal securely.
- Arrange the filled dough balls tightly in a greased bundt pan or a round cake pan, ensuring they are close together for a pull-apart effect.
- Brush the tops of the dough balls with olive oil and sprinkle any remaining herbed garlic mixture over them. Cover the pan with a cloth and let it rise for an additional 30 minutes.
- Preheat your oven to 375°F (190°C) while the dough is rising.
- Once the second rise is complete, bake the bread in the preheated oven for 25-30 minutes, or until the top is golden brown and the bread is cooked through.
- Let the bread cool in the pan for a few minutes before turning it out onto a serving platter.


![To create the Roasted Beet and Goat Cheese Salad, you will need the following ingredients: - 4 medium beets, scrubbed and trimmed - 2 tablespoons extra virgin olive oil, divided - Sea salt and freshly ground black pepper to taste - 4 cups mixed greens (arugula, spinach, and kale) - 1/2 cup creamy goat cheese, crumbled - 1/4 cup walnuts, toasted and roughly chopped - 1/4 cup dried cranberries - 2 tablespoons balsamic vinegar - 1 tablespoon pure honey - Fresh herbs (basil or parsley) for garnish Each ingredient adds not just flavor, but also nutrition. Beets are rich in vitamins and minerals. They help boost your energy levels. Goat cheese brings a creamy texture and a tangy taste. It pairs well with the sweetness of beets and cranberries. Walnuts add crunch and healthy fats, while mixed greens provide fiber. The dressing of balsamic vinegar and honey ties all the flavors together. You can find the Full Recipe for step-by-step instructions to make this delightful salad. 1. Preheat the oven: Set your oven to 400°F (200°C). This makes sure the beets roast well. 2. Wrap the beets: Take each beet and wrap it in foil. Drizzle 1 tablespoon of olive oil on them. Add sea salt and black pepper for flavor. Seal the foil tightly. 3. Roast the beets: Place the wrapped beets on a baking sheet. Roast them in the oven for 45-60 minutes. They are done when a fork easily pierces them. 1. Peel and slice the beets: Let the beets cool a bit. Then, peel off the skin. I recommend wearing gloves to avoid stains. Cut the beets into wedges for a nice look. 2. Combine salad ingredients: In a large mixing bowl, add the mixed greens, sliced roasted beets, crumbled goat cheese, toasted walnuts, and dried cranberries. Gently mix everything together. 1. Prepare the dressing: In a small bowl, whisk together the balsamic vinegar, the last tablespoon of olive oil, and honey. Stir well until combined. Taste it and add salt and pepper as needed. 2. Dress the salad: Drizzle the dressing over the salad. Toss everything gently to coat the greens and other ingredients. 3. Serve the salad: Plate the salad right away. Garnish with fresh herbs for a pop of color and extra flavor. For the full recipe, check out the Beet the Ordinary: Roasted Beet and Goat Cheese Salad. - Choosing the right beet size for even cooking: I recommend using medium beets. They cook evenly and are easy to handle. If you use larger beets, they may take longer to roast, leading to uneven texture. Smaller beets cook too quickly and may dry out. - How to properly season the beets: Before wrapping the beets in foil, drizzle them with olive oil. Add a generous pinch of sea salt and freshly ground black pepper. This simple seasoning enhances their natural sweetness and flavor during roasting. - Creative ways to plate the salad: For a stunning presentation, use a large, flat platter. Layer mixed greens as a base. Fan out the roasted beet wedges on top and sprinkle crumbled goat cheese and walnuts over the salad. This method creates a colorful and inviting look. - Garnishing tips to elevate the dish: Fresh herbs can add color and flavor. A sprinkle of chopped basil or parsley brightens the dish. You can also use edible flowers for a special touch, making it perfect for gatherings or celebrations. - Best practices for prepping ingredients in advance: You can roast the beets a day ahead. Once cooled, wrap them in plastic to keep fresh. Store the mixed greens and other ingredients separately. This way, you can quickly assemble your salad just before serving, keeping everything crisp and tasty. For the complete recipe, see [Full Recipe]. {{image_4}} You can switch up the greens in your salad to make it special. Try using arugula for a peppery kick or romaine for a crisp bite. Each green offers a different taste and texture, giving your salad a new vibe. If you want to change the cheese, feta or blue cheese can work wonders. Feta adds a salty flavor, while blue cheese brings a bold touch. Both complement the sweetness of the beets nicely. The right dressing can elevate your salad. A citrus vinaigrette adds a bright and zesty flavor. Mix fresh lemon juice with olive oil for a quick option. If you want something creamy, a yogurt dressing is perfect. It pairs well with the tang of goat cheese and makes the salad feel lush. Don’t hesitate to experiment with different dressings to find your favorite. Add protein to make your salad more filling. Grilled chicken is a great choice, giving the salad a hearty feel. For a plant-based option, chickpeas work well. They add protein and texture. You can also sprinkle seeds, like pumpkin or sunflower seeds, for some crunch. Fresh fruit, such as sliced pears or apples, can add a sweet note. Each add-in brings its own charm to the dish, making it unique every time. Don’t forget to check out the Full Recipe for more inspiration! To keep your roasted beet and goat cheese salad fresh, store it in an airtight container. Place any leftovers in the fridge. The salad will stay good for about three days. Make sure to keep the dressing separate until you are ready to eat. This helps keep the greens crisp and fresh. If you want to store beets for longer, you can freeze them. First, roast the beets as in the Full Recipe. Let them cool, then peel and slice them. Place the slices in a freezer-safe bag, removing as much air as possible. Beets can last up to six months in the freezer. However, I do not recommend freezing the prepared salad. The greens won't hold up well after thawing. When it's time to eat your stored salad, you can reheat the beets if you like. Just warm them in the microwave for about 30 seconds. Toss the salad again after reheating. This helps mix the flavors back together. If you stored the salad dressed, consider adding a bit more dressing before serving. This keeps everything tasty and vibrant. How long do roasted beets last in the fridge? Roasted beets can last up to five days in your fridge. Store them in an airtight container. This way, they stay fresh and tasty for your salads. Can I use pre-cooked beets for this recipe? Yes, you can use pre-cooked beets. They are a great time-saver. Just cut them into wedges and add them to your salad. They will still taste delicious! What type of goat cheese is best for salads? A creamy goat cheese works best for this salad. It adds a nice richness and tang. Look for soft, crumbled varieties for easy mixing. Can I substitute goat cheese with a dairy-free option? Absolutely! You can use a dairy-free cheese made from nuts. Look for a creamy cashew cheese or tofu-based option. Both will provide a nice flavor. What are the health benefits of beet and goat cheese salad? This salad is packed with nutrients. Beets are high in fiber and antioxidants. Goat cheese adds protein and calcium. Together, they support heart health and digestion. How many calories are in a serving of this salad? One serving of this salad has about 300 calories. This includes the beets, goat cheese, nuts, and dressing. It’s a great balance of flavors and nutrients without too many calories. For the complete recipe, check out the Full Recipe. This salad combines roasted beets, fresh greens, and tangy goat cheese. You learned how to roast beets and mix vibrant ingredients for a delicious dish. Remember to choose the right beet size and season well for great texture. Don't hesitate to try different greens or dressings to make it your own. Salad prep can be easy, helping you save time. Enjoy this healthy meal that packs flavor and nutrients. Make it today and impress yourself with your cooking skills!](https://dishtreats.com/wp-content/uploads/2025/06/a3a0567a-1f00-4857-8ef4-d1e9b38b024f-768x768.webp)


![The Sun-Dried Tomato Chickpea Salad is simple to make and full of flavor. Here’s what you need: - 1 can (15 oz) chickpeas, thoroughly drained and rinsed - 1/2 cup sun-dried tomatoes, roughly chopped - 1/4 cup red onion, finely diced - 1/2 cucumber, peeled and diced - 1/4 cup feta cheese, crumbled into small pieces - 2 tablespoons fresh parsley, finely chopped - 2 tablespoons extra virgin olive oil - 1 tablespoon freshly squeezed lemon juice - 1 teaspoon dried oregano - Salt and freshly ground black pepper, to taste This mix of ingredients creates a bright, fresh dish. Chickpeas add protein and fiber. Sun-dried tomatoes give a sweet and tangy taste. The red onion adds a sharp bite, while cucumber brings crunch. Feta cheese adds creaminess to the salad. Fresh parsley brightens the flavors. Make sure to use high-quality extra virgin olive oil for the best taste. Fresh lemon juice adds a zesty kick. Dried oregano brings an earthy flavor that ties everything together. Adjust salt and pepper to your liking for a perfect balance. For the full recipe, follow the steps to enjoy this delightful salad. It's quick to prepare and great for lunch or dinner! To make this salad, start with a large mixing bowl. Combine the following ingredients: - 1 can (15 oz) chickpeas, thoroughly drained and rinsed - 1/2 cup sun-dried tomatoes, roughly chopped - 1/4 cup red onion, finely diced - 1/2 cucumber, peeled and diced - 1/4 cup feta cheese, crumbled into small pieces Gently stir the ingredients together. This ensures an even distribution of flavors and textures. In a separate small bowl, whisk together the dressing ingredients: - 2 tablespoons extra virgin olive oil - 1 tablespoon freshly squeezed lemon juice - 1 teaspoon dried oregano - Salt and freshly ground black pepper, to taste Mix until well combined. You want the oil and lemon juice to emulsify, meaning they blend into a smooth mixture. Drizzle the dressing over the salad base. Toss gently to coat everything evenly. Be careful not to break the chickpeas or feta cheese. After mixing, sprinkle the freshly chopped parsley on top. Give it one last gentle toss. Cover the salad and let it rest for at least 15 minutes. This time allows the flavors to meld together, enhancing the taste. You can serve it chilled or at room temperature for the best experience. For the full recipe, check the ingredients and instructions above. To make your Sun-Dried Tomato Chickpea Salad stand out, choose a nice serving bowl. A colorful bowl can catch the eye and add to the meal. You can layer the salad to show off its colors. Start with chickpeas at the bottom, then add layers of sun-dried tomatoes, cucumbers, and red onions. For garnishing, sprinkle extra parsley leaves on top. This adds a fresh touch. You can also add a few crumbles of feta cheese over the top. This gives a nice contrast to the vibrant colors of the salad. If you want to impress, serve it with crusty bread or pita on the side. You can make this salad ahead of time. Store it in the fridge for a quick meal later. After you mix it, cover the salad well. It stays fresh for 2 to 3 days. The flavors will deepen as it sits. For meal prepping, divide the salad into single-serving containers. This makes it easy to grab and go. Keep the dressing separate until you are ready to eat. This keeps the salad crisp and fresh. Enjoy your meal! For the full recipe, check out the details above. {{image_4}} You can switch out chickpeas for other beans. Black beans or kidney beans work well. They add a different taste and texture. If you want to try lentils, they can also be good. For a dairy-free option, use a vegan feta cheese. There are many brands available. You can also skip the cheese and add more vegetables. This keeps the salad fresh and tasty. To boost the flavor, add spices like cumin or paprika. These spices can take your salad to a new level. You could also add bell peppers or corn for a nice crunch. If you want more protein, add grilled chicken or tofu. These options make the salad heartier. You can even mix in some nuts or seeds for added texture. For the full recipe, check out the details above and create your own delicious twist! To keep your Sun-Dried Tomato Chickpea Salad fresh, use these tips: - Store in an airtight container. - Layer ingredients to prevent sogginess. - Keep dressing separate until serving. - Use glass containers for better preservation. Glass keeps the salad fresh longer. It also helps you see the colorful layers. Your salad lasts up to three days in the fridge. After that, it may lose its crunch. Watch for these signs of spoilage: - Change in smell or color. - Soft or mushy chickpeas. - Feta cheese that appears slimy. If you notice these signs, it's best to throw it away. Enjoy the salad while it's fresh for the best taste! For the full recipe, click [Full Recipe]. To make this salad, start by gathering your ingredients. You need chickpeas, sun-dried tomatoes, red onion, cucumber, feta cheese, parsley, olive oil, lemon juice, oregano, salt, and pepper. 1. In a large bowl, mix the chickpeas, sun-dried tomatoes, cucumber, onion, and feta. 2. In a small bowl, whisk olive oil, lemon juice, oregano, salt, and pepper together. 3. Pour the dressing over the salad and toss gently. 4. Add the parsley and mix lightly. 5. Let the salad rest for 15 minutes. This helps the flavors blend well. You can find the full recipe above for detailed steps. Yes! This salad is perfect for meal prep. You can prepare it a day in advance. Just store it in an airtight container in the fridge. The flavors will deepen, making it taste even better. Make sure to keep the salad covered to keep it fresh. This salad pairs well with many dishes. Here are some ideas: - Grilled chicken or fish for added protein. - Crusty bread or pita to scoop up the salad. - A light soup like tomato basil for a cozy meal. - Roasted vegetables for a colorful plate. These options will enhance your meal and make it even more enjoyable! This blog post detailed how to create a refreshing Sun-Dried Tomato Chickpea Salad. We covered the necessary ingredients, simple steps to prepare, and tips for presentation. You can enhance this salad with various substitutes or flavors. Proper storage ensures freshness and keeps meals tasty longer. Remember, this salad is not just easy to make—it's also adaptable. Enjoy making it your own, and delight your taste buds with every bite. Your next meal can be both fun and healthy!](https://dishtreats.com/wp-content/uploads/2025/07/f0fe0f85-1842-4358-ad7f-ac591425fdaf-768x768.webp)