Greek Yogurt Chicken Salad Healthy and Fresh Dish

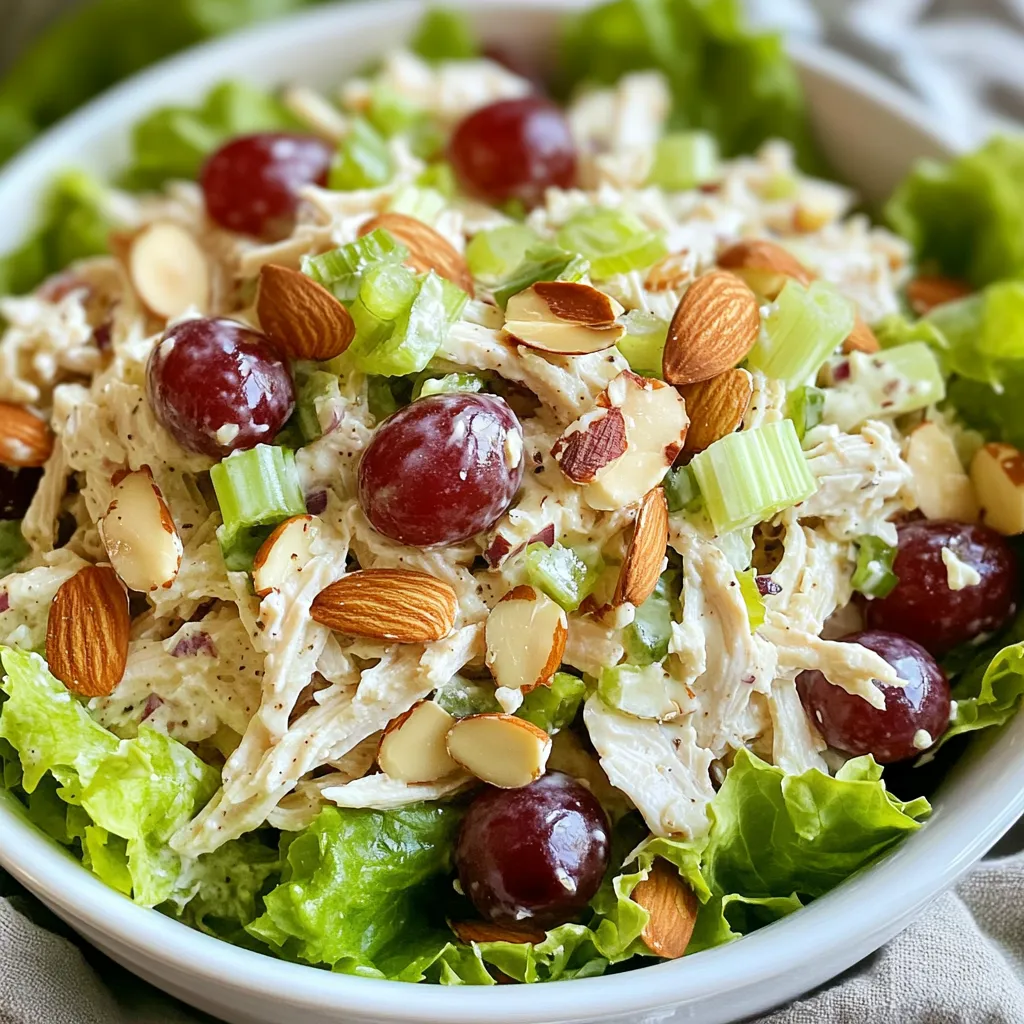
Looking for a tasty and nutritious dish? My Greek Yogurt Chicken Salad is a game changer! With a creamy yogurt dressing and fresh ingredients, it’s perfect for any meal. You’ll love how easy it is to customize. Plus, it packs a punch of flavor without the guilt. In this article, I’ll walk you through everything you need to know to create this healthy dish at home. Let’s dive in!
Why I Love This Recipe
- Healthy and Nutritious: This chicken salad is packed with protein from the chicken and Greek yogurt, making it a great option for a healthy meal.
- Quick and Easy: With only 15 minutes of prep time, this recipe is perfect for busy weekdays or a last-minute gathering.
- Flavorful and Versatile: The combination of grapes, almonds, and tangy dressing adds a burst of flavor and texture, making it delicious on its own or in wraps.
- Customizable: You can easily adjust the ingredients to suit your taste or dietary preferences, such as adding other fruits or nuts.
Ingredients
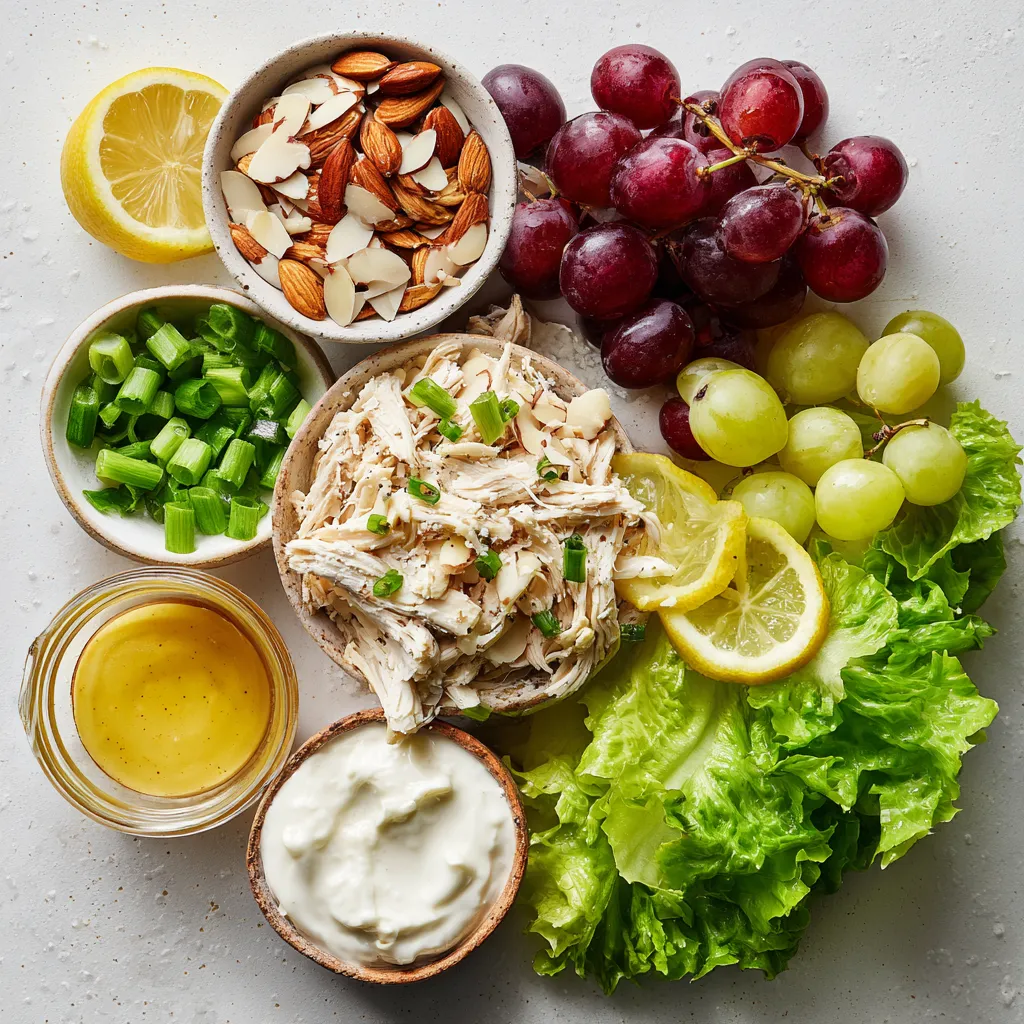
List of Key Ingredients
- 2 cups cooked chicken breast, shredded
- 1 cup plain Greek yogurt
- 1/2 cup celery, finely diced
- 1/2 cup red grapes, halved
- 1/4 cup sliced almonds, toasted
- 1/4 cup green onion, thinly sliced
- 1 tablespoon Dijon mustard
- 1 tablespoon honey
- 1 tablespoon fresh lemon juice
- Salt and freshly ground black pepper to taste
- Crisp lettuce leaves for serving (optional)
Optional Ingredients for Customization
You can add different fruits, nuts, or herbs to make this salad your own. Consider adding:
- Apples or pears for a crunch
- Walnuts or pecans for rich flavor
- Fresh dill or parsley for a herbaceous touch
Nutritional Benefits of Each Ingredient
- Chicken breast: High in protein, it helps build and repair muscles.
- Greek yogurt: Packed with probiotics, it supports gut health and adds creaminess.
- Celery: Low in calories and high in fiber, it helps with digestion.
- Red grapes: These add sweetness and are rich in antioxidants.
- Almonds: They provide healthy fats and add a satisfying crunch.
- Green onion: This adds flavor and is low in calories.
- Dijon mustard: A low-calorie way to add a tangy kick.
- Honey: Offers natural sweetness and antioxidants.
- Lemon juice: It brightens flavors and adds vitamin C.
- Salt and pepper: Essential for enhancing the dish’s overall taste.
- Lettuce: Adds a fresh crunch and makes the dish more filling.
By using these ingredients, you create a tasty and healthy dish. Each component contributes to a balanced meal.

Step-by-Step Instructions
Preparation of the Chicken
Start by shredding 2 cups of cooked chicken breast. You can use leftover chicken or bake it fresh. Shredding makes it easy to mix with other ingredients. In a large mixing bowl, add the shredded chicken. Next, finely dice 1/2 cup of celery. Toss the celery into the bowl with the chicken. This adds crunch and flavor to your salad.
Making the Greek Yogurt Dressing
In a medium bowl, combine 1 cup of plain Greek yogurt, 1 tablespoon of Dijon mustard, 1 tablespoon of honey, and 1 tablespoon of fresh lemon juice. Add a pinch of salt and freshly ground black pepper. Whisk all the ingredients together until smooth and creamy. This dressing will give your salad a rich and tangy taste.
Combining All Ingredients
Now, drizzle the yogurt dressing over the chicken and celery mixture. Gently toss everything together. Make sure the chicken and celery are coated well with the dressing. Next, fold in 1/2 cup of halved red grapes, 1/4 cup of sliced almonds, and 1/4 cup of thinly sliced green onions. Be careful not to break the grapes while folding. Taste the salad and adjust the seasoning if needed. For serving, scoop the chicken salad onto crisp lettuce leaves or use it in pita bread or wraps. Enjoy your tasty and healthy dish!
Tips & Tricks
How to Achieve the Creamiest Salad
To make your Greek yogurt chicken salad super creamy, choose full-fat Greek yogurt. This gives a rich texture. When mixing, whisk the yogurt until smooth. This helps blend all flavors well. If you find it too thick, add a splash of water or more lemon juice. This adds freshness and keeps it light.
Suggestions for Perfect Seasoning
Seasoning makes a big difference! Start with salt and black pepper. Taste after mixing. If it needs more kick, add a bit of Dijon mustard. Honey adds sweetness, balancing the tangy yogurt. Fresh lemon juice brightens the dish. Always adjust to your taste. Remember, seasoning is key for a tasty salad.
Presentation Tips for Serving
To make your chicken salad pop, use a bright bowl. Serve over crisp lettuce leaves. This adds color and crunch. Before serving, sprinkle extra red grapes on top. This gives a nice look and a sweet bite. Pair with whole-grain bread or crunchy crackers for a complete meal. Enjoy the beautiful dish!
Pro Tips
- Use Leftover Chicken: For a quicker prep, utilize leftover rotisserie or grilled chicken. This will cut down on cooking time and add delicious flavors.
- Add Fresh Herbs: Enhance the flavor by incorporating fresh herbs like dill or parsley. They add brightness and complexity to the salad.
- Chill Before Serving: For the best taste, allow the chicken salad to chill in the refrigerator for at least 30 minutes before serving. This helps the flavors develop.
- Experiment with Add-ins: Feel free to customize your salad by adding ingredients like diced apples or cranberries for a sweet twist, or even some chopped bell peppers for extra crunch.

Variations
Protein Substitutes
If you want to change up the protein in your Greek yogurt chicken salad, you have great options. Tofu is a fantastic choice for a plant-based version. It absorbs flavors well and gives a nice texture. Turkey is another lean protein that works wonderfully. Just shred it like chicken, and you’re ready to go.
Different Flavor Add-ins
Adding different herbs and spices can make your salad unique. Fresh dill or parsley can brighten the dish. You might also try adding a bit of curry powder for a warm twist. A splash of hot sauce can give it a nice kick. Experiment with what you love!
Serving Options
You can serve this salad in many ways. Use crisp lettuce leaves as a base for a fresh bite. Pita bread is great for a fun sandwich. You can also wrap it in a tortilla for a snack on the go. Each option adds a new twist to your meal. Enjoy finding your favorite way to serve it!
Storage Info
Best Practices for Storing Chicken Salad
To keep your Greek yogurt chicken salad fresh, store it in an airtight container. This prevents air from spoiling the ingredients. Ensure the container is clean and dry before adding the salad. If you plan to eat it later, avoid adding toppings like nuts or grapes until serving. This keeps them crunchy and fresh.
How Long It Lasts in the Refrigerator
Your chicken salad stays good in the refrigerator for about 3 to 4 days. After this time, the flavors can fade, and it may spoil. Always check for any off smells or changes in texture before eating. If it looks or smells odd, it’s best to toss it.
Tips for Freezing and Thawing
Freezing chicken salad can change its texture. If you must freeze it, use a freezer-safe container. Leave some space at the top, as it expands when frozen. When you’re ready to eat it, thaw it in the fridge overnight. After thawing, stir it well and check if it needs more seasoning.
FAQs
Can I use low-fat Greek yogurt?
Yes, you can use low-fat Greek yogurt. It keeps the salad creamy without adding too many calories. The taste stays similar, and you still get that nice tang. Just remember, low-fat yogurt might be a bit thinner. You may need to adjust the amount of honey or mustard for flavor balance.
How can I make it dairy-free?
To make this dish dairy-free, swap Greek yogurt for a plant-based option. Look for almond or coconut yogurt. Make sure it is unsweetened to avoid altering the taste. You can also mix in some mashed avocado for creaminess. This keeps the salad rich and delicious without any dairy.
What to serve with Greek Yogurt Chicken Salad?
You can serve Greek yogurt chicken salad in many ways. Here are a few ideas:
- Use crisp lettuce leaves as cups.
- Stuff it into pita bread for a tasty sandwich.
- Serve it on whole-grain bread for a hearty meal.
- Pair it with crunchy crackers for a light snack.
Each option adds a fun twist to the dish!
In this article, we explored key ingredients for Greek yogurt chicken salad and how to make it. I shared tips for achieving creaminess and great flavor. You learned about variations, storage, and answers to common questions.
Enjoying this salad is easy and healthy. You can swap ingredients and customize it to your taste. Try it out, and this dish will quickly become a favorit

Creamy Greek Yogurt Chicken Salad Delight
Ingredients
- 2 cups cooked chicken breast, shredded
- 1 cup plain Greek yogurt
- 0.5 cup celery, finely diced
- 0.5 cup red grapes, halved
- 0.25 cup sliced almonds, toasted
- 0.25 cup green onion, thinly sliced
- 1 tablespoon Dijon mustard
- 1 tablespoon honey
- 1 tablespoon fresh lemon juice
- Salt and freshly ground black pepper to taste
- Crisp lettuce leaves for serving (optional)
Instructions
- In a spacious mixing bowl, combine the shredded chicken and finely diced celery.
- In a separate medium bowl, whisk together the plain Greek yogurt, Dijon mustard, honey, fresh lemon juice, and a pinch of salt and pepper.
- Drizzle the yogurt dressing over the chicken and celery mixture and gently toss to coat.
- Delicately fold in the halved red grapes, sliced almonds, and green onions.
- Taste the chicken salad and adjust the seasoning with additional salt and pepper if desired.
- Serve the chicken salad on a bed of crisp lettuce leaves or use as a filling for pita bread or wraps.


![- 4 large bell peppers (any color) - 1 lb ground chicken - 2 cups fresh spinach, roughly chopped - 1 cup cooked quinoa (or rice) - 1 cup mozzarella cheese, shredded - 1 small onion, finely minced - 2 cloves garlic, minced - 1 teaspoon Italian seasoning blend - ½ teaspoon red pepper flakes - Salt and pepper to taste - 1 tablespoon olive oil - Fresh basil leaves for garnish When I make chicken and spinach stuffed peppers, I love using fresh ingredients. The bell peppers can be red, green, yellow, or orange. Each color adds a fun touch and a slight flavor difference. Ground chicken gives a light taste and pairs well with spinach. I usually chop the spinach roughly. This keeps some texture in the filling. Quinoa or rice adds a nice base and helps the stuffing stick together. I recommend using cooked quinoa for a nutty flavor and added protein. Mozzarella cheese brings creaminess and melts beautifully on top. The minced onion and garlic create a fragrant base. I often sauté these first to build flavor. The Italian seasoning and red pepper flakes bring warmth and depth. Adjust the red pepper flakes to suit your taste. Lastly, a sprinkle of salt and pepper enhances all the flavors. The olive oil adds richness and helps everything cook evenly. I often finish with fresh basil leaves for a bright and fresh touch. You can find the full recipe to make these delicious stuffed peppers! - Preheat your oven to 375°F (190°C). - Prepare the bell peppers by removing the tops and seeds. Start by heating your oven. This ensures it’s hot for your peppers. While waiting, grab your bell peppers. Cut off the tops and scoop out the seeds inside. You want them ready to hold all that tasty filling. A little olive oil on the outside adds flavor and color. - Sauté onion and garlic in olive oil. - Add ground chicken and cook thoroughly. - Stir in spinach, quinoa, and spices. Now, heat olive oil in a large skillet over medium heat. Add the finely minced onion and sauté for about 3-4 minutes. You want them soft and clear. Then, toss in your minced garlic and cook for one more minute. It will smell amazing! Next, add the ground chicken. Use a spoon to break it apart as it cooks. This should take about 6-8 minutes. Make sure the chicken is brown and fully cooked. Then, mix in the chopped spinach, cooked quinoa, Italian seasoning, red pepper flakes, salt, and pepper. Cook for another 2-3 minutes until the spinach wilts and blends in. - Mix in mozzarella and stuff peppers. - Bake covered and then uncovered until cooked. Remove the skillet from heat. Now, add half of the shredded mozzarella cheese to the filling. Stir until it melts and mixes well. Carefully spoon this tasty mixture into each pepper. Press it down to fill them well. Finally, sprinkle the remaining mozzarella over the tops of each pepper. Cover your dish tightly with foil and place it in the oven. Bake for 25 minutes. This helps the peppers cook through. After that, take off the foil and bake for another 10-15 minutes. Look for tender peppers and bubbly, golden cheese. Your Chicken and Spinach Stuffed Peppers are almost ready! - Choosing the right peppers for optimal flavor: I love using bell peppers in various colors. Each color brings a unique taste. Red peppers are sweet, while green ones are more bitter. Choose your favorite or mix them for a colorful dish. - Ensuring even cooking of the filling: To cook the filling evenly, chop the spinach and onion small. This helps them blend well with the ground chicken. Stir often while cooking to make sure everything heats up at the same time. - Plates and garnishes for serving: Use bright plates to showcase your stuffed peppers. A white plate makes the colors pop. Add fresh basil leaves on top for a nice touch. It adds color and flavor. - Drizzling options for added flavor: Consider drizzling a balsamic reduction over the peppers. This gives a sweet and tangy kick. You can also use olive oil or a bit of hot sauce if you like spice. - Low-calorie ingredient options: If you want to cut calories, use ground turkey instead of chicken. You can also skip the cheese or use a low-fat version. This keeps the rich taste without the extra calories. - Gluten-free substitutes: For a gluten-free option, use quinoa or rice as a base. Both are great alternatives. Make sure your seasonings are also gluten-free to keep the dish safe for everyone. For the full recipe, check out the details above. {{image_4}} You can switch the protein in your stuffed peppers. Ground turkey works great as a leaner choice. It has a mild flavor that blends well with the spices. Ground beef is another option. It adds richness and depth to the dish. If you want a vegetarian option, try black beans or chickpeas. They add protein and fiber. You can mash them for a creamy texture or leave them whole for a nice bite. Spicing up your stuffed peppers can elevate the dish. Add cumin or smoked paprika for a smoky flavor. You can also try chili powder for a bit of heat. If you love sauces, think about adding salsa or barbecue sauce to the filling. A drizzle of ranch or yogurt on top can enhance the taste too. These simple tweaks can really make your meal pop. Stuffed peppers pair well with many sides. A fresh salad with greens and a lemon vinaigrette works nicely. You can also serve them with rice or quinoa on the side. For meal prep, these stuffed peppers are great to make ahead. They store well and taste even better the next day. Leftovers can be enjoyed cold or reheated easily, making them perfect for quick lunches. If you want to impress, plate them on colorful dishes and garnish with fresh herbs. For the full recipe, check [Full Recipe]. After you make your chicken and spinach stuffed peppers, let them cool. Place leftovers in an airtight container. This keeps them fresh and tasty. You can store them in the fridge for up to three days. When you want to enjoy them again, simply reheat in the oven or microwave. If using the oven, cover with foil to keep the moisture in. Heat at 350°F (175°C) for about 15-20 minutes. If using a microwave, heat in one-minute bursts until hot. If you want to save some for later, freezing is a great option. Wrap each stuffed pepper in plastic wrap. Then put them in a freezer-safe bag. This keeps them from getting freezer burn. You can freeze them for up to three months. When you’re ready to eat, take them out and let them thaw in the fridge overnight. You can bake them from frozen, but it will take longer. Bake at 375°F (190°C) for about 40-50 minutes. Make sure they are hot all the way through. Enjoy the convenience of having these delicious meals ready to go! How long do stuffed peppers last in the fridge? Stuffed peppers can last up to four days in the fridge. Store them in an airtight container. Can I use frozen spinach instead of fresh? Yes, you can use frozen spinach. Just thaw and drain it first to remove excess water. What can I substitute for quinoa in this recipe? You can use rice instead of quinoa. Brown rice or white rice works well for this dish. Are stuffed peppers healthy? Yes, stuffed peppers are healthy. They are full of protein, fiber, and vitamins. How can I tell when the peppers are done cooking? Peppers are done when they are tender and the cheese is bubbly and golden. Can I prep these ahead of time? Yes, you can prep them a day in advance. Just store the stuffed peppers in the fridge. What sides pair well with stuffed peppers? Great sides include a light salad, garlic bread, or steamed veggies. Enjoy your meal! In this article, we explored a tasty recipe for chicken and spinach stuffed peppers. We covered detailed ingredients, step-by-step instructions, cooking tips, and variations to try. Stuffed peppers are fun to make and easy to adapt. You can even store leftovers or freeze them for later. This dish is not only healthy but also full of flavor that everyone will enjoy. Try it out and get creative!](https://dishtreats.com/wp-content/uploads/2025/06/8d5b3b7f-ae7d-4f86-a3ac-77abf09c6433-768x768.webp)