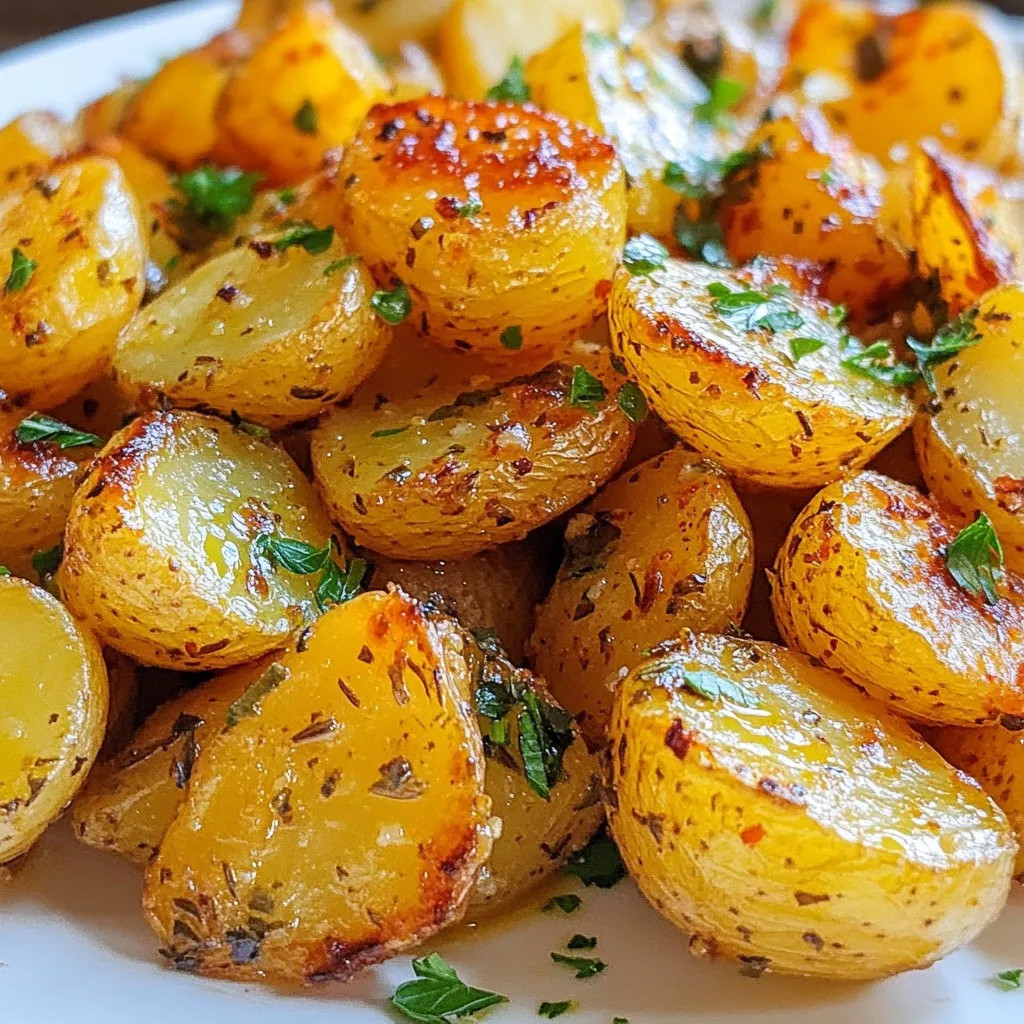
Looking for a simple and tasty dish that will impress? Garlic Herb Roasted Potatoes are your answer! This flavorful recipe combines baby potatoes with garlic, rosemary, and thyme for a dish that’s easy to make and hard to resist. Whether you’re hosting friends or just enjoying a family meal, these roasted potatoes are sure to be a hit. Let’s dive into the ingredients and make something delicious today!
Why I Love This Recipe
- Simple Preparation: This recipe requires minimal prep time and uses everyday ingredients, making it accessible for any home cook.
- Flavorful Combination: The blend of garlic and herbs creates a delicious aroma and taste that elevates the humble potato to new heights.
- Versatile Side Dish: These roasted potatoes pair beautifully with a variety of main courses, from grilled meats to vibrant salads.
- Perfectly Crispy: Roasting at high heat ensures that the potatoes develop a golden-brown, crispy exterior while remaining tender on the inside.
Ingredients
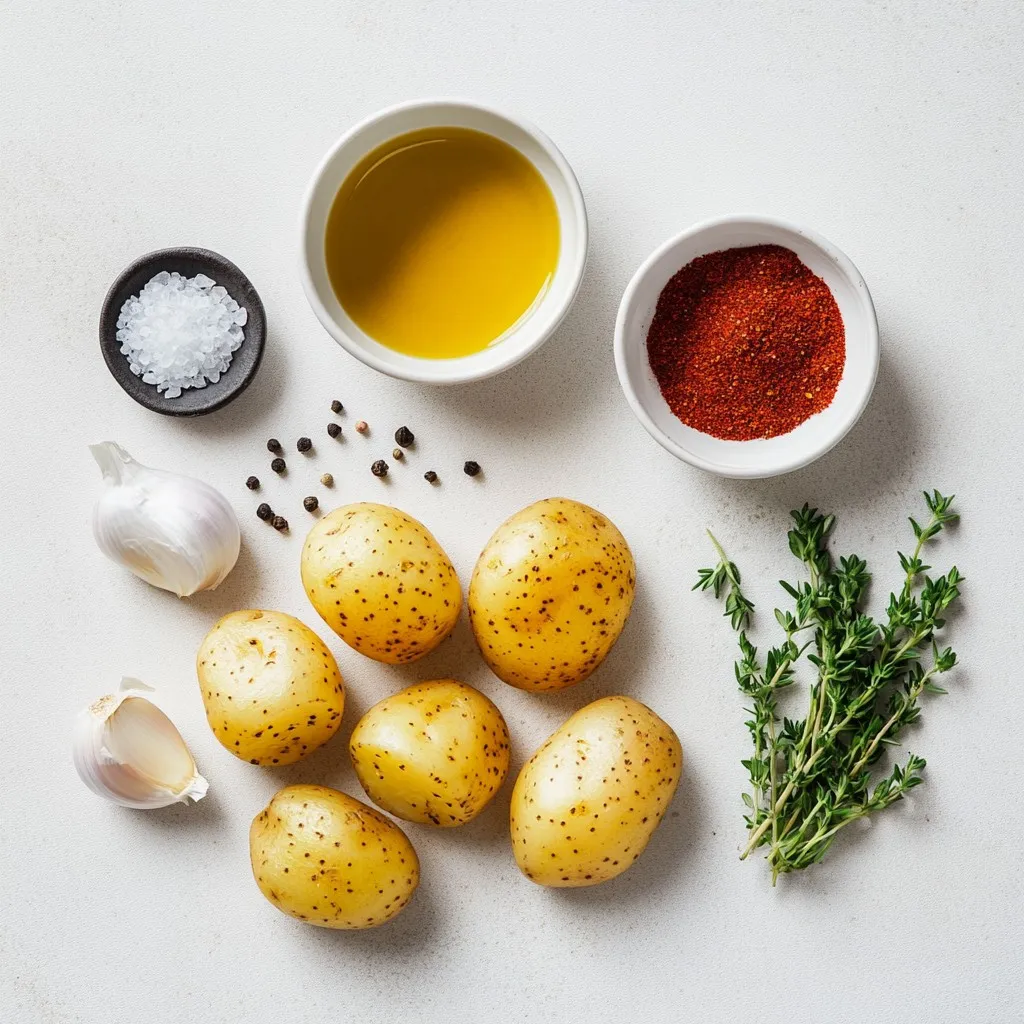
List of Ingredients
– 2 pounds of baby potatoes (halved or quartered)
– 4 tablespoons of extra virgin olive oil
– 4 cloves of fresh garlic (minced)
– 2 teaspoons of dried rosemary (crushed)
– 2 teaspoons of dried thyme
– 1 teaspoon of smoked paprika
– Salt and freshly cracked black pepper (to taste)
– Fresh parsley (for garnish)
Ingredient Quality Tips
Choosing high-quality olive oil:
Select extra virgin olive oil for rich flavor. Look for a dark bottle to protect it from light. Check the harvest date for freshness.
Selecting fresh vs. dried herbs:
Fresh herbs add bright flavor. Use them if you have them. Dried herbs are great for convenience. Crush them to release more aroma.
Measurement Conversions
Converting ounces to tablespoons:
Remember, 1 ounce equals about 2 tablespoons. Use this for precise measurements.
Adjusting for different serving sizes:
If you want more servings, simply double the ingredients. Keep the same ratios for best results.
Step-by-Step Instructions
Prepping the Oven and Ingredients
Preheat your oven to 425°F (220°C). This step is key for getting crispy, golden potatoes. A hot oven helps the potatoes roast evenly.
Mixing the Ingredients
In a big mixing bowl, add 2 pounds of halved or quartered baby potatoes. Toss in 4 minced garlic cloves and 4 tablespoons of extra virgin olive oil. Sprinkle in 2 teaspoons of crushed rosemary, 2 teaspoons of thyme, and 1 teaspoon of smoked paprika. Add salt and pepper to taste. Use your hands or a spoon to mix well. Make sure every potato is coated with the herbs and oil.
Roasting Instructions
Line a large baking sheet with parchment paper. This keeps the potatoes from sticking. Spread the seasoned potatoes in a single layer. Don’t overcrowd them to ensure they cook properly.
Place the baking sheet in the oven. Roast the potatoes for 25-30 minutes. Halfway through, flip the potatoes with a spatula. This helps them brown and crisp up evenly.
When they are golden brown and fork-tender, take them out. Let them cool for a few minutes. Just before serving, add fresh parsley on top for color and flavor. Enjoy these tasty garlic herb roasted potatoes!
Tips & Tricks
Achieving Perfect Roasted Potatoes
To get the best garlic herb roasted potatoes, make sure to coat them well. Use your hands to mix the potatoes, oil, and herbs in a bowl. This ensures each piece gets flavor. For crispier potatoes, spread them in a single layer on the baking sheet. Avoid overcrowding. This allows hot air to circulate around each potato.
Flavor Enhancement Suggestions
Want more flavor? Try adding spices like onion powder or chili flakes. You can also marinate the potatoes before roasting. This gives time for the flavors to sink in. Use a mix of olive oil and herbs for a tasty soak. Let them marinate for 30 minutes to an hour for the best taste.
Cooking Time Adjustments
Different potatoes need different cooking times. If you use larger potatoes, cut them into smaller pieces. This way, they cook evenly. A larger piece can take longer to roast. Check them often. If you have a new oven, you might need to adjust the time. Keep an eye on the potatoes, so they don’t burn.
Pro Tips
- Use Fresh Herbs: Fresh herbs can enhance the flavor profile of your roasted potatoes even more than dried ones. Consider using fresh rosemary or thyme, adding them in the last 10 minutes of roasting for a burst of freshness.
- Cut Evenly: Ensure all potato pieces are cut to a similar size for even cooking. This will help them roast uniformly, achieving that perfect golden crispiness on all sides.
- Don’t Crowd the Pan: Give your potatoes enough space on the baking sheet. Overcrowding can cause them to steam rather than roast, resulting in a softer texture instead of the desired crispiness.
- Experiment with Spices: Feel free to add your favorite spices to the mix, such as garlic powder, onion powder, or even a pinch of cayenne for a kick. Adjusting the spice blend can create a unique flavor every time!
Variations
Herb Variations
You can choose fresh or dried herbs for your roasted potatoes. Fresh herbs have a bright flavor, while dried herbs offer convenience. If you use fresh rosemary or thyme, use about three times more than dried. Try mixing herbs for a unique twist. For example, combine dill and basil for a fresh taste.
Flavor Additions
Adding cheese or other flavors can make this dish special. Grated Parmesan adds a nice touch and melts beautifully. For a spicy kick, sprinkle chili flakes on top. This adds depth and excitement to every bite. You can also try adding lemon zest for a hint of brightness.
Cooking Method Alternatives
If you want to try a different method, use an air fryer. It cooks the potatoes quickly and gives them a crispy exterior. Simply toss the seasoned potatoes in the air fryer basket and cook at 400°F for about 20 minutes. You can also use a stovetop skillet. Heat oil in a skillet, add the potatoes, and cook until golden brown. Flip them for even cooking and enjoy a different texture.
Storage Info
Storing Leftovers
To store your garlic herb roasted potatoes, let them cool first. Place them in an airtight container. This keeps them fresh and tasty. In the fridge, they last up to 3 days. Always label your container with the date for easy tracking.
Freezing Instructions
If you want to freeze them, you can! First, let the potatoes cool completely. Then, spread them on a baking sheet in a single layer and freeze for 1-2 hours. Once frozen, transfer them to a freezer-safe bag. They can stay fresh for up to 2 months. When you want to eat them, reheat in the oven at 375°F (190°C) until hot.
Using Leftover Potatoes
There are many fun ways to use leftover potatoes. You can mash them for a creamy side. Chop them for a breakfast hash with eggs. Toss them in a salad for extra flavor. Try adding them to soups or stews for heartiness. Roasted potatoes also make a great filling for tacos or wraps.
FAQs
How can I make my garlic herb roasted potatoes extra crispy?
To make your garlic herb roasted potatoes extra crispy, follow these tips:
– Cut potatoes evenly: Ensure your potato pieces are the same size. This helps them cook evenly.
– Soak before roasting: Soak the cut potatoes in cold water for 30 minutes. This removes excess starch and promotes crispiness.
– Use high heat: Roast at a high temperature, around 425°F (220°C). This helps create a crispy outside.
– Space them out: Spread the potatoes in a single layer on the baking sheet. Overcrowding leads to steaming, not roasting.
– Flip halfway: Turn the potatoes halfway through cooking. This allows all sides to brown nicely.
Can I use larger potatoes instead of baby potatoes?
Yes, you can use larger potatoes. Here’s how to adjust:
– Cut larger potatoes: Cut them into smaller pieces, about 1 to 2 inches, for even cooking.
– Cooking time: Larger pieces may take longer to cook. Check them after 30 minutes and add more time if needed.
– Peeling: You can peel them if you prefer, but the skin adds extra flavor and texture.
What are the best herbs to use for roasted potatoes?
When choosing herbs for roasted potatoes, consider these options:
– Rosemary: This herb adds a robust flavor that pairs well with potatoes.
– Thyme: It offers a gentle, earthy taste that enhances the dish.
– Parsley: Often used as a garnish, it adds freshness and color.
– Oregano: This herb brings a warm and slightly peppery flavor.
– Sage: Its strong taste is great for a rich, savory dish.
Feel free to mix and match these herbs based on your taste!
This blog post detailed how to make garlic herb roasted potatoes. We covered essential ingredients, quality tips, and step-by-step instructions for roasting. I shared ways to enhance flavor, achieve perfect texture, and suggested how to store leftovers.
Remember, high-quality ingredients lead to tasty dishes. Be creative with herbs and spices. Cooking should be fun, so experiment! Enjoy your roasted potatoes and make them your own. Each bite should bring you jo


