Garlic Herb Roasted Carrots Flavorful and Simple Dish

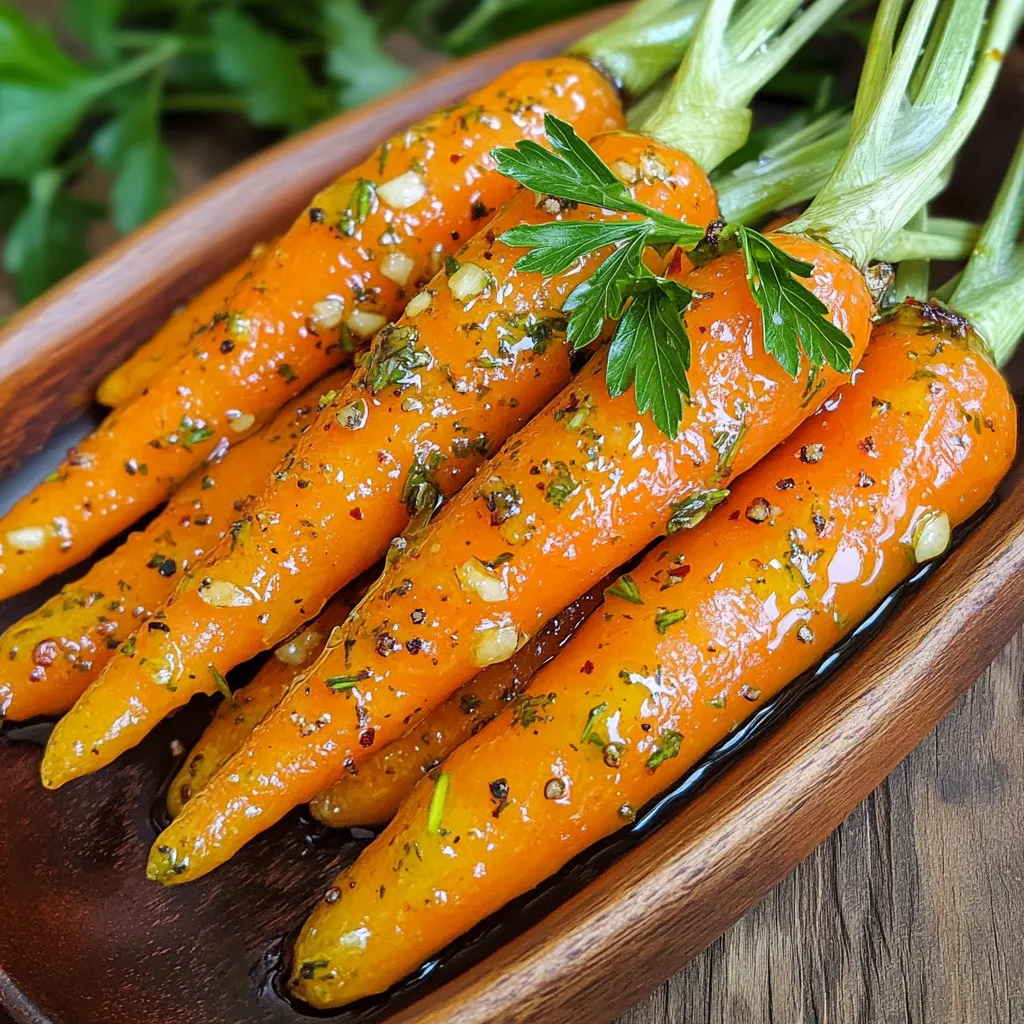
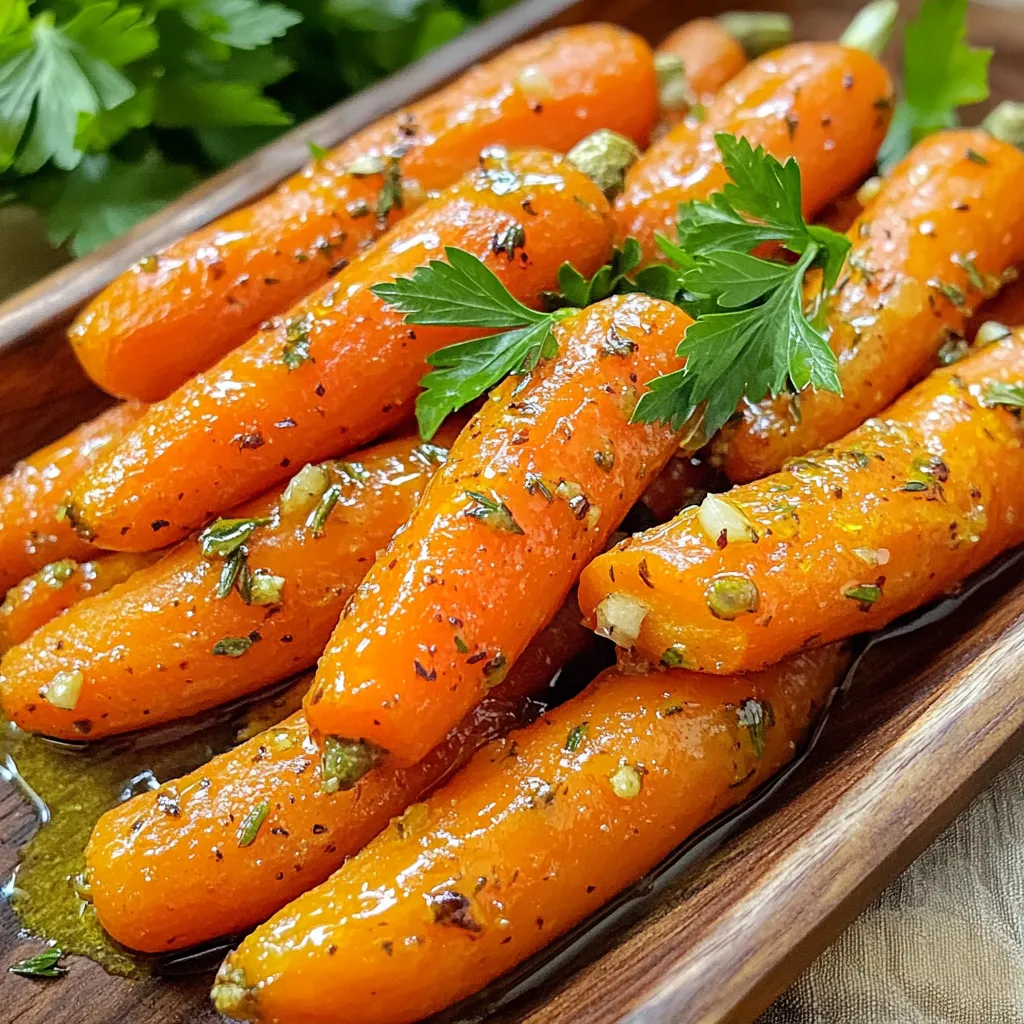
Looking for a simple yet flavorful dish? Garlic Herb Roasted Carrots are the perfect choice! These tender, sweet carrots burst with herbs and garlic, making them a delightful side for any meal. In this article, I’ll walk you through easy steps, ingredient options, and tips to create your own batch. Whether you’re a pro in the kitchen or just starting out, this recipe will impress everyone at the table!
Ingredients
Essential Ingredients for Garlic Herb Roasted Carrots
To create this tasty dish, you need these key items:
- 1 pound baby carrots, peeled and trimmed
- 4 cloves garlic, minced
- 3 tablespoons extra virgin olive oil
- 1 tablespoon fresh rosemary, finely chopped
- 1 tablespoon fresh thyme, finely chopped
- 1 teaspoon honey
- Salt and freshly ground black pepper, to taste
- Fresh parsley, chopped for garnish
These ingredients work together to give the carrots great flavor. The garlic adds a punch, while the herbs bring warmth.
Optional Ingredients for Enhanced Flavor
You can also try these extras to boost taste:
- Lemon juice for brightness
- Red pepper flakes for a kick
- Balsamic vinegar for sweetness
Using these optional ingredients can change the dish’s flavor profile. Experimenting can lead to new favorites.
Ingredient Substitutions
If you lack any ingredients, here are some swaps:
- Use regular carrots instead of baby carrots.
- Try dried herbs if fresh ones are not available.
- Swap olive oil for another oil like avocado oil.
These substitutions can still deliver great results. Don’t be afraid to get creative with what you have on hand.
Step-by-Step Instructions
Preparation Steps for Roasting Carrots
Start by preheating your oven to 425°F (220°C). This heat will help the carrots roast nicely. Next, take 1 pound of baby carrots. Peel and trim them to get rid of any rough edges. In a large bowl, mix the carrots with 4 cloves of minced garlic. Add 3 tablespoons of extra virgin olive oil for flavor and moisture.
Now, you’ll want to add 1 tablespoon of finely chopped rosemary and 1 tablespoon of finely chopped thyme. These herbs will give the dish a fresh taste. Don’t forget the honey—1 teaspoon will add a touch of sweetness. Finally, season your mixture with salt and freshly ground black pepper. Toss everything well with your hands or a spatula until each carrot gets a good coat of the tasty mix.
Baking and Roasting Process
Spread the carrots on a baking sheet lined with parchment paper. Make sure they are in a single layer. This step is key for even cooking and caramelization. Now, it’s time to roast! Place the baking sheet in your hot oven. Roast the carrots for 25 to 30 minutes. Halfway through, give them a gentle toss. This helps them cook evenly. You want them tender and beautifully browned when they’re done.
Serving Suggestions
When the carrots finish roasting, take them out of the oven. Transfer them to a nice serving dish. To make them pop, sprinkle some freshly chopped parsley on top. This adds color and a fresh flavor. Enjoy your garlic herb roasted carrots as a side dish. They pair well with meats or grains. They are not just tasty; they look great on the table!
Tips & Tricks
How to Achieve Perfectly Roasted Carrots
To get perfectly roasted carrots, start with fresh baby carrots. Peel and trim them for even cooking. Make sure your oven is hot, around 425°F (220°C). This high heat helps caramelize the sugars. Spread the carrots in a single layer on the baking sheet. This prevents steaming. Toss them halfway through to ensure even browning. Keep an eye on them to avoid burning. Aim for a golden brown color for the best flavor.
Flavor Pairing Suggestions
Garlic herb roasted carrots go well with many dishes. Try serving them with roasted chicken or grilled fish. They also pair nicely with quinoa or rice. For a fresh twist, add a squeeze of lemon juice. Fresh herbs like dill or cilantro can enhance the flavor too. Don’t forget to season with salt and pepper to taste. These simple additions can elevate your dish.
Tools and Equipment Recommendations
You need a few key tools to make this dish. A large mixing bowl is essential for combining the ingredients. A baking sheet lined with parchment paper helps with cleanup. Use a sharp knife for chopping herbs and garlic. A spatula or your hands works well for tossing the carrots. If you have a meat thermometer, it can help ensure even cooking. These tools make the process easier and more efficient.

Variations
Herb Variations for Different Tastes
You can change up the herbs for new flavors. Try using fresh dill or oregano instead of rosemary and thyme. Basil adds a nice touch, especially in summer. Each herb brings its own taste and aroma to the dish. Experiment with combinations to find what you love best.
Sweet and Savory Additions
Want to add more depth? You can mix in a little brown sugar or maple syrup for sweetness. Add a splash of balsamic vinegar for tanginess. You can also toss in some chopped nuts like walnuts or pecans for crunch. These additions create a balance of flavors that makes the dish pop.
Dietary Adaptations (Vegan, Gluten-Free)
This recipe is already vegan and gluten-free. You can enjoy it without worry. If you need a nut-free option, just skip the nuts. Use the same ingredients for a delicious and safe dish. Garlic herb roasted carrots fit many diets, making them a great choice for gatherings.
Storage Info
How to Store Leftover Garlic Herb Roasted Carrots
To store leftover garlic herb roasted carrots, first let them cool down. Place them in an airtight container. You can keep them in the fridge for up to three days. Make sure to label the container with the date. This helps you remember when you made them.
Reheating Instructions for Optimal Flavor
When you are ready to enjoy your leftovers, preheat your oven to 350°F (175°C). Spread the carrots on a baking sheet. Heat them for about 10-15 minutes, or until warm. This method keeps the carrots crispy and tasty. You can also microwave them for 1-2 minutes, but the oven gives better results.
Freezing Options and Tips
If you want to freeze roasted carrots, first let them cool completely. Place them in a freezer-safe bag, removing as much air as you can. They will last for up to three months in the freezer. When you are ready to eat them, thaw in the fridge overnight. Reheat in the oven for the best texture and taste.
FAQs
Can I use regular carrots instead of baby carrots?
Yes, you can use regular carrots. Just cut them into similar sizes for even cooking. Baby carrots are tender and sweet, but regular ones work too. Peel them first for the best texture.
What can I serve with Garlic Herb Roasted Carrots?
Garlic Herb Roasted Carrots pair well with many dishes. Try them with roasted chicken or grilled fish. They also go great with quinoa or rice. Add a fresh salad for a complete meal.
How long do leftovers last in the fridge?
Leftovers last about three to four days in the fridge. Store them in an airtight container. Reheat them in the oven to keep them crispy.
Can I make this recipe ahead of time?
Yes, you can prepare the carrots ahead of time. Toss them with the herbs and oil. Store them in the fridge for up to 24 hours. Roast them just before serving for the best flavor.
Garlic herb roasted carrots are simple and tasty. We explored key ingredients and optional add-ins for more flavor. The step-by-step guide showed how to prep, roast, and serve these carrots. I shared useful tips for roasting perfection and creative variations, plus storage and reheating advice.
These carrots fit many diets and make any meal special. Try different herbs or spices to make the dish your own. Enjoy delicious roasted carrots with ease!


![To create the Roasted Beet and Goat Cheese Salad, you will need the following ingredients: - 4 medium beets, scrubbed and trimmed - 2 tablespoons extra virgin olive oil, divided - Sea salt and freshly ground black pepper to taste - 4 cups mixed greens (arugula, spinach, and kale) - 1/2 cup creamy goat cheese, crumbled - 1/4 cup walnuts, toasted and roughly chopped - 1/4 cup dried cranberries - 2 tablespoons balsamic vinegar - 1 tablespoon pure honey - Fresh herbs (basil or parsley) for garnish Each ingredient adds not just flavor, but also nutrition. Beets are rich in vitamins and minerals. They help boost your energy levels. Goat cheese brings a creamy texture and a tangy taste. It pairs well with the sweetness of beets and cranberries. Walnuts add crunch and healthy fats, while mixed greens provide fiber. The dressing of balsamic vinegar and honey ties all the flavors together. You can find the Full Recipe for step-by-step instructions to make this delightful salad. 1. Preheat the oven: Set your oven to 400°F (200°C). This makes sure the beets roast well. 2. Wrap the beets: Take each beet and wrap it in foil. Drizzle 1 tablespoon of olive oil on them. Add sea salt and black pepper for flavor. Seal the foil tightly. 3. Roast the beets: Place the wrapped beets on a baking sheet. Roast them in the oven for 45-60 minutes. They are done when a fork easily pierces them. 1. Peel and slice the beets: Let the beets cool a bit. Then, peel off the skin. I recommend wearing gloves to avoid stains. Cut the beets into wedges for a nice look. 2. Combine salad ingredients: In a large mixing bowl, add the mixed greens, sliced roasted beets, crumbled goat cheese, toasted walnuts, and dried cranberries. Gently mix everything together. 1. Prepare the dressing: In a small bowl, whisk together the balsamic vinegar, the last tablespoon of olive oil, and honey. Stir well until combined. Taste it and add salt and pepper as needed. 2. Dress the salad: Drizzle the dressing over the salad. Toss everything gently to coat the greens and other ingredients. 3. Serve the salad: Plate the salad right away. Garnish with fresh herbs for a pop of color and extra flavor. For the full recipe, check out the Beet the Ordinary: Roasted Beet and Goat Cheese Salad. - Choosing the right beet size for even cooking: I recommend using medium beets. They cook evenly and are easy to handle. If you use larger beets, they may take longer to roast, leading to uneven texture. Smaller beets cook too quickly and may dry out. - How to properly season the beets: Before wrapping the beets in foil, drizzle them with olive oil. Add a generous pinch of sea salt and freshly ground black pepper. This simple seasoning enhances their natural sweetness and flavor during roasting. - Creative ways to plate the salad: For a stunning presentation, use a large, flat platter. Layer mixed greens as a base. Fan out the roasted beet wedges on top and sprinkle crumbled goat cheese and walnuts over the salad. This method creates a colorful and inviting look. - Garnishing tips to elevate the dish: Fresh herbs can add color and flavor. A sprinkle of chopped basil or parsley brightens the dish. You can also use edible flowers for a special touch, making it perfect for gatherings or celebrations. - Best practices for prepping ingredients in advance: You can roast the beets a day ahead. Once cooled, wrap them in plastic to keep fresh. Store the mixed greens and other ingredients separately. This way, you can quickly assemble your salad just before serving, keeping everything crisp and tasty. For the complete recipe, see [Full Recipe]. {{image_4}} You can switch up the greens in your salad to make it special. Try using arugula for a peppery kick or romaine for a crisp bite. Each green offers a different taste and texture, giving your salad a new vibe. If you want to change the cheese, feta or blue cheese can work wonders. Feta adds a salty flavor, while blue cheese brings a bold touch. Both complement the sweetness of the beets nicely. The right dressing can elevate your salad. A citrus vinaigrette adds a bright and zesty flavor. Mix fresh lemon juice with olive oil for a quick option. If you want something creamy, a yogurt dressing is perfect. It pairs well with the tang of goat cheese and makes the salad feel lush. Don’t hesitate to experiment with different dressings to find your favorite. Add protein to make your salad more filling. Grilled chicken is a great choice, giving the salad a hearty feel. For a plant-based option, chickpeas work well. They add protein and texture. You can also sprinkle seeds, like pumpkin or sunflower seeds, for some crunch. Fresh fruit, such as sliced pears or apples, can add a sweet note. Each add-in brings its own charm to the dish, making it unique every time. Don’t forget to check out the Full Recipe for more inspiration! To keep your roasted beet and goat cheese salad fresh, store it in an airtight container. Place any leftovers in the fridge. The salad will stay good for about three days. Make sure to keep the dressing separate until you are ready to eat. This helps keep the greens crisp and fresh. If you want to store beets for longer, you can freeze them. First, roast the beets as in the Full Recipe. Let them cool, then peel and slice them. Place the slices in a freezer-safe bag, removing as much air as possible. Beets can last up to six months in the freezer. However, I do not recommend freezing the prepared salad. The greens won't hold up well after thawing. When it's time to eat your stored salad, you can reheat the beets if you like. Just warm them in the microwave for about 30 seconds. Toss the salad again after reheating. This helps mix the flavors back together. If you stored the salad dressed, consider adding a bit more dressing before serving. This keeps everything tasty and vibrant. How long do roasted beets last in the fridge? Roasted beets can last up to five days in your fridge. Store them in an airtight container. This way, they stay fresh and tasty for your salads. Can I use pre-cooked beets for this recipe? Yes, you can use pre-cooked beets. They are a great time-saver. Just cut them into wedges and add them to your salad. They will still taste delicious! What type of goat cheese is best for salads? A creamy goat cheese works best for this salad. It adds a nice richness and tang. Look for soft, crumbled varieties for easy mixing. Can I substitute goat cheese with a dairy-free option? Absolutely! You can use a dairy-free cheese made from nuts. Look for a creamy cashew cheese or tofu-based option. Both will provide a nice flavor. What are the health benefits of beet and goat cheese salad? This salad is packed with nutrients. Beets are high in fiber and antioxidants. Goat cheese adds protein and calcium. Together, they support heart health and digestion. How many calories are in a serving of this salad? One serving of this salad has about 300 calories. This includes the beets, goat cheese, nuts, and dressing. It’s a great balance of flavors and nutrients without too many calories. For the complete recipe, check out the Full Recipe. This salad combines roasted beets, fresh greens, and tangy goat cheese. You learned how to roast beets and mix vibrant ingredients for a delicious dish. Remember to choose the right beet size and season well for great texture. Don't hesitate to try different greens or dressings to make it your own. Salad prep can be easy, helping you save time. Enjoy this healthy meal that packs flavor and nutrients. Make it today and impress yourself with your cooking skills!](https://dishtreats.com/wp-content/uploads/2025/06/a3a0567a-1f00-4857-8ef4-d1e9b38b024f-768x768.webp)

![Creating a Grilled Peach Caprese Salad is simple and fun. Here’s what you need: - Ripe peaches - Fresh mozzarella - Mixed greens - Cherry tomatoes - Fresh basil leaves - Balsamic glaze - Extra virgin olive oil - Salt and black pepper Each ingredient plays a key role in this dish. Ripe peaches bring sweetness. Fresh mozzarella adds creaminess. Mixed greens provide a nice crunch. Cherry tomatoes add color and flavor. Fresh basil contributes a fragrant touch. The balsamic glaze adds a tangy finish. Extra virgin olive oil enhances the taste. Lastly, salt and pepper bring everything together. For the full recipe, check out the steps to make this tasty salad. Trust me, your taste buds will thank you! - Preheat the grill to medium-high heat. This helps create great grill marks. - Ensure your grill grates are clean and lightly oiled. This prevents sticking. - Start by cutting the peaches in half and removing the pit. - Brush the cut sides of the peach halves with olive oil. This adds flavor and helps them grill well. - Place the peach halves cut side down on the grill. Grill for about 3-4 minutes. You want those nice grill marks. - Once they soften slightly, remove them. Let them cool for a couple of minutes. - Grab a large serving platter. Create a bed of mixed greens in the center. - Place the grilled peach halves on top of the greens. Spread them out for a nice look. - Next, add slices of fresh mozzarella around the peaches. Then scatter halved cherry tomatoes. - Tear fresh basil leaves and sprinkle them over the salad. This adds a lovely aroma. - Finally, drizzle balsamic glaze over the salad. Add salt and black pepper to taste. - For the best flavor, serve the salad right away. You can chill it a bit if you prefer. For the complete recipe, check out the [Full Recipe]. To get perfect grill marks on your peaches, heat your grill to medium-high. Brush the cut sides of each peach half with olive oil. This helps prevent sticking and adds flavor. Look for ripe peaches that yield slightly when pressed. They should be fragrant and have a bright color. Presentation matters! Try arranging your salad in a spiral pattern. You can also layer the ingredients in single servings. This makes each plate look special. Pair your salad with a crisp white wine or a light red. Both will enhance the flavors of the dish. Want to mix things up? Try using different dressings like a lemon vinaigrette or honey mustard. Fresh herbs like mint or dill can add a twist. You could also sprinkle some chili flakes for a little heat. These simple changes will keep your salad exciting. For the full recipe, check here: [Full Recipe]. {{image_4}} You can change up your Grilled Peach Caprese Salad by swapping fruits. Try using ripe nectarines or plums instead of peaches. These fruits provide a sweet touch and work well on the grill. You can also use strawberries or even grilled pineapple for a fun twist. For cheese, fresh mozzarella is the classic choice. However, you can try burrata for a creamier texture. Feta cheese adds a salty punch, while goat cheese gives a tangy flavor. Each cheese brings its own flair to the dish. To make this salad vegan, skip the cheese and use a plant-based alternative. Cashew cheese or tofu can work well. Drizzle a vegan balsamic glaze for that sweet touch. If you need a gluten-free option, this salad is naturally gluten-free. Just make sure your balsamic glaze is gluten-free as well. Enjoy fresh ingredients without any worries. For the best flavor, pick peaches in late summer. They are sweet and juicy in this season. In spring, try using asparagus or snap peas for a fresh crunch. In winter, roasted root vegetables like beets can replace fresh greens. Add some nuts for extra texture and flavor. Adapt your salad to fit the season and enjoy a fresh taste year-round. For the complete recipe of Grilled Peach Caprese Salad, check the Full Recipe. To keep your Grilled Peach Caprese Salad fresh, store it properly. First, separate the components. This way, the flavors stay bright and fresh. - Peaches: Place grilled peaches in a sealed container. Store them in the fridge for up to three days. - Salad Greens: Keep mixed greens in a dry, airtight container. This keeps them crisp and fresh. - Cheese and Tomatoes: Store mozzarella and cherry tomatoes in separate containers. This helps prevent sogginess. - Balsamic Glaze: Keep the glaze in a small jar. It can last for weeks in the fridge. You might wonder if you should reheat grilled peaches. I recommend enjoying them cold. Their flavor shines best this way. But if you prefer warm peaches, here’s how to heat them: - Microwave: Place peaches on a microwave-safe plate. Heat for about 10-20 seconds. Check them often to avoid overheating. - Stovetop: Heat a non-stick pan over low heat. Add a dash of olive oil and warm the peaches for a minute. For other salad ingredients, like mozzarella and tomatoes, it’s best to enjoy them cold too. Mixing warm and cold can lead to a fun flavor contrast in your dish. To make this dish, follow these simple steps: 1. Preheat your grill to medium-high heat. 2. Brush cut sides of halved peaches with olive oil. 3. Grill peach halves cut side down for 3-4 minutes. 4. On a platter, spread mixed greens for a base. 5. Place grilled peaches on top of the greens. 6. Add mozzarella slices and halved cherry tomatoes around the peaches. 7. Scatter torn basil leaves over the salad. 8. Drizzle balsamic glaze on top, then season with salt and pepper. 9. Serve right away or chill slightly before serving. Fresh mozzarella is the classic choice for Caprese salad. Its creamy texture balances the sweetness of grilled peaches. You can also try burrata for extra creaminess. Feta adds a tangy twist, while goat cheese can give a bold flavor. Choose based on your taste preferences to enhance your salad. You can prep parts of the salad ahead of time. Grill the peaches and store them in the fridge. Wash and dry the greens and tomatoes, keeping them fresh. Assemble everything just before serving to maintain flavor and texture. This way, your salad stays fresh and tasty. Check the [Full Recipe] for more details. This blog shared how to make a Grilled Peach Caprese Salad. You learned about choosing ripe peaches, grilling them, and assembling the salad. Tips on serving and variations helped you create your own version. Remember to store leftovers properly to keep them fresh. With these insights, you can enjoy a delicious, refreshing salad anytime. Trust that your skills will shine. Enjoy experimenting with flavors and ingredients to make it uniquely yours. Your summer gatherings will never be the same!](https://dishtreats.com/wp-content/uploads/2025/06/c765deb6-47e2-46b1-bbfc-9b058c8c2a51-768x768.webp)
