Garlic Herb Butter Chicken Thighs Flavorful and Juicy

Are you ready to elevate your dinner game with a dish that sings flavor? My Garlic Herb Butter Chicken Thighs are juicy, tender, and packed with rich taste. This easy recipe combines simple ingredients with aromatic herbs, perfect for impressing family or guests. I’ll guide you through each step, from making the buttery herb mix to achieving crispy skin. Let’s dive in and make magic in your kitchen!
Why I Love This Recipe
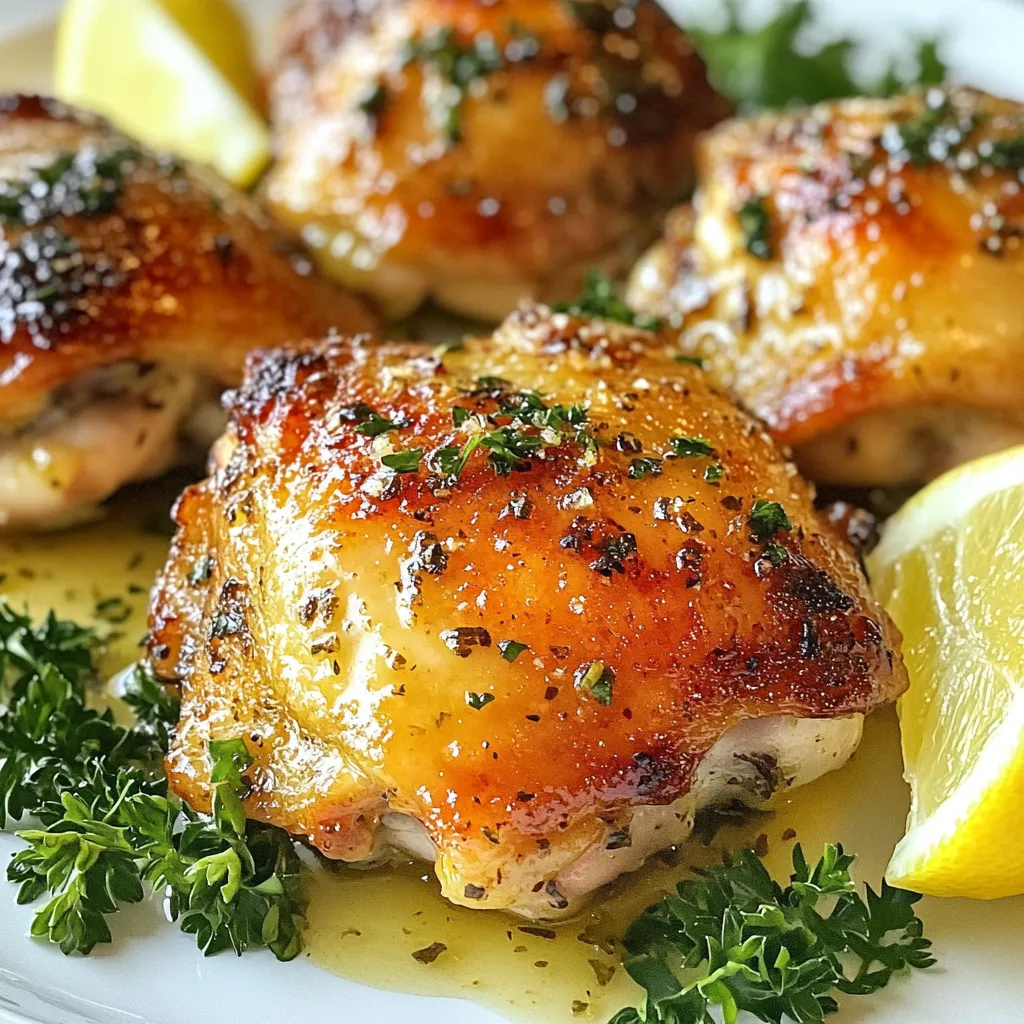
- Delicious Flavor Profile: The combination of garlic, herbs, and lemon creates a mouthwatering flavor that elevates the chicken to new heights.
- Crispy Skin: With the herb butter spread under the skin, you achieve a perfectly crispy exterior that locks in moisture and flavor.
- Easy Preparation: This recipe requires minimal prep time and is straightforward, making it perfect for weeknight dinners or special occasions.
- Impressive Presentation: Serving the chicken with lemon wedges and fresh herbs not only looks beautiful but also enhances the dining experience.
Ingredients
List of Main Ingredients
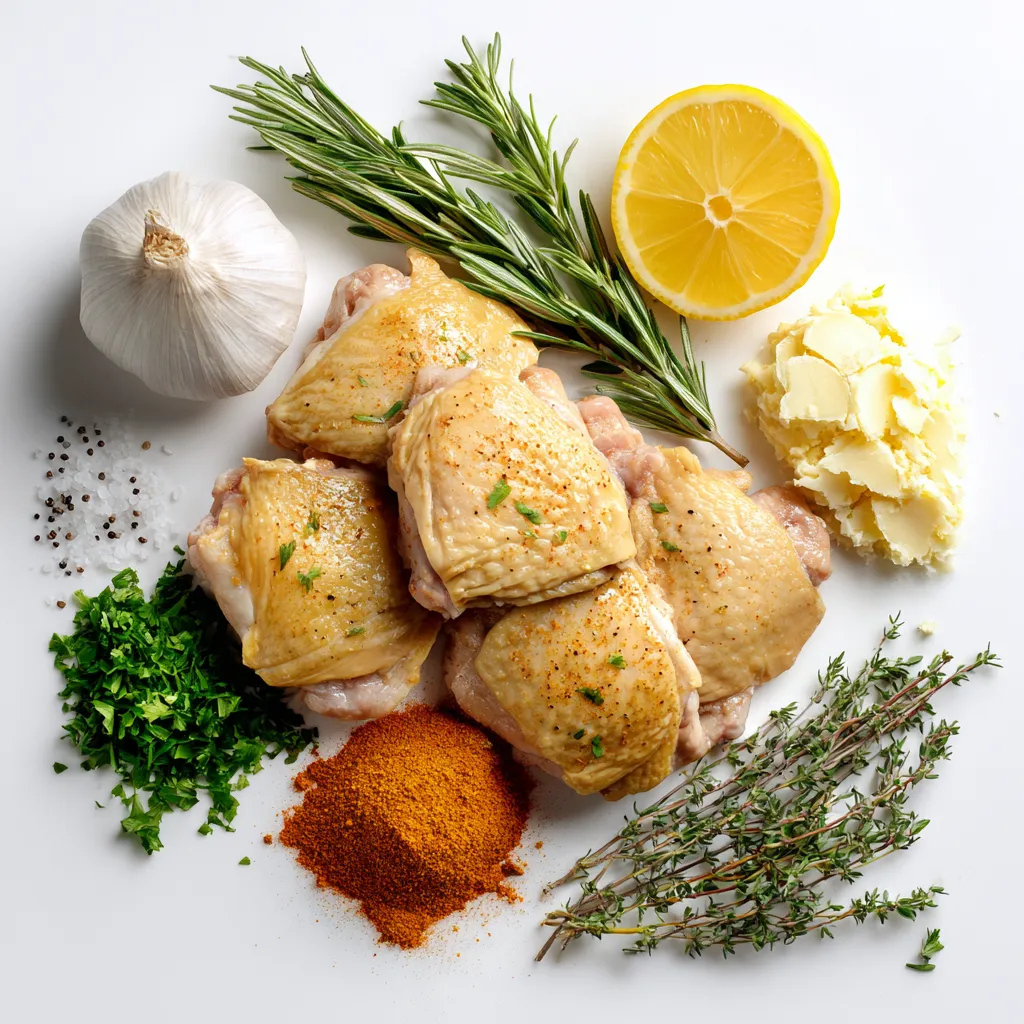
For this recipe, you will need:
- 4 bone-in, skin-on chicken thighs
- 4 tablespoons unsalted butter, softened
- 5 cloves garlic, finely minced
- 2 teaspoons fresh rosemary, finely chopped
- 2 teaspoons fresh thyme, finely chopped
- 1 teaspoon smoked paprika
- Sea salt and freshly ground black pepper
- 1 lemon, zested and juiced
Essential Seasonings
The key flavors come from simple seasonings. The garlic adds a strong taste. Rosemary and thyme provide a fresh aroma. Smoked paprika gives a hint of sweetness. Use sea salt and black pepper to enhance all these flavors.
Recommended Garnishes
Garnish makes the dish pop! I suggest using fresh parsley. It adds color and freshness. You can also add lemon wedges for a zesty touch. This will brighten the dish and make it look appealing.

Step-by-Step Instructions
Preheat and Prepare
First, preheat your oven to 400°F (200°C). This high heat helps to cook the chicken evenly. While the oven warms up, gather your ingredients. You want everything ready to go for a smooth cooking process.
Make the Garlic Herb Butter
Next, take a small bowl and mix together the softened butter, minced garlic, chopped rosemary, chopped thyme, smoked paprika, sea salt, and black pepper. Stir until it blends well. You will smell a strong, savory aroma. This butter adds flavor and moisture to the chicken.
Seasoning and Arranging the Chicken
Now, take your chicken thighs. Pat them dry using paper towels. This step is key for crispy skin. Season both sides with sea salt and black pepper. Then, lift the skin gently and spread some garlic herb butter underneath. Use the rest of the butter to coat the top. This ensures that every bite is packed with flavor.
Arrange the chicken thighs in a baking dish, leaving some space between each piece. Squeeze fresh lemon juice over the chicken and sprinkle lemon zest on top. This adds a bright taste that balances the rich butter.
Baking the Chicken
Place the baking dish in the preheated oven. Bake the chicken for 35-40 minutes. The skin should turn a beautiful golden brown. Use a meat thermometer to check; the internal temperature should reach 165°F (75°C). This ensures the chicken is safe to eat.
Resting and Serving
Once baked, take the chicken out of the oven. Let it rest for 5-10 minutes. Resting helps the juices spread throughout the meat. This makes the chicken moist and juicy. Just before serving, sprinkle some freshly chopped parsley on top for a nice touch.
Serve your garlic herb butter chicken thighs on a wooden board. Add lemon wedges around for extra flair. Enjoy your tasty dish!
Tips & Tricks
Achieving Crispy Skin
To get that perfect crispy skin on your chicken thighs, start by drying them well. Use paper towels to pat them dry. This step is key because moisture makes the skin soggy. Season both sides with sea salt and pepper. This not only adds flavor but also helps with crispiness. When you bake the chicken at 400°F, the hot air will make the skin golden and crunchy.
Enhancing Flavor with Fresh Herbs
Using fresh herbs makes a big difference in flavor. I love rosemary and thyme for this dish. They add a bright, earthy taste that pairs well with chicken. Make sure to chop them finely. Mix them into the garlic butter, so their oils release while cooking. This infuses the chicken with rich flavors. You can also try mixing in other herbs if you like.
Importance of Proper Resting Time
After baking, let your chicken rest for 5-10 minutes. This time allows the juices to settle back into the meat. If you cut into it too soon, the juices run out, and the chicken becomes dry. This resting period ensures each bite is juicy and full of flavor.
Pro Tips
- Perfectly Crispy Skin: Make sure to pat the chicken thighs dry with paper towels before seasoning and cooking. This will help achieve that irresistible crispy skin.
- Butter Under the Skin: Spreading the garlic herb butter under the skin infuses the chicken with flavor while keeping it moist. Be gentle to avoid tearing the skin.
- Resting Time: Allow the chicken to rest for 5-10 minutes after baking. This helps the juices redistribute, resulting in tender and juicy meat.
- Lemon Zest Brightness: Zesting the lemon and sprinkling it on top before baking adds a fresh, vibrant flavor that complements the rich herbs and butter.

Variations
Substituting Chicken Thighs with Breasts
You can swap chicken thighs for breasts in this recipe. Chicken breasts cook faster, so check them early. Aim for a final temperature of 165°F (75°C). The herb butter will keep the breasts moist. You can still enjoy that crispy skin by cooking them with the skin on.
Adding Vegetables for a Complete Meal
Add vegetables to the baking dish for a full meal. Ideas include carrots, potatoes, or green beans. Toss veggies in olive oil and season them with salt and pepper. Place them around the chicken. They will soak up the chicken juices, adding flavor and nutrition.
Flavor Variations with Different Herbs
Feel free to change the herbs in the recipe. Basil, oregano, or dill can add a new twist. Use dried herbs if fresh ones are not available. Keep the same amounts for a balanced taste. Experimenting with flavors can lead to exciting new meals that you will love.
Storage Info
Short-term Storage Tips
After cooking garlic herb butter chicken thighs, let them cool. Place the chicken in an airtight container. This helps keep the chicken fresh for up to three days in your fridge. Be sure to store any leftover garlic herb butter separately. It adds great flavor when reheating.
Freezing Cooked Garlic Herb Butter Chicken
You can freeze the chicken for longer storage. Allow the chicken to cool completely. Wrap each thigh tightly in plastic wrap. Then, place them in a freezer-safe bag. This method keeps them tasty for up to three months. When you’re ready to eat, just thaw them in the fridge overnight.
Reheating Best Practices
To reheat, preheat your oven to 350°F (175°C). Place the chicken in a baking dish. Add a splash of chicken broth or water to keep it moist. Cover the dish with foil to prevent drying out. Heat for about 20-25 minutes until warmed through. You can also use a microwave, but the oven keeps the skin crispy.
FAQs
Can I use boneless chicken thighs instead of bone-in?
Yes, you can use boneless chicken thighs. They will cook faster than bone-in thighs. Adjust baking time to around 25-30 minutes. Check for a safe internal temperature of 165°F (75°C).
How long should I bake chicken thighs for optimal tenderness?
Bake chicken thighs for 35-40 minutes. This time allows them to cook through while staying juicy. Use a meat thermometer to ensure they reach 165°F (75°C). Rest them for 5-10 minutes before serving.
What sides pair well with garlic herb butter chicken thighs?
This dish goes well with many sides. Try roasted vegetables, creamy mashed potatoes, or a fresh salad. Garlic bread also complements the chicken nicely. Choose sides that balance flavors and textures.
Can I substitute the butter for a healthier option?
Yes, you can use olive oil or avocado oil as a substitute. These oils add healthy fats and flavor. The result will be lighter but still delicious. You can also try using a plant-based butter.
Is this recipe suitable for meal prep?
Yes, this recipe is perfect for meal prep! Cook the chicken, then store it in airtight containers. It keeps well in the fridge for 3-4 days. You can reheat it easily for a quick meal.
Now you have all the tools to make delicious garlic herb butter chicken. We covered the key ingredients, step-by-step instructions, and useful tips. Remember, the right seasonings and resting time can make a big difference. Don’t shy away from trying new variations, like adding vegetables or using different herbs.
With proper storage, you can enjoy this dish later too. Happy cookin

Garlic Herb Butter Chicken Thighs
Ingredients
- 4 pieces bone-in, skin-on chicken thighs
- 4 tablespoons unsalted butter, softened to room temperature
- 5 cloves garlic, finely minced
- 2 teaspoons fresh rosemary, finely chopped
- 2 teaspoons fresh thyme, finely chopped
- 1 teaspoon smoked paprika
- to taste sea salt and freshly ground black pepper
- 1 piece lemon, zested and juiced
- for garnish fresh parsley, finely chopped
Instructions
- Begin by preheating your oven to 400°F (200°C), ensuring a hot environment for cooking the chicken evenly.
- In a small mixing bowl, blend together the softened butter, minced garlic, chopped rosemary, chopped thyme, smoked paprika, sea salt, and freshly ground black pepper. Stir until all ingredients are well incorporated and the mixture is fragrant.
- Take each chicken thigh and pat it dry with paper towels; season both sides with sea salt and freshly cracked black pepper.
- Carefully lift the skin of each chicken thigh and spread a generous portion of the garlic herb butter directly under the skin. Use any remaining butter to coat the top of the chicken.
- Arrange the seasoned chicken thighs in a baking dish, ensuring space between each piece. Drizzle fresh lemon juice over the chicken and sprinkle the lemon zest on top.
- Place the baking dish in the preheated oven and bake for 35-40 minutes until the skin is golden brown and crispy, and the internal temperature reaches 165°F (75°C).
- Once baked, remove the chicken from the oven and allow it to rest for 5-10 minutes.
- Just before serving, sprinkle freshly chopped parsley over the chicken.


![Here’s what you need for a creamy, dreamy mac and cheese: - 1 lb elbow macaroni - 4 cups water - 2 tablespoons unsalted butter, divided - 1 teaspoon garlic powder - 1 teaspoon onion powder - ½ teaspoon smoked paprika - Salt and pepper, to taste - 2 cups sharp cheddar cheese, shredded - 1 cup mozzarella cheese, shredded - ½ cup cream cheese, softened - ½ cup whole milk Gather these ingredients to make your Instant Pot creamy mac and cheese. The elbow macaroni cooks perfectly in the Instant Pot, soaking up all the flavors. The two types of cheese give a rich taste. Cream cheese adds smoothness, while whole milk makes it extra creamy. Each spice, like garlic and paprika, adds a nice touch. Want to make your mac and cheese even better? Try these add-ins: - Cooked bacon for a salty crunch - Steamed broccoli for a healthy twist - Diced tomatoes for freshness - Jalapeños for heat Feel free to mix and match! You can make it just how you like. For the full recipe, check out the detailed cooking steps. Gather all your ingredients. You will need: - 1 lb elbow macaroni - 4 cups water - 2 tablespoons unsalted butter, divided - 1 teaspoon garlic powder - 1 teaspoon onion powder - ½ teaspoon smoked paprika - Salt and pepper, to taste - 2 cups sharp cheddar cheese, shredded - 1 cup mozzarella cheese, shredded - ½ cup cream cheese, softened - ½ cup whole milk Measure everything out before you start. This makes cooking easier and faster. Pour 4 cups of water into your Instant Pot. Add the elbow macaroni, 1 tablespoon of unsalted butter, garlic powder, onion powder, smoked paprika, and a pinch of salt. Stir this mix well to coat the pasta. Now, close the lid and set the valve to sealing. Choose the manual cooking option and set the timer to cook on high pressure for 4 minutes. Once the time is up, do a quick release by moving the valve to venting. Open the lid once the steam has escaped. Add the remaining tablespoon of unsalted butter, shredded cheddar cheese, shredded mozzarella cheese, softened cream cheese, and whole milk. Stir everything together with a spatula until it’s creamy. If it’s too thick, add a little more milk for a smoother texture. Season with salt and pepper to your liking. Stir again to mix in the flavors. For the complete recipe, check out the Full Recipe. Enjoy your creamy mac and cheese! To make your mac and cheese super creamy, use a mix of cheeses. I love combining sharp cheddar and mozzarella. The cheddar gives a bold flavor, while mozzarella adds stretchiness. Cream cheese also helps create a rich texture. If it's too thick, add a splash of whole milk. This will help achieve the creamy consistency you want. Here are some great cheese combos: - Sharp cheddar - Mozzarella - Cream cheese - Gruyere - Fontina Mixing these cheeses gives depth and flavor. Try different amounts to find your favorite mix. You can also add a bit of parmesan for a salty kick. Common mistakes can ruin your dish. First, don't overcook the pasta. Set your timer for 4 minutes. Overcooked pasta becomes mushy. Second, be careful when releasing steam. Always use a kitchen towel for safety. Lastly, remember to season well. Taste your mac and cheese before serving. Add more salt and pepper if needed. For more details, check out the Full Recipe. {{image_4}} You can make your mac and cheese heartier by adding protein. Cooked chicken or crispy bacon works great. Simply chop the cooked chicken or crumble the bacon into pieces. Stir it in after mixing the cheese. This adds flavor and makes it a full meal. For a vegan twist, swap the dairy for plant-based ingredients. Use cashew cream or coconut milk in place of whole milk. Replace the cheese with vegan cheese or nutritional yeast for a cheesy taste. This keeps the dish creamy while making it dairy-free. Add extra flavor by mixing in spices and herbs. A dash of cayenne pepper gives it a kick. Fresh herbs like basil or thyme add brightness. Try Italian seasoning for a different twist. You can also add mustard powder for depth. Experiment to find your favorite mix. For the full recipe, check out [Full Recipe]. To store your creamy mac and cheese, let it cool first. Place it in an airtight container. You can keep it in the fridge for up to three days. Make sure it is sealed tightly to keep it fresh. If you want to enjoy it later, consider freezing it. When you want to reheat mac and cheese, use the microwave or stovetop. If using the microwave, place your serving in a bowl. Add a splash of milk to keep it creamy. Heat it in short bursts, stirring in between. For the stovetop, warm it in a pot over low heat. Stir well and add milk if needed. This helps it regain its creamy texture. To freeze mac and cheese, use an airtight container or freezer bag. Make sure it is cool before you put it in. It can last in the freezer for up to three months. When you are ready to eat it, thaw it overnight in the fridge. Then, reheat using one of the methods above. This way, you can enjoy that yummy flavor again! For the full recipe, check the details above. Yes, you can use gluten-free pasta in this recipe. Just choose your favorite brand. Cook times may vary slightly, so check the package instructions. Gluten-free pasta can be just as creamy and tasty as regular pasta. To spice up your mac and cheese, add cayenne pepper or red pepper flakes. Start with a small amount, like 1/4 teaspoon, and taste as you go. You can also mix in some diced jalapeños for a fresh kick. Adjust it based on your spice level preference. Any Instant Pot model works well for this creamy mac and cheese. I recommend using a model with at least a 6-quart capacity. This size gives enough room for the pasta and water. The Instant Pot Duo or Ultra are popular choices, offering great features for beginners and pros alike. For the full recipe, check the link. This blog has shared everything you need for perfect mac and cheese in your Instant Pot. We covered the needed ingredients, cooking steps, and tips to avoid mistakes. You learned how to make it creamy and flavorful, even with variations. Remember to store leftovers properly for later. Keep experimenting with flavors and ingredients to find what you enjoy. Each recipe can be a new adventure. Enjoy your cooking journey!](https://dishtreats.com/wp-content/uploads/2025/07/aef5e05b-bf60-4c96-8d62-11668510c0c6-768x768.webp)

![For One Pot Fiesta Rice, you need: - 1 cup long-grain rice - 2 cups vegetable broth - 1 can (15 oz) black beans, drained and rinsed - 1 cup corn kernels (choice of fresh, frozen, or canned) - 1 red bell pepper, diced - 1 green bell pepper, diced - 1 small onion, finely chopped - 2 cloves garlic, minced These ingredients create a base full of colors and flavors. The rice absorbs all the tasty broth, making it fluffy and delicious. The black beans add protein, while the corn and peppers provide sweetness and crunch. You will also need: - 1 teaspoon ground cumin - 1 teaspoon chili powder - Salt and pepper to taste These spices give the dish its kick. Cumin adds warmth, while chili powder brings a bit of heat. Adjust the salt and pepper to balance the flavors just right. To finish off your meal, use: - Fresh cilantro, chopped (for garnish) - Lime wedges (for serving) Cilantro adds freshness, and lime juice brightens the dish. Together, they enhance the fiesta feel. The combination of these ingredients makes this dish not just tasty but also visually appealing. You can find the full recipe to guide you through the cooking process. - Heat olive oil and sauté onion and garlic. - Add diced bell peppers. Start by heating one tablespoon of olive oil in a large pot over medium heat. Once hot, add the finely chopped onion and minced garlic. Sauté for about three to four minutes. You want the onion to become soft and clear. The garlic will fill your kitchen with a lovely aroma. Next, toss in your diced red and green bell peppers. Cook them for two to three more minutes. Stir occasionally until they soften and brighten in color. - Incorporate spices and rice. - Simmer with vegetable broth. Now it's time to spice things up! Sprinkle in one teaspoon each of ground cumin and chili powder. Stir well to mix the spices into the onion and pepper mixture. Let them cook for one minute. This step helps release their rich flavors. Next, add one cup of long-grain rice to the pot. Stir it thoroughly so each grain gets coated with the mixture. Now, pour in two cups of vegetable broth. Turn the heat up to bring it to a boil. Once boiling, reduce the heat to low. Cover the pot and let it simmer for about 15 to 20 minutes. Do not lift the lid during this time; you want to keep the steam in. - Add black beans and corn. - Season and fluff. - Presentation tips. When the rice is tender and all the liquid is gone, gently fold in one can of drained black beans and one cup of corn. Allow the mixture to heat through for about five minutes on low heat. Afterward, taste your dish and season with salt and pepper as needed. Use a fork to fluff the rice gently, mixing all the ingredients together. For a beautiful presentation, serve the fiesta rice in bright bowls. Top with fresh cilantro and add lime wedges on the side. This adds a zesty touch and makes your meal look vibrant. Enjoy the colorful feast you've created! You can find the Full Recipe for more details. To prevent rice from sticking, rinse the rice before cooking. This step removes excess starch. After rinsing, dry the rice with a towel. This helps the grains stay separate. Next, use the right water ratio. For every cup of rice, use two cups of liquid. The right ratio keeps the rice fluffy. Simmering time is key for perfect rice. After bringing the pot to a boil, reduce the heat. Cover the pot tightly and let it simmer. Avoid lifting the lid during cooking. This keeps the steam inside, which is crucial. Allowing it to simmer for 15-20 minutes ensures even cooking. For an extra kick, try adding spices like paprika or oregano. These spices blend well with the base flavors. You can also add a pinch of cayenne for heat. Fresh ingredients like diced tomatoes or jalapeños work great too. Top your fiesta rice with fresh avocado or sour cream. It adds creaminess and balances the spice. Using pre-cooked ingredients saves time. You can find canned black beans and corn at the store. These options cut down your prep time significantly. You can also use pre-chopped veggies from the store. This helps you skip the chopping step. Quick prep ideas include using frozen vegetables. They cook fast and still taste fresh. Keep them on hand for busy nights. You can even prepare the rice ahead of time. Just reheat it when you're ready to serve. For the full recipe, check [Full Recipe]. {{image_4}} You can easily customize One Pot Fiesta Rice with protein. Try adding chicken or shrimp. For chicken, use bite-sized pieces and cook them first. Add them back in with the beans and corn. Shrimp cooks quickly, so toss them in during the last few minutes. They should turn pink when done. If you want a vegetarian dish, consider adding tofu or tempeh. Both soak up flavors well. Cut them into small cubes and sauté them with the veggies. You can also use extra beans to boost protein. Want a spicy kick? Add jalapeños to the mix. Dice them finely and sauté with the onions and garlic. This will give your dish a nice heat. Adjust the amount to fit your taste. For a Southwest edition, swap out black beans for pinto or kidney beans. You can also add diced tomatoes or corn salsa for a fresh taste. These small changes can make a big difference in flavor. If you're looking for alternatives to long-grain rice, try quinoa or cauliflower rice. Quinoa is packed with protein and cooks in about the same time. Rinse it well before cooking to remove any bitterness. Cauliflower rice is a great low-carb option. It cooks faster, so reduce your liquid and cooking time. You don't want it mushy. For a nuttier flavor, brown rice is another option. Just know it will take longer to cook, so adjust your time and liquid accordingly. These substitutes keep your meals fresh and exciting! Store your One Pot Fiesta Rice in an airtight container. It stays fresh for 3 to 5 days. Check for any signs of spoilage before using leftovers. To keep the rice at its best, let it cool down before sealing it. This helps prevent moisture build-up, which can cause mushy rice. You can freeze portions of One Pot Fiesta Rice for later. Use freezer-safe bags or containers. Make sure to remove as much air as possible to avoid freezer burn. It will last up to 3 months in the freezer. When you're ready to eat, thaw it overnight in the fridge. For quick meals, you can microwave frozen rice straight from the freezer. To reheat, place the rice in a pot with a splash of water. Cover and warm it over low heat. Stir occasionally to heat evenly. If it seems dry, add a bit more water. You can also microwave it. Just add a little water and cover it. After reheating, taste and adjust the flavors. You may want to add a squeeze of lime or a sprinkle of fresh cilantro for a burst of flavor. Can I use brown rice instead of white? Yes, you can use brown rice. It takes longer to cook. Add about 10-15 minutes to the cooking time. You may also need to add more broth to keep it moist. How do I adjust the recipe for more servings? To make more servings, simply double the ingredients. Use a larger pot to fit everything. Cooking time may not change much, but check the rice to be sure. What are the best side dishes to serve with One Pot Fiesta Rice? Some great sides include grilled veggies, avocado slices, or a fresh salad. You could also serve it with tortilla chips for a crunchy contrast. How to tell when the rice is cooked? The rice is ready when it has absorbed all the liquid. It should look fluffy and tender. You can taste a grain to check if it’s done. Can I substitute vegetable broth with chicken broth? Yes, chicken broth works well. It adds a different flavor that many people enjoy. Just make sure to choose low-sodium broth if you watch your salt intake. What is the calorie count per serving? Each serving has about 250 calories. This can vary based on additional toppings or sides added. Are there any allergens in this recipe? This recipe is generally free from common allergens. However, check the labels on canned goods for potential allergens. If you are sensitive to beans or corn, be cautious. This blog covered a simple recipe for One Pot Fiesta Rice. We explored ingredients like long-grain rice, black beans, and fresh veggies. I shared tips on cooking techniques and storage methods. You can enjoy many variations to suit your taste. Whether you prefer chicken, shrimp, or a spicy twist, the options are endless. This dish is easy to make and great for leftovers. Enjoy your cooking adventure!](https://dishtreats.com/wp-content/uploads/2025/07/eb10aa28-84d4-4922-bf2e-e4835b83e1a4-768x768.webp)
