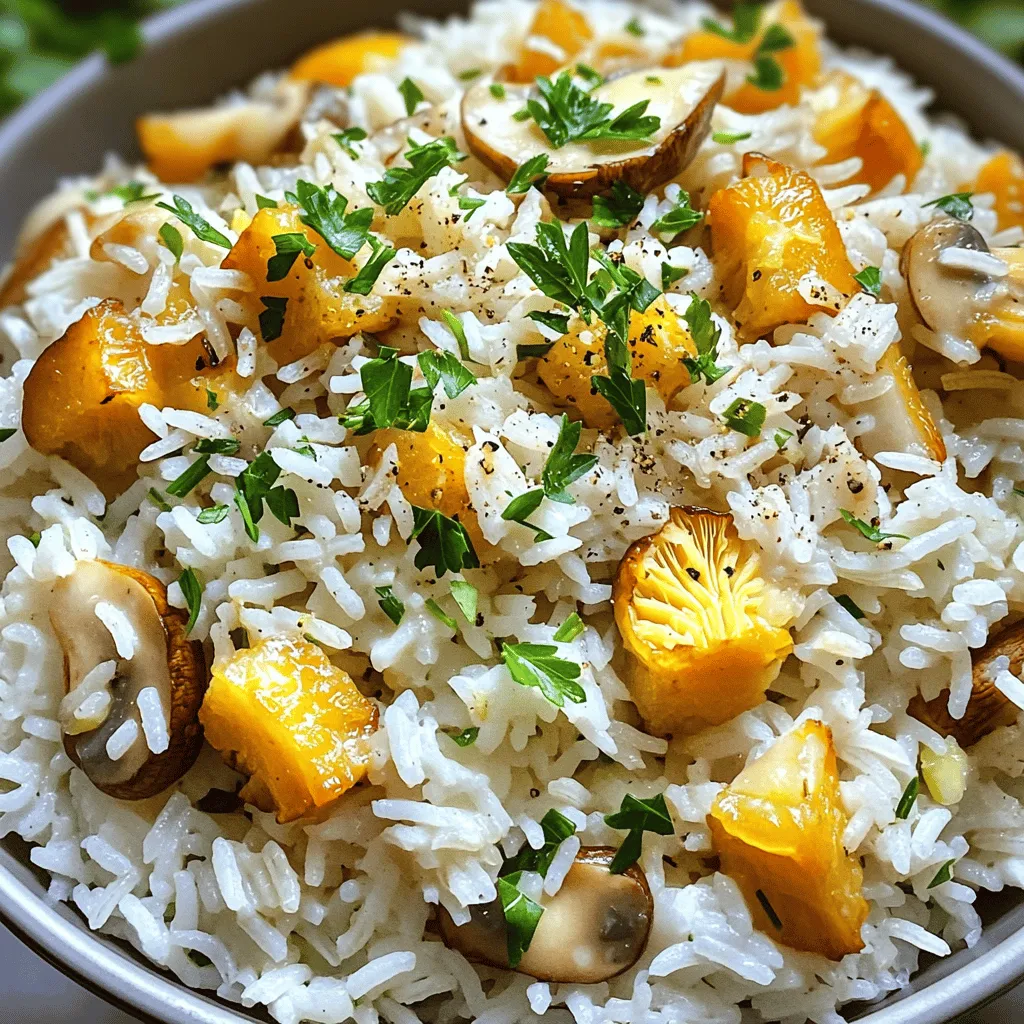
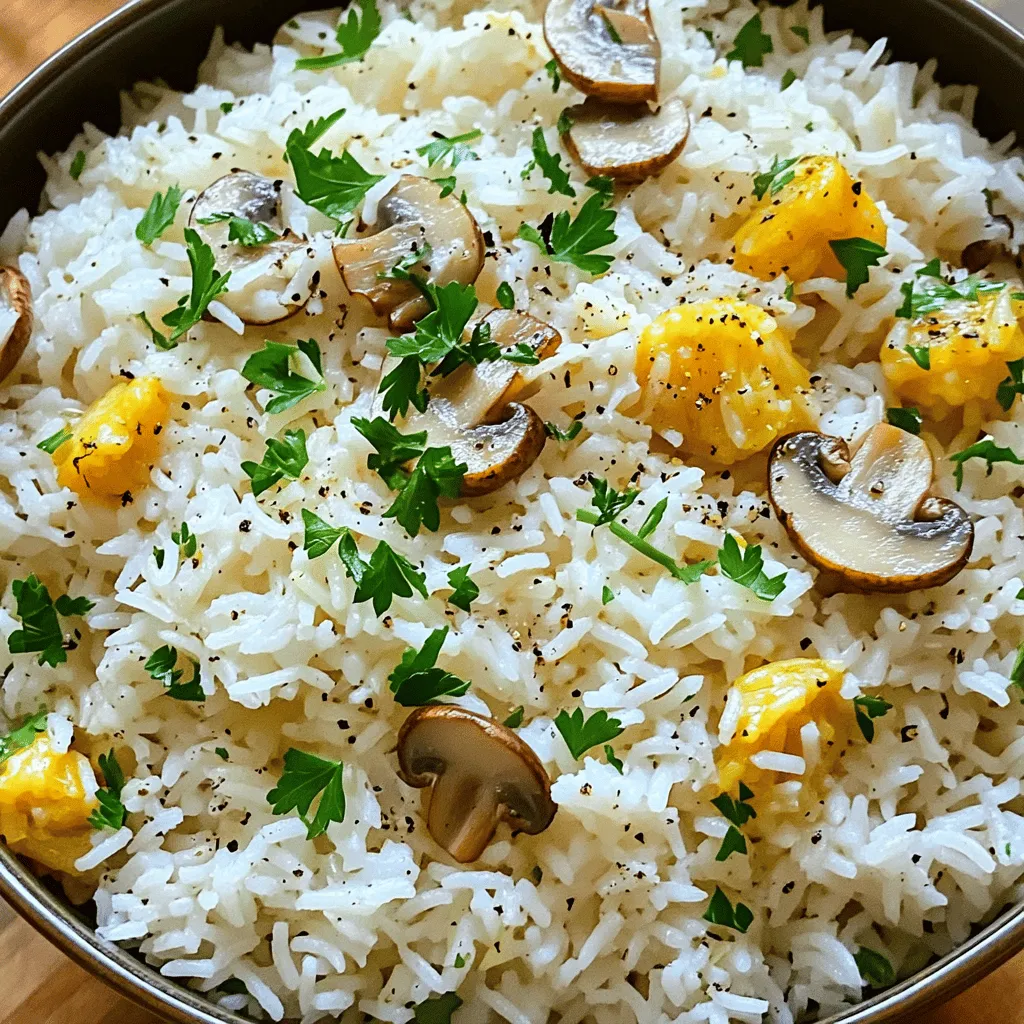
Looking for a meal that’s both easy and full of flavor? Garlic Butter Mushroom Rice is your answer! This dish combines tender jasmine rice, savory mushrooms, and rich garlic butter, making it a perfect fit for any dinner table. In this blog, I’ll guide you through simple steps to create this delicious meal. Let’s dive into the ingredients and get cooking!
Ingredients
Main Ingredients
– 1 cup jasmine rice
– 2 cups vegetable broth
– 2 tablespoons unsalted butter
– 1 tablespoon olive oil
Flavor Enhancers
– 3 cups mushrooms, sliced (cremini or button)
– 4 cloves garlic, minced
– 1 small onion, diced
– 1 teaspoon dried thyme
Seasoning & Garnish
– Salt and pepper to taste
– Fresh parsley, chopped (for garnish)
To make garlic butter mushroom rice, start with the right ingredients. Jasmine rice gives a lovely aroma and fluffy texture. The vegetable broth adds depth and flavor to the rice.
Using unsalted butter and olive oil together creates a rich base for the mushrooms. When it comes to mushrooms, cremini and button are my go-to choices. They soak up flavors well and offer a nice bite.
Fresh garlic and onion are key flavor enhancers. The garlic gives a punch, while the onion adds sweetness. Dried thyme rounds out the dish, adding earthy notes.
Don’t forget the salt and pepper. They help bring out all the flavors. A sprinkle of fresh parsley adds color and a fresh taste to the dish.
Step-by-Step Instructions
Cooking the Rice
– Rinse jasmine rice under cold water until clear.
– Boil vegetable broth, add rice, and simmer.
To start, you must rinse the jasmine rice. This step is key. Rinsing removes excess starch, helping the rice stay fluffy. After rinsing, boil the vegetable broth in a medium pot. Once boiling, add the rice. Give it a quick stir, then reduce the heat. Cover the pot and let it simmer for about 15 minutes. This allows the rice to absorb all the broth. Afterward, remove it from the heat but keep it covered for another 5 minutes to steam.
Preparing the Mushroom Mixture
– Heat olive oil and butter in a skillet.
– Sauté diced onion until translucent.
– Add sliced mushrooms, cooking until golden brown.
While the rice cooks, heat a skillet. Add the olive oil and butter together. Wait until they melt over medium heat. Then, add the diced onion. Cook it for about 3 to 4 minutes. You want it soft and translucent. Next, add the sliced mushrooms. Stir well and cook them until they turn golden brown, around 5 to 7 minutes. This step brings out their rich flavor.
Combining Ingredients
– Stir in garlic and thyme for flavor.
– Fluff rice and combine with mushroom mixture.
– Season and garnish before serving.
Now, it’s time to mix everything! Add the minced garlic and dried thyme to the skillet. Sauté for about a minute. Be careful not to burn the garlic. Once the rice is ready, fluff it with a fork. This step helps separate the grains. Add the rice to the mushroom mixture and stir gently. Finally, season with salt and pepper to taste. Mix well so every bite is full of flavor. Before serving, garnish with fresh parsley for a pop of color. Enjoy your meal!
Tips & Tricks
Achieving Fluffy Rice
Rinsing the rice is key. It removes extra starch that makes the rice sticky. Rinse until the water runs clear. This step ensures fluffy rice every time. After cooking, let the rice sit covered for a few minutes. This allows steam to finish the cooking process.
Enhancing Flavor
You can add cheese for a creamy touch. Fresh herbs like thyme or parsley also boost flavor. Cooking the mushrooms correctly is vital. Sauté them until they turn golden brown. This step helps release their natural flavors. Don’t rush this part; it makes a big difference.
Presentation Suggestions
Serve the rice in a large, shallow bowl. This creates a beautiful display. Garnish with extra parsley and a sprinkle of black pepper. For a special touch, add whole sautéed mushrooms on top. It makes the dish look even more appealing. Enjoy the vibrant colors and delicious flavors!
Variations
Dietary Modifications
You can easily adapt garlic butter mushroom rice to fit your diet. If you need a gluten-free option, choose rice like basmati or arborio. Both work well and keep the dish tasty. For a vegan twist, swap unsalted butter with vegan butter or coconut oil. This change keeps the rich flavor while making the dish plant-based.
Flavor Variations
Want to mix it up? You can add fresh spinach or peas for a pop of color and nutrients. Nuts like pine nuts or walnuts add crunch and depth. If you like heat, sprinkle some chili flakes on top. Fresh herbs like basil or cilantro can brighten the dish. Each addition gives this rice a unique taste.
Cuisine Influences
You can take this dish in many directions. For an Asian-inspired version, add soy sauce or sesame oil. This gives it a savory twist. Want a Mediterranean flair? Stir in olives or sun-dried tomatoes. These ingredients add a whole new level of flavor and surprise your taste buds!
Storage Info
Storing Leftovers
To keep your garlic butter mushroom rice fresh, use proper refrigeration techniques. First, let the rice cool to room temperature. Then, transfer it to an airtight container. This helps prevent moisture and air from spoiling the rice. If you want to keep it fresh for longer, store it in the fridge. It can last for about three to four days when stored correctly.
Reheating Guidelines
When it comes to reheating, you have two main options: microwave or stovetop. For the microwave, place the rice in a bowl. Add a splash of water to keep it moist. Cover the bowl with a microwave-safe lid. Heat in short bursts, stirring in between until hot. On the stovetop, add a bit of olive oil in a skillet. Heat over low until warmed, stirring well. This method helps keep the texture nice and fluffy.
Freezing Instructions
You can freeze the cooked rice and mushroom mixture if you have leftovers. Allow the dish to cool completely first. Then, place it in a freezer-safe bag or container. Make sure to remove as much air as possible to avoid freezer burn. When you’re ready to eat it, thaw the rice in the fridge overnight. Reheat on the stove or microwave, stirring until fully heated. This method preserves the flavors and textures well.
FAQs
How long does Garlic Butter Mushroom Rice last in the fridge?
Garlic Butter Mushroom Rice stays fresh for about 3 to 4 days in the fridge. Make sure to store it in an airtight container. This keeps it from drying out and helps it stay tasty.
Can I use other types of rice?
Yes, you can use other types of rice. Long-grain rice or basmati rice works well. Keep in mind that these may change the texture and flavor. Jasmine rice gives a nice, fragrant touch that many people love.
What can I serve with Garlic Butter Mushroom Rice?
Garlic Butter Mushroom Rice pairs well with many dishes. You can serve it with grilled chicken, steak, or roasted veggies. It also goes nicely with a fresh salad or a light soup.
How to ensure mushrooms aren’t soggy?
To keep mushrooms from being soggy, avoid washing them. Instead, wipe them clean with a damp cloth. Cook them over medium heat until they brown and release their juices. This helps to keep them firm and flavorful.
In this blog post, we explored how to make delicious Garlic Butter Mushroom Rice. We covered key ingredients like jasmine rice, mushrooms, and seasoning. You learned step-by-step instructions for cooking and flavor tips to enhance your dish. Remember, rinsing the rice is key to fluffiness, and proper storage can keep leftovers fresh. With variations for diets and flavor twists, this recipe is flexible. Enjoy creating this tasty dish that can adapt to many meals. Happy cooking!


