Easy Veggie Sushi Rolls Simple and Quick Recipe

Are you ready to make delicious veggie sushi rolls at home? You don’t need to be a pro chef to enjoy this simple and quick recipe! With just a few fresh ingredients like avocado, cucumber, and bell pepper, you’ll create colorful and tasty bites. Grab your bamboo mat, and let’s dive into making sushi that’s healthy and fun. Your taste buds will thank you!
Ingredients
To make easy veggie sushi rolls, you need a few simple ingredients. Here’s what you will need:
- 2 cups sushi rice
- 2 ½ cups water
- 1/4 cup rice vinegar
- 1 tablespoon sugar
- 1/2 teaspoon salt
- 4 sheets nori (seaweed)
- 1 ripe avocado, sliced thin
- 1 fresh cucumber, julienned
- 1 vibrant carrot, julienned
- 1 red bell pepper, cut into thin strips
- Soy sauce, for dipping
- Sesame seeds, for garnish (optional)
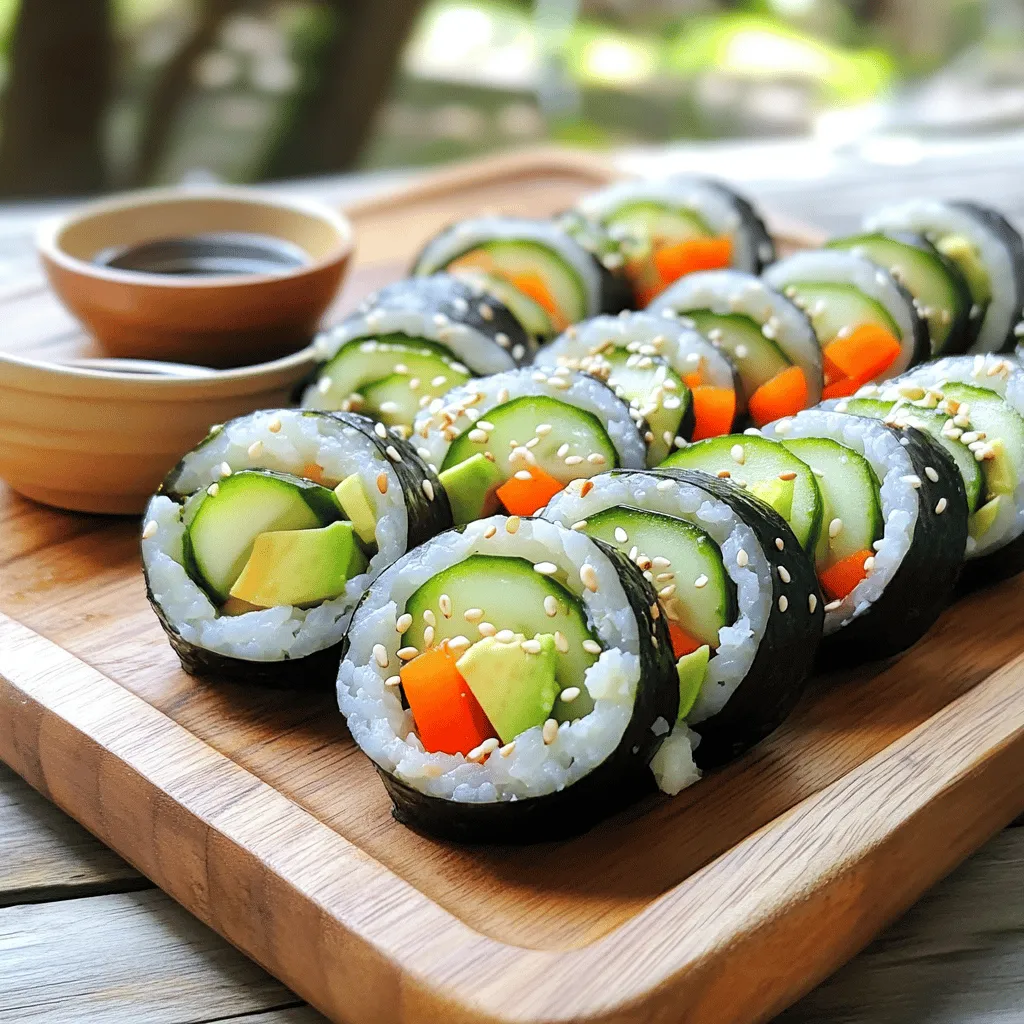
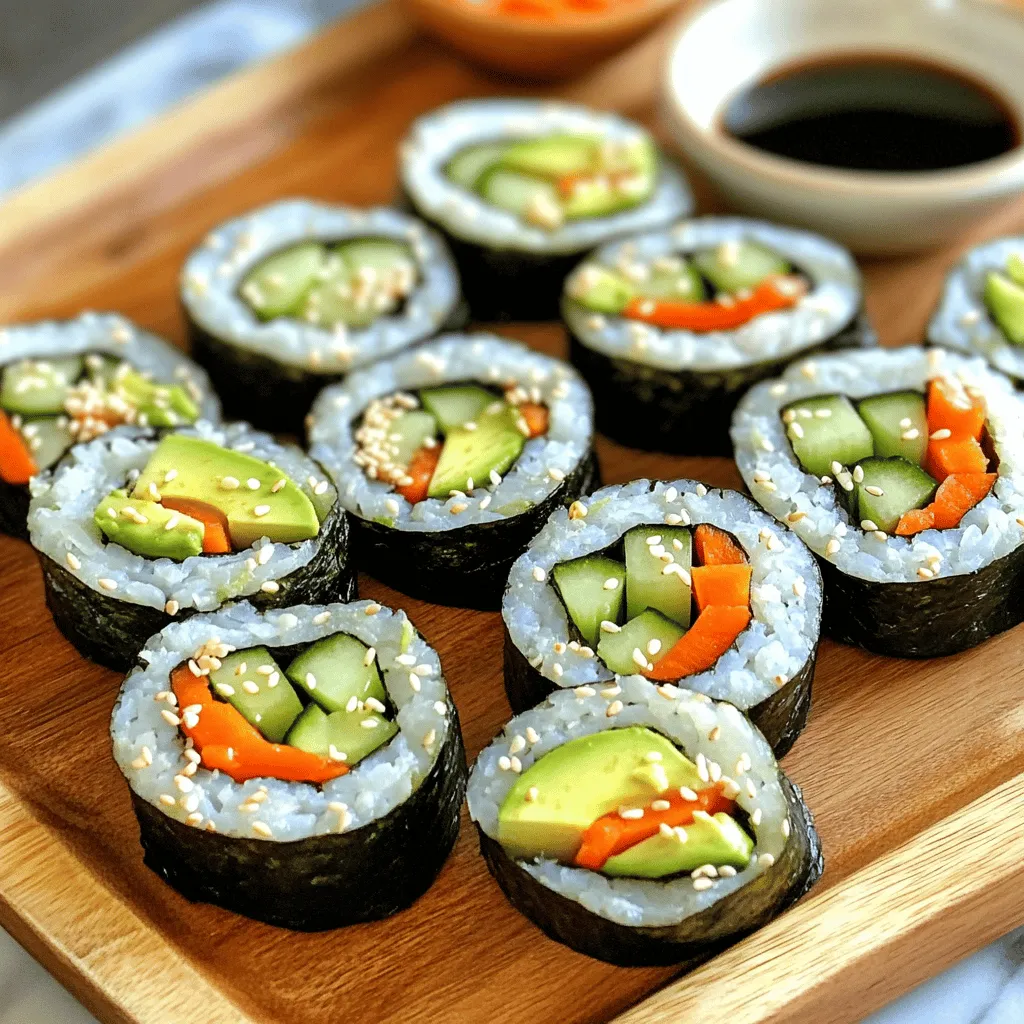
These fresh ingredients create a colorful and tasty sushi roll.Each item plays a key role in flavor and texture. Sushi rice gives a sticky base. Nori wraps everything together. Fresh veggies add crunch and color. Soy sauce is perfect for dipping. If you want, sprinkle some sesame seeds on top for a nice touch. Enjoy making your sushi rolls!
Step-by-Step Instructions
Preparing the Rice
First, rinse the sushi rice under cold water. Do this until the water runs clear. This step removes excess starch. Next, cook the rice. If you have a rice cooker, add 2 cups of rice and 2 ½ cups of water. Follow the cooker’s instructions. If using a pot, boil the rice and water over medium heat. Lower the heat and cover the pot. Let it simmer for about 20 minutes.
Once the rice is cooked, mix rice vinegar, sugar, and salt in a small bowl. Stir until the sugar dissolves. Transfer the warm rice to a large bowl. Gently fold in the vinegar mixture. Let the rice cool to room temperature. This keeps it fluffy and perfect for sushi.
Preparing the Fillings
While the rice cools, prepare your veggies. Slice the avocado thinly. For the cucumber and carrot, julienne them finely. This means cutting them into long, thin strips. Finally, cut the bell pepper into thin strips too. This makes sure every bite is full of flavor.
Assembling the Rolls
Now, it’s time to assemble. Lay your bamboo sushi mat on a clean surface. Place one sheet of nori, shiny side down, on the mat. Wet your hands with water to stop the rice from sticking. Grab a handful of sushi rice and spread it evenly over the nori. Leave about 1 inch at the top edge. This space helps seal the roll later.
Rolling the Sushi
Let’s roll! Starting from the edge closest to you, lift the bamboo mat. Gently roll it away from you, tucking the filling inside as you go. Make sure the roll is tight but not too compact. This keeps the filling from spilling out. Once rolled, wet the top edge of the nori with a little water. This helps seal the sushi roll.
Slicing and Serving
To slice the rolls, use a sharp knife. Cut the roll into bite-sized pieces. Wipe the knife with a damp cloth between cuts. This keeps the edges clean and neat.
Arrange your sushi rolls on a plate. For a fun touch, sprinkle sesame seeds on top if you want. Serve with soy sauce for dipping. Enjoy your creation!
Tips & Tricks
Perfecting Sushi Rice
To make great sushi, the rice must be perfect. First, rinse the sushi rice well. This removes excess starch. You want the rice to be fluffy, not sticky. Cook the rice according to your rice cooker’s instructions. If you use a pot, let it simmer on low heat for 20 minutes. After cooking, mix rice vinegar, sugar, and salt. Fold this mixture into the warm rice. This step gives the rice flavor. Let the rice cool to room temperature before rolling. This helps the rice hold together without getting mushy.
Presentation Ideas
Presentation is key to an enjoyable meal. Arrange your sushi rolls on a colorful plate. A wooden sushi board also looks great. Add garnishes like pickled ginger and wasabi for extra flair. These not only add color but also enhance the taste. You can sprinkle sesame seeds on top for a nice touch. Use bright dishes to match the vibrant colors of your vegetables.
Common Mistakes to Avoid
Avoid overcooking your rice. Too much moisture leads to soggy sushi. Make sure to use the right amount of water. Keep your vegetable cuts uniform. This helps with even rolling and makes each bite delightful. If the veggies are too thick, they may spill out. Always check that your nori is fresh. Old nori can make your rolls lose flavor.

Variations
Different Vegetable Fillings
You can use many types of vegetables in your sushi rolls. Here are some great options:
- Zucchini
- Sweet potato
- Spinach
- Radish
These veggies change with the seasons. Use what’s fresh in your area. You can also swap any veggie for one you like better. Don’t be afraid to mix and match!
Adding Protein
Want to make your sushi rolls heartier? You can add protein like tofu or tempeh. Here’s how:
- Tofu: Press it, then slice it. Marinate for more flavor.
- Tempeh: Cook it, then slice thinly. It has a nutty taste.
If you want other vegetarian proteins, consider chickpeas or edamame. They fit well with the veggies and rice.
Flavor Enhancements
To make your sushi rolls pop, add some flavor boosts. Here are a few ideas:
- Sauces: Use soy sauce, spicy mayo, or teriyaki sauce.
- Spices: Sprinkle sesame seeds or chili flakes for some heat.
- Herbs: Add fresh herbs like cilantro or mint for a bright taste.
These touches make each bite more exciting. You can find your favorite flavors as you experiment!
Storage Info
Storing Leftover Sushi
To keep your sushi fresh, wrap it in plastic. Make sure to cover each roll tightly. This helps keep air out. Place the wrapped sushi in an airtight container. Store it in the fridge. This way, it stays tasty for later.
Reheating Tips
You should not microwave sushi. It makes the rice mushy. Instead, eat it cold or at room temperature. If you prefer warmth, try dipping the rolls in warm water for a few seconds. This can help revive the flavors.
Shelf Life
Veggie sushi rolls last about 24 hours in the fridge. After this time, they may spoil. Watch for changes. If the rice feels hard or the veggies look wilted, it’s time to toss them. Fresh sushi is the best sushi, so enjoy it soon after making.
FAQs
What type of rice is best for sushi?
The best rice for sushi is sushi rice, also known as short-grain rice. It has a sticky texture that helps the rolls hold together. You can also use medium-grain rice if sushi rice is not available. The key is to rinse it well to remove excess starch and cook it properly.
Can I use other types of nori?
Yes, you can use other types of nori! Nori comes in different grades. Look for sushi nori, which is usually roasted and has a nice flavor. You can also try flavored nori for some extra taste. Just make sure it’s suitable for sushi rolls.
How do I make my sushi less sticky?
To make sushi less sticky, rinse the rice thoroughly before cooking. Use cold water and wash the rice until the water runs clear. Also, let the cooked rice cool to room temperature before rolling. This helps keep it fluffy and less sticky.
Is it possible to make sushi vegan?
Absolutely! Veggie sushi rolls are naturally vegan. You can fill them with a variety of vegetables like avocado, cucumber, and carrots. You can also add tofu or tempeh for extra protein. There are endless options for delicious vegan sushi.
What can I serve with veggie sushi rolls?
Serve your veggie sushi rolls with soy sauce for dipping. You can also add pickled ginger and wasabi for an extra kick. For a complete meal, pair the sushi with a light salad or miso soup. Enjoy your colorful and fresh meal!
Making sushi at home is simple and fun. We covered essential ingredients, from sushi rice to fresh veggies. You learned how to prepare, roll, and slice your sushi for a delightful meal.
Remember to customize your rolls with various fillings and dips. Practice proper storage to keep your creation fresh. Now, you have all the tools to impress yourself and others with your homemade sushi! Enjoy this tasty adventure!


![- 1 cup plain Greek yogurt - 1/4 cup creamy mayonnaise - 1 tablespoon freshly squeezed lemon juice - 1 teaspoon garlic powder - 1 teaspoon onion powder - 1 teaspoon dried dill weed - 1 teaspoon dried parsley - 1/2 teaspoon sea salt - 1/4 teaspoon freshly ground black pepper - 1/4 teaspoon smoked paprika - Assorted fresh vegetables (carrots, celery, bell peppers, cucumber) To make a delicious Creamy Greek Yogurt Ranch Dip, you need a few simple ingredients. Start with the main trio: Greek yogurt, creamy mayonnaise, and lemon juice. The yogurt gives the dip its rich and tangy base. The mayonnaise adds a smooth, creamy texture, while the lemon juice brightens the flavors. Next, you’ll want to gather your seasonings. Garlic powder and onion powder add a savory punch. Dried dill weed and parsley bring in that classic ranch flavor. Salt, black pepper, and smoked paprika round out the taste, adding depth and a hint of spice. Finally, think about what to dip. Fresh veggies like carrots, celery, bell peppers, and cucumber work perfectly. They add crunch and freshness, creating a balanced snack. For the full recipe, check out the details above. First, grab a medium-sized mixing bowl. In this bowl, add 1 cup of plain Greek yogurt and 1/4 cup of creamy mayonnaise. These two ingredients create a rich base for our dip. Use a whisk or spatula to blend them well until smooth. It should look creamy and inviting. Next, squeeze in 1 tablespoon of freshly squeezed lemon juice. This adds a nice tang to the dip. Now, sprinkle in the seasonings: 1 teaspoon each of garlic powder, onion powder, dried dill weed, and dried parsley. Add 1/2 teaspoon of sea salt, 1/4 teaspoon of freshly ground black pepper, and 1/4 teaspoon of smoked paprika. These flavors will come together beautifully. Now it's time to whisk everything together. Vigorously mix the ingredients until the dip is fully combined. It should be smooth and creamy, with a lovely thickness. Take a taste and adjust the seasonings as needed. If you want more flavor, feel free to add a pinch of salt or a few more herbs. Your taste buds will guide you. Once you're happy with the flavor, it's time to chill the dip. Cover the bowl with plastic wrap or transfer the dip to an airtight container. Place it in the refrigerator for at least 30 minutes. This step allows the flavors to meld and deepen. When you're ready to enjoy, take the dip out of the fridge. Serve it chilled with an assortment of fresh vegetables for dipping, like carrots, celery, bell peppers, and cucumber. This adds a vibrant touch and makes for a fun snack! For the complete recipe, check out the [Full Recipe]. To make your Creamy Greek Yogurt Ranch Dip even tastier, try using fresh herbs. Fresh chives, dill, or parsley can add great flavor. You can also adjust the lemon juice for more tanginess. A little extra juice can brighten the dip. If you want a thicker dip, add more Greek yogurt. It will make the dip creamier. You can also cut back on the mayonnaise for a lighter version. This keeps the flavor while reducing calories. This dip is perfect for parties and gatherings. It pairs well with crackers or pita chips. Serve it with an array of fresh veggies, like carrots or cucumbers. They make great dippers, adding crunch to your snack. For the full recipe, check the earlier sections. {{image_4}} You can easily change the herbs in this dip. Fresh herbs like chives or basil work great. They add a nice twist to the flavor. Dried herbs can also give you different tastes. Think about using oregano or thyme for a unique touch. If you love some heat, add a spicy twist. Incorporate hot sauce or cayenne pepper. This will give your dip a zesty kick. You can also add chopped jalapeños for extra spice. Just be careful with the amount; you want to enjoy the heat, not overpower it! For a vegan version, swap the yogurt and mayonnaise. Use a plant-based yogurt and vegan mayo. Make sure all seasonings are plant-based too. This way, you can enjoy the same creamy dip without any animal products. It's delicious and fits many diets! For the full recipe, check out the link above. To keep your creamy Greek yogurt ranch dip fresh, store it in an airtight container. This helps prevent any odors from other foods in your fridge. You can enjoy the dip for up to one week. Just make sure to seal it tightly. Freezing this dip is not recommended. The texture may change after thawing, making it watery. Only freeze if it is necessary. If you must, use a freezer-safe container. If you freeze the dip, place it in the refrigerator to thaw. This method gives you the best results. Once thawed, stir it well before serving again. This helps bring back the creamy texture. Yes, non-fat can be used for a lighter version. This choice keeps the dip creamy while cutting down on fat. The flavor remains rich and satisfying. The dip lasts up to one week in the refrigerator. Store it in an airtight container to keep it fresh. I find it gets even better after a day. Fresh veggies, crackers, pita chips, or pretzels are great options. Carrots, celery, and bell peppers work well. You can get creative with your dippers! Yes, all ingredients are gluten-free; verify brands to be sure. This makes it a perfect snack for anyone with gluten sensitivities. Yes, it’s recommended to make it a few hours ahead to enhance flavors. The longer it sits, the more the flavors blend. I often prepare it the night before. This blog post shared a tasty Greek yogurt dip recipe. We covered the key ingredients, easy steps, and tips to make it even better. You learned how to customize the dip, try vegan options, and store it correctly. Think of this dip for your next party or snack. It’s healthy, easy to make, and perfect with fresh veggies or chips. Enjoy your tasty dip and feel good about sharing it with friends!](https://dishtreats.com/wp-content/uploads/2025/07/4dca82da-d028-43ac-94fd-c211b04a114a-768x768.webp)
![To make creamy avocado toast, you need these fresh ingredients: - 4 ripe avocados - 8 slices of whole grain bread - 1 tablespoon fresh lemon juice - ½ teaspoon garlic powder - ½ teaspoon smoked paprika - Salt and black pepper, to taste - 1 cup cherry tomatoes, halved - Fresh basil leaves for garnish These ingredients come together to create a bright and tasty dish. The avocados provide creaminess, while the lemon juice adds a zing. Garlic powder and smoked paprika give the avocado spread a delicious depth. You can customize your toast with these optional toppings: - Crumbled feta cheese - Red chili flakes - A drizzle of balsamic glaze These extras let you explore different flavors. Feta adds a salty kick, while red chili flakes bring heat. Balsamic glaze offers a sweet contrast. Feel free to mix and match to suit your taste! Avocados are not just tasty; they also pack a punch in nutrition. They are rich in healthy fats, which can help lower bad cholesterol. They also contain fiber, which aids digestion. Plus, avocados are high in vitamins C, E, and K, supporting your immune system and skin health. Eating avocados promotes heart health and keeps you feeling full longer. This creamy avocado toast is not only a simple delight but a smart choice for your meals. For the full recipe, check out the detailed instructions! To make creamy avocado toast, start by toasting your bread. Use a toaster or a skillet. Aim for a golden brown color. This creates a firm base for your toppings. While the bread toasts, cut the ripe avocados in half. Remove the pits carefully. Use a spoon to scoop the soft flesh into a bowl. Next, add fresh lemon juice, garlic powder, smoked paprika, salt, and black pepper. Mix these into the avocado. Use a fork to mash it until creamy. It should still have some small chunks for texture. Taste it and adjust the seasoning if needed. Once the bread is ready, spread the avocado mix generously over each slice. Make sure to cover the bread completely. For the best toast, choose whole grain bread. It adds flavor and nutrition. Toasting in a skillet gives a nice crispness. Preheat the skillet over medium heat. Add a bit of olive oil for extra flavor. If using a toaster, toast twice for extra crunch. Keep an eye on the bread to avoid burning. Perfect toast should be firm and golden. To achieve the best creaminess, use ripe avocados. They should yield slightly when pressed. Start mashing with a fork in a bowl. Press down firmly to break it up. Mix in your other ingredients as you mash. This helps blend the flavors well. You want a creamy texture, but some chunks are great for bite. Don’t over-mash; keep it fun and textured. For the full recipe, you can check out the [Full Recipe]. When choosing avocados, look for ones that feel slightly soft when you gently squeeze them. A ripe avocado should give a little but not feel mushy. Check the skin color too; darker skin often means it's ripe. If you find hard avocados, leave them at room temperature for a few days to ripen. You can speed this up by placing them in a paper bag with a banana. If you have leftover avocado mixture, store it in an airtight container. To keep it fresh, add a layer of plastic wrap on top, pressing it directly against the surface. This prevents air from causing browning. You can also add a little extra lemon juice for added protection. Serve your creamy avocado toast with fresh toppings for added flavor and fun. Consider adding sliced radishes for crunch, or a poached egg for protein. You can also try smoked salmon or a sprinkle of nuts for extra texture. Customize each slice to create a unique bite every time. For the full recipe, check out the detailed steps and enjoy this simple dish! {{image_4}} Let’s get creative with your creamy avocado toast! You can mix and match toppings to make each bite special. Here are some ideas: - Crumbled feta cheese: This adds a salty kick. - Red chili flakes: For a spicy touch, sprinkle these on top. - Balsamic glaze: Drizzle it for a sweet and tangy flavor. - Radish slices: These add crunch and a peppery note. - Sliced boiled eggs: They provide extra protein and creaminess. You can change the whole vibe of your toast with different flavors. Here are some tasty combos: - Spicy: Mash in jalapeños or add hot sauce for heat. - Mediterranean: Mix in olives, sun-dried tomatoes, and a bit of oregano. - Mexican: Top with black beans, corn, and a squeeze of lime. - Asian: Add sesame seeds, soy sauce, and sliced green onions. Avocado toast is great for everyone! Here are some easy swaps: - Vegan bread: Choose gluten-free bread to keep it vegan and gluten-free. - Nutritional yeast: Use this instead of cheese for a cheesy flavor. - Chickpeas: Mash these into the avocado for added protein and flavor. - Hummus: Spread a layer of hummus under the avocado for extra creaminess. Feel free to explore these variations and make this dish your own. For the full recipe, check the recipe section above. If you have leftover toast, store it in an airtight container. This keeps it from getting soggy. You can also wrap it in foil or plastic wrap. Toast is best eaten fresh, but you can enjoy it later. Just reheat it in a toaster or oven to bring back its crunch. To keep avocados fresh, sprinkle lemon juice on the cut side. The acid slows browning. Cover the avocado tightly with plastic wrap. You can also store it in an airtight container. Place the pit back in the unused half to help it stay fresh longer. If you prepare avocado toast but can't eat it right away, store it carefully. Place the toast in a container with a lid. Avoid stacking to prevent sogginess. When ready to eat, reheat it for a few minutes in an oven. This brings back the crispy texture. For the best taste, enjoy it fresh if you can. Check out the Full Recipe for more tips! To make creamy avocado toast, you need ripe avocados, whole grain bread, and a few spices. Start by toasting the slices of bread until golden brown. Next, cut the avocados in half, remove the pits, and scoop the flesh into a bowl. Add lemon juice, garlic powder, smoked paprika, salt, and pepper. Mash the mixture until creamy but slightly chunky. Spread it on the toast, top with cherry tomatoes, and finish with fresh basil. For full details, check out the Full Recipe. Avocados are packed with good fats. They are rich in fiber, which helps digestion. They also contain vitamins like C, E, K, and B6. These nutrients support heart health and skin. Eating avocados can also boost your mood and give you energy. Plus, they can help lower cholesterol! You can prepare the avocado mixture ahead of time. Store it in an airtight container with lemon juice to prevent browning. However, I advise against toasting the bread too early. Toasted bread tastes best fresh and crunchy. Assemble your avocado toast right before serving for the best flavor and texture. Whole grain bread is my go-to choice. It adds a nice nutty flavor and fiber. Sourdough is also excellent for a tangy twist. Gluten-free bread works well too. Choose a bread that you enjoy, as it will make your toast even better! Creamy avocado toast is simple and delicious. You learned the key ingredients, from ripe avocados to tasty toppings. Following the steps ensures the perfect texture and creaminess. Remember to choose ripe avocados and store them right. You can explore unique flavor combos for a fun twist. This dish offers great health benefits and endless variations. Enjoy making this tasty treat!](https://dishtreats.com/wp-content/uploads/2025/06/dc41bef5-23d5-41ad-b579-59fa0f16c9c9-768x768.webp)
![To make crispy baked sweet potato fries, you need just a few simple ingredients. Here’s what you’ll need: - 2 large sweet potatoes - 2 tablespoons extra-virgin olive oil - 1 teaspoon cornstarch - 1 teaspoon smoked paprika - 1/2 teaspoon garlic powder - 1/2 teaspoon onion powder - 1/4 teaspoon cayenne pepper (optional) - Salt and freshly ground black pepper - Fresh parsley for garnish These ingredients combine to create a flavorful and fun side dish. Sweet potatoes give a natural sweetness. Olive oil helps with that crispy texture. The cornstarch is the secret for extra crunch. Smoked paprika adds a nice depth of flavor. Garlic and onion powder bring warmth. Cayenne pepper can spice things up if you like it hot. Finally, salt and pepper enhance everything. Using fresh parsley on top not only looks nice but adds a fresh taste. This is the perfect mix for a tasty treat. You can find the full recipe in the recipe section to make it easy for you. 1. Preheat your oven to 425°F (220°C). It’s key for crispiness. 2. Line a large baking sheet with parchment paper. This helps fries not stick. 3. Take 2 large sweet potatoes. Rinse and cut them into even-sized fries. Try to keep them similar in size for even cooking. 4. Place the fries in a mixing bowl. Drizzle 2 tablespoons of olive oil over them. Mix well to coat each fry evenly. 1. Sprinkle 1 teaspoon of cornstarch over the fries. This helps them get that crispy texture. 2. Add spices: 1 teaspoon of smoked paprika, 1/2 teaspoon of garlic powder, 1/2 teaspoon of onion powder, and 1/4 teaspoon of cayenne pepper if you like spice. 3. Season with salt and black pepper to taste. Toss the fries gently to make sure they are all coated well with the seasonings. 1. Arrange the seasoned fries on your baking sheet. Make sure they are in a single layer. This allows air to flow and makes them crispy. 2. Bake in the preheated oven for 25 to 30 minutes. Flip the fries halfway through. This helps them brown evenly. 3. When they turn golden and crispy, they are ready. Let them cool for a few minutes before serving. Enjoy these crispy baked sweet potato fries with your favorite dips! For the full recipe, check out the detailed instructions. To get the best crispy fries, air circulation is key. When you spread the fries out on the baking sheet, make sure they aren't touching. This allows hot air to flow all around them. If your fries aren’t crispy enough, try adding a few extra minutes to the cooking time. Keep an eye on them to avoid burning. You can customize the spice levels based on your taste. If you like more heat, add more cayenne pepper. For a milder flavor, leave it out. You can also swap the spices for other favorites like chili powder or Italian herbs. Mix and match to find your perfect blend. An eye-catching way to serve your fries is in a cone or a basket with parchment paper. This makes them look fun and inviting. Pair your fries with tasty dipping sauces like spicy mayo, creamy ranch, or classic ketchup. It adds more flavor and makes the meal special. Enjoy your crispy baked sweet potato fries from the [Full Recipe]. {{image_4}} You can easily change the taste of your sweet potato fries. For a sweet and spicy option, drizzle them with maple syrup before baking. This will add a nice glaze and a kick of flavor. If you prefer herbs, try adding fresh rosemary or thyme. These herbs bring a savory touch that pairs well with the natural sweetness of the potatoes. Using an air fryer is a fantastic way to make crispy fries. Set your air fryer to 400°F (200°C) and cook them for about 15-20 minutes. Shake the basket halfway through to ensure even cooking. If you enjoy grilling, you can also grill sweet potato fries. Slice them thicker, brush with olive oil, and grill over medium heat for about 5-7 minutes on each side. This gives a nice smoky flavor. Sweet potato fries are great on their own, but you can elevate your meal. Pair them with grilled chicken, fish, or a fresh salad for a balanced dish. They also work well in meal prep. You can make a batch and store them in the fridge. Just reheat them for a quick snack or side dish. For a fun twist, serve them in a cone with a side of your favorite dipping sauce. Try creamy ranch, spicy mayo, or classic ketchup for added flavor. For the full recipe, check out the full recipe link! To keep your crispy baked sweet potato fries fresh, store them in the fridge. Place them in an airtight container. This helps maintain their flavor and texture. They can last for up to three days in the fridge. If you want to keep them longer, freezing is a great option. Place the fries in a freezer-safe bag. Remove as much air as you can before sealing. This prevents freezer burn and keeps them tasty. When you're ready to enjoy your leftovers, reheating is key. For crispy fries, use the oven. Preheat your oven to 400°F (200°C). Spread the fries in a single layer on a baking sheet. Heat for about 10 to 15 minutes, flipping halfway through. This method keeps the fries crispy. You can also use an air fryer. Set it to 380°F (193°C) and heat for about 5 to 7 minutes. Avoid using a microwave, as it can make the fries soggy. In the fridge, your fries can last about three days. In the freezer, they can last up to three months. When you store them correctly, you can enjoy them later without losing flavor or texture. Just remember to check for any signs of freezer burn if they are in the freezer for a while. How can I make sweet potato fries even crispier? To make your sweet potato fries crispier, soak them in cold water. Do this for at least 30 minutes. This helps remove excess starch. After soaking, dry them well with a towel. Also, use cornstarch before baking to create a crisp outer layer. Can I use regular potatoes instead? Yes, you can use regular potatoes. They will taste different but can still be delicious. You might need to adjust the cooking time. Regular potatoes may cook faster than sweet potatoes. What's the nutritional value of sweet potato fries? Sweet potato fries are high in vitamins A and C. They are also a good source of fiber. Compared to regular fries, they have fewer calories and more nutrients. This makes them a healthier choice for a snack or side dish. What is the optimal temperature for baking sweet potato fries? The best temperature for baking sweet potato fries is 425°F (220°C). This high heat helps them cook evenly and get crispy. How long should I bake them for the best results? Bake the fries for 25 to 30 minutes. Be sure to flip them halfway through to get an even golden color. They should look crispy and slightly browned when done. Can I use a different oil? Yes, you can use other oils like avocado oil or canola oil. Each oil has a different flavor, but all will work well for baking. What if I don't have cornstarch? If you don't have cornstarch, you can use potato starch or even flour. Both will help create a crisp texture. Just use the same amount as the cornstarch in the recipe. Making sweet potato fries is simple and fun. You learned the key ingredients and steps to create crispy fries. I shared tips for seasoning and presentation to elevate your meal. You can also explore variations and alternative cooking methods. Storing and reheating properly ensures you can enjoy leftovers without losing quality. Incorporate your favorite flavors and get creative. Remember, these fries are a tasty, healthy option for any meal. Enjoy your cooking adventure!](https://dishtreats.com/wp-content/uploads/2025/07/5c45319a-0858-4d48-b29a-502acd419023-768x768.webp)
![- 1 lb Brussels sprouts, trimmed and halved - 3 tablespoons extra virgin olive oil - 2 tablespoons pure maple syrup - 1 tablespoon Dijon mustard - 1 teaspoon garlic powder - 1/4 cup chopped walnuts (optional for added crunch) - Fresh parsley, roughly chopped, for garnish (optional) - Salt - Freshly ground black pepper When making Maple Mustard Brussels Sprouts, the main ingredients are key to flavor. Brussels sprouts bring a nice crunch. Extra virgin olive oil adds richness, while pure maple syrup gives a sweet touch. Dijon mustard adds a tangy kick that ties it all together. You might want to add garlic powder for more flavor. If you like crunch, chopped walnuts work well. A sprinkle of fresh parsley adds color and freshness to the dish. For seasoning, salt and freshly ground black pepper enhance the taste. Be sure to adjust these to your liking. The balance of flavors makes this dish a standout! Check the [Full Recipe] for detailed steps to prepare these delightful sprouts. - Preheat your oven to 400°F (200°C). - Line a baking sheet with parchment paper. This makes cleanup easy. - In a bowl, combine olive oil, maple syrup, Dijon mustard, and garlic powder. - Season with salt and pepper. Whisk until smooth. - Add halved Brussels sprouts to the dressing. - Toss until evenly coated. Make sure every sprout gets some flavor. - Spread sprouts on the baking sheet in a single layer. - If you like, sprinkle with walnuts for crunch. - Roast for 25-30 minutes. Remember to stir halfway through for even cooking. - Check if the sprouts are fork-tender and caramelized. - Garnish with fresh parsley before serving. This adds color and freshness to your dish. For the complete recipe, check out the [Full Recipe]. To get that golden-brown color, you need to space the Brussels sprouts well on the baking sheet. If they are too close, they will steam instead of roast. Stir them halfway through cooking. This helps them cook evenly and get that nice caramelized look. You can add more flavor by mixing in balsamic vinegar for a tangy twist. This will balance the sweetness of the maple syrup. Also, try using herbs like thyme or rosemary. These herbs add a fresh taste that brightens the dish. Use a large mixing bowl when tossing your ingredients. This gives you enough space to coat the Brussels sprouts well. A high-quality baking sheet is key for even roasting. It helps them brown nicely without sticking. For the full recipe, check out the details above. {{image_4}} To make this dish vegan, swap out the Dijon mustard for a vegan option. There are many great choices available, like a chickpea or tahini-based mustard. These alternatives keep the flavor bold and rich, just like the traditional recipe. You won’t lose any taste while making it plant-based. If you need a nut-free dish, simply leave out the walnuts. The Brussels sprouts will still have a lovely texture and taste. The maple and mustard glaze adds all the flavor you want. You can enjoy this dish without any worries about allergies. For a heartier meal, consider adding protein. Roasted chickpeas or crispy tofu work great here. They pair perfectly with the sweet and tangy flavors of the Brussels sprouts. You can serve them together on the same plate for a filling and nutritious dish. This option makes it easy to create a balanced meal. For the full recipe, check out the details above! Store any leftover Maple Mustard Brussels Sprouts in an airtight container. They will stay fresh for up to 3 days. This keeps them safe and tasty for later meals. Just remember to let them cool down first before sealing them up. You can freeze roasted Brussels sprouts for up to 2 months. To do this, place them in a freezer-safe bag or container. Make sure to squeeze out as much air as possible. This helps prevent freezer burn and keeps their flavor intact. To enjoy your Brussels sprouts again, reheat them in the oven or on the stovetop. The oven gives them a nice crispy texture. If you choose the stovetop, keep the heat medium to avoid burning. Just warm them through until they are hot and ready to eat. For the full recipe, check out the [Full Recipe]. The ideal roasting time is 25-30 minutes. This time allows them to cook perfectly. You want them fork-tender and golden brown. Stir them halfway through to help them caramelize well. Yes, you can prep these sprouts a day ahead. Just mix the Brussels sprouts with the maple-mustard dressing and store them in the fridge. When you're ready to serve, simply roast them before your meal. This saves time and keeps flavors fresh. Pair them with proteins like chicken or fish. They also go great with grains like quinoa or rice. The sweet and tangy flavor of the sprouts complements many dishes well. Absolutely! Maple Mustard Brussels Sprouts store well in the fridge. You can enjoy them throughout the week. Just reheat them in the oven or on the stovetop for the best texture. For the full recipe, be sure to check the earlier sections. This blog post shared a simple and tasty recipe for Maple Mustard Brussels Sprouts. You learned about the main ingredients and optional add-ins. The step-by-step instructions ensure you roast them to perfection. I’ve also shared tips for flavor and storage, plus variations to suit your needs. These Brussels sprouts are easy to make and full of flavor. Try them with your favorite protein for a delicious meal! Enjoy experimenting with this recipe and make it your own.](https://dishtreats.com/wp-content/uploads/2025/06/4f608c6e-5907-49f6-a9cf-d865501fb0be-768x768.webp)

