Easy Vegan Pumpkin Mac and Cheese Creamy Delight

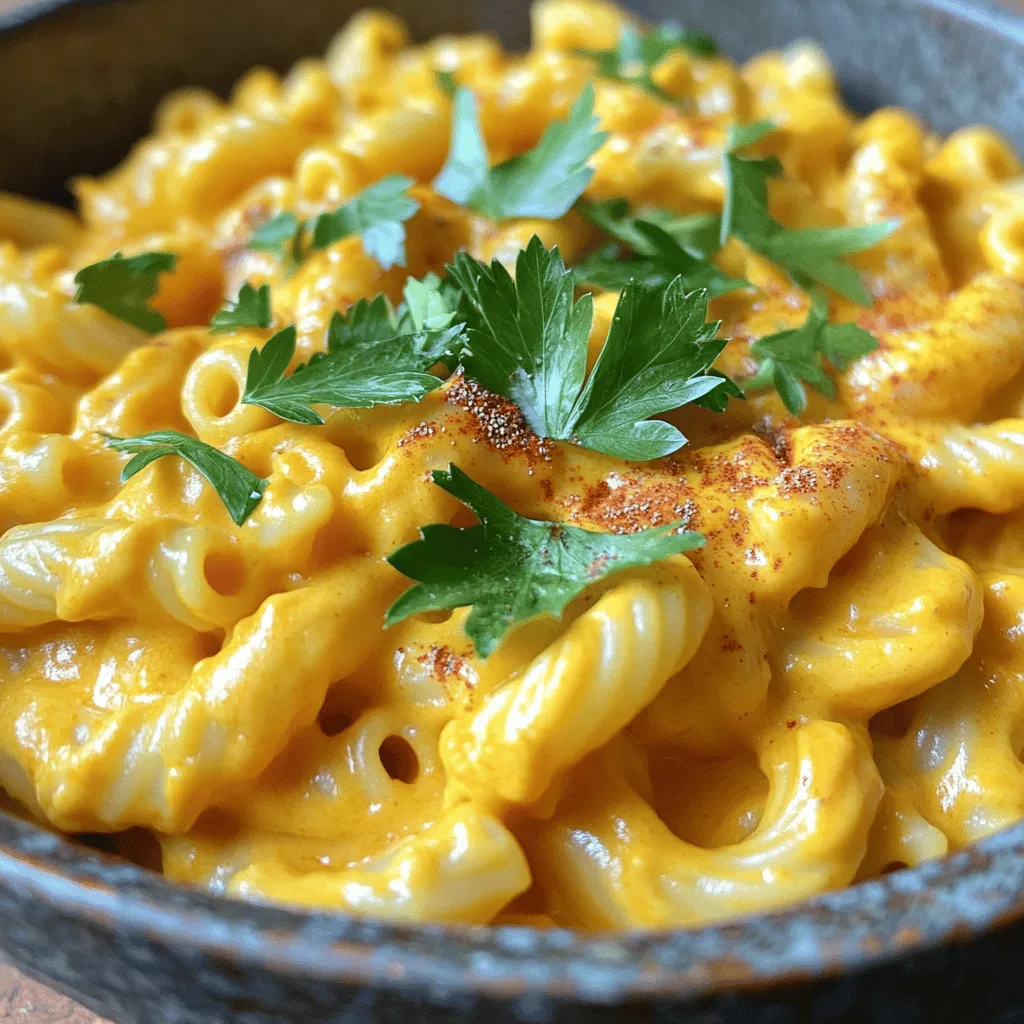
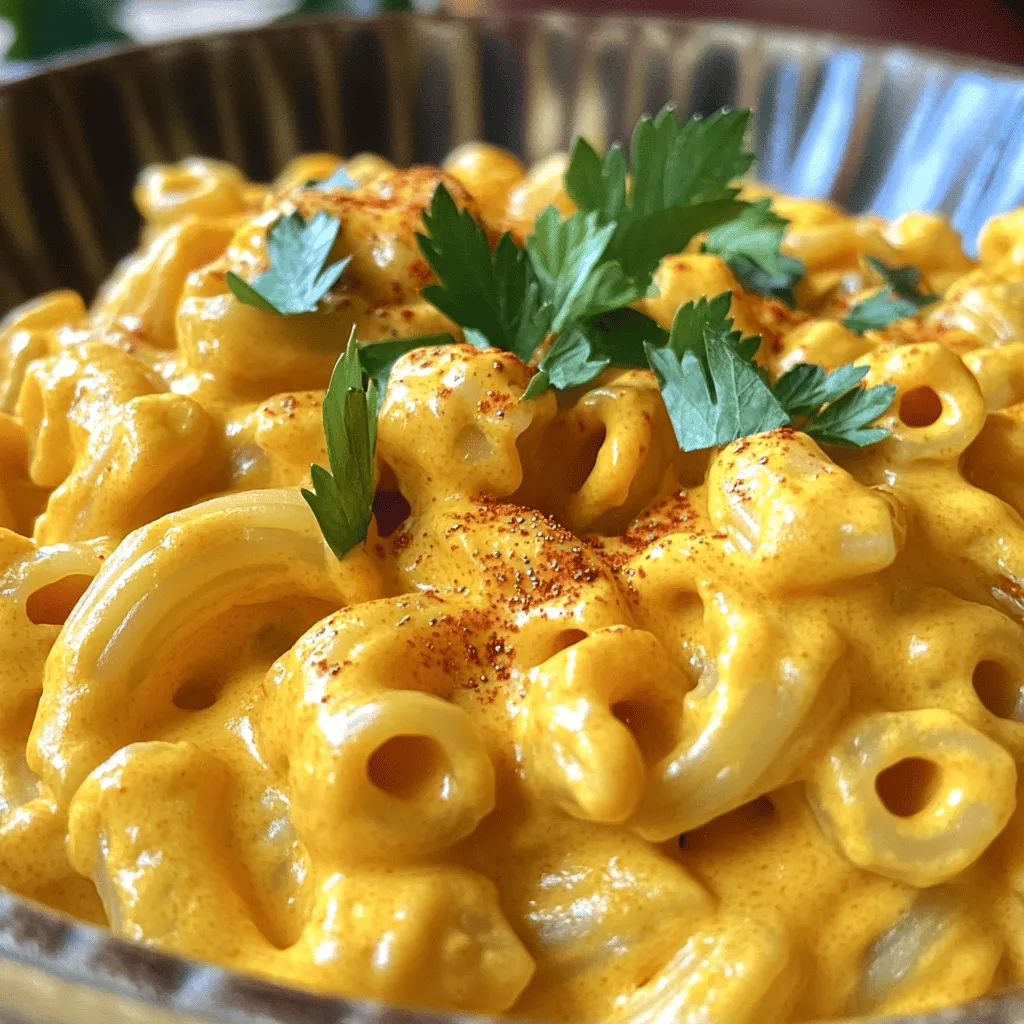
If you crave a comforting meal that’s both tasty and easy, you’ll love my Easy Vegan Pumpkin Mac and Cheese! This creamy delight is perfect for anyone looking to enjoy a dairy-free meal without sacrificing flavor. With simple ingredients like pumpkin puree and nutritional yeast, you can whip up this dish in no time. Ready to impress your taste buds? Let’s dive into this delicious recipe!
Ingredients
List of Ingredients
- 8 ounces elbow macaroni
- 1 cup pumpkin puree
- 1/2 cup nutritional yeast
- 1 cup unsweetened almond milk
- 2 tablespoons olive oil
- 1 tablespoon lemon juice
- 1 teaspoon garlic powder
- 1 teaspoon onion powder
- 1/2 teaspoon smoked paprika
- Salt and pepper to taste
- Fresh parsley or chives for garnish
Pumpkin puree is the star of this dish. It brings warmth and creaminess. It is rich in vitamins and minerals. Nutritional yeast adds a cheesy flavor without dairy. It is also a great source of protein and B vitamins. Unsweetened almond milk gives a light, creamy base. It is low in calories and dairy-free.
Using these ingredients not only makes the dish tasty but also healthy. This vegan pumpkin mac and cheese is a great meal for everyone.
Step-by-Step Instructions
Cooking the Pasta
First, grab a large pot and fill it with water. Add a good amount of salt to the water. This helps flavor the pasta. Bring the water to a boil over high heat. Once boiling, toss in 8 ounces of elbow macaroni. Cook it according to the package instructions until it is al dente. This usually takes about 7 to 10 minutes. When the pasta is ready, drain it in a colander. Rinse it briefly under cold water to stop the cooking process. Set the pasta aside for later.
Making the Cheese Sauce
In a medium saucepan, pour in 2 tablespoons of olive oil. Heat it over medium heat. Once the oil is warm, add 1 cup of pumpkin puree. Stir it well. Next, add 1/2 cup of nutritional yeast, 1 cup of unsweetened almond milk, and 1 tablespoon of lemon juice. Add 1 teaspoon of garlic powder, 1 teaspoon of onion powder, and 1/2 teaspoon of smoked paprika. These ingredients will make a creamy and flavorful sauce. Use a whisk to mix everything together until it is smooth. Let the sauce simmer gently for about 3 to 5 minutes. Stir occasionally to keep it from sticking.
Combining Pasta and Sauce
Now it’s time to bring it all together! Add the drained pasta to the saucepan with the cheese sauce. Gently stir the pasta into the sauce. You want to make sure every noodle is coated in that creamy goodness. Let the mix cook on low heat for 2 to 3 minutes. This helps the pasta absorb some of the flavor from the sauce. When it is heated through, it is ready to serve.
Tips & Tricks
Perfecting the Sauce Texture
To make your sauce just right, you can adjust the thickness easily. If it feels too thick, simply add a splash of almond milk. Stir it in slowly until you reach your desired creaminess. The key is to keep a close eye on the texture as you mix.
Flavor is just as important as texture. You can customize your sauce by adding spices. Try extra garlic powder or a pinch of cayenne for heat. Each spice will give your sauce a unique twist. Experiment until you find your favorite blend.
Serving Suggestions
When you serve your vegan pumpkin mac and cheese, think about how it looks. Use colorful bowls to make the dish pop. A sprinkle of nutritional yeast on top adds a nice touch. You can also add a dash of smoked paprika for extra color.
For garnish, fresh parsley or chives work well. They not only add color but also enhance the flavor. Just chop them finely and sprinkle them over your dish. This simple step makes your meal look fancy and inviting.
Making Ahead
If you want to save time, you can make this dish ahead of time. Store the mac and cheese in the fridge for up to three days. Just keep it in an airtight container to keep it fresh.
When reheating, use a low heat to keep the sauce creamy. Add a little almond milk when warming it up. This helps the sauce stay smooth and tasty. Enjoy your creamy delight any day of the week with these simple tips.

Variations
Adding Vegetables
You can make this dish even better by adding vegetables. Spinach is a great choice. It adds color and nutrients. Just stir in a handful of fresh spinach when mixing the pasta and sauce. It will wilt nicely and blend in.
Broccoli is another option. Steam it until tender, then chop it into small pieces. Fold it into the mac and cheese before serving for a crunchy texture.
Want something colorful? Add bell peppers. Dice them small and sauté with the pumpkin sauce. This brings a sweet taste and extra crunch.
Protein Boosts
To make this dish heartier, consider adding vegan protein sources. Chickpeas are an easy choice. Just rinse and drain a can, then mix them in with the pasta. This adds both protein and fiber.
Lentils work well too. You can use cooked lentils for this recipe. They blend nicely and add some earthiness. Just fold them into the dish right before serving.
Flavor Enhancements
Let your taste buds explore! You can enhance flavors by trying different spices. Add a pinch of cumin for a warm, earthy tone. A dash of cayenne pepper can give a little heat, if you like spice.
Flavored plant-based milks can also change the game. Use coconut milk for a creamier texture and a hint of sweetness. Or try oat milk for a smooth finish.
Storage Info
Refrigerator Storage
To keep your Easy Vegan Pumpkin Mac and Cheese fresh, store it in an airtight container. This helps to keep moisture in and odors out. You can enjoy your leftovers for up to three days. When you want to eat it, just reheat it on the stove or microwave.
Freezing Instructions
To freeze your mac and cheese, first let it cool down completely. Then, scoop portions into freezer-safe bags or containers. Make sure to remove as much air as possible to prevent freezer burn. You can freeze it for about two months. When ready to eat, thaw it overnight in the fridge. To reheat, warm it gently on the stove. Add a splash of almond milk to revive the creaminess.
Utilizing Leftovers
There are many fun ways to use leftover mac and cheese. Try adding it to a baked potato for a hearty meal. You can also mix in some veggies or beans for extra nutrition. Another idea is to use it as a filling for vegan tacos or burritos. For a twist, make a mac and cheese casserole by layering it with veggies and baking until golden. These options keep your meals exciting and reduce waste!
FAQs
Can I make this mac and cheese gluten-free?
Yes, you can. To make this dish gluten-free, use gluten-free pasta. Look for brands that offer elbow macaroni made from rice, quinoa, or lentils. These options cook well and taste great. You may also try chickpea pasta for added protein.
How long does it take to cook vegan mac and cheese?
Cooking this vegan mac and cheese is quick and simple.
- Prep time: 10 minutes
- Cook time: 10 minutes
- Total time: 20 minutes
This includes boiling the pasta and making the creamy sauce.
Is it possible to add other flavors or ingredients?
Absolutely! You can customize this dish to fit your taste.
- Add veggies: Spinach, broccoli, or bell peppers work well.
- Mix in spices: Try adding cayenne for heat or Italian herbs for flavor.
- Protein options: Consider adding black beans or chickpeas for a protein boost.
Feel free to experiment and make it your own!
This blog post shared a tasty vegan mac and cheese recipe. We covered ingredients, cooking steps, and tips for perfecting the dish. You learned how to boost nutrition and add flavor with veggies and spices. I hope you’re excited to try making this creamy, plant-based delight. Enjoy creating your own version and make it your own! Remember, cooking is all about experimenting and having fun in the kitchen.


![To make crispy sweet and sour chicken, you need some key ingredients. Here’s what to gather: - 1 lb (450g) chicken breast, cut into bite-sized pieces - 1 cup cornstarch - 2 large eggs, beaten - Oil for frying - Salt and black pepper to taste These ingredients form the base of your dish. The chicken gives protein, while cornstarch creates that crispy texture. Eggs help the cornstarch stick to the chicken. Adding vibrant colors and fresh flavors is easy with the right vegetables and fruits. Here’s what you’ll need: - 1 cup bell peppers, chopped (mix of colors for visual appeal) - 1 cup pineapple chunks (fresh or canned) - 1 cup onion, chopped - 3 cloves garlic, minced The bell peppers and onions add crunch and sweetness. Pineapple brings a juicy burst of flavor. Garlic adds depth to the dish. The sweet and sour sauce makes this dish memorable. Gather these components: - 1/2 cup ketchup - 1/4 cup apple cider vinegar - 1/4 cup brown sugar - 2 tablespoons soy sauce - 1 tablespoon cornstarch mixed with 2 tablespoons water (for slurry) This sauce balances sweetness and tang. Ketchup gives a rich base, while apple cider vinegar adds a zesty kick. Brown sugar enhances the sweetness, and soy sauce adds umami. The cornstarch slurry thickens the sauce perfectly. For the full recipe, check out the complete list of steps to follow. Happy cooking! Start by seasoning the chicken pieces with salt and pepper. This simple step adds great flavor. Next, dredge each piece in cornstarch. Make sure to shake off any extra cornstarch. This helps create a nice, crispy crust. After that, dip the chicken pieces into the beaten eggs. This coating will help the cornstarch stick well. In a large skillet, heat oil over medium-high heat. You want the oil to shimmer before adding the chicken. Fry the chicken in batches. Avoid crowding the pan to keep the chicken crispy. Cook each piece for about 4-5 minutes per side. When golden brown, use a slotted spoon to remove the chicken. Place it on paper towels to drain any excess oil. Lower the heat to medium. In the same pan, add chopped onions and bell peppers. Sauté them for about 3-4 minutes or until soft. This brings out their sweetness. Then, add minced garlic and cook for another minute. The aroma will fill your kitchen and make your mouth water. In a bowl, whisk together the sauce ingredients: ketchup, apple cider vinegar, brown sugar, and soy sauce. Combine these until smooth. Pour this sweet and tangy sauce over the sautéed vegetables. Stir gently to mix everything together. The colors and smells will be inviting. Raise the heat slightly and bring the sauce to a gentle simmer. This helps blend the flavors. Once it simmers, add pineapple chunks for sweetness. Then, mix the cornstarch slurry and pour it in. Stir continuously until the sauce thickens, which takes about 2-3 minutes. You want it to coat the chicken well. Add the crispy chicken back into the pan. Carefully fold it into the thickening sauce. Toss everything gently to coat each piece of chicken. Once warmed through, the dish is ready to serve. For a great presentation, plate it over fluffy rice or steamed quinoa. You can also garnish it with sesame seeds and green onions for extra flair. To get that perfect crispy texture, start with your oil. Heat it well, around 350°F (175°C) is ideal. If the oil isn't hot enough, your chicken will soak up oil and get soggy. Fry the chicken in batches to avoid crowding. This keeps the oil temperature steady. Once fried, place the chicken on paper towels. This helps drain off any extra oil. For a twist on the classic sauce, try adding a splash of orange juice. It brightens the flavor. You can also swap brown sugar with honey for a different sweetness. Using fresh ginger in your sauce will give an extra kick. Remember to taste as you mix. Adjust salt and pepper to suit your taste buds. Presentation makes your dish look more appealing. Serve your crispy sweet and sour chicken over fluffy white rice or quinoa. Sprinkle sesame seeds on top for crunch. Finely chopped green onions add a pop of color. You can even add a few slices of fresh pineapple on the side for a tropical touch. This will make your meal look vibrant and inviting. {{image_4}} You can switch up the protein in this dish. Shrimp works great and cooks fast. Just sauté it until it turns pink. Tofu is another good option. Use firm tofu for the best texture. Cut it into cubes and fry until golden. Pork also fits well. Use pork tenderloin or chops, cut into bite-sized pieces. Each protein adds its own flavor, keeping things exciting. You can mix in different veggies for added nutrition. Broccoli is a great choice. It adds a nice crunch and color. Carrots give a sweet flavor and vibrant look. Snap peas are another fun option. They stay crisp and add a pop of freshness. Feel free to combine any of these for a colorful plate. It makes your meal more appealing and nutritious. You can easily tweak the sauce to match your taste. If you like heat, add some red pepper flakes or sriracha. This will spice up the dish nicely. For sweetener options, you can swap brown sugar for honey or maple syrup. This change adds a different flavor twist. Adjust the acidity by adding more vinegar or a squeeze of lime juice. Each change can create a new experience with this classic dish. For the full recipe, check out the detailed instructions earlier. After enjoying your crispy sweet and sour chicken, store any leftovers in an airtight container. This keeps the dish fresh for up to three days. Before storing, let the chicken cool down to room temperature. This prevents condensation, which can make the chicken soggy. If you have sauce left over, store it separately to keep the chicken crispy. To freeze your crispy sweet and sour chicken, place it in a freezer-safe container or bag. Make sure to remove as much air as possible. This helps avoid freezer burn. It can stay good for about one month. When you're ready to eat, thaw it overnight in the fridge. For the best taste and texture, reheat your chicken in an oven. Preheat the oven to 350°F (175°C). Spread the chicken on a baking sheet and cover with foil. Heat for about 15-20 minutes or until warm. This method helps keep the chicken crispy. You can also reheat it in a skillet over medium heat. Just add a splash of water to the pan to create steam, which helps warm it without drying out. Enjoy your leftovers just as much as the first time! To make crispy sweet and sour chicken, start with these steps: 1. Prep Chicken: Cut chicken breast into bite-sized pieces. Season with salt and pepper. Dredge in cornstarch, then coat in beaten eggs. 2. Fry Chicken: Heat oil in a skillet over medium-high heat. Fry chicken pieces until golden brown, about 4-5 minutes per side. Drain on paper towels. 3. Sauté Vegetables: Lower heat and add chopped onion and bell peppers to the same pan. Cook for 3-4 minutes. Add minced garlic and cook for another minute. 4. Prepare Sauce: Mix ketchup, apple cider vinegar, brown sugar, and soy sauce in a bowl. Pour this mixture over the vegetables in the pan. 5. Thicken Sauce: Bring the sauce to a gentle simmer. Add pineapple chunks and cornstarch slurry. Stir until the sauce thickens, about 2-3 minutes. 6. Combine Chicken and Sauce: Add the fried chicken back into the pan. Toss gently to coat the chicken in the sauce. 7. Serve: Let the dish rest for a minute. Serve it over rice or quinoa for a complete meal. Yes, you can prepare some parts in advance. Cook the chicken and the sauce ahead of time. Store them separately in airtight containers in the fridge. You can keep the chicken for up to three days. The sauce will last about a week. When ready to serve, reheat the chicken and sauce together in a pan. This keeps the chicken crispy and the sauce fresh. Yes, you can make a vegetarian version! Use tofu instead of chicken. Press the tofu to remove excess moisture, then cut it into cubes. Coat and fry the tofu pieces just like you would with chicken. You can also use seitan or tempeh for a similar texture. The sauce remains the same, giving you that sweet and sour flavor. I love serving crispy sweet and sour chicken with steamed rice or quinoa. You can also pair it with: - Fried rice - Noodles - Steamed broccoli - A fresh cucumber salad These sides complement the dish well and add color to your plate. Enjoy your meal! For the complete recipe, check the [Full Recipe]. Crispy sweet and sour chicken is a delightful dish. We explored key ingredients, cooking methods, and tips for perfecting it. You learned how to achieve that crispy texture and enhance flavors. Remember, try different proteins and veggies for variety. Proper storage keeps leftovers fresh. This dish is not only tasty but also versatile. Enjoy making and sharing it with friends and family. Let your kitchen creativity shine with this classic recipe!](https://dishtreats.com/wp-content/uploads/2025/05/ffc138cc-1bdb-4282-b515-13f85bd5dbd6-768x768.webp)


