Easy Vegan Pumpkin Mac and Cheese Cozy and Comforting

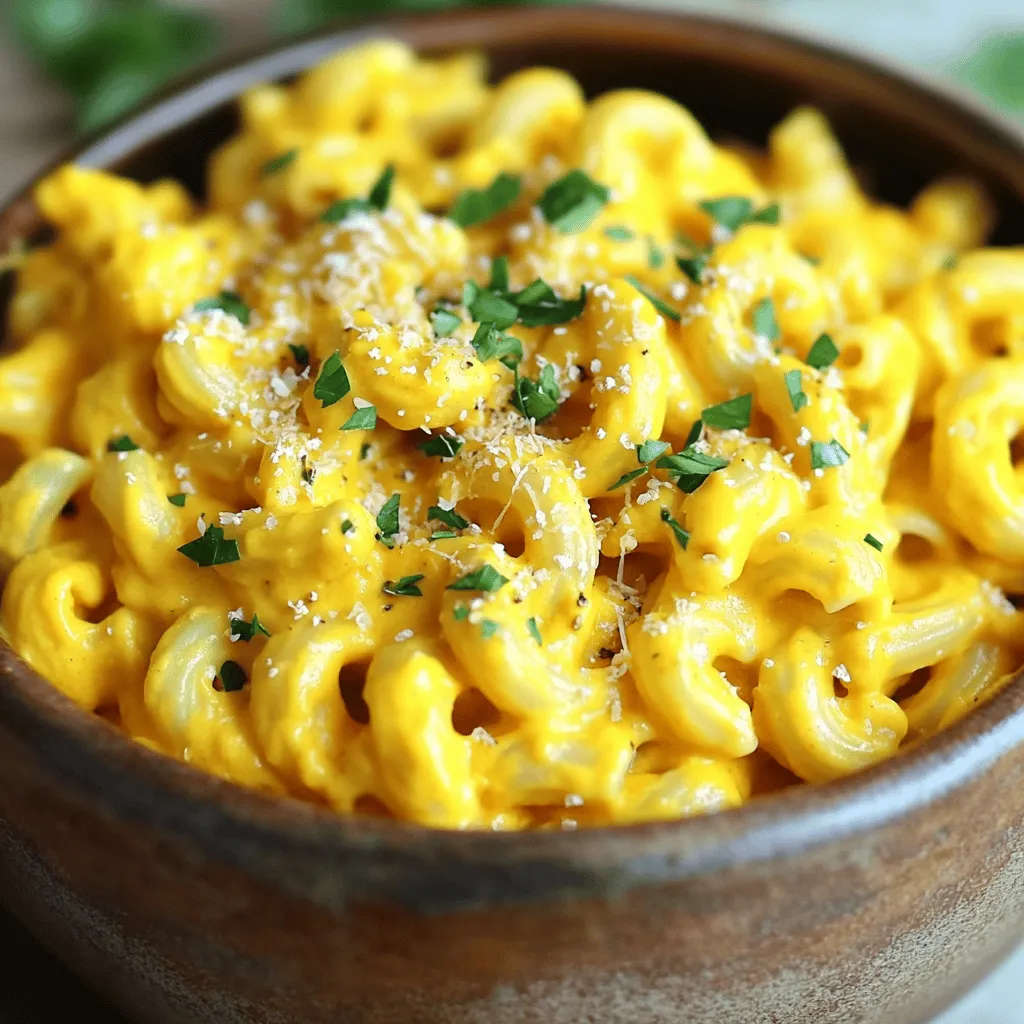
Looking for a warm and easy dish that feels like a hug? My Easy Vegan Pumpkin Mac and Cheese is just what you need. This cozy meal is rich in flavor and simple to make. You’ll enjoy creamy pumpkin sauce mixed perfectly with pasta. Plus, I’ll share helpful tips, swaps, and common mistakes to avoid. Let’s dive in and make a dish that comforts your soul!
Ingredients
Complete List of Ingredients
- 8 ounces elbow macaroni (or your preferred pasta)
- 1 cup canned pumpkin puree
- 1 cup cashews (soaked in water for 2-4 hours and drained)
- 1 cup nutritional yeast
- 1 cup almond milk (or any non-dairy milk of your choice)
- 2 tablespoons olive oil
- 2 tablespoons lemon juice
- 1 teaspoon garlic powder
- 1 teaspoon onion powder
- 1 teaspoon smoked paprika
- Salt and pepper to taste
- Optional: fresh parsley, chopped (for garnish)
Key Ingredients Explained
Canned pumpkin puree gives this dish a rich texture and a sweet taste. It adds warmth and a fall flavor that’s cozy and inviting. Cashews create a creamy sauce when blended. They provide healthy fats and protein. Nutritional yeast adds a cheesy flavor without dairy. It’s perfect for vegan recipes. Almond milk keeps the sauce light and smooth. You can use any non-dairy milk you like. Garlic powder and onion powder bring depth to the sauce, while smoked paprika adds a hint of smokiness. This blend of flavors makes the dish comforting and delicious.
Vegan Substitutions and Recommendations
If you’re allergic to nuts, try sunflower seeds instead of cashews. They also blend well into a creamy sauce. For a different flavor, use coconut milk instead of almond milk. If you don’t have nutritional yeast, try using vegan cheese shreds instead. You can mix in veggies like spinach or kale for extra nutrition. You can also adjust the spices to fit your taste. This way, you can make the dish your own while still keeping it vegan.
Step-by-Step Instructions
Cooking the Pasta
Start by filling a large pot with water. Add a generous pinch of salt. Bring the water to a rolling boil. Once boiling, add 8 ounces of elbow macaroni. Cook according to the package instructions until it’s ‘al dente,’ or firm to the bite. After cooking, drain the pasta in a colander and set it aside.
Preparing the Creamy Pumpkin Sauce
In a high-speed blender, combine the following ingredients:
- 1 cup canned pumpkin puree
- 1 cup soaked and drained cashews
- 1 cup nutritional yeast
- 1 cup almond milk (or any non-dairy milk of your choice)
- 2 tablespoons olive oil
- 2 tablespoons lemon juice
- 1 teaspoon garlic powder
- 1 teaspoon onion powder
- 1 teaspoon smoked paprika
- Salt and pepper to taste
Blend these on high until you achieve a completely smooth and creamy sauce. If the sauce seems too thick, add a bit more almond milk until it’s just right.
Combining Pasta and Sauce
Return the pot with the cooked pasta to the stove. Pour the creamy pumpkin sauce over the pasta. Use a spatula to gently stir until every piece is coated. Make sure the sauce is evenly distributed. Lower the heat to low-medium, stirring continuously for about 2-3 minutes. This step warms the dish through. Be careful not to boil the sauce to keep it creamy.
Finally, taste your mac and cheese and adjust the seasoning with more salt or pepper as needed.
Tips & Tricks
How to Achieve the Perfect Creamy Texture
To make your vegan pumpkin mac and cheese super creamy, start with soaked cashews. Soak them for at least 2 hours. This makes them soft and easy to blend. Use a high-speed blender to mix the sauce until it is smooth. If the sauce feels too thick, add more almond milk little by little. This helps you get your ideal texture. Blending slowly at first helps mix everything well.
Suggested Garnishes for Serving
Garnishing adds a fun touch to your dish. I love using fresh chopped parsley on top. It adds color and a fresh taste. You can also sprinkle some nutritional yeast for a cheesy flavor. If you want a kick, try adding a dash of smoked paprika. These simple toppings make your meal look inviting and delicious.
Common Mistakes to Avoid
One common mistake is not soaking the cashews long enough. This can lead to a grainy texture. Another mistake is boiling the sauce too hot. If it boils, it may separate and lose creaminess. Always stir gently over low heat to warm it up. Lastly, don’t forget to taste your dish before serving. Adjust the salt and pepper to make it just right. Following these tips will help you create a comforting bowl of vegan pumpkin mac and cheese every time.

Variations
Different Pasta Options to Use
You can swap out elbow macaroni for other fun pasta shapes. Try using shells, penne, or fusilli. Each shape holds the creamy sauce differently. I love the way shells trap the sauce inside. It gives every bite a burst of flavor. Whole grain or gluten-free pasta can work too. Just cook them according to the package instructions for best results.
Flavor Enhancements and Add-ins
Want to take your vegan pumpkin mac and cheese to the next level? Add in some cooked veggies! Broccoli, spinach, or roasted bell peppers blend well. You can also stir in some canned tomatoes for a fresh twist. For extra creaminess, try adding a spoonful of vegan cream cheese. If you love a nutty taste, sprinkle in some toasted pine nuts. These add-ins make the dish more colorful and nutritious.
Adjusting Spice Levels
Spice can really change the flavor of this dish. If you like heat, add a pinch of cayenne pepper or red pepper flakes. For a milder taste, skip the spice or use sweet paprika instead. You can also mix in some fresh herbs like basil or thyme for a fragrant touch. Adjust the flavors to suit your taste buds. Cooking should always be about what you enjoy!
Storage Info
How to Store Leftovers
To store your Easy Vegan Pumpkin Mac and Cheese, let it cool first. Place it in an airtight container. It will stay fresh in the fridge for about 3 to 5 days. Make sure to seal the container well to prevent air from getting in.
Freezing Instructions
You can freeze this dish for longer storage. Scoop the mac and cheese into freezer-safe containers. Leave some space at the top for expansion. It should last up to 2 months in the freezer. When you’re ready to eat it, take it out and let it thaw in the fridge overnight.
Reheating Methods
Reheat your mac and cheese on the stove or in the microwave. For the stove, add a splash of almond milk. Heat on low and stir until it’s hot. For the microwave, put it in a bowl and cover it. Heat for 1 to 2 minutes, stirring halfway through. This helps keep the texture creamy. Enjoy your dish even after storing!
FAQs
Can I make this recipe gluten-free?
Yes, you can make this recipe gluten-free. Just swap the elbow macaroni for gluten-free pasta. Look for brands made from rice or chickpeas. They cook well and taste great, too.
How long does the mac and cheese last in the fridge?
The mac and cheese lasts about 3 to 5 days in the fridge. Store it in an airtight container. Make sure it cools down first before sealing it up. This keeps it fresh and tasty.
What can I serve with Easy Vegan Pumpkin Mac and Cheese?
You can serve this dish with a side salad for a fresh touch. Roasted veggies also pair nicely. If you want something crunchy, try garlic bread or toasted pita chips. They add a fun texture to your meal.This recipe includes all the steps you need to create this warm and delicious meal. It’s easy, fun, and perfect for any occasion!
This blog post covered a tasty vegan pumpkin mac and cheese recipe. We explored the key ingredients, cooking steps, and helpful tips. I shared substitutions for different diets, plus ways to add flavor. You can also learn how to store leftovers for later. Remember, this dish is simple and fun to make. With practice, you’ll create a creamy delight that impresses everyone. Now, get cooking and enjoy your delicious vegan meal!


![- 1 block firm tofu, thoroughly drained and pressed - 1 cup jasmine rice - 2 tablespoons Sriracha sauce The firm tofu acts as the main protein. It absorbs flavors well and provides a hearty bite. Jasmine rice, with its fluffy texture, makes a great base. Sriracha sauce adds the spicy kick, balancing heat and taste. - 1 cup broccoli florets, fresh or frozen - 1 red bell pepper, thinly sliced - ½ cup carrots, julienned or matchstick-cut Broccoli florets add crunch and color. The red bell pepper brings sweetness and a pop of color. Carrots add a nice crunch and a bit of earthiness. Together, they create a vibrant mix that enhances the dish. - 1 tablespoon soy sauce (preferably low-sodium) - 1 tablespoon sesame oil - Fresh cilantro, for garnish Soy sauce brings umami depth. Sesame oil adds a nutty flavor that complements the spice. Fresh cilantro brightens the dish, giving it a fresh finish. This combo of flavors makes each bite exciting. For the full recipe, check out the complete guide. To start, cut the pressed tofu into 1-inch cubes. This size helps the tofu cook evenly. Next, toss the cubes in a bowl with cornstarch. Make sure every piece is coated. This coating is key for a crispy finish when you cook it. Pressing the tofu is vital. It removes excess water, allowing better flavor absorption and texture. Bring vegetable broth to a boil in a medium saucepan. Add the jasmine rice and stir it once. Cover the pan, reduce the heat, and let it simmer for about 15 minutes. This method infuses flavor into the rice. Once the liquid absorbs, fluff the rice with a fork. This step keeps the rice light and airy, which balances the dish. Heat vegetable oil in a large skillet over medium-high heat. Carefully add the cornstarch-coated tofu cubes in a single layer. Fry them for about 8-10 minutes, turning occasionally. You want all sides to turn golden brown and crispy. Once done, transfer the tofu to a plate lined with paper towels. This helps absorb any excess oil. In the same skillet, add the broccoli, red bell pepper, and carrots. Stir-fry the veggies for 4-5 minutes. You want them tender but still bright and colorful. This keeps their nutrients intact. Add the sliced green onions for the last minute. Their fresh taste adds a nice crunch to the mix. In a small bowl, whisk together the Sriracha sauce, soy sauce, sesame oil, and honey (or maple syrup). Mix until well blended. This sauce brings all the flavors together. If you like it spicier, add more Sriracha. For a milder version, reduce the amount. Now, it’s time to put it all together! Divide the fluffy jasmine rice into bowls. Top it with the spicy tofu and vegetable mix. For a polished finish, sprinkle sesame seeds and fresh cilantro on top. This adds flavor and a pop of color to your bowl. For the full recipe, refer back to the main section. Enjoy your Spicy Sriracha Tofu Bowl! To make crispy tofu, you need to press it well. Start by wrapping the block of firm tofu in a clean kitchen towel. Place a heavy object, like a cast iron pan, on top for about 20-30 minutes. This helps remove excess moisture. Next, coat the tofu cubes with cornstarch. Use about 2 tablespoons, ensuring each piece is covered. This coating creates a crunchy texture when cooked. Not everyone enjoys the same heat. If you want less spice, use only 1 tablespoon of Sriracha. You can also mix Sriracha with a bit of honey or ketchup to mellow the heat. For a different flavor, try other sauces. Chili garlic sauce or sweet chili sauce can work well too. Experiment with these options to find what you like best. To save time, prep your ingredients ahead of time. You can chop the vegetables and store them in the fridge for up to three days. Cook the rice and tofu in advance, too. Store them separately in airtight containers. This way, you can quickly assemble your Spicy Sriracha Tofu Bowl when you’re ready to eat. Enjoy the convenience of quick meals without sacrificing taste! For the full recipe, check out the Spicy Sriracha Tofu Bowl. {{image_4}} You can switch the tofu for other protein sources. Tempeh is a great choice. It has a nutty flavor and holds up well in stir-fries. Seitan is another tasty option. It mimics the texture of meat nicely. If you prefer meat, chicken or shrimp work well too. Chicken adds a mild taste, while shrimp brings a sweet, briny flavor. Both cook quickly, making your meal even faster. Feel free to change the vegetables based on the season. In spring, try snap peas or asparagus. In summer, zucchini and bell peppers shine. Winter vegetables like Brussels sprouts and kale add heartiness. You can also use frozen veggies. They save time and are often just as nutritious as fresh ones. Just make sure to thaw and drain excess water before cooking. If you need a gluten-free option, swap soy sauce for tamari. Tamari has a similar flavor but is gluten-free. For the rice, try quinoa or cauliflower rice. Both options are nutritious and add a unique texture to your bowl. Quinoa is protein-rich, while cauliflower rice is low in carbs and calories. These swaps ensure everyone can enjoy this spicy dish! For the complete recipe, check the [Full Recipe]. To keep your spicy Sriracha tofu bowl fresh, store leftovers in an airtight container. Place the bowl in the fridge within two hours of cooking. This helps keep the food safe. Your leftovers can last for up to four days in the fridge. To reheat the tofu without losing its crispness, use an oven or a skillet. If using an oven, preheat it to 350°F (175°C). Place the tofu on a baking sheet for about 10-15 minutes. If using a skillet, heat over medium heat for about 5-7 minutes, turning the tofu occasionally. This keeps it crispy and delicious. You can freeze cooked bowls if you want to save some for later. Place the cooled bowl in a freezer-safe container. It can stay frozen for up to three months. To thaw, move the bowl to the fridge overnight. Reheat it in the oven or a skillet as mentioned above. This way, you can enjoy your spicy Sriracha tofu bowl anytime! For the full recipe, check the earlier sections. To make the Spicy Sriracha Tofu Bowl vegan, swap honey for maple syrup. This simple change keeps the dish sweet and plant-based. Also, check that all products you use are vegan-friendly. For example, ensure your soy sauce is made without animal products. Yes, you can use brown rice. However, remember that brown rice takes longer to cook. It usually needs about 40-50 minutes, while jasmine rice only takes around 15 minutes. Brown rice has a nuttier taste and chewier texture. So, it can change the feel of your bowl. If you don’t have Sriracha, several substitutes work well. You can use chili garlic sauce or sambal oelek for a similar heat. You can also make a homemade version by mixing hot sauce, garlic, and a bit of sugar. This gives you control over the flavor. The spice level of this dish depends on the amount of Sriracha you use. One tablespoon adds mild heat, while two tablespoons ramp up the spice. To adjust heat to your taste, start with less and add more if you like it spicier. Always taste as you go. You can serve this bowl with a side of edamame or a fresh salad. They add nice contrast and extra crunch. For more flavor, drizzle extra Sriracha or sesame oil on top. You can also add lime juice for a zesty touch. Enjoy your meal! For the full recipe, check out the Spicy Sriracha Tofu Bowl details above. You learned how to make a tasty Spicy Sriracha Tofu Bowl. We covered each ingredient and how to prepare them. From cooking the rice to achieving crispy tofu, each step matters. Remember to adjust spices to suit your taste. Feel free to swap in different proteins or veggies to keep it fresh. Store leftovers well to enjoy later. This bowl is not just good; it’s fun to make and share. Enjoy your cooking adventure!](https://dishtreats.com/wp-content/uploads/2025/07/ee3e23f0-fb80-42df-ace0-60219f206871-768x768.webp)
![- 4 boneless, skinless chicken thighs - 2 cups long-grain rice - 4 tablespoons unsalted butter, divided - 5 cloves garlic, finely minced - 1 medium onion, finely chopped - 1 teaspoon dried oregano - 1 teaspoon paprika - Salt and freshly ground black pepper, to taste - 3 cups chicken broth - 1 cup frozen peas - Fresh parsley, chopped (for garnish) When I prepare Garlic Butter Chicken and Rice, I love the way the flavors mix. The chicken thighs bring a juicy texture. Long-grain rice soaks up all the savory chicken broth. Unsalted butter adds a rich taste. Aromatics play a big role here. Garlic cloves and onion give a sweet aroma. Dried oregano and paprika add warmth and depth. I always use fresh black pepper and salt to make the dish pop. For a splash of color, I toss in frozen peas. They keep their bright green shade when cooked. Fresh parsley adds a nice finish. It makes the dish look inviting and fresh. If you want to try this dish, check the Full Recipe for all the steps! You'll enjoy making it, and even more, eating it. 1. Start by melting 2 tablespoons of butter in a large skillet over medium heat. This will create a rich base for your dish. 2. Once the butter melts, add the chopped onion. Sauté it for about 5 minutes until it turns soft and fragrant. 3. Next, add 5 cloves of minced garlic to the skillet. Cook it for 1 minute, just until the garlic smells good but isn’t browned. 4. While the onion and garlic are cooking, season 4 chicken thighs on both sides. Use 1 teaspoon of oregano, 1 teaspoon of paprika, salt, and pepper. This will add a lot of flavor. 5. Move the onion and garlic to one side of the skillet. Place the seasoned chicken thighs in the center. Cook each side for 6-7 minutes until they turn golden brown. Once done, take the chicken out and set it aside. 1. In the same skillet, add the remaining 2 tablespoons of butter. Let it melt completely. 2. Now, stir in 2 cups of long-grain rice. Toast the rice for 2-3 minutes, stirring often. This step brings out the nutty flavor. 3. Pour 3 cups of chicken broth over the toasted rice. Gently stir to coat all the grains. Increase the heat to bring the mixture to a boil. 1. Once the broth is boiling, lower the heat to a simmer. Nestle the cooked chicken thighs on top of the rice. Cover the skillet with a lid and let it cook for 15-20 minutes. The rice should absorb most of the broth and become tender. 2. For the last 5 minutes of cooking, sprinkle 1 cup of frozen peas directly over the rice. Do not stir. This will keep the peas bright and fresh. 3. After cooking, remove the skillet from the heat. Leave it covered for an extra 5 minutes. This helps the rice fluff up nicely. 4. Finally, use a fork to fluff the rice and mix in the peas. Serve warm, with fresh parsley on top for color and flavor. This simple process makes Garlic Butter Chicken and Rice a fun and tasty comfort meal. For the complete recipe, check out the [Full Recipe]. To boost the flavor of your garlic butter chicken and rice, consider adding fresh herbs. Thyme, rosemary, or basil can bring new notes to the dish. You can also mix in some red pepper flakes for a little heat. Adjust the spices to fit your taste. If you like it spicy, add more paprika or even cayenne pepper. Remember, always taste as you go to find your perfect balance. Sautéing is key for great flavor. Start with a medium heat to avoid burning the garlic and onions. Stir them often to help them cook evenly. When cooking the chicken, ensure it's golden and cooked through. Use a meat thermometer to check the internal temperature. It should reach 165°F (75°C) for safe eating. This way, you get juicy chicken every time. For a beautiful presentation, serve your garlic butter chicken and rice on a large platter. Sprinkle fresh parsley on top for a pop of color. You can also add lemon wedges on the side. This adds a zesty touch when served. Pair your meal with a simple green salad or steamed vegetables. For drinks, try a light white wine or sparkling water with lemon. Enjoy your delicious creation! You can find the full recipe [here](#). {{image_4}} You can make this dish lighter by swapping rice for cauliflower rice. Cauliflower rice offers a low-carb option that still tastes great. It cooks quickly and absorbs flavors well. Using skinless chicken breasts instead of thighs is another healthy choice. Breasts have less fat but still provide protein. Spice things up by adding cayenne pepper for heat. A pinch can really enhance the dish. You can also try Italian seasoning for a different twist. Adding veggies like bell peppers or carrots boosts nutrition and color. They add crunch and sweetness that pairs well with garlic butter. If you need gluten-free options, use gluten-free chicken broth. It keeps the dish flavorful while meeting dietary needs. For those avoiding dairy, there are great butter substitutes. Look for dairy-free spreads made from plant oils. They work well in this recipe without losing taste. To keep your Garlic Butter Chicken and Rice fresh, store any leftovers in airtight containers. This helps lock in the flavor and moisture. Make sure to let the dish cool down before sealing it up. For longer storage, you can freeze it. Divide the dish into smaller portions to make thawing easier later. When it's time to reheat, use a skillet or a microwave. If using a skillet, add a splash of chicken broth to keep it moist. Heat it over low to medium heat, stirring gently. In the microwave, cover the dish with a damp paper towel. This keeps moisture in and avoids a dry result. Remember, you want your chicken and rice to stay tender. In the fridge, your Garlic Butter Chicken and Rice lasts about 3 to 4 days. Always check for signs before eating. Look for any off smells or changes in color. If it smells funny or looks slimy, it’s best to toss it. Always trust your senses to keep your meals safe and tasty. To amp up the flavor, try adding fresh herbs like thyme or rosemary. You can also mix in spices such as garlic powder or onion powder for extra depth. A splash of lemon juice at the end brightens the dish. For a spicy kick, consider adding crushed red pepper flakes. These little changes can make a big taste difference. Yes, you can! To adapt this recipe, first, brown the chicken thighs in a skillet. This step gives great flavor. Then, place the chicken, onions, garlic, and rice into the slow cooker. Add chicken broth and spices. Cook on low for 4-6 hours. Check the rice for doneness. Slow cooking makes this dish very tender and delicious. This dish pairs well with a side of steamed vegetables like broccoli or green beans. A fresh salad with vinaigrette is also nice. For drinks, consider serving iced tea or a light white wine. These choices balance the rich flavors of the chicken and rice. Absolutely! You can make this dish ahead of time. Store the chicken and rice in separate containers to keep them fresh. It lasts up to four days in the fridge. When ready to eat, simply reheat in the microwave or on the stovetop. This makes it a perfect option for busy weekdays. For the full recipe, check out the link above. This article guides you through making Garlic Butter Chicken and Rice. You learned about key ingredients like chicken thighs, long-grain rice, and garlic. I shared easy steps for cooking flavorful meals, plus tips to enhance taste and presentation. In conclusion, this dish is tasty and versatile. You can adjust it to fit your diet or mood. Enjoy experimenting with flavors and make it your own! Happy cooking!](https://dishtreats.com/wp-content/uploads/2025/05/2b69aced-7351-4258-8c9e-dc4a3c9f0304-768x768.webp)


