Easy Chicken Fajitas Quick and Flavorful Recipe

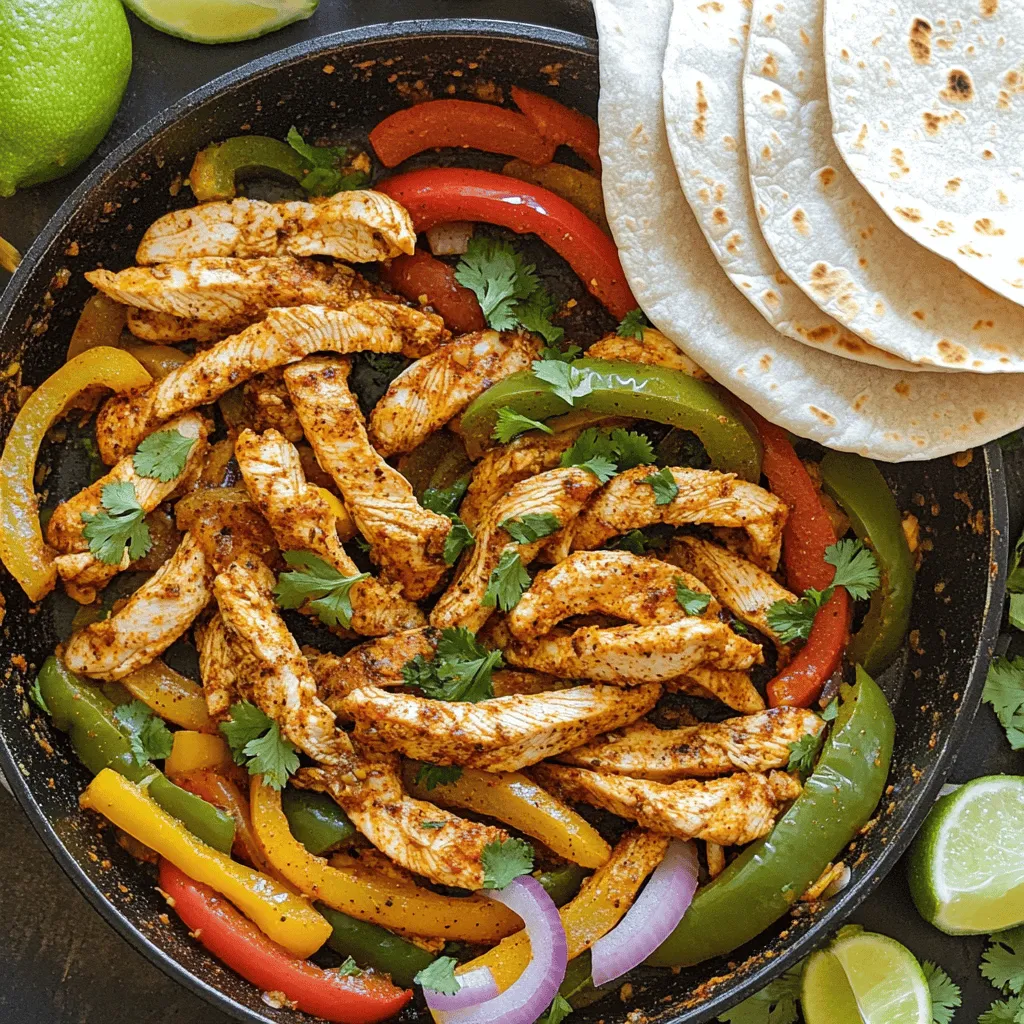
Looking for a quick and tasty dinner? You’ve found it! My Easy Chicken Fajitas recipe is simple and bursting with flavor. In under 30 minutes, you can have a delicious meal on the table. Whether you prefer spicy or mild, I’ll guide you through every step. Let’s dive in and create a dish that everyone will love, from kids to adults!
Ingredients
List of Required Ingredients
- 1 lb boneless, skinless chicken breasts, cut into thin strips
- 2 tablespoons extra virgin olive oil
- 1 teaspoon ground chili powder
- 1 teaspoon ground cumin
- 1 teaspoon smoked paprika
- 1 teaspoon garlic powder
- Sea salt and freshly cracked black pepper, to taste
- 1 red bell pepper, thinly sliced
- 1 green bell pepper, thinly sliced
- 1 large yellow onion, thinly sliced
- 8 small flour or corn tortillas
- Fresh cilantro, finely chopped (for garnish)
- Lime wedges (for garnish and serving)
Optional Ingredients for Customization
You can add your favorite toppings. Consider these:
- Sliced avocado or guacamole
- Sour cream or Greek yogurt
- Shredded cheese, like cheddar or queso fresco
- Salsa or pico de gallo
- Jalapeños for heat
Kitchen Tools Needed
To make these fajitas, use these tools:
- A large skillet or frying pan
- Medium mixing bowl for the marinade
- Whisk or spoon for mixing
- Knife and cutting board for slicing veggies
- Tongs for easy flipping and serving
- Measuring spoons for precise spice amounts
This recipe is all about flavor and ease.Enjoy your cooking adventure!
Step-by-Step Instructions
Preparation of the Marinade
To make the marinade, grab a medium bowl. Combine 2 tablespoons of extra virgin olive oil, 1 teaspoon of ground chili powder, 1 teaspoon of ground cumin, 1 teaspoon of smoked paprika, and 1 teaspoon of garlic powder. Add sea salt and freshly cracked black pepper to taste. Whisk these ingredients together until they blend well. This mixture gives the chicken a rich and zesty flavor.
Marinating the Chicken
Next, add 1 pound of thinly sliced chicken breasts to the marinade. Toss the chicken until each piece is coated well. Cover the bowl with plastic wrap. Let it marinate for 15-20 minutes at room temperature. For a deeper flavor, refrigerate the chicken for up to 2 hours. This step makes your chicken tender and packed with flavor.
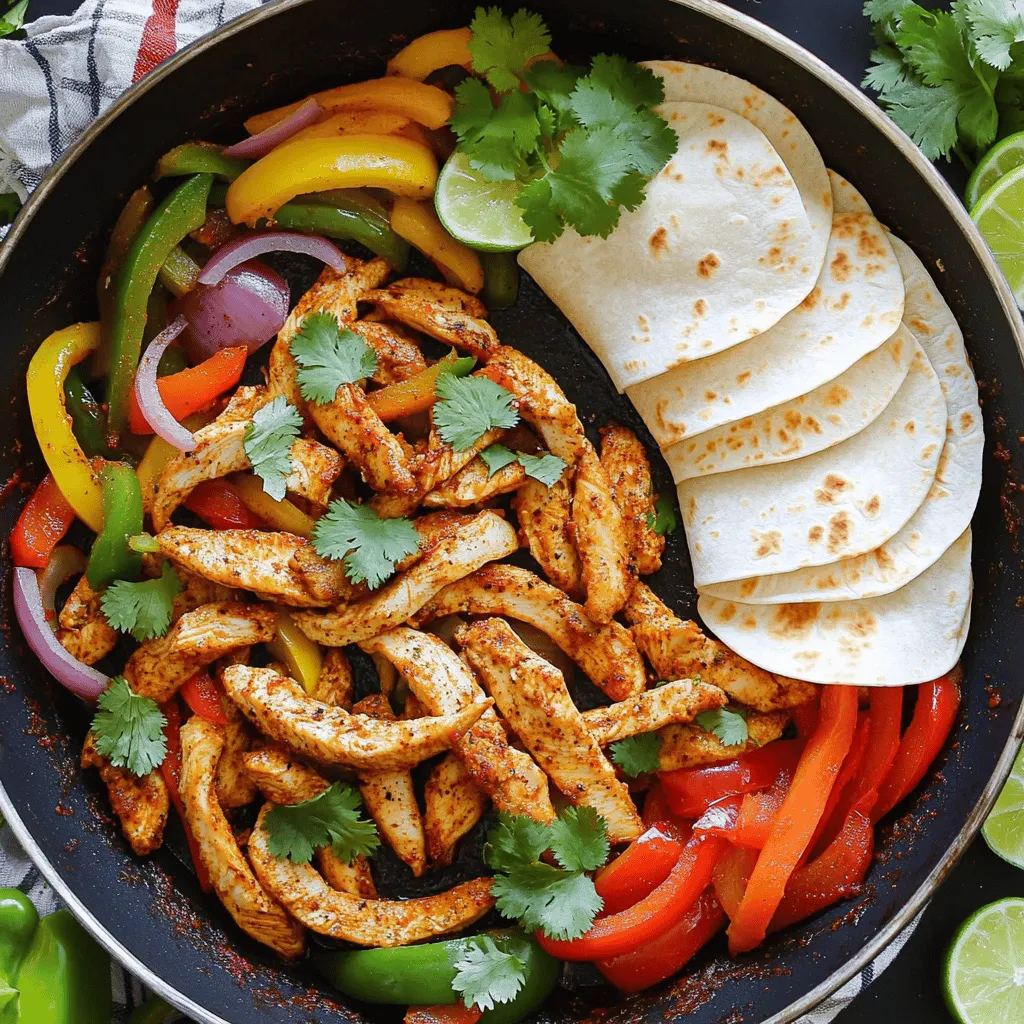
Cooking the Chicken and Vegetables
Heat a large skillet over medium-high heat. Once hot, add the marinated chicken in a single layer. Cook for about 5 minutes. Stir occasionally until the chicken is golden brown and fully cooked. Then, add 1 sliced red bell pepper, 1 sliced green bell pepper, and 1 sliced yellow onion to the skillet. Stir and cook for an additional 5-7 minutes. This softens the veggies while keeping a nice crunch.
Warming the Tortillas
While the chicken and veggies cook, warm 8 small tortillas. You can heat them in a separate skillet over low heat for 30 seconds on each side. Alternatively, wrap them in a damp paper towel and microwave for 15-20 seconds. Warm tortillas are soft and perfect for wrapping.
Assembling the Fajitas
To assemble your fajitas, take a warm tortilla. Place a generous scoop of the chicken and vegetable mixture in the center. Sprinkle with fresh cilantro for a burst of flavor. Serve with lime wedges on the side for extra zest.Enjoy every bite!
Tips & Tricks
Best Cooking Techniques for Chicken Fajitas
To make great chicken fajitas, heat your skillet well. A hot skillet gives the chicken a nice sear. This creates flavor and texture. Use thin strips of chicken for quick cooking. They cook evenly and absorb the marinade well.
When you add the veggies, keep them crisp. Stir them in after the chicken cooks. This way, they stay colorful and crunchy.
Serving Suggestions and Pairings
Serve your fajitas with lime wedges and fresh cilantro. The lime adds a bright taste that pairs well with the spices. Try adding guacamole or salsa for extra flavor. These toppings make the meal more fun and tasty. A side of rice or beans can also round out the meal.
Common Mistakes to Avoid
One common mistake is overcrowding the pan. This can steam the chicken instead of searing it. Cook in batches if needed. Another mistake is skipping the marinating step. Marinating adds flavor and tenderness.
Don’t forget to warm your tortillas. Cold tortillas can make the meal less enjoyable. Try using a damp paper towel in the microwave for a quick fix.

Variations
Vegetarian Alternative
If you want a meat-free option, use firm tofu or portobello mushrooms. Cut them into strips like the chicken. Marinate them just like the chicken for great flavor. Cook them in the skillet until golden. You can add more veggies, such as zucchini or carrots. This makes a tasty and colorful dish!
Different Spice Levels
You can adjust the heat by changing the spices. For mild fajitas, use less chili powder or skip the spicy peppers. If you like heat, add jalapeños or a pinch of cayenne pepper. You can also use a hot sauce to spice things up during cooking or at the table. This way, everyone can enjoy their own level of heat.
Serving on a Bed of Rice or Salad
For a fresh twist, serve your fajita mix over rice or a salad. Use brown rice or quinoa for a healthy touch. If you choose salad, add greens like spinach or romaine. Top with your fajitas and a squeeze of lime. This makes a filling meal that’s also light and refreshing!
Storage Info
How to Store Leftovers
After enjoying your chicken fajitas, store leftovers in an airtight container. This keeps them fresh. Let the fajitas cool before sealing. You can keep them in the fridge for up to three days. If you have extra tortillas, store them separately.
Reheating Tips
To reheat, use a skillet for the best results. Heat the skillet over medium heat. Add a splash of oil if needed. Warm the fajitas for about 5 minutes, stirring often. You can also use a microwave for a quick option. Place them in a microwave-safe dish and cover with a damp paper towel. Heat for 1-2 minutes, checking to avoid overheating.
Freezing Instructions
If you want to save some fajitas for later, freezing is a great option. Place the cooled fajitas in a freezer-safe bag. Remove as much air as you can before sealing. You can freeze them for up to three months. When ready to eat, thaw overnight in the fridge. Then, reheat as mentioned above. Enjoy your delicious meal anytime!
FAQs
How do I make easy chicken fajitas in under 30 minutes?
To make easy chicken fajitas quickly, prepare the marinade first. Mix oil and spices in a bowl. Cut the chicken into strips and toss in the marinade. Let it sit for 15 minutes. While marinating, slice the bell peppers and onion. Cook the chicken in a hot skillet for about 5 minutes. Then, add the veggies and cook for another 5-7 minutes. Warm the tortillas in a separate skillet or microwave. Fill and serve! This method keeps things fast and tasty.
Can I use beef or shrimp instead of chicken?
Yes, you can use beef or shrimp. For beef, choose flank steak or sirloin. Cut it into thin strips like chicken. Marinate as you would the chicken. For shrimp, use raw, peeled shrimp. Cook them for about 3-5 minutes until they turn pink. Both options provide a different flavor while keeping the dish fun.
What’s the best way to cut the chicken for fajitas?
The best way to cut chicken for fajitas is to slice it against the grain. This method keeps the meat tender. Use a sharp knife and cut the chicken breasts into thin strips. Aim for about 1/2 inch wide. This size cooks evenly and fits well in the tortillas.
Do I need to marinate the chicken?
Marinating is not required but highly recommended. It adds flavor and tenderness to the chicken. If you are short on time, a quick 15-minute marinade works well. For more flavor, marinate for 1-2 hours in the fridge.
What toppings can I add to my chicken fajitas?
You can add many toppings to your chicken fajitas. Here are some great options:
- Shredded cheese
- Sour cream
- Guacamole
- Salsa
- Jalapeños
- Diced tomatoes
- Avocado slices
- Fresh cilantro
These toppings give extra flavor and texture to your dish. Enjoy mixing and matching!
In this article, we explored how to make tasty chicken fajitas. We covered the important ingredients, tools, and step-by-step instructions. You learned tips for the best cooking and some great variations. I shared how to store leftovers and answered common questions too.
Now, you have all you need to impress family and friends. Enjoy your cooking, and make dinner fun!


![To make pumpkin spice oatmeal, gather these simple ingredients: - 1 cup rolled oats - 2 cups milk (dairy or almond) - 1/2 cup pumpkin puree - 1 teaspoon pumpkin spice blend - 1 tablespoon maple syrup or honey - 1/4 teaspoon vanilla extract - Pinch of salt - Optional add-ins: - 1/4 cup chopped walnuts - 1/4 cup dried cranberries or raisins - Fresh apple slices or banana for garnish Each ingredient plays a key role in creating a warm and comforting breakfast. The rolled oats form the base, while the pumpkin puree adds rich flavor and nutrition. Pumpkin spice blend gives that cozy fall taste, and maple syrup or honey sweetens it just right. You can customize this dish by adding walnuts for a crunchy texture or dried fruit for a hint of sweetness. Fresh fruit on top is also a great way to brighten the dish. If you follow the Full Recipe, you will have a delightful breakfast to enjoy on chilly mornings. To start, grab a medium-sized saucepan. Combine the rolled oats, milk, and a pinch of salt. Stir gently to ensure the oats mix well with the milk. Place the saucepan over medium heat. You want to bring this to a gentle simmer. Stir occasionally. This should take about five minutes until the oats soften. Once the oats are soft, it’s time to add some flavor! Carefully add the pumpkin puree, pumpkin spice blend, maple syrup, and vanilla extract to the saucepan. Stir well to combine everything. Keep cooking for another two to three minutes. This step makes the oatmeal creamy and rich. If you like some crunch, fold in chopped walnuts. For added sweetness, toss in dried cranberries or raisins if you wish. Let the oatmeal sit for one to two minutes. This resting time helps it thicken nicely before serving. Now you’re ready to enjoy your cozy pumpkin spice oatmeal! If you want the full recipe, just check the details above. To get your oatmeal just right, you can adjust its texture. If it seems too thick, add more milk. If it feels too runny, cook it a bit longer. Using fresh pumpkin spice makes a big difference in taste. The aroma and flavor become richer and more vibrant. For a lovely presentation, top your oatmeal with apple slices or banana. These fruits add sweetness and texture. You can also create decorative swirls with pumpkin puree. This not only looks nice but also adds a bit more flavor. If mornings are busy, make a large batch of oatmeal. You can easily reheat leftovers for a quick breakfast. Store it in the fridge, and it will be ready when you are. This way, you can enjoy Pumpkin Spice Oatmeal any time without the fuss. {{image_4}} You can change up the flavor of your pumpkin spice oatmeal easily. If you want a different sweetness, try using agave or brown sugar instead of maple syrup. Each sweetener brings a unique taste. For extra crunch, mix in different nuts like almonds or pecans. Seeds like chia or flax can also add a fun texture. If you follow a vegan diet, you can make this oatmeal vegan. Simply swap dairy milk for almond milk and use maple syrup for sweetness. This way, you keep all the yummy flavors while sticking to your diet. If you need a gluten-free option, just choose certified gluten-free oats. This ensures that everyone can enjoy this tasty dish. As the holidays approach, you can add cranberries or raisins for a festive twist. These fruits not only give a nice burst of sweetness but also add a pop of color. This makes your pumpkin spice oatmeal even more inviting. You can feel the warmth of the season with each bite. To explore the full potential of this recipe, check out the [Full Recipe]. Store leftovers in an airtight container for up to 3 days. This keeps your oatmeal fresh. It’s a great way to enjoy a quick breakfast later in the week. Reheat on the stovetop or in the microwave with a splash of milk. This helps restore the creamy texture. If using the stovetop, heat gently over low heat. Stir often to avoid sticking. Freeze individual servings for easy breakfasts. To enjoy, thaw overnight in the fridge. Then, reheat as usual. This method makes mornings smoother when you’re in a rush. Leftovers can be stored for up to 3 days in the fridge. Make sure to use an airtight container. This keeps the oatmeal fresh and tasty for your next breakfast. Yes, you can adjust the amount of maple syrup. You can also use an alternative sweetener if you prefer. Honey, agave, or stevia work well. Make it as sweet as you like! Simply multiply the ingredients as needed. Keep the same cooking process for best results. This way, you can feed more people or have extra for later. It is packed with fiber from oats. The pumpkin adds vitamins, making it a nourishing breakfast option. This meal supports digestion and gives you energy to start your day. Yes, it’s easy to prepare in advance. You can reheat the oatmeal quickly for busy mornings. Just store it in the fridge and warm it up when you are ready to eat. For the full recipe, check out the complete guide! This blog post explored the simple and tasty ways to make Pumpkin Spice Oatmeal. We covered the key ingredients, step-by-step cooking instructions, and helpful tips for perfecting your recipe. You can also customize it with various add-ins and flavors. This dish is not only delicious but also nutritious and great for meal prep. Enjoy a warm bowl of pumpkin spice oatmeal and kick-start your day!](https://dishtreats.com/wp-content/uploads/2025/06/a752c53c-93b7-4877-b1fd-c59ff5d6dc49-768x768.webp)


![To make delicious grilled veggie kabobs, gather these fresh ingredients: - 1 bell pepper (any color), cut into 1-inch pieces - 1 zucchini, sliced into rounds - 1 yellow squash, sliced into rounds - 1 red onion, cut into wedges - 8 cherry tomatoes - 1 cup mushrooms, cleaned and stems removed - 3 tablespoons olive oil - 2 cloves garlic, finely minced - 1 teaspoon smoked paprika - 1 teaspoon dried oregano - Salt and freshly ground black pepper to taste - 8 skewers (wooden or metal) Fresh vegetables make a big difference in flavor. You can swap in seasonal veggies, like asparagus or eggplant, based on what you find at the market. This keeps your kabobs fresh and exciting. If you have frozen vegetables, use those too! Just remember to thaw and drain them well. Fresh veggies often taste better but frozen can be a great backup. Using fresh ingredients ensures better taste and texture. Fresh veggies hold their shape and crunch better on the grill. When you bite into a grilled kabob, you want that satisfying crunch. Plus, fresh produce packs more nutrients and flavor. So, always try to choose fresh when you can! For the full recipe, check the section above. Cutting vegetables evenly ensures they cook at the same rate. Aim for 1-inch pieces for bell peppers and wedges for onions. Slice zucchini and yellow squash into rounds. If using wooden skewers, soak them in water for at least 30 minutes. This step prevents burning and keeps them strong. Marinating vegetables adds rich flavor. Combine olive oil, minced garlic, smoked paprika, and oregano. Toss in salt and pepper, then mix well. Add your veggies and coat them with the marinade. Let them sit for 15 minutes to soak up the flavors. Preheat your grill to medium-high heat. A hot grill helps create nice grill marks and a good sear. Place the kabobs on the grill grates. Arrange them evenly for better cooking. Cook for about 10-15 minutes. Turn them occasionally to ensure even cooking. Look for tender veggies with nice grill marks. To serve kabobs, use a rustic platter for a warm touch. Garnish with fresh herbs for added color. Serve with tzatziki or yogurt dip for a creamy contrast. Pair with a light salad or grilled protein for a complete meal. Enjoy your delicious creation! For the full recipe, check out the Grilled Veggie Kabobs details above. To boost the taste of your grilled veggie kabobs, try different marinades. Balsamic vinegar adds a sweet tang. Citrus juices like lemon or lime give a bright kick. You can also add spices or herbs. Consider rosemary, thyme, or cayenne pepper for extra flavor. Smoking the veggies adds depth too. If you have a grill with a smoker box, use it. Wood chips like hickory or mesquite can make a big difference. When you assemble your kabobs, think about color and texture. Alternate your veggies for a pretty look. Start with a bell pepper, then add a mushroom, followed by a cherry tomato. This keeps the kabob interesting. To prevent veggies from falling apart, push them snugly together on the skewer. Avoid overloading them; a little space helps. You can also add proteins like chicken or shrimp, or even cheese cubes for variety. This makes your kabobs more filling and tasty. For a twist, try marinating the protein in the same mix as the veggies. If you want to dive deeper into the recipe, check out the Full Recipe for more details! {{image_4}} You can easily customize grilled veggie kabobs by using seasonal vegetables. Here are some ideas: - Summer: Try corn on the cob, eggplant, and asparagus. - Fall: Use butternut squash, Brussels sprouts, and sweet potatoes. - Winter: Consider root veggies like carrots, turnips, and beets. You can also grill fruits alongside your veggies. Fruits add sweetness and a nice contrast. Pineapple, peaches, and bell peppers work well. Skewer them together for fun color and taste. For a great look and texture, combine different colors and shapes. Mix round cherry tomatoes with long zucchini slices. Use bright peppers with earthy mushrooms. This creates visual interest on your plate. You can make grilled veggie kabobs vegan by omitting any animal products. The recipe is already plant-based, so it’s a perfect choice. If you want a gluten-free version, ensure your marinade is gluten-free. Most spices and oils are safe, but check labels. You can enhance nutrition by adding grains or legumes. Try adding cooked quinoa or chickpeas to your kabobs. This gives extra protein and fiber. If you follow a low-carb diet, focus on non-starchy vegetables. Zucchini, bell peppers, and mushrooms are great picks. You can skip the starchy veggies like corn or potatoes. Check out the Full Recipe for more ideas on how to adapt these kabobs! To keep your leftover kabobs fresh, store them in the fridge. Place them in an airtight container. They can last up to three days. For longer storage, freeze them. Wrap each kabob in plastic wrap, then place them in a freezer bag. They can stay frozen for up to three months. When reheating kabobs, use the oven or grill. Preheat the oven to 350°F. Place the kabobs on a baking sheet. Heat them for about 10 minutes. This method keeps the veggies tender. You can also grill them for 5 minutes on medium heat. Avoid microwaving, as it makes them soggy. The freshness of your ingredients matters. Bell peppers and zucchini last well in the fridge for about a week. Tomatoes and mushrooms are best if used within three days. Always check for signs of spoilage before using leftovers. You can prep veggies ahead of time for easy grilling. Cut your bell pepper, zucchini, and onion in advance. Store them in the fridge in sealed bags. This saves time when you're ready to grill. Kabobs are great for meal plans. You can mix and match different veggies throughout the week. Pair them with grains or salads for a full meal. They also work well for lunch boxes. Just make sure to keep them cool until you eat. If you have a gathering, kabobs are a hit! You can set up a kabob station. Guests can choose their favorite veggies. This adds fun and personalization to your meal. Kabobs not only taste great but also look colorful and inviting on the table. For the complete recipe, check out the [Full Recipe]. Can I make these kabobs in the oven? Yes, you can! Set your oven to 400°F. Place the kabobs on a baking sheet. Bake for about 20 minutes, turning halfway through. This gives you a tasty option when grilling isn't possible. What are the best vegetables for grilling? The best vegetables for grilling include: - Bell peppers - Zucchini - Yellow squash - Red onion - Cherry tomatoes - Mushrooms These veggies hold up well on the grill and taste great! How to know when the vegetables are done cooking? Look for nice grill marks and tenderness. You can pierce them with a fork. If they are soft but still firm, they are ready to eat. How to make grilled veggie kabobs more flavorful? Use a good marinade with olive oil, garlic, and spices. Let the veggies soak in the marinade for at least 15 minutes. This step really boosts their taste. Why should you marinate vegetables? Marinating adds flavor and helps keep them juicy. The oil and spices soak into the veggies, making each bite delicious. What type of skewers work best for grilling? Both wooden and metal skewers work well. If using wooden skewers, soak them first. This prevents burning. Metal skewers can be reused and do not need soaking. Can I use tofu or tempeh in veggie kabobs? Yes, tofu or tempeh can add protein. Cut them into cubes and marinate like the veggies. They grill nicely and taste great with the other flavors. How do I prevent vegetables from burning on the grill? Start with a clean grill and preheat it. Keep an eye on the kabobs while grilling. Turn them often to ensure even cooking and avoid burning. What can I serve alongside grilled veggie kabobs? Serve kabobs with dips like tzatziki or hummus. They also pair well with rice, quinoa, or a fresh salad. Adding some bread can complete the meal nicely. You now have all the tools to create delicious grilled veggie kabobs. We covered essential ingredients, preparation methods, grilling tips, and serving ideas. Remember, fresh ingredients make a big difference. You can also customize with various vegetables and flavors. Don’t forget to store leftovers properly for future meals. Enjoy your grilling adventure, and get creative with your kabob variations. With practice, you'll master this fun cooking method that delights everyone!](https://dishtreats.com/wp-content/uploads/2025/06/56cc5cbd-3bee-4e7d-a92f-dff27107e6fe-768x768.webp)
![To make avocado chocolate chip cookies, gather these simple items: - 1 ripe avocado, thoroughly mashed - 1/2 cup packed brown sugar - 1/4 cup granulated sugar - 1/4 cup unsalted butter, melted and slightly cooled - 1 teaspoon pure vanilla extract - 1 large egg, room temperature - 1 cup all-purpose flour - 1/2 teaspoon baking soda - 1/4 teaspoon fine sea salt - 1 cup semisweet chocolate chips These ingredients create a tasty cookie with a twist. If you don’t have some items, here are good swaps: - Avocado: Use 1/2 cup unsweetened applesauce. This keeps it moist. - Butter: Coconut oil works well. It adds a hint of flavor. - Brown Sugar: Use coconut sugar for a lower glycemic option. - All-purpose flour: Try oat flour for a gluten-free choice. These substitutes can change the flavor and texture but still taste great. These cookies are not just yummy; they also pack some nutrition. Here’s a quick look: - Calories: About 120 per cookie - Fat: 6g (mostly healthy fats from avocado) - Carbohydrates: 16g - Protein: 1g - Fiber: 1g Using avocado adds healthy fats and fiber. You can enjoy a treat without feeling guilty. For the full recipe, check out my detailed guide. 1. Preheat your oven to 350°F (175°C). This is key for even baking. 2. Line a baking sheet with parchment paper. This makes cleanup easy and prevents sticking. 3. In a large bowl, mash one ripe avocado until smooth. It should be creamy. 4. Add 1/2 cup brown sugar, 1/4 cup granulated sugar, 1/4 cup melted butter, and 1 teaspoon vanilla extract. Mix until smooth and creamy. 5. Crack one large egg into the bowl. Whisk until the mix is fluffy and well combined. 6. In another bowl, mix 1 cup flour, 1/2 teaspoon baking soda, and 1/4 teaspoon salt. This helps the cookies rise. 7. Slowly add the dry mix to the wet mix. Stir gently until combined. A few lumps are fine. 8. Fold in 1 cup of chocolate chips with a spatula. Make sure they spread evenly in the dough. 1. Use a tablespoon or cookie scoop to place rounded dough on the baking sheet. Space them about 2 inches apart. 2. Bake in the preheated oven for 10-12 minutes. Look for golden edges and soft centers. 3. Once done, take the cookies out of the oven. Let them sit on the sheet for about 5 minutes. This helps them firm up. 1. Transfer the cookies to a wire rack to cool completely. 2. Serve the cookies in a jar or on a decorative plate. 3. For a special touch, sprinkle them with sea salt before serving. This enhances the chocolate flavor. Follow the [Full Recipe] to make these tasty avocado chocolate chip cookies! - Use a ripe avocado. It should feel soft to the touch. - Measure your ingredients accurately for the best results. - Mix the wet ingredients until creamy for a smooth dough. - Don’t overmix when adding dry ingredients; a few lumps are okay. - Space cookies at least 2 inches apart on the baking sheet. - Using unripe avocados can lead to a gritty texture. - Overbaking makes cookies hard instead of soft and chewy. - Forgetting to let the melted butter cool can change the dough. - Not cooling cookies on a wire rack can make them soggy. - Store cookies in an airtight container to keep them fresh. - For longer storage, freeze the cookies in a freezer bag. - To reheat, warm cookies in the oven at 300°F (150°C) for 5-7 minutes. - Enjoy them warm for that fresh-baked taste! For the full recipe, check out the details above. {{image_4}} You can make vegan avocado chocolate chip cookies easily. Replace the egg with a flax egg. To make a flax egg, mix 1 tablespoon of ground flaxseed with 2.5 tablespoons of water. Let it sit for 5 minutes until it thickens. Use the same method as the original recipe. The cookies will still be soft and tasty. If you want gluten-free cookies, swap all-purpose flour for almond or oat flour. Both options work well. Just ensure they are finely ground. Adjust the amount slightly, as these flours absorb moisture differently. The taste will change, but the cookies will remain delicious. Get creative with your cookies! You can add nuts like walnuts or pecans for crunch. Dried fruit, like cranberries or raisins, adds a sweet touch. For a fun twist, try adding a teaspoon of instant coffee or a pinch of cinnamon. Each choice adds a unique flavor to your cookies. To keep your avocado chocolate chip cookies fresh, use an airtight container. Place parchment paper between layers to prevent sticking. Store them at room temperature for up to three days. If you want to keep them longer, consider refrigerating them. Just let them warm up to room temp before eating. You can freeze the cookie dough for later use. Scoop the dough onto a baking sheet and freeze until firm. Once solid, transfer the dough balls to a zip-top bag. They will last in the freezer for up to three months. When you’re ready to bake, just take them out and let them thaw for about 30 minutes before baking. Baked cookies can last about a week in an airtight container at room temperature. If you notice them getting hard, pop them in the microwave for a few seconds. This will soften them up again. For the best taste, try to eat them within a few days. Enjoy your delicious treats from the Full Recipe! Yes, you can use ripe avocados for this recipe. Ripe avocados add a smooth texture and rich taste. Look for avocados that yield slightly when you press them. This softness means they are ready to mash. The ripeness helps make the cookies moist and flavorful. You can also mash the avocado with a fork or a blender for a creamy mix. To know when the cookies are done, check the edges. They should be golden brown. The centers may look soft and slightly undercooked. This is perfect! They will firm up as they cool. For best results, set a timer for 10-12 minutes. Keep an eye on them to avoid burning. If your cookies turn hard, you can soften them easily. Place a slice of bread in the container with the cookies. The moisture from the bread will help them soften. You can also microwave cookies for a few seconds. This will warm them up and make them soft again. Store leftover cookies in an airtight container to keep them fresh longer. This blog post covered key ingredients, step-by-step instructions, and tips for making cookies. You learned about ingredient substitutes and nutrition too. I shared variations like vegan and gluten-free options. Storing and reheating cookies is essential to enjoy them longer. Remember the common mistakes to avoid for perfect cookies every time. Use the FAQ section for quick answers. Try these tips and recipes to create delicious cookies that everyone loves. Enjoy your baking adventure and happy eating!](https://dishtreats.com/wp-content/uploads/2025/07/2a4aa59d-42b3-40d6-b422-d0063b121310-768x768.webp)