Easy Caprese Pasta Salad Fresh and Flavorful Dish

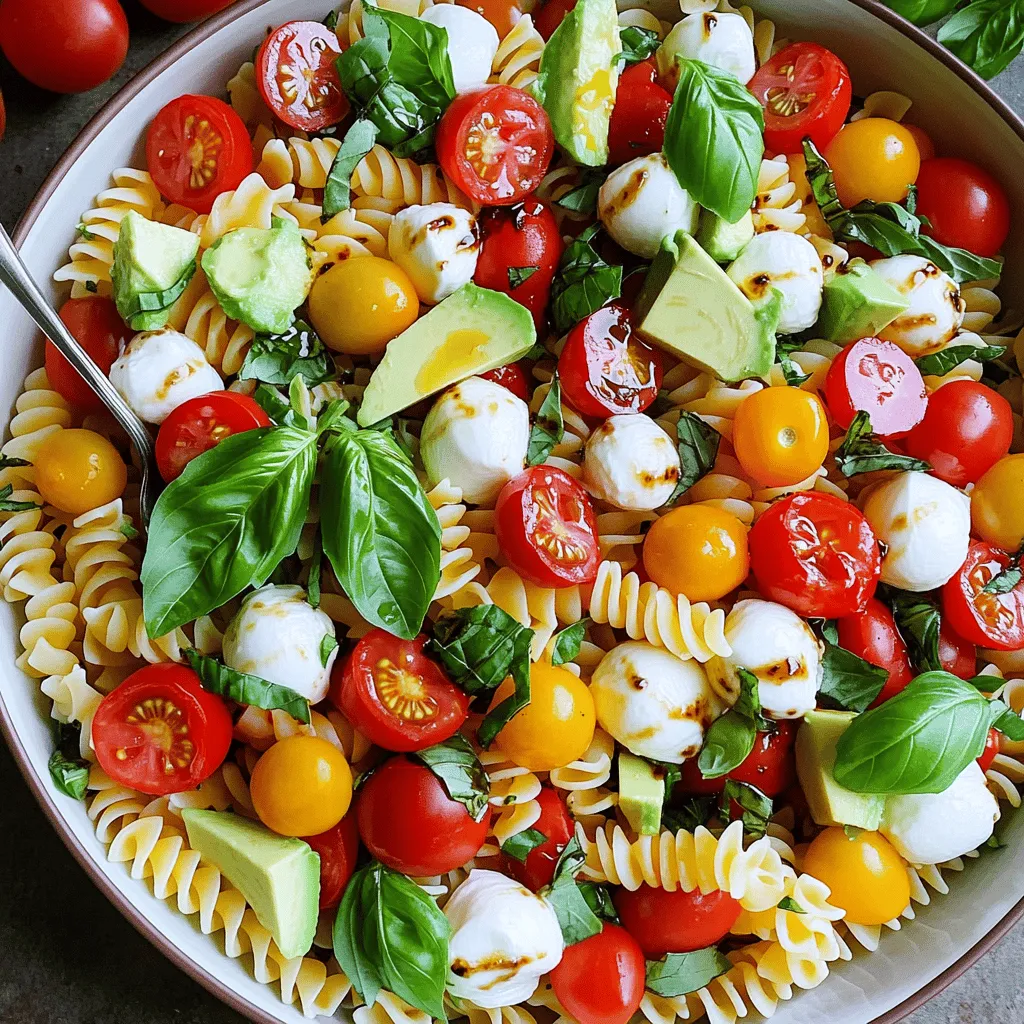
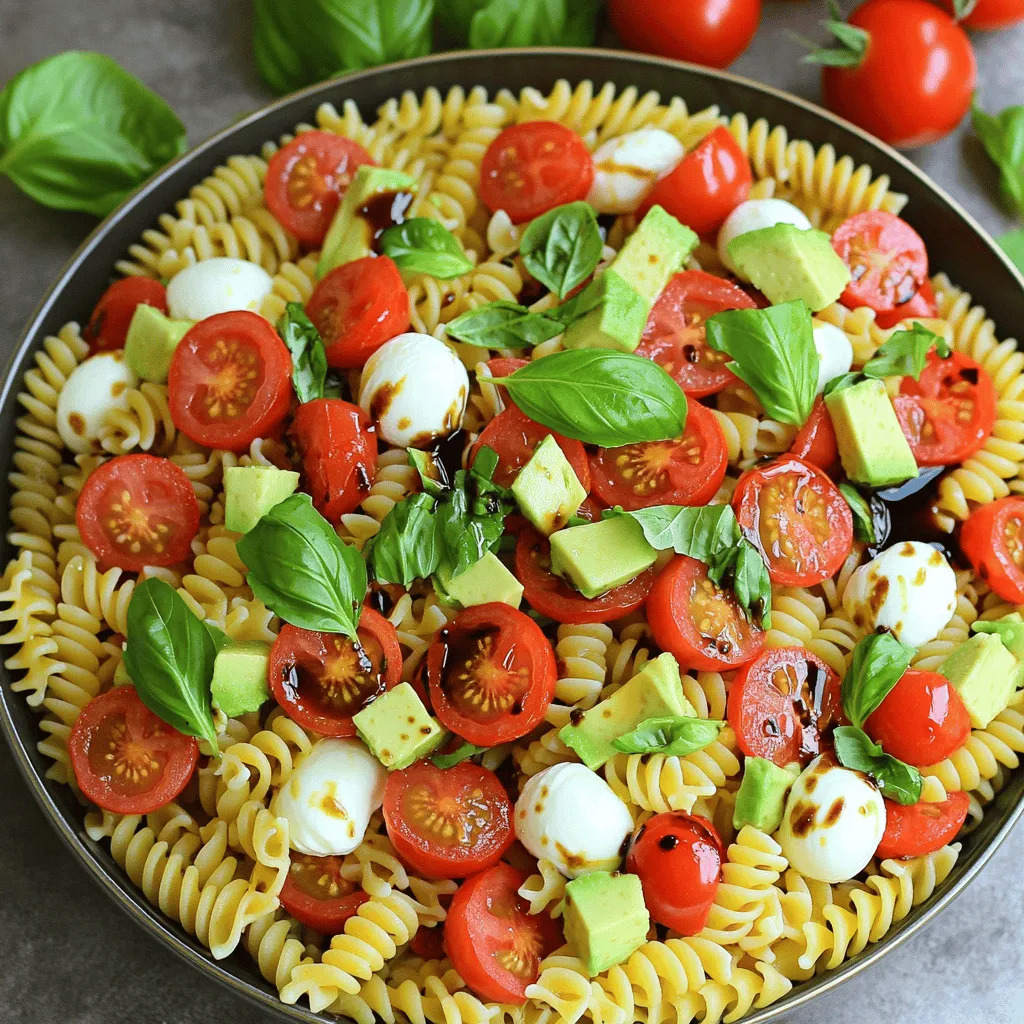
Looking for a quick and tasty dish? My Easy Caprese Pasta Salad is fresh, vibrant, and bursting with flavor! With just a handful of ingredients, this delightful recipe combines pasta, cherry tomatoes, mozzarella, and avocado. Perfect for busy weeknights or sunny picnics, it’s a meal that you can whip up in no time. Get ready to enjoy a salad that’s as simple to make as it is delicious!
Ingredients
To make a delicious Easy Caprese Pasta Salad, you’ll need the following ingredients:
- 8 oz. rotini pasta or your favorite variety
- 1 cup cherry tomatoes, halved
- 1 cup fresh mozzarella balls (bocconcini), halved
- 1 ripe avocado, diced
- ¼ cup fresh basil leaves, finely chopped
- 3 tablespoons extra-virgin olive oil
- 2 tablespoons balsamic vinegar
- Salt and freshly ground black pepper, to taste
- Optional: 1 teaspoon garlic powder
These ingredients create a fresh and colorful dish. The pasta forms a hearty base, while the cherry tomatoes add sweetness. The mozzarella brings creaminess, and the avocado adds a rich texture. Fresh basil ties everything together with its vibrant flavor. Using high-quality olive oil and balsamic vinegar enhances the salad’s taste. Adjust salt and pepper to suit your preference.
If you want an extra kick, add garlic powder. It gives a nice depth to the dish.
This recipe is simple yet flavorful, making it perfect for a quick lunch or a side at dinner.Enjoy crafting this delightful salad!
Step-by-Step Instructions
Cooking the Pasta
1. Start by bringing a large pot of salted water to a boil.
2. Add 8 oz. of rotini pasta. Cook it until it’s al dente, about 8 to 10 minutes.
3. Once cooked, drain the pasta in a colander. Rinse it under cold water. This stops the cooking process. Set the pasta aside to cool.
Assembling the Salad
1. In a large mixing bowl, combine the cooled pasta with fresh ingredients.
2. Add 1 cup of halved cherry tomatoes, 1 cup of halved mozzarella balls, and 1 diced avocado.
3. Toss in ¼ cup of finely chopped basil leaves.
4. Mix gently to ensure even distribution of all ingredients.
Making the Dressing
1. In a small bowl, whisk together 3 tablespoons of extra-virgin olive oil and 2 tablespoons of balsamic vinegar.
2. Season the dressing with salt and freshly ground black pepper to taste.
3. If you want a kick, add 1 teaspoon of garlic powder.
4. Whisk until the mixture is smooth and combined.
5. Pour this dressing over the pasta salad and gently toss everything together.
6. Taste the salad and adjust seasonings if needed. Add more salt, pepper, or balsamic vinegar as preferred.Enjoy every bite of your Easy Caprese Pasta Salad!
Tips & Tricks
Enhancing Flavor
To boost the taste of your Caprese pasta salad, you can add a few optional ingredients. Consider mixing in some sliced olives or roasted red peppers for a tangy twist. A sprinkle of crushed red pepper flakes can add a hint of heat. Adjust the seasonings based on your taste. Start with the basic salt and pepper but feel free to add more. You can always add more, but it’s hard to take it out!
Presentation Suggestions
Serve your pasta salad in a large, colorful bowl. This adds to the visual appeal. Top it with extra basil leaves for a fresh look. Whole cherry tomatoes can also brighten up your salad. Arrange them artfully for a stunning presentation. Remember, we eat with our eyes first!
Perfecting Texture
For the best texture, make sure your pasta is al dente. This prevents it from being mushy. Rinse the pasta under cold water after cooking. This stops the cooking process and keeps the pasta firm. Avoid letting the salad sit too long before serving. This can cause it to become soggy. Enjoy your Easy Caprese Pasta Salad fresh for the best experience.

Variations
Add-Ins
You can make your Caprese pasta salad even better with some fun add-ins. Try adding extra veggies like bell peppers, cucumbers, or even roasted zucchini. These colorful ingredients boost flavor and nutrition. You might also consider proteins like grilled chicken, shrimp, or chickpeas. They can make the salad heartier.
If you want to switch up the cheese, try using feta or goat cheese. These cheeses add a different creaminess and tang to the dish. You can also use vegan cheese if you prefer a dairy-free option.
Dietary Adjustments
If you need a gluten-free option, look for gluten-free pasta. Many brands offer great choices that taste just as good. You won’t miss out on flavor or texture.
For a vegan twist, swap the cheese for a nut-based substitute. You can also replace the dressing with a mix of olive oil, lemon juice, and a pinch of salt. This way, everyone can enjoy this delicious salad.
Seasonal Twists
Using seasonal ingredients can really make your Caprese pasta salad shine. In summer, add fresh corn or ripe peaches for a sweet touch. In fall, try roasted butternut squash or apples.
You can also think about seasonal herbs. Fresh dill or cilantro can bring new flavors to the dish. Get creative by mixing different seasonal items to keep things fresh and exciting.
Storage Info
Keeping the Salad Fresh
To keep your Caprese pasta salad fresh, store it in an airtight container in the fridge. This prevents air from getting in and keeps the flavors bright. If you want to meal prep, make the salad a day in advance. Just wait to add the avocado until right before serving. This keeps it from turning brown.
Reheating Suggestions
I find that this salad is best served cold. However, if you prefer it warm, gently heat it in a pan. Use low heat to keep the pasta from becoming mushy. Serve it cold on hot days for a refreshing dish.
Shelf Life
Your pasta salad stays good for about three days in the fridge. Check for any off smells or color changes. If it looks or smells strange, it’s time to toss it. Enjoying this dish fresh is always best!
FAQs
How to make Caprese Pasta Salad more filling?
You can add proteins like grilled chicken, shrimp, or chickpeas. These options boost protein and flavor. You may also mix in grains. Quinoa or farro can add texture and nutrients. These ingredients complement the fresh flavors in your salad. They make it hearty and satisfying.
Can leftovers be used the next day?
Yes, you can enjoy leftovers the next day. Store the salad in an airtight container in the fridge. It stays fresh for about three days. When ready to eat, you can eat it cold or warm it up. Just remember to stir it well. If it seems dry, add a splash of olive oil or balsamic vinegar. This will help revive the flavors.
What can I substitute for balsamic vinegar?
If you need alternatives, try red wine vinegar or apple cider vinegar. These options bring a nice tang to the salad. You can also use lemon juice for a fresh twist. Each option changes the taste, so pick what you like best.
This blog post covers how to make a delicious Caprese Pasta Salad. We explored the key ingredients, like pasta, cherry tomatoes, and avocado. You learned step-by-step instructions on cooking and assembling the salad. We shared tips on enhancing flavors and presentation. Plus, we covered variations, storage, and common questions.
In short, this salad is flexible and easy. It’s perfect for any meal. Enjoy trying different flavors as you make it your own. Happy cooking!


![To make lemon garlic scallops, you need fresh and simple ingredients. Here is what you will need: - 1 pound sea scallops, thawed if previously frozen - 3 tablespoons extra virgin olive oil - 4 cloves garlic, finely minced - Zest and juice of 1 large lemon - Sea salt and freshly cracked black pepper, to taste - 1 tablespoon fresh parsley, finely chopped - Lemon slices for an elegant garnish Sea scallops are best for this dish. They have a sweet flavor and a firm texture. Choose bright, glossy scallops with a clean scent. Avoid any that smell fishy. Fresh garlic adds a punch of flavor. It gives depth and richness to the dish. Lemon brings brightness and acidity, balancing the sweet scallops. The zest adds an extra layer of lemony goodness. When sourcing ingredients, look for a trusted fish market. Ask about the origin of the scallops. Fresh, high-quality ingredients make a big difference in taste. You want to create a dish that shines with flavor and freshness. For the olive oil, choose a high-quality extra virgin variety. It enhances the overall flavor profile. Fresh parsley adds color and freshness at the end. Always use fresh herbs for the best taste. By selecting quality ingredients, you set the stage for a memorable meal. Follow the [Full Recipe] to create this delightful dish! First, drying scallops is key. Use paper towels to pat them dry. Moisture will stop them from searing well. Next, season both sides with sea salt and black pepper. A light touch works wonders here. When you place them in the skillet, space them out. Overcrowding will steam them instead of searing them. Heat your olive oil in a large skillet on medium-high heat. Watch for it to shimmer but not smoke. Carefully add the dry scallops in a single layer. Let them sear for 2-3 minutes without moving them. This helps form a nice golden crust. Once they look brown, gently flip them using tongs. Now, add the minced garlic to the pan. Cook for another 2-3 minutes. Stir the garlic to stop it from burning. The scallops should become opaque and fully cooked. Remove the skillet from heat right after cooking. Add the lemon zest and juice to the pan. Toss the scallops gently so they soak up the flavors. Lastly, sprinkle fresh parsley over the top. This adds color and fresh taste. For serving, place the scallops on a plate and drizzle the pan juices over them. Garnish with lemon slices for an elegant touch. You can pair them with sautéed greens or a crisp salad for a complete meal. - Overcooking scallops: This is a big mistake. Scallops cook fast. If you cook them too long, they become rubbery. Aim for a golden crust on the outside and opaque inside. - Not using enough oil for searing: Oil helps create a nice crust. If you skimp on oil, the scallops may stick. Use at least three tablespoons to get good results. - Ignoring the resting time post-cooking: Let your scallops rest for a minute after cooking. This helps them stay juicy. Don’t rush this step! - Recommended skillet types for best results: A heavy skillet works best. Cast iron or stainless steel distributes heat evenly. Avoid non-stick pans; they won’t give you a good sear. - Importance of temperature control: Start with a hot skillet. If it's too cool, scallops won’t brown. Heat the oil until it shimmers. This shows it’s ready for the scallops. - Suggestions for seasoning variations: Besides lemon and garlic, try fresh herbs or spices. Thyme, chili flakes, or even a splash of white wine can add depth. Experiment to find your favorite mix! For the full recipe, check out the details above and get cooking! {{image_4}} You can elevate your lemon garlic scallops with a few simple tweaks. - Incorporating herbs: Add fresh thyme or basil for a fragrant twist. These herbs enhance the dish’s aroma and add depth to the flavor. - Alternative citrus options: Try lime or orange juice for a unique taste. Each citrus brings its own brightness and pairs nicely with scallops. - Adding heat: If you like spice, sprinkle in some chili flakes or drizzle Sriracha. The heat balances the dish’s richness and excites your taste buds. Pair your scallops with sides to create a full meal. Here are some ideas: - Suggested side dishes: Serve with sautéed greens for a fresh crunch. A light salad or creamy risotto also works well to complement the scallops. - Pairing with wines or cocktails: A chilled white wine, like Sauvignon Blanc, enhances the dish. For cocktails, a gin and tonic is refreshing and bright. - Plating ideas: For a restaurant-style look, place the scallops on a clean plate. Drizzle the pan juices over them and add lemon slices for a pop of color. A sprinkle of parsley adds a final touch of green. For the full recipe, check out the Lemon Garlic Scallops recipe. After you finish your Lemon Garlic Scallops, store any extras right. First, place them in a shallow, airtight container. This helps keep them fresh. You can put them in the fridge for up to two days. If you wait longer, the taste and texture change. To reheat, use a non-stick skillet. Heat it over low to medium heat. Add a splash of water or broth to keep them moist. Cover the pan with a lid. This method helps keep the scallops tender. You can freeze scallops, but do it right. Raw scallops freeze well if you place them in a sealed bag. Remove as much air as possible. They can stay fresh for up to three months. If you want to freeze cooked scallops, make sure they cool first. Then, follow the same bag method. To thaw, leave them in the fridge overnight. Never thaw scallops in warm water. This can ruin their texture. When you reheat frozen scallops, use low heat again. Check them often to avoid overcooking. Enjoy your scallops as fresh as possible! For the full recipe, check out the details above. You should use sea scallops for this recipe. Sea scallops are larger and have a sweet taste. Bay scallops are smaller and can be more delicate. They work well in soups or pasta but may not sear as nicely. When picking scallops at the market, look for these signs: - They should smell fresh, like the ocean. - The meat should be firm and glossy. - Avoid scallops that look dry or have brown spots. Yes, you can use other oils. Grapeseed oil or avocado oil are good options. They have high smoke points, too. Using different oils can change the flavor. Olive oil adds a rich taste, while grapeseed is lighter. Choose based on your preference and what you have on hand. Perfectly cooked scallops are opaque and firm. They should have a golden crust outside. The safe internal temperature for scallops is 145°F (63°C). Use a food thermometer to check. If you don’t have one, look for that golden color and firm texture. For a full recipe, check out the Lemon Garlic Scallops guide! Lemon garlic scallops are a tasty dish that combines fresh ingredients and simple steps. Using quality sea scallops, fresh garlic, and lemon makes all the difference. I shared tips for cooking and avoiding common mistakes, like overcooking. Remember, you can customize your flavors with herbs or spices. Enjoy your cooking journey. Perfect scallops can impress anyone. With practice, you’ll master this dish and feel confident serving it. Take your time and savor the process!](https://dishtreats.com/wp-content/uploads/2025/07/19c1a638-1668-4343-8a69-d1fc169e2d79-768x768.webp)


