Double Chocolate Zucchini Bread Moist and Rich Delight

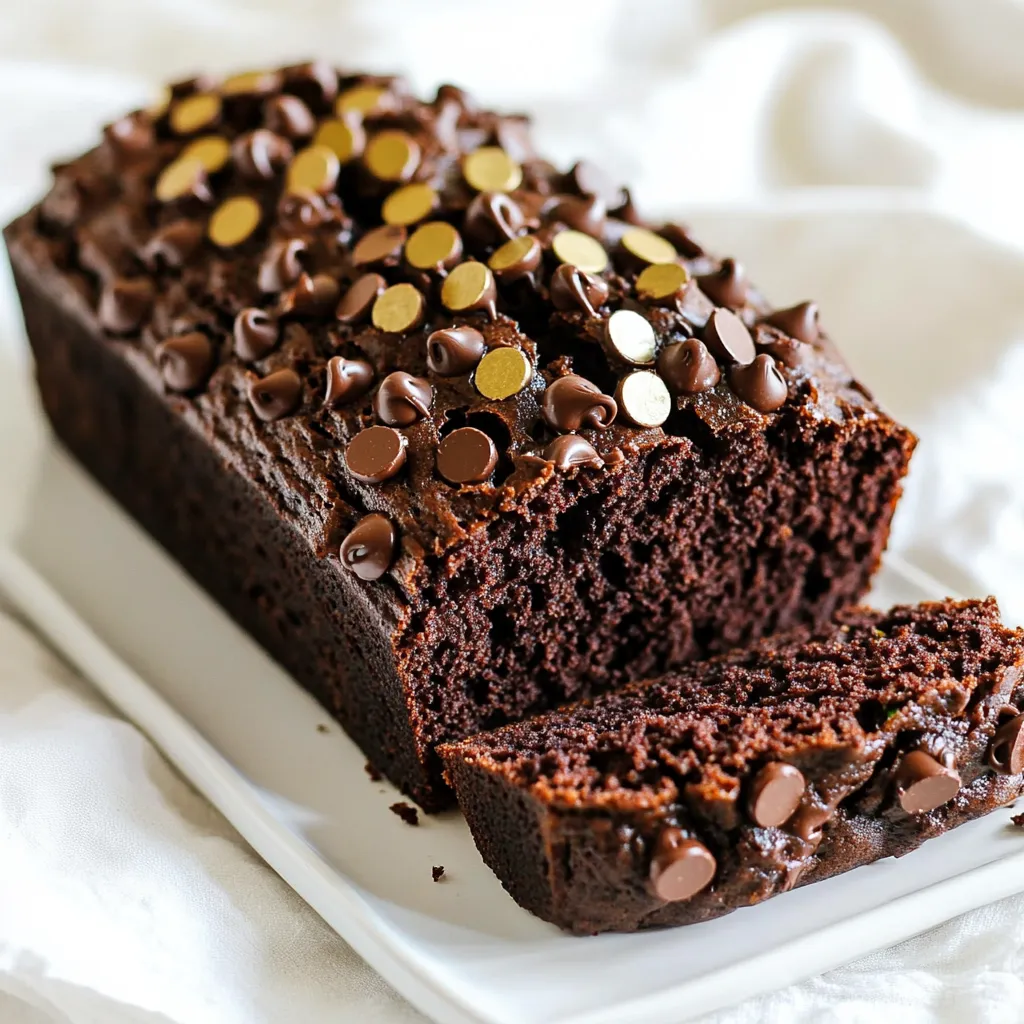
If you think zucchini only belongs in savory dishes, think again! This Double Chocolate Zucchini Bread is a moist and rich treat that combines veggies and chocolate in the most delightful way. I’ll guide you through simple steps to create a scrumptious loaf that’s perfect for any occasion. Whether you’re a baking pro or just getting started, this recipe will satisfy your sweet tooth with every bite. Let’s dive in!
Ingredients
To make your Double Chocolate Zucchini Bread, gather the following ingredients:
- 1 cup grated zucchini (squeeze out excess moisture)
- 1 cup all-purpose flour
- 1/2 cup unsweetened cocoa powder
- 1/2 teaspoon baking soda
- 1/2 teaspoon baking powder
- 1/4 teaspoon salt
- 1/2 cup granulated sugar
- 1/2 cup brown sugar (packed firmly)
- 2 large eggs
- 1/3 cup vegetable oil (or melted coconut oil)
- 1 teaspoon vanilla extract
- 1/2 cup semi-sweet chocolate chips (plus more for topping)
- 1/2 cup chopped walnuts or pecans (optional)
These ingredients work together to create a moist and rich bread. The grated zucchini adds moisture without overpowering the chocolate flavor. The mix of granulated and brown sugars gives it a perfect balance of sweetness.
Make sure you use fresh zucchini for the best taste. If you want a richer flavor, try using coconut oil. The semi-sweet chocolate chips can enhance the chocolate intensity, making each bite a delight. You can also add nuts for a nice crunch, but this is optional.
Gather these ingredients, and let’s turn your kitchen into a chocolate heaven!
Step-by-Step Instructions
Preheat Oven and Prepare Pan
Set your oven to 350°F (175°C). Take a 9×5-inch loaf pan. You can grease it lightly. Alternatively, line it with parchment paper. This helps with easy removal later.
Combine Dry Ingredients
In a medium bowl, mix together the following:
- 1 cup all-purpose flour
- 1/2 cup unsweetened cocoa powder
- 1/2 teaspoon baking soda
- 1/2 teaspoon baking powder
- 1/4 teaspoon salt
Whisk these dry ingredients well. Make sure there are no lumps.
Mix Wet Ingredients
In a large bowl, whisk these ingredients together:
- 1/2 cup granulated sugar
- 1/2 cup brown sugar
- 2 large eggs
Keep whisking until the mixture is smooth and creamy. Then add:
- 1/3 cup vegetable oil
- 1 teaspoon vanilla extract
Whisk again until fully combined.
Combine Wet and Dry Mixtures
Carefully fold in:
- 1 cup grated zucchini
Make sure it spreads evenly without overmixing. Gradually add the dry mixture to the wet mixture. Stir gently until just combined. Overmixing can change the texture.
Add Chocolate Chips and Nuts
Gently fold in:
- 1/2 cup semi-sweet chocolate chips
- 1/2 cup chopped walnuts or pecans (optional)
Make sure these ingredients are evenly mixed throughout the batter.
Bake the Bread
Transfer the batter into your prepared loaf pan. Smooth the top with a spatula. Optionally, sprinkle more chocolate chips on top.
Place the pan in the oven. Bake for 50 to 60 minutes. It’s done when a toothpick inserted in the center comes out clean or with a few moist crumbs.
After baking, let it cool in the pan for about 10 minutes. Then, remove the bread and place it on a wire rack to cool completely.
Tips & Tricks
Ensuring Moisture and Flavor
Squeezing excess moisture from zucchini is key. Zucchini holds a lot of water. If you don’t remove it, your bread may turn out soggy. I recommend using a clean kitchen towel or paper towels. Simply place the grated zucchini in the towel, twist, and squeeze until most of the liquid is gone. This simple step keeps your bread moist and flavorful.
Avoiding Overmixing
Overmixing affects the texture of the bread. When you mix too much, the bread can turn out tough and dense. You want your bread to be light and fluffy. So, mix just until the dry ingredients are combined with the wet mix. Gently fold in the grated zucchini and chocolate chips. This will help keep your bread tender and soft.
Presentation Tips
For serving, slice the zucchini bread into thick pieces. You can serve it warm or at room temperature. To make it special, dust the slices with powdered sugar. Another fun idea is to drizzle chocolate ganache over the top. Store the bread in an airtight container. This keeps it fresh for up to four days. If you want, you can also freeze it for later enjoyment!

Variations
Gluten-Free Option
If you want a gluten-free version, you can swap out the all-purpose flour. Use a gluten-free flour blend instead. Look for one that contains xanthan gum. This will help the bread hold together. You can also try almond flour or coconut flour. They add a nice flavor but use less. Adjust the liquid in the recipe as needed to get the right texture.
Dairy-Free Version
To make this bread dairy-free, swap the semi-sweet chocolate chips for dairy-free options. Many brands offer great dairy-free chocolate chips. You can also use cacao nibs for a different crunch. They add a rich chocolate flavor without any dairy. This way, you still enjoy the chocolate goodness without the dairy.
Flavor Enhancements
Want to kick up the flavor? Add spices like cinnamon or espresso powder. Just a teaspoon of cinnamon can warm up the taste. It blends well with chocolate. A little espresso powder can deepen the chocolate flavor. Mix it into the batter with the dry ingredients. These small changes can make your Double Chocolate Zucchini Bread even better!
Storage Info
Best Storage Practices
Store your Double Chocolate Zucchini Bread at room temperature. Wrap it in plastic wrap or foil. This keeps it fresh for up to three days. If you want to keep it longer, put it in the fridge. In the fridge, it lasts about a week. Make sure to seal it well to avoid drying out.
Freezing Instructions
To freeze your zucchini bread, let it cool completely first. Wrap it tightly in plastic wrap, then in aluminum foil. This prevents freezer burn. You can freeze it for up to three months. When ready to eat, thaw it overnight in the fridge. For quick thawing, leave it at room temperature for a few hours.
Shelf Life Notes
Double Chocolate Zucchini Bread can stay fresh for about three days at room temperature. It lasts about a week in the fridge. If frozen, it remains good for up to three months. Always check for signs of spoilage before enjoying your slice!
FAQs
Can I use frozen zucchini in this recipe?
Yes, you can use frozen zucchini. However, it might add more moisture. Squeeze out the excess water before adding it to the batter. This step helps keep the texture right. Too much moisture can make the bread soggy.
Can I substitute the sugars?
You can change the sugars if needed. Use coconut sugar for a more natural option. Maple syrup or agave nectar works too. Just adjust the liquid in your recipe to keep the bread moist.
What can I use instead of eggs?
If you want a vegan option, try using flax eggs. Mix 1 tablespoon of ground flaxseed with 2.5 tablespoons of water. Let it sit for five minutes until it thickens. Applesauce or mashed banana also works. Use 1/4 cup for each egg.
How do I know when the bread is done?
To check if the bread is done, use a toothpick. Insert it into the center of the loaf. If it comes out clean or with a few moist crumbs, your bread is ready. If it has wet batter on it, bake a bit longer.
This blog post covered all you need to know to make Double Chocolate Zucchini Bread. We discussed key ingredients, easy steps to bake, and tips to enhance flavor. Remember to squeeze excess moisture from the zucchini for the best texture. Try adding spices for a twist or using dairy-free chocolate chips. Store your bread properly to keep it fresh. With these tips, you’ll enjoy delicious, moist bread to share or savor on your own. Happy baking!


![To make Cherry Almond Protein Muffins, you need simple and healthy ingredients. Here’s a list for you: - 1 cup almond flour - 1/2 cup rolled oats - 1/2 cup protein powder (vanilla or unflavored) - 1/4 cup honey or maple syrup - 1/2 cup plain Greek yogurt - 2 large eggs - 1/2 cup unsweetened almond milk - 1 teaspoon baking powder - 1/2 teaspoon baking soda - 1/2 teaspoon salt - 1 cup fresh or frozen cherries, pitted and halved - 1/4 cup sliced almonds (for topping) - 1 teaspoon almond extract Each ingredient plays a key role in making these muffins tasty and nutritious. Almond flour gives a nutty flavor and a great texture. Rolled oats add heartiness and health benefits. Protein powder boosts the protein content, making these muffins perfect for a snack or breakfast. Using honey or maple syrup adds sweetness, while Greek yogurt keeps the muffins moist. The eggs help bind everything together, giving structure. Almond milk keeps the muffins light and adds a hint of almond flavor. Baking powder and baking soda make the muffins rise, resulting in fluffy bites. Cherries bring a burst of color and flavor, while sliced almonds on top add a delightful crunch. The almond extract enhances the nutty taste, tying all the flavors together. You can find the full recipe in the article to guide you step by step. Happy baking! Set your oven temperature to 350°F (175°C). Line a muffin tin with paper liners or grease each cup lightly. This helps the muffins come out easily after baking. In a large bowl, combine the almond flour, rolled oats, protein powder, baking powder, baking soda, and salt. Use a whisk to stir these ingredients well. Mixing them well ensures that your muffins rise evenly. In another bowl, whisk together the honey (or maple syrup), Greek yogurt, eggs, almond milk, and almond extract. Mix until it is smooth and creamy. This step adds moisture and flavor to your muffins. Gradually add the wet mixture to the dry mixture. Stir gently with a spatula until just combined. Be careful not to overmix the batter, as this can make the muffins tough. Gently fold the halved cherries into the batter. This adds bursts of flavor throughout each muffin. Then, fill each muffin cup about two-thirds full with the batter. This allows space for the muffins to rise. Place the muffin tin in the oven and bake for 18-20 minutes. The muffins should be golden on top. You can check for doneness by inserting a toothpick in the center; it should come out clean. Let the muffins cool in the pan for 5 minutes before transferring them to a wire rack. To make the best cherry almond protein muffins, watch your baking time. I suggest checking them at the 18-minute mark. If they look golden and a toothpick comes out clean, they are ready. Overbaking can dry out the muffins, so keep a close eye on them. After baking, let the muffins cool in the pan for five minutes. This step helps them firm up and gives you the right texture. Then, move them to a wire rack to cool completely. If you don’t have almond flour, you can use oat flour or whole wheat flour. They work well and will still taste great. For protein powder, you can try using a plant-based option or even a different flavor. If you need a non-dairy version, swap Greek yogurt for coconut yogurt or silken tofu. For almond milk, you can use soy milk or oat milk. These changes will still keep your muffins tasty and nutritious. Want to kick up the flavor? You can add a pinch of cinnamon or nutmeg to the batter. Both spices pair well with the cherries and almonds. You might also try adding a splash of vanilla extract for extra sweetness. If you enjoy a hint of citrus, a bit of lemon zest can brighten the taste. These simple additions can make your muffins even more delightful. Check out the full recipe to get started on your delicious cherry almond protein muffins! {{image_4}} You can play with flavors in these muffins. Dark chocolate chips add a rich touch. You can mix in some unsweetened coconut for a tropical twist. If you want to switch up the fruit, try using blueberries or raspberries. Both fruits pair well with almonds and give a fresh taste. You can also use dried cherries for a chewiness that works great in muffins. To make these muffins vegan, swap the eggs for flax eggs. Just mix one tablespoon of ground flaxseed with three tablespoons of water and let it sit for five minutes. Use plant-based yogurt instead of Greek yogurt. Maple syrup is a good choice to keep it sweet. You can still enjoy the same tasty muffins without animal products. If you want to cut back on sugar, reduce the honey or maple syrup. You can try using mashed bananas or unsweetened applesauce. Both will keep your muffins moist and sweet. Just remember to balance the flavors so you still enjoy every bite. Use spices like cinnamon to enhance the taste without adding more sugar. For the full recipe, check out the [Full Recipe] section above! To keep your Cherry Almond Protein Muffins fresh at room temperature, place them in an airtight container. This helps to keep moisture in and air out. Store them for up to three days. If you live in a warm area, keep them in a cool, dry place. Avoid direct sunlight, as it can dry them out. These muffins taste best when fresh, so enjoy them soon after baking. For long-term storage, freezing is the best option. Allow the muffins to cool completely before freezing. Wrap each muffin tightly in plastic wrap or aluminum foil. Then, place them in a freezer-safe bag or container. This method prevents freezer burn and helps preserve flavor. You can freeze them for up to three months. When ready to eat, simply thaw them in the fridge overnight or leave them at room temperature for a few hours. To enjoy your muffins warm, you can easily reheat them. Preheat your oven to 350°F (175°C). Place the muffins on a baking sheet and warm them for about 10 minutes. This method helps restore their soft texture. You can also use the microwave for a quick fix. Heat each muffin for 15-20 seconds. Just be careful not to overheat, as that can make them dry. For the full recipe, check out the delicious Cherry Almond Protein Muffins! Yes, you can use frozen cherries. They work just as well as fresh cherries. Just make sure to thaw them first and drain any extra liquid. This keeps the batter from becoming too wet. Frozen cherries can add a nice burst of flavor, and they are often just as nutritious as fresh ones. To check if your muffins are done, look for a golden top. Insert a toothpick into the center of a muffin. If it comes out clean or with a few crumbs, the muffins are ready. They should feel firm to the touch. If they are still wet, bake them for a few more minutes. Each muffin has about 150 calories. They are rich in protein and fiber. The almond flour and Greek yogurt add healthy fats and nutrients. Plus, cherries provide antioxidants. This makes them a tasty and nutritious snack. Enjoy these muffins guilt-free, knowing they are good for you! For the complete recipe, check the Full Recipe section. This blog post covers a simple and tasty cherry almond protein muffin recipe. You learned about the key ingredients and steps to make them. I shared tips for baking success, ingredient swaps, and ways to customize the recipe. Muffins can be fun and flexible. Whether you want to make them vegan or low-sugar, it's easy! Always store them well to keep their flavor fresh. Enjoy cooking, and have fun trying different variations. Your kitchen adventures can lead to yummy treats!](https://dishtreats.com/wp-content/uploads/2025/07/36a729b1-00f1-4288-a77b-47884a3c4d33-768x768.webp)

![- 1 cup all-purpose flour - 2 tablespoons granulated sugar - 2 teaspoons baking powder - ½ teaspoon baking soda - ¼ teaspoon salt - 1 cup buttermilk - 1 large egg, lightly beaten - 2 tablespoons unsalted butter, melted - 2 teaspoons pure vanilla extract - 1 tablespoon ground cinnamon - 3 tablespoons brown sugar, packed - 1 cup powdered sugar - 3 tablespoons cream cheese, softened to room temperature - 2-3 tablespoons milk (to achieve desired icing consistency) When I make these pancakes, I always start with the dry ingredients. This step is key. I mix the flour, sugar, baking powder, baking soda, and salt in a bowl. It’s important to whisk these well. This ensures even rising and sweetness. Next, I move to the wet ingredients. I pour the buttermilk into a separate bowl. Then, I add the beaten egg, melted butter, and vanilla extract. Whisk until smooth. This mixture is crucial for the pancake’s fluffiness. Now, let's talk about the cinnamon filling. In a small bowl, I combine ground cinnamon and brown sugar. This mix gives the pancakes their sweet, spicy swirl. Finally, for the icing, I beat together powdered sugar and softened cream cheese. I add milk slowly until I reach the right consistency. Drizzling this icing over the warm pancakes is pure bliss. For the full recipe, check out the complete guide. Enjoy your cooking adventure! 1. In a mixing bowl, combine the all-purpose flour, granulated sugar, baking powder, baking soda, and salt. Mix well until the dry ingredients are blended. 2. Take another bowl and whisk together the buttermilk, the lightly beaten egg, melted butter, and vanilla extract. Make sure this mixture is smooth. 1. Gradually pour the wet ingredients into the bowl with the dry ingredients. Stir gently until just combined. It’s okay if there are a few lumps; this helps keep your pancakes fluffy. 2. Be careful not to overmix. Overmixing can make the pancakes tough. 1. In a small bowl, combine the ground cinnamon and packed brown sugar. Mix them well to combine. This mixture will create a sweet swirl in your pancakes. 1. Preheat a non-stick skillet or griddle over medium heat. Pour about ¼ cup of pancake batter onto the skillet for each pancake. 2. When the batter starts bubbling on the surface (about 1-2 minutes), sprinkle about a teaspoon of the cinnamon filling mixture onto the pancake before flipping it. 3. Flip the pancake carefully and cook for another 1-2 minutes, until golden brown. Repeat this process with the remaining batter and filling. 1. In a small bowl, mix the powdered sugar, softened cream cheese, and enough milk to reach your desired icing consistency. Blend until the mixture is smooth. Now you're ready to enjoy your delicious cinnamon roll pancakes! For precise measurements and more tips, check the Full Recipe. To make fluffy pancakes, avoid overmixing the batter. When you mix too much, the pancakes can turn tough. You want a few lumps in the batter; that is okay! Use fresh baking powder and baking soda. Old leavening agents may not make your pancakes rise well. Check the expiration date on the package to be sure. Heat is key when cooking pancakes. Adjust the heat as needed to prevent burning. If your skillet is too hot, the pancakes may burn on the outside and stay raw inside. A non-stick skillet helps with easy flipping. It also allows you to use less oil. Always preheat the skillet before pouring your batter. The icing makes these pancakes special. To achieve your desired thickness, adjust the milk quantity. Start with 2 tablespoons and add more if needed. Drizzle icing over warm pancakes for best results. The warmth helps the icing melt into the pancakes, making each bite delightful. {{image_4}} Cinnamon roll pancakes are fun! You can change them up in many ways. Let’s explore some tasty options. You can add chopped walnuts or pecans to the batter. This nutty addition gives a lovely crunch. It also adds healthy fats and protein. Just mix in about ½ cup of nuts before cooking. You will love the extra texture and flavor. Want a fruity twist? Add diced apples or berries to the batter. They add sweetness and freshness. Try using about 1 cup of fruit. Blueberries or chopped strawberries work great. Apples give a nice cinnamon flavor when cooked. Your pancakes will be more colorful and tasty! Feel free to experiment with spices. Adding nutmeg or cardamom can change the taste. Start with ¼ teaspoon of each spice. You will enjoy the new flavors. These spices pair well with cinnamon and make your pancakes special. For the complete recipe, check out the [Full Recipe]. Enjoy your cooking adventure! You can store leftover cinnamon roll pancakes in an airtight container. They will stay fresh in the refrigerator for up to 3 days. This keeps them moist and ready for a quick breakfast or snack. To freeze your pancakes, lay them in a single layer on a baking sheet. Once frozen, transfer them to a freezer-safe bag. This method keeps them from sticking together. You can pull out as many as you need later. When you are ready to enjoy your pancakes again, simply microwave or toast them. If you want to make them even better, add extra icing on top while they warm up. This gives them a fresh taste and makes them feel special again. Yes, you can use whole wheat or gluten-free flour. However, this may change the texture of your pancakes. Whole wheat flour adds a nutty flavor and denser texture. Gluten-free flour can make them lighter but may need extra moisture. To make these pancakes dairy-free, swap buttermilk for almond milk. Use a dairy-free butter alternative in the recipe. This ensures you keep the great taste while avoiding dairy. Cinnamon roll pancakes are delicious on their own. However, they pair well with fresh fruits, like strawberries or bananas. Whipped cream can add a light and fluffy touch. You can also drizzle on more maple syrup for added sweetness. For the full recipe, check out the details above. Cinnamon Roll Pancakes are simple and fun to make. We combined dry and wet ingredients with cinnamon filling for a tasty treat. Use tips for fluffiness, cooking, and icing to ensure success. You can customize these pancakes by adding nuts or fruits. Remember to store leftovers well for future enjoyment. Try new variations each time for a delightful twist. These pancakes can impress anyone and become a family favorite. Enjoy your cooking adventure!](https://dishtreats.com/wp-content/uploads/2025/06/80f0c7ad-2155-4787-b1f4-2bdd3b819c66-768x768.webp)


