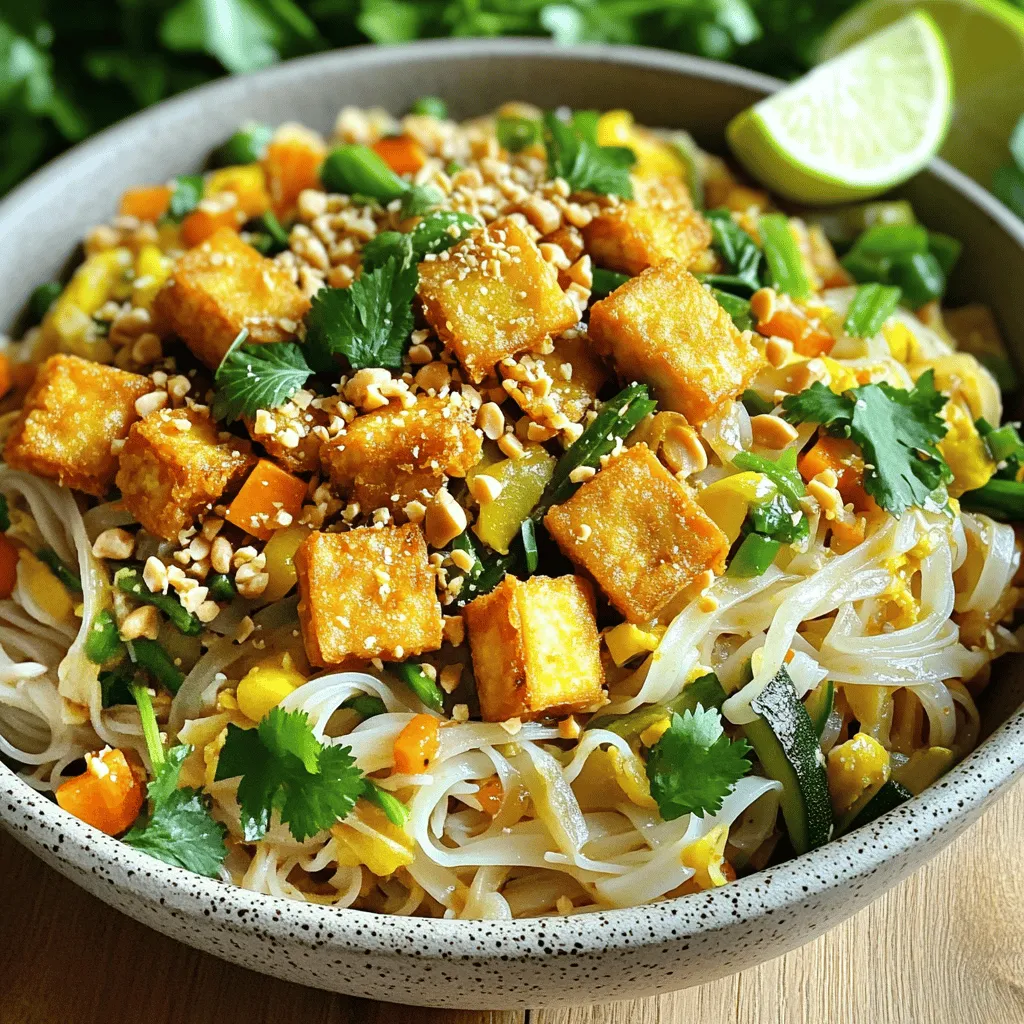
Looking for a tasty meal that’s better than takeout? You’re in the right place! My Crispy Tofu Pad Thai is easy to make and packed with flavor. This dish satisfies your cravings without the hassle of delivery. With crisp tofu, fresh veggies, and perfect noodles, you’ll wonder why you ever ordered out. Let’s dive into this delicious recipe and bring Pad Thai magic to your kitchen!
Ingredients
Main Ingredients
– 14 oz firm tofu, pressed and cubed
– 8 oz rice noodles
– 2 tablespoons cornstarch
– 3 tablespoons vegetable oil (for frying)
– 2 large eggs, lightly beaten
– 1 cup bean sprouts
– 3 green onions, chopped (white and green parts separated)
– 1 medium carrot, julienned
– 1/4 cup crushed peanuts
– 3 tablespoons soy sauce
– 1 tablespoon tamarind paste
– 1 tablespoon sugar
– 2 cloves garlic, minced
– 1 tablespoon fresh lime juice
– Fresh cilantro leaves for garnish
– Lime wedges for serving
Optional Ingredients
You can add more veggies to your Pad Thai. Consider bell peppers or snap peas for extra crunch. If you like heat, try adding sliced red chili or chili paste. They bring a nice kick to the dish.
The Best Tofu for Pad Thai
For the best crispy tofu, choose firm or extra-firm tofu. These types hold their shape well during cooking. Press the tofu to remove excess water. This helps it crisp up nicely when frying. Look for tofu with a clean, simple ingredient list. Organic options are often best for flavor and health.
Step-by-Step Instructions
Preparing the Noodles
Start by placing the rice noodles in a large mixing bowl. Pour boiling water over them. Let the noodles soak for about 15 minutes. You want them tender but still firm, which is called al dente. Once they are soft, carefully drain the water and set the noodles aside.
Crispy Tofu Preparation and Frying
Next, take the cubed tofu and place it in a mixing bowl. Lightly coat each piece with cornstarch. This step is key for a crunchy texture. Heat 3 tablespoons of vegetable oil in a large non-stick skillet over medium-high heat. Once hot, add the tofu cubes in a single layer. Fry them without moving for about 4-5 minutes. You want them golden brown and crispy. Once done, transfer the tofu to a plate lined with paper towels to soak up extra oil.
Combining the Ingredients
Now, push the crispy tofu to one side of the skillet. Pour in the beaten eggs into the open space. Scramble them until they are fully cooked. Mix the eggs with the tofu in the skillet. Next, add minced garlic, julienned carrots, and the white parts of the green onions. Sauté for 2-3 minutes until the garlic smells good and the veggies are soft.
Add the soaked noodles, bean sprouts, soy sauce, tamarind paste, sugar, and lime juice to the skillet. Toss everything gently to combine. Heat through for about 3-4 minutes. Finally, fold the crispy tofu back into the mix. Taste and adjust seasoning, maybe with more soy sauce or lime juice. Serve it all in deep bowls, garnishing with crushed peanuts, fresh cilantro, and lime wedges. Enjoy your beautiful Crispy Tofu Pad Thai!
Tips & Tricks
Achieving the Perfect Crispy Tofu
To get crispy tofu, you need to start with firm tofu. Press it to remove water, then cut it into cubes. Coat each piece lightly with cornstarch. This step is key for that crunchy texture. Heat vegetable oil in a skillet until hot. Fry the tofu in a single layer. Don’t crowd the pan; this lets the tofu get golden and crispy. Flip them gently to avoid breaking. Use a plate with paper towels to drain excess oil.
Flavor Enhancements to Try
To boost the flavor of your Pad Thai, consider adding a splash of lime juice. It adds brightness that enhances the dish. You can also try adding a bit of chili paste for heat. Mixing in fresh herbs like basil or mint can bring freshness. For a nutty flavor, sprinkle more crushed peanuts on top. Each addition can make your dish unique and delicious.
Cooking Techniques for Noodles and Vegetables
Soak the rice noodles in boiling water. This keeps them tender but firm. After soaking, drain and set aside. When cooking vegetables, sauté them until they are soft but still crisp. Start with garlic for flavor before adding carrots and green onions. This method brings out the best taste and texture. Combine the noodles and veggies carefully to keep the noodles intact. This way, every bite will be flavorful and enjoyable.

Variations
Vegetarian and Vegan Options
You can easily make this dish vegetarian or vegan. For a vegetarian option, keep the eggs in the recipe. If you want a vegan version, skip the eggs or use a tofu scramble instead. You can also add more veggies like bell peppers or zucchini for extra nutrition and flavor.
Gluten-Free Substitutions
To make this Pad Thai gluten-free, use rice noodles, which are naturally gluten-free. Swap soy sauce for tamari, a gluten-free alternative. Ensure that your tamarind paste and any other sauces are gluten-free as well. This way, you can enjoy all the taste without any worries.
Protein Additions
You can add other proteins to boost your meal. Grilled chicken, shrimp, or tempeh work great. If you want to keep it plant-based, consider chickpeas or edamame. These options add flavor and make the dish more filling. Choose what you love best and make it your own!
Storage Info
How to Store Leftovers
To store your leftover Crispy Tofu Pad Thai, let it cool first. Place it in an airtight container. This keeps the flavors fresh and the tofu crispy. You can store it in the fridge for up to three days. If you want to enjoy it later, consider freezing it.
Reheating Techniques
When you’re ready to eat, you can reheat it easily. The best way is to use a skillet. Heat it over medium heat and add a splash of water to keep it moist. Stir often until it’s warmed through. If you use a microwave, cover the dish to keep the steam in. Heat for one minute and check if it’s hot. Stir and heat again if needed.
Freezing Options
If you want to freeze your Pad Thai, it’s simple. Make sure it cools completely first. Place it in a freezer-safe container or a heavy-duty freezer bag. This dish can last up to two months in the freezer. When you want to enjoy it again, thaw it overnight in the fridge before reheating.
FAQs
Can I use a different type of noodle?
Yes, you can! While rice noodles are classic for Pad Thai, you can try other noodles. For a gluten-free option, use rice vermicelli or even zucchini noodles. They will add a fresh twist. Just remember to check the cooking times, as they vary.
How can I make Pad Thai spicier?
To add heat, you can mix in some red pepper flakes or sliced fresh chili. You can also use sriracha sauce or chili paste when cooking. Adjust the spice to match your taste. Start small, so you don’t overpower the dish.
What is a good alternative to tamarind paste?
If you don’t have tamarind paste, you can use lime juice mixed with a bit of brown sugar. This mix gives a similar sweet and sour taste. Another option is to use vinegar with sugar. It won’t taste the same, but will still be tasty!
How do I make this dish nut-free?
To make this dish nut-free, simply skip the crushed peanuts. You can add sunflower seeds or pumpkin seeds for some crunch. These seeds give a nice texture without the nuts. Always check that your sauces are also nut-free.
This article covered all you need to know about making delicious Pad Thai. We discussed key ingredients, from main ones to flavorful variations. You learned step-by-step instructions to prepare noodles and achieve crispy tofu. Tips and tricks were shared to enhance taste and texture. We also explored storage methods for leftovers.
Making your Pad Thai can be fun and tasty. Use these steps to create your perfect dish every time. Happy cooking!


