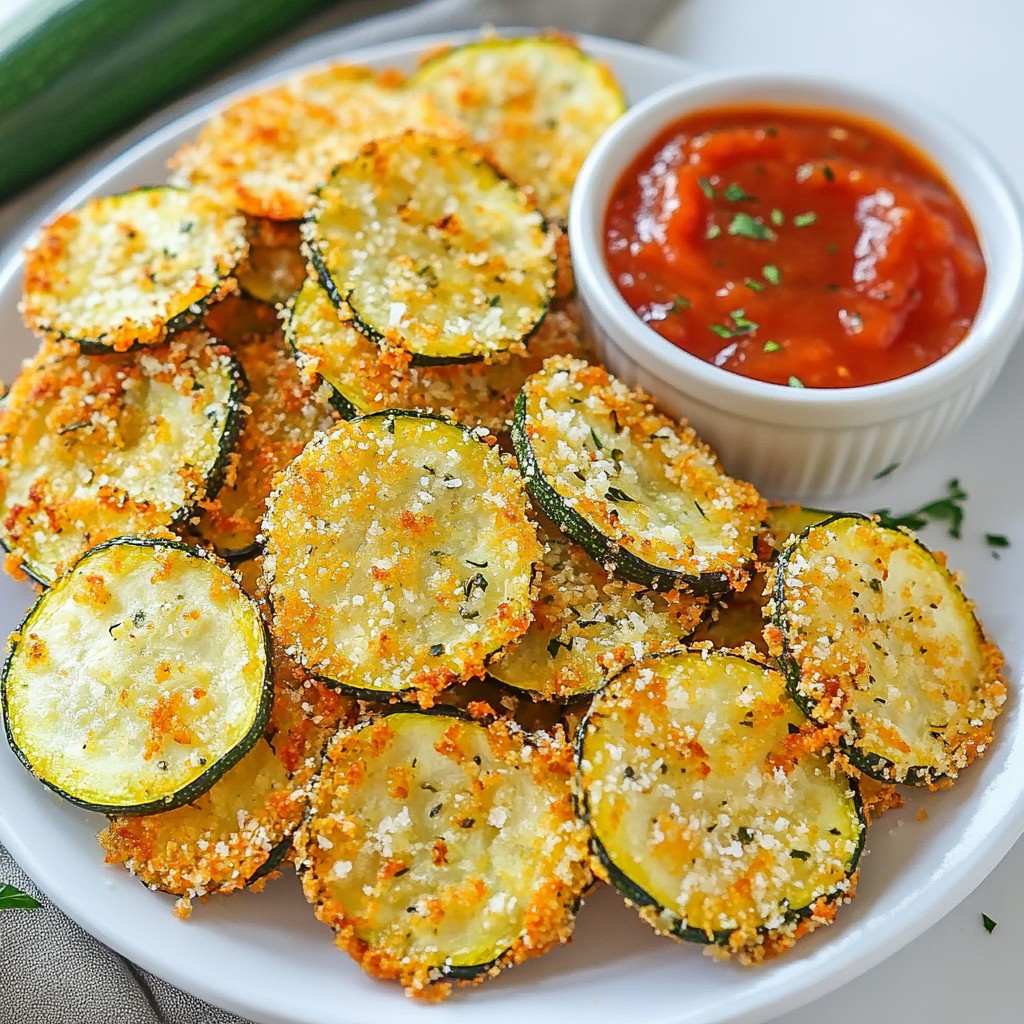
Looking for a delicious and healthy snack? You’ll love these Crispy Parmesan Zucchini Chips! They’re crunchy, cheesy, and super easy to make. With just a few main ingredients and simple steps, you can whip up a tasty treat for movie night or game day. Plus, I’ll share some tips to get them perfectly crispy every time. Let’s dive into this tasty snack option that will satisfy your cravings!
Why I Love This Recipe
- Healthy Snack Alternative: These crispy zucchini chips are a guilt-free way to enjoy a crunchy snack without the excess calories of traditional chips.
- Easy to Make: With simple ingredients and straightforward steps, you can whip up these delicious chips in no time, making them a perfect snack for any occasion.
- Customizable Flavor: The seasoning can be adjusted to your taste, allowing you to experiment with different herbs and spices to create your ideal flavor profile.
- Great for Sharing: These crispy snacks are perfect for parties or gatherings, and they pair wonderfully with a variety of dips, making them a crowd-pleaser!
Ingredients
Main Ingredients
- 2 medium zucchinis, sliced thinly (approximately 1/8 inch thick)
- 1 cup grated Parmesan cheese
- 1 cup panko breadcrumbs
Additional Ingredients
- 2 large eggs, beaten until smooth
- 1 teaspoon garlic powder
- 1 teaspoon onion powder
- 1 teaspoon Italian seasoning
- Salt and freshly ground black pepper, to taste
- Cooking spray or a drizzle of olive oil
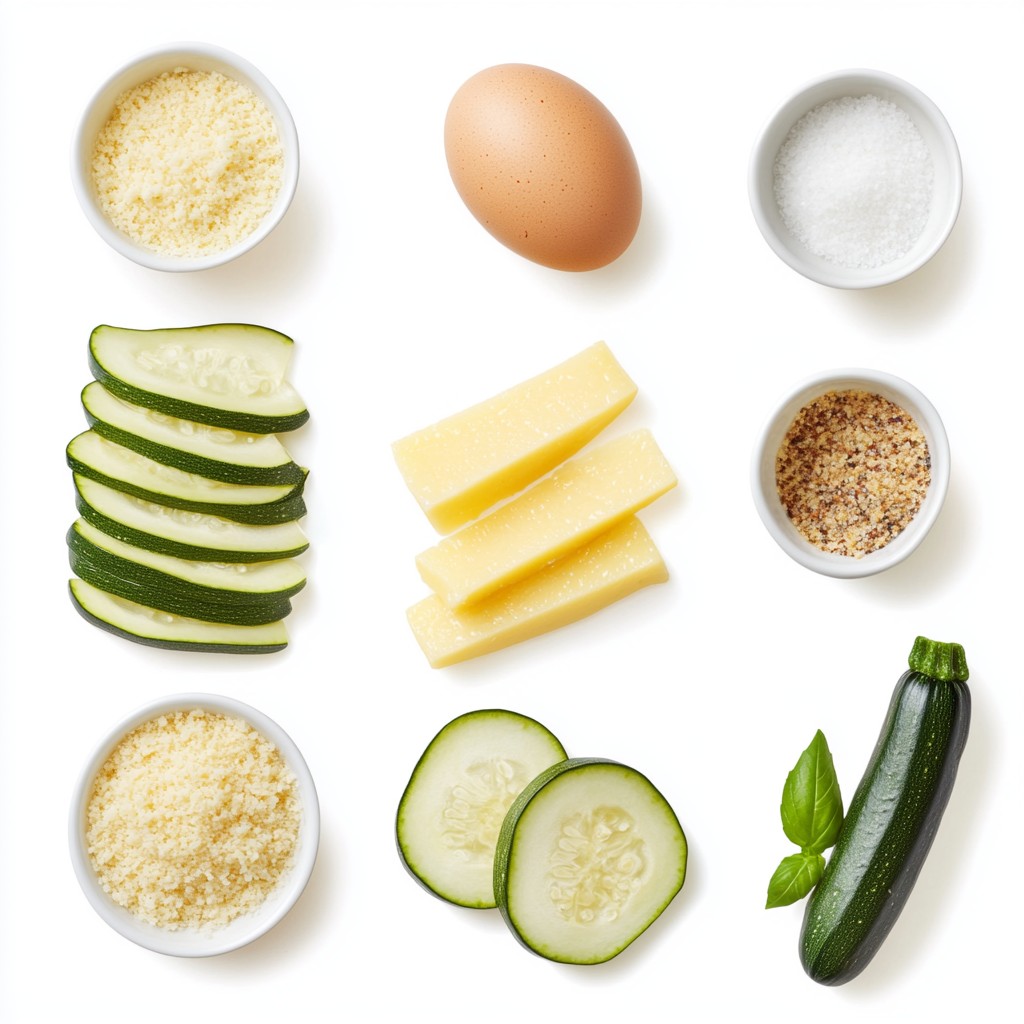
The main ingredients give the chips their flavor and crunch. Zucchini is fresh and light. Parmesan cheese adds a rich, salty taste. Panko breadcrumbs make the chips crisp.
For extra taste, I add eggs to help the coating stick. Spices like garlic powder, onion powder, and Italian seasoning boost the flavor even more. Finally, a sprinkle of salt and pepper gives the chips a nice finish.
I use cooking spray or olive oil to help the chips crisp up in the oven. This combination of ingredients makes these crispy Parmesan zucchini chips a tasty snack option that everyone will love.
Step-by-Step Instructions
Preparation
1. Preheating the oven: Start by preheating your oven to 425°F (220°C). This heat makes the chips crispy and golden.
2. Preparing the baking sheet: Line a baking sheet with parchment paper. This helps the chips not stick and makes cleanup easy.
Coating Process
1. Mixture for breadcrumbs: In a shallow bowl, mix 1 cup of panko breadcrumbs, 1 cup of grated Parmesan cheese, 1 teaspoon of garlic powder, 1 teaspoon of onion powder, 1 teaspoon of Italian seasoning, and a pinch of salt and pepper. Stir well to blend the flavors.
2. Egg mixture preparation: In another bowl, beat 2 large eggs until smooth. This egg mixture helps the breadcrumbs stick to the zucchini slices.
Baking the Chips
1. Coating the zucchini slices: Take a slice of zucchini and dip it in the egg mixture. Make sure it is well-coated. Let any extra egg drip off. Then, place it in the breadcrumb mixture. Press down gently to help the crumbs stick. Place the coated slice on the baking sheet.
2. Baking time and temperature: Repeat the coating for each zucchini slice. Arrange them in a single layer on the sheet. Lightly spray with cooking spray or drizzle olive oil on top. Bake for 20-25 minutes until golden brown and crunchy. Flip the chips halfway through for even cooking. When done, let them cool slightly for extra crispiness.
Tips & Tricks
Achieving Crispiness
To make your zucchini chips extra crispy, use panko breadcrumbs. Panko is lighter and airier than regular breadcrumbs. This texture helps your chips get that nice crunch. You can find panko at most grocery stores, usually in the Asian foods aisle.
Another key to crispiness is using olive oil or cooking spray. A light drizzle of olive oil adds flavor and helps the breadcrumbs brown. If you prefer, cooking spray works well too. Just make sure to coat the chips lightly before baking.
Serving Suggestions
For a great presentation, arrange the crispy zucchini chips on a colorful platter. You can garnish them with fresh herbs for a pop of color. Pair your chips with a small bowl of marinara sauce or ranch dressing. These dips add flavor and make for a fun snack. Guests will love having options!
Pro Tips
- Slice Thickness Matters: For the best results, ensure your zucchini slices are consistently 1/8 inch thick. This uniformity will help them cook evenly and achieve that perfect crispiness.
- Keep Them Dry: Pat the zucchini slices dry with a paper towel before coating. Removing excess moisture helps the batter adhere better and ensures a crispier final product.
- Experiment with Seasonings: Feel free to customize the seasoning mix! Add cayenne pepper for a kick, or try smoked paprika for a unique flavor twist that complements the zucchini.
- Storage Tips: If you have leftovers, store them in an airtight container at room temperature for up to 2 days. Re-crisp them in the oven for a few minutes before serving again.
Variations
Alternative Breading Options
You can change the breading to suit your needs. Try using gluten-free breadcrumbs if you want a gluten-free option. These will still give you that nice crunch. You can also add more flavor by mixing in herbs and spices. Try chili powder for heat or smoked paprika for a smoky taste. Mixing in dried herbs like thyme or oregano can add depth as well. Get creative with your mix to match your taste.
Veggie Substitutions
Zucchini is great, but you can use other veggies too. Eggplant, sweet potatoes, or even carrots work well. Just slice them thin like zucchini. You can use the same breading process for these veggies. Change the seasoning to fit the vegetable. For example, use cumin and coriander with sweet potatoes for a warm flavor. Experiment with what you have on hand to find your new favorite!
Storage Info
Storing Leftovers
To keep your crispy Parmesan zucchini chips fresh, follow these steps:
- Cool completely: Let the chips cool down to room temperature. This prevents steam from building up.
- Use airtight containers: Store the chips in a container that seals well. A glass or plastic container works great.
- Paper towels: Place a paper towel in the container. This will help absorb any moisture.
Reheating Instructions
To enjoy your chips again, reheating is key. Here’s how to do it while keeping them crispy:
- Oven method: Preheat your oven to 375°F (190°C).
- Bake for 10 minutes: Place the chips on a baking sheet and warm them for about 10 minutes.
- Check for crispiness: Keep an eye on them to make sure they don’t burn.
Using these tips, your crispy Parmesan zucchini chips will stay delicious and crunchy!
FAQs
How do I make zucchini chips more flavorful?
To add more flavor to your zucchini chips, try different spices. You can mix in:
- Paprika
- Cayenne pepper
- Dried herbs like thyme or rosemary
- Parmesan cheese with added herbs
These spices and herbs enhance the taste and create a unique flavor. Feel free to experiment with what you like best.
Can I fry zucchini chips instead of baking them?
Yes, you can fry zucchini chips, but there are pros and cons.
Frying:
- Gives a richer flavor and crispier texture.
- Requires more oil, making them less healthy.
Baking:
- Uses less oil, making it a lighter option.
- Takes longer but is easier to clean up.
Baking is great for a healthier snack, while frying can be a fun treat. Choose based on your mood or diet.
What can I serve with Crispy Parmesan Zucchini Chips?
Crispy Parmesan zucchini chips go well with many dips and sides. Here are some popular pairings:
- Marinara sauce for a classic combo.
- Ranch dressing for a creamy touch.
- A spicy aioli for a kick.
- Hummus for a healthy option.
These dips make your snack even better. You can mix and match to find your favorite!
In this article, we explored how to make crispy Parmesan zucchini chips. We covered the essential ingredients, including zucchini, Parmesan cheese, and Panko breadcrumbs. The step-by-step instructions guided you from preparation to baking. I shared tips for achieving crispiness and ideas for serving. We also discussed variations, storage, and common questions.
Now, you’re ready to enjoy these tasty chips. They are simple to make and delicious to eat. Happy cooking!