Crispy Parmesan Ranch Potato Skins Tasty Snack Recipe

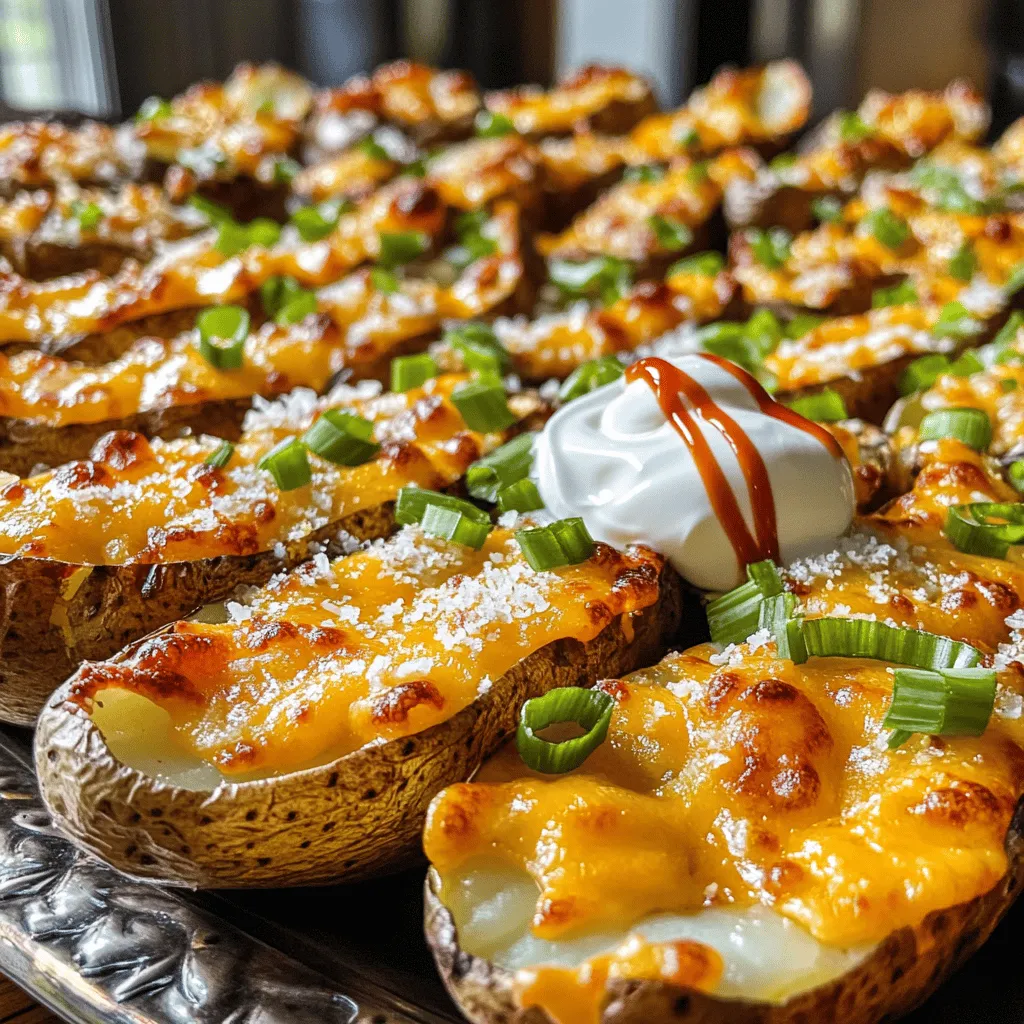
If you’re craving a delicious snack that’s crunchy and packed with flavor, you’ve come to the right place! My Crispy Parmesan Ranch Potato Skins are easy to make and perfect for sharing. With just a few key ingredients and simple steps, you’ll create a mouthwatering treat that will impress anyone. Let’s dive into the ingredients and get cooking! Your taste buds will thank you later!
Ingredients
Essential Ingredients for Crispy Parmesan Ranch Potato Skins
To make Crispy Parmesan Ranch Potato Skins, you need these key items:
- 4 medium russet potatoes
- 1 tablespoon olive oil
- 1 teaspoon garlic powder
- 1 teaspoon onion powder
- 1 teaspoon dried parsley
- ½ teaspoon salt
- ¼ teaspoon black pepper
- ½ cup grated Parmesan cheese
- ½ cup shredded cheddar cheese
- ½ cup sour cream
- 2 green onions, finely sliced
- Optional: hot sauce for drizzling
These ingredients come together to create a tasty snack that everyone will love. The russet potatoes give a great base. Olive oil helps achieve that golden, crispy texture.
Optional Toppings to Enhance Flavor
You can add a few extra toppings for more flavor. Here are some ideas:
- Crispy bacon bits
- Jalapeño slices for heat
- Fresh herbs like chives or cilantro
These toppings can make your potato skins even more exciting. They add different tastes and textures, making your snack feel gourmet.
Key Equipment Needed
You will need some basic kitchen tools to prepare this recipe:
- Baking sheet
- Mixing bowls
- Fork for piercing potatoes
- Spoon for scooping out the insides
Using the right tools helps make the process smooth. Having everything ready means you can focus on creating a delicious dish.
Step-by-Step Instructions
Prepping the Potatoes
Start by washing your russet potatoes well. Make sure to scrub off any dirt. After that, pierce each potato several times with a fork. This helps steam escape while baking. It’s key to avoid burst potatoes. Next, place the potatoes on a baking sheet.
Baking the Potato Skins
Set your oven to preheat at 400°F (200°C). Bake the potatoes for 45 to 60 minutes. They should feel tender when you poke them with a fork. Once done, take them out and let them cool for about 10 minutes. This makes them easier to handle. Then, cut each potato in half lengthwise. Use a spoon to scoop out some of the insides. Leave about a ¼-inch shell. This keeps them sturdy.
Adding Seasoning and Cheese
Brush the inside and outside of each potato skin with olive oil. This helps achieve a nice crisp. In a bowl, mix garlic powder, onion powder, dried parsley, salt, and black pepper. Stir until blended well. Sprinkle this seasoning mix inside each potato skin. Add a generous amount of grated Parmesan cheese and shredded cheddar cheese on top. Place the potato skins back on the baking sheet with cheese-side up. Bake for another 15 to 20 minutes. You want the cheese to be bubbly and golden. The edges should turn crispy. Finally, remove them from the oven and let them cool a bit. Top each skin with sour cream and sliced green onions. If you like heat, drizzle hot sauce for that extra kick.
Tips & Tricks
Achieving Maximum Crispiness
To get the best crispiness from your potato skins, follow these tips:
- Use russet potatoes. Their starch content helps create a crispy texture.
- Bake them until fork-tender. This ensures they are soft inside, which helps when scooping.
- Brush with olive oil. A good layer of oil makes a big difference in crispness.
- Bake again after adding cheese. This final bake allows the cheese to bubble and brown.
How to Select the Best Potatoes
Choosing the right potatoes is key to great potato skins. Here’s what to look for:
- Look for medium-sized russets. They have the right thickness for sturdy skins.
- Check for smooth skin. Avoid potatoes with blemishes or soft spots.
- Choose firm potatoes. This indicates freshness and will help them hold up during baking.
Serving Suggestions for Appetizers
When serving your crispy potato skins, consider these ideas:
- Serve warm. Warm skins are best for tasting the melted cheese.
- Add a variety of dips. Sour cream, ranch, or even guacamole pairs well.
- Garnish with fresh herbs. Chopped parsley or cilantro adds color and flavor.
- Create a platter. Arrange them on a large dish for a fun sharing experience.

Variations
Different Cheese Options to Consider
You can switch up the cheese in your potato skins. While Parmesan and cheddar work great, try mozzarella for a gooey texture. Goat cheese adds a tangy twist. For a sharper taste, use aged cheddar. Mixing cheeses can create a richer flavor.
Vegetarian-Friendly Alternatives
If you want a vegetarian option, skip the cheese or use plant-based cheese. You can load the skins with veggies. Try adding spinach, mushrooms, or bell peppers. They add color and taste without meat. This makes your snack healthy and fun.
Spicy Variants of Potato Skins
For spice lovers, add some heat! Mix jalapeños or chili flakes in your cheese topping. You can also drizzle hot sauce over the sour cream. This adds a tasty kick. For an even spicier option, consider using pepper jack cheese. It packs a punch and enhances the flavor of your crispy potato skins.
Storage Info
How to Store Leftover Potato Skins
To keep your crispy potato skins fresh, let them cool completely. Place them in an airtight container. You can store them in the fridge for up to three days. Make sure to separate layers with parchment paper to avoid sticking.
Reheating Tips for Best Results
When you’re ready to enjoy the leftovers, reheat them in the oven. Set your oven to 350°F (175°C). Place the potato skins on a baking sheet and heat for about 10-15 minutes. This method keeps them crispy. Avoid using a microwave, as it can make them soggy.
Freezing Instructions
You can freeze these potato skins if you want to save them for later. First, let them cool completely. Wrap each skin tightly in plastic wrap, then place them in a freezer bag. They will stay good for up to two months. When you’re ready to eat them, thaw in the fridge overnight before reheating.
FAQs
What type of potatoes are best for this recipe?
I recommend using medium russet potatoes. They have a thick skin and a fluffy inside. This makes them perfect for holding toppings. Their texture gives you that nice crispiness after baking.
Can I make these potato skins in advance?
Yes, you can prepare the potato skins ahead of time. Bake the potatoes and scoop out the insides. Store the skins in the fridge. When you’re ready, add your toppings and bake them. This saves time when you need a quick snack.
How long do Crispy Parmesan Ranch Potato Skins stay fresh?
These potato skins are best enjoyed fresh. However, they can last in the fridge for up to three days. Just store them in an airtight container. Reheat them in the oven for the best results.
Is it possible to make these potato skins in an air fryer?
Absolutely! You can use an air fryer for a quicker option. After preparing the potato skins, air fry them at 375°F for about 10-15 minutes. This gives you that crispy texture you love without using the oven.
Crispy Parmesan Ranch Potato Skins are a winning snack choice. We covered essential ingredients, step-by-step baking, and tips for maximum crispiness. Don’t forget to explore tasty variations and proper storage methods.
These skins are easy to make and will impress your friends. Enjoy your delicious creations!


![The Sun-Dried Tomato Chickpea Salad is simple to make and full of flavor. Here’s what you need: - 1 can (15 oz) chickpeas, thoroughly drained and rinsed - 1/2 cup sun-dried tomatoes, roughly chopped - 1/4 cup red onion, finely diced - 1/2 cucumber, peeled and diced - 1/4 cup feta cheese, crumbled into small pieces - 2 tablespoons fresh parsley, finely chopped - 2 tablespoons extra virgin olive oil - 1 tablespoon freshly squeezed lemon juice - 1 teaspoon dried oregano - Salt and freshly ground black pepper, to taste This mix of ingredients creates a bright, fresh dish. Chickpeas add protein and fiber. Sun-dried tomatoes give a sweet and tangy taste. The red onion adds a sharp bite, while cucumber brings crunch. Feta cheese adds creaminess to the salad. Fresh parsley brightens the flavors. Make sure to use high-quality extra virgin olive oil for the best taste. Fresh lemon juice adds a zesty kick. Dried oregano brings an earthy flavor that ties everything together. Adjust salt and pepper to your liking for a perfect balance. For the full recipe, follow the steps to enjoy this delightful salad. It's quick to prepare and great for lunch or dinner! To make this salad, start with a large mixing bowl. Combine the following ingredients: - 1 can (15 oz) chickpeas, thoroughly drained and rinsed - 1/2 cup sun-dried tomatoes, roughly chopped - 1/4 cup red onion, finely diced - 1/2 cucumber, peeled and diced - 1/4 cup feta cheese, crumbled into small pieces Gently stir the ingredients together. This ensures an even distribution of flavors and textures. In a separate small bowl, whisk together the dressing ingredients: - 2 tablespoons extra virgin olive oil - 1 tablespoon freshly squeezed lemon juice - 1 teaspoon dried oregano - Salt and freshly ground black pepper, to taste Mix until well combined. You want the oil and lemon juice to emulsify, meaning they blend into a smooth mixture. Drizzle the dressing over the salad base. Toss gently to coat everything evenly. Be careful not to break the chickpeas or feta cheese. After mixing, sprinkle the freshly chopped parsley on top. Give it one last gentle toss. Cover the salad and let it rest for at least 15 minutes. This time allows the flavors to meld together, enhancing the taste. You can serve it chilled or at room temperature for the best experience. For the full recipe, check the ingredients and instructions above. To make your Sun-Dried Tomato Chickpea Salad stand out, choose a nice serving bowl. A colorful bowl can catch the eye and add to the meal. You can layer the salad to show off its colors. Start with chickpeas at the bottom, then add layers of sun-dried tomatoes, cucumbers, and red onions. For garnishing, sprinkle extra parsley leaves on top. This adds a fresh touch. You can also add a few crumbles of feta cheese over the top. This gives a nice contrast to the vibrant colors of the salad. If you want to impress, serve it with crusty bread or pita on the side. You can make this salad ahead of time. Store it in the fridge for a quick meal later. After you mix it, cover the salad well. It stays fresh for 2 to 3 days. The flavors will deepen as it sits. For meal prepping, divide the salad into single-serving containers. This makes it easy to grab and go. Keep the dressing separate until you are ready to eat. This keeps the salad crisp and fresh. Enjoy your meal! For the full recipe, check out the details above. {{image_4}} You can switch out chickpeas for other beans. Black beans or kidney beans work well. They add a different taste and texture. If you want to try lentils, they can also be good. For a dairy-free option, use a vegan feta cheese. There are many brands available. You can also skip the cheese and add more vegetables. This keeps the salad fresh and tasty. To boost the flavor, add spices like cumin or paprika. These spices can take your salad to a new level. You could also add bell peppers or corn for a nice crunch. If you want more protein, add grilled chicken or tofu. These options make the salad heartier. You can even mix in some nuts or seeds for added texture. For the full recipe, check out the details above and create your own delicious twist! To keep your Sun-Dried Tomato Chickpea Salad fresh, use these tips: - Store in an airtight container. - Layer ingredients to prevent sogginess. - Keep dressing separate until serving. - Use glass containers for better preservation. Glass keeps the salad fresh longer. It also helps you see the colorful layers. Your salad lasts up to three days in the fridge. After that, it may lose its crunch. Watch for these signs of spoilage: - Change in smell or color. - Soft or mushy chickpeas. - Feta cheese that appears slimy. If you notice these signs, it's best to throw it away. Enjoy the salad while it's fresh for the best taste! For the full recipe, click [Full Recipe]. To make this salad, start by gathering your ingredients. You need chickpeas, sun-dried tomatoes, red onion, cucumber, feta cheese, parsley, olive oil, lemon juice, oregano, salt, and pepper. 1. In a large bowl, mix the chickpeas, sun-dried tomatoes, cucumber, onion, and feta. 2. In a small bowl, whisk olive oil, lemon juice, oregano, salt, and pepper together. 3. Pour the dressing over the salad and toss gently. 4. Add the parsley and mix lightly. 5. Let the salad rest for 15 minutes. This helps the flavors blend well. You can find the full recipe above for detailed steps. Yes! This salad is perfect for meal prep. You can prepare it a day in advance. Just store it in an airtight container in the fridge. The flavors will deepen, making it taste even better. Make sure to keep the salad covered to keep it fresh. This salad pairs well with many dishes. Here are some ideas: - Grilled chicken or fish for added protein. - Crusty bread or pita to scoop up the salad. - A light soup like tomato basil for a cozy meal. - Roasted vegetables for a colorful plate. These options will enhance your meal and make it even more enjoyable! This blog post detailed how to create a refreshing Sun-Dried Tomato Chickpea Salad. We covered the necessary ingredients, simple steps to prepare, and tips for presentation. You can enhance this salad with various substitutes or flavors. Proper storage ensures freshness and keeps meals tasty longer. Remember, this salad is not just easy to make—it's also adaptable. Enjoy making it your own, and delight your taste buds with every bite. Your next meal can be both fun and healthy!](https://dishtreats.com/wp-content/uploads/2025/07/f0fe0f85-1842-4358-ad7f-ac591425fdaf-768x768.webp)


. - Preheat the oven to 425°F (220°C). - Slice the red bell peppers in half. Remove the seeds and membranes. Place them skin-side up on a lined baking sheet. - Roast the peppers for about 25 minutes until the skin is blistered. - Let the peppers cool. Once cool, peel off the skin and chop them into bite-sized pieces. - Rinse 1 cup of quinoa thoroughly under cold water. - In a saucepan, combine the rinsed quinoa with 2 cups of water. Bring it to a boil. - Reduce the heat to low, cover, and simmer for about 15 minutes until the water is absorbed. - Fluff the quinoa with a fork and let it cool. - In a large mixing bowl, combine the cooled quinoa with the roasted peppers, halved cherry tomatoes, finely diced red onion, and diced cucumber. - Mix gently to ensure even distribution of all ingredients. - In a small bowl, whisk together 3 tablespoons of olive oil, 2 tablespoons of balsamic vinegar, and 1 teaspoon of garlic powder. - Add a pinch of salt and freshly ground black pepper, to taste. - Drizzle the dressing over the salad mixture and toss gently to coat. - If you want, sprinkle 1/4 cup of crumbled feta cheese on top and mix lightly. - Finally, garnish with freshly chopped parsley for a colorful finish. For more details, refer to the Full Recipe. To get that perfect blistered skin on your red peppers, follow these steps: - Choose fresh peppers: Look for firm, shiny skin. - Cut them right: Slice each pepper in half lengthwise. This helps them roast evenly. - High heat is key: Roast at 425°F (220°C) for about 25 minutes. - Watch for bubbles: The skin should bubble and char slightly. This adds great flavor. For seasoning your peppers, try these ideas: - Simple salt and pepper: This lets the natural sweetness shine. - Add garlic powder: This gives a rich taste. - Sprinkle paprika: This adds a nice smoky flavor. To ensure your quinoa is fluffy and not mushy, use this method: - Rinse well: Rinse quinoa under cold water to remove bitterness. - Water ratio matters: Use 2 cups of water for every 1 cup of quinoa. - Don’t skip the simmer: Bring to a boil, then lower the heat and cover. Let it simmer for 15 minutes. You can also hydrate quinoa with broth instead of water. This adds extra flavor to your dish. To make your Roasted Red Pepper Quinoa Salad even tastier, consider these tips: - Add fresh herbs: Basil or cilantro can brighten the dish. - Spice it up: A pinch of red pepper flakes adds heat. - Mix textures: Add nuts for crunch or avocado for creaminess. These simple changes can elevate your salad and keep it exciting. For the full recipe, refer to the earlier section. {{image_4}} For a vegan twist, you can skip the feta cheese. Instead, use avocado or vegan cheese. These options add creaminess without dairy. You can also mix in other vegetables. Try adding spinach, roasted zucchini, or artichokes. They boost flavor and nutrition. Want to make your salad heartier? Add chickpeas or grilled chicken. Chickpeas add fiber and protein. They make the salad more filling. If you prefer meat, grilled chicken works great. You can also try other legumes like black beans or lentils. They offer different flavors and textures. You can change the salad with the seasons. In summer, use fresh corn, tomatoes, or cucumber. These veggies are sweet and crunchy. You might also swap roasted red peppers for grilled asparagus or eggplant. These changes keep the salad exciting and fresh all year. For the full recipe, check out the details above. To keep your roasted red pepper quinoa salad fresh, store it in the fridge. Use an airtight container to avoid moisture loss. Place a piece of parchment paper between the salad and the lid. This helps keep it crisp. This salad lasts about 3 to 5 days in the refrigerator. Look for signs of spoilage like an off smell or slimy texture. If the salad looks or smells bad, it’s best to toss it. You can freeze quinoa, but it's best not to freeze the whole salad. Freezing can change the texture of the veggies. To freeze quinoa, cook it and let it cool. Then, place it in a freezer-safe bag. Remove as much air as possible. This way, you can use it later for quick meals. Yes, you can make this salad ahead. Prepare it in advance for busy days. I suggest making it up to two days before serving. Store it in an airtight container in the fridge. The flavors will meld nicely. Just keep the dressing separate until you’re ready to eat. This keeps the salad fresh and crisp. If you want a change, try using brown rice, farro, or couscous. Each option gives a different taste and texture. You can even use lentils for a protein boost. Just make sure to cook them according to package directions. This keeps your salad hearty and filling. This salad has a mild flavor. The roasted peppers add sweetness, not heat. If you like spice, you can add jalapeños or red pepper flakes. For a milder taste, skip the spicy additions. You can also add more cucumber or feta to balance the heat. This salad works great as a side or main dish. Pair it with grilled chicken or fish for protein. It also complements roasted veggies or a light soup. For a vegetarian option, add chickpeas or serve with hummus. You can enjoy it as part of a larger meal or on its own. Check out the Full Recipe for more ideas! This Roasted Red Pepper Quinoa Salad is easy and tasty. We covered key ingredients, cooking steps, and helpful tips. You can customize it to fit your diet and likes. Always store leftovers properly to enjoy later. Remember, fresh flavors and textures make this salad shine. With these ideas, you can impress your friends or family at any meal. Enjoy making and sharing this healthy dish!](https://dishtreats.com/wp-content/uploads/2025/06/1f28db07-8093-4cb7-8796-796da85cb13a-768x768.webp)

