
Looking for a tasty snack that’s easy to make? Try my crispy baked sweet potato fries! This recipe transforms humble sweet potatoes into a crunchy treat that everyone loves. With just a few ingredients and simple steps, you’ll impress family and friends. Whether you munch them alone or serve with your favorite dip, these fries add flavor to any meal. Ready to get started? Let’s dive into this delicious recipe!
Ingredients
To make crispy baked sweet potato fries, you need just a few simple ingredients. Here’s what you’ll need:
– 2 large sweet potatoes
– 2 tablespoons extra-virgin olive oil
– 1 teaspoon cornstarch
– 1 teaspoon smoked paprika
– 1/2 teaspoon garlic powder
– 1/2 teaspoon onion powder
– 1/4 teaspoon cayenne pepper (optional)
– Salt and freshly ground black pepper
– Fresh parsley for garnish
These ingredients combine to create a flavorful and fun side dish. Sweet potatoes give a natural sweetness. Olive oil helps with that crispy texture. The cornstarch is the secret for extra crunch. Smoked paprika adds a nice depth of flavor. Garlic and onion powder bring warmth. Cayenne pepper can spice things up if you like it hot. Finally, salt and pepper enhance everything.
Using fresh parsley on top not only looks nice but adds a fresh taste. This is the perfect mix for a tasty treat.
Step-by-Step Instructions
Preparation Steps
1. Preheat your oven to 425°F (220°C). It’s key for crispiness.
2. Line a large baking sheet with parchment paper. This helps fries not stick.
3. Take 2 large sweet potatoes. Rinse and cut them into even-sized fries. Try to keep them similar in size for even cooking.
4. Place the fries in a mixing bowl. Drizzle 2 tablespoons of olive oil over them. Mix well to coat each fry evenly.
Seasoning the Fries
1. Sprinkle 1 teaspoon of cornstarch over the fries. This helps them get that crispy texture.
2. Add spices: 1 teaspoon of smoked paprika, 1/2 teaspoon of garlic powder, 1/2 teaspoon of onion powder, and 1/4 teaspoon of cayenne pepper if you like spice.
3. Season with salt and black pepper to taste. Toss the fries gently to make sure they are all coated well with the seasonings.
Baking the Fries
1. Arrange the seasoned fries on your baking sheet. Make sure they are in a single layer. This allows air to flow and makes them crispy.
2. Bake in the preheated oven for 25 to 30 minutes. Flip the fries halfway through. This helps them brown evenly.
3. When they turn golden and crispy, they are ready. Let them cool for a few minutes before serving.
Enjoy these crispy baked sweet potato fries with your favorite dips!
Tips & Tricks
Achieving Maximum Crispiness
To get the best crispy fries, air circulation is key. When you spread the fries out on the baking sheet, make sure they aren’t touching. This allows hot air to flow all around them. If your fries aren’t crispy enough, try adding a few extra minutes to the cooking time. Keep an eye on them to avoid burning.
Perfecting Seasoning
You can customize the spice levels based on your taste. If you like more heat, add more cayenne pepper. For a milder flavor, leave it out. You can also swap the spices for other favorites like chili powder or Italian herbs. Mix and match to find your perfect blend.
Presentation Suggestions
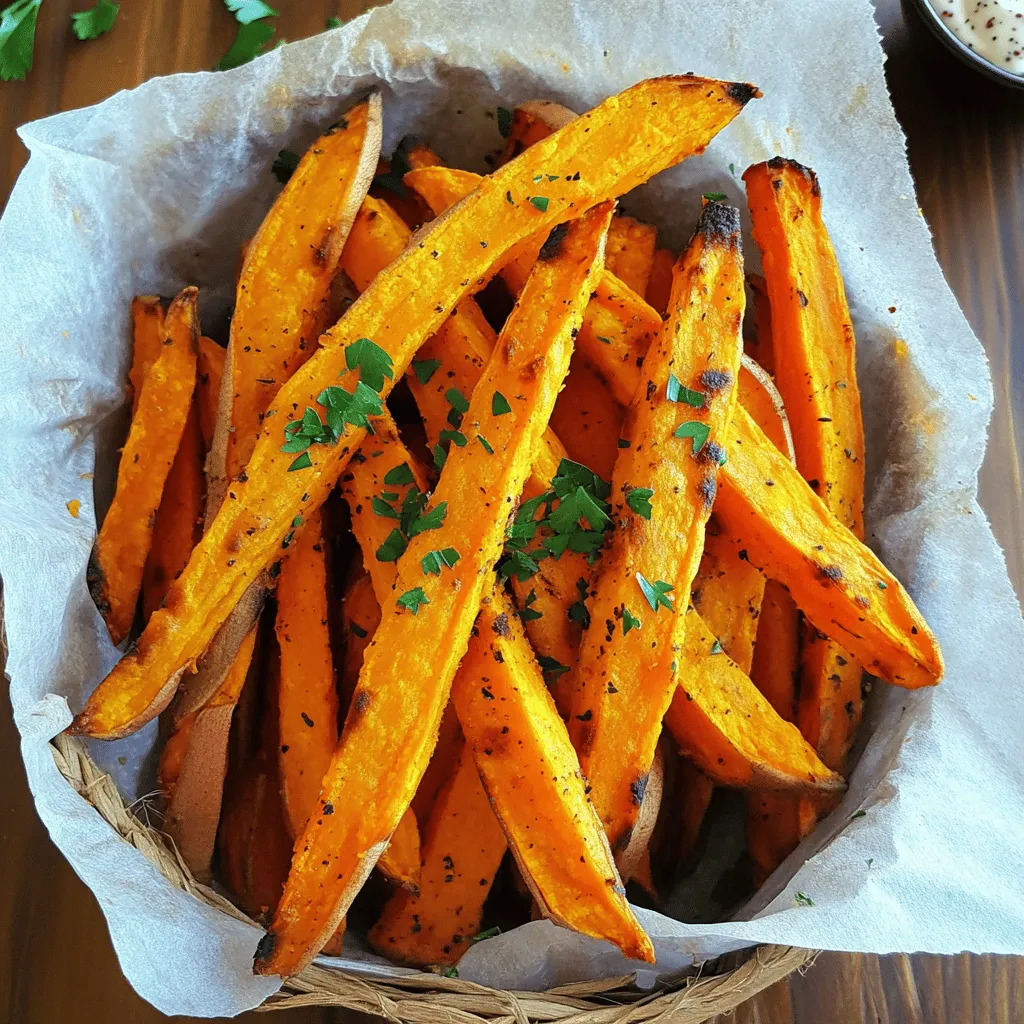
An eye-catching way to serve your fries is in a cone or a basket with parchment paper. This makes them look fun and inviting. Pair your fries with tasty dipping sauces like spicy mayo, creamy ranch, or classic ketchup. It adds more flavor and makes the meal special.
Variations
Flavor Variations
You can easily change the taste of your sweet potato fries. For a sweet and spicy option, drizzle them with maple syrup before baking. This will add a nice glaze and a kick of flavor. If you prefer herbs, try adding fresh rosemary or thyme. These herbs bring a savory touch that pairs well with the natural sweetness of the potatoes.
Alternative Cooking Methods
Using an air fryer is a fantastic way to make crispy fries. Set your air fryer to 400°F (200°C) and cook them for about 15-20 minutes. Shake the basket halfway through to ensure even cooking. If you enjoy grilling, you can also grill sweet potato fries. Slice them thicker, brush with olive oil, and grill over medium heat for about 5-7 minutes on each side. This gives a nice smoky flavor.
Serving Suggestions
Sweet potato fries are great on their own, but you can elevate your meal. Pair them with grilled chicken, fish, or a fresh salad for a balanced dish. They also work well in meal prep. You can make a batch and store them in the fridge. Just reheat them for a quick snack or side dish. For a fun twist, serve them in a cone with a side of your favorite dipping sauce. Try creamy ranch, spicy mayo, or classic ketchup for added flavor.
Storage Info
Storing Leftovers
To keep your crispy baked sweet potato fries fresh, store them in the fridge. Place them in an airtight container. This helps maintain their flavor and texture. They can last for up to three days in the fridge. If you want to keep them longer, freezing is a great option. Place the fries in a freezer-safe bag. Remove as much air as you can before sealing. This prevents freezer burn and keeps them tasty.
Reheating Instructions
When you’re ready to enjoy your leftovers, reheating is key. For crispy fries, use the oven. Preheat your oven to 400°F (200°C). Spread the fries in a single layer on a baking sheet. Heat for about 10 to 15 minutes, flipping halfway through. This method keeps the fries crispy. You can also use an air fryer. Set it to 380°F (193°C) and heat for about 5 to 7 minutes. Avoid using a microwave, as it can make the fries soggy.
Shelf Life
In the fridge, your fries can last about three days. In the freezer, they can last up to three months. When you store them correctly, you can enjoy them later without losing flavor or texture. Just remember to check for any signs of freezer burn if they are in the freezer for a while.
FAQs
Common Questions About Sweet Potato Fries
How can I make sweet potato fries even crispier?
To make your sweet potato fries crispier, soak them in cold water. Do this for at least 30 minutes. This helps remove excess starch. After soaking, dry them well with a towel. Also, use cornstarch before baking to create a crisp outer layer.
Can I use regular potatoes instead?
Yes, you can use regular potatoes. They will taste different but can still be delicious. You might need to adjust the cooking time. Regular potatoes may cook faster than sweet potatoes.
What’s the nutritional value of sweet potato fries?
Sweet potato fries are high in vitamins A and C. They are also a good source of fiber. Compared to regular fries, they have fewer calories and more nutrients. This makes them a healthier choice for a snack or side dish.
Cooking Time and Temperature
What is the optimal temperature for baking sweet potato fries?
The best temperature for baking sweet potato fries is 425°F (220°C). This high heat helps them cook evenly and get crispy.
How long should I bake them for the best results?
Bake the fries for 25 to 30 minutes. Be sure to flip them halfway through to get an even golden color. They should look crispy and slightly browned when done.
Ingredient Substitutions
Can I use a different oil?
Yes, you can use other oils like avocado oil or canola oil. Each oil has a different flavor, but all will work well for baking.
What if I don’t have cornstarch?
If you don’t have cornstarch, you can use potato starch or even flour. Both will help create a crisp texture. Just use the same amount as the cornstarch in the recipe.
Making sweet potato fries is simple and fun. You learned the key ingredients and steps to create crispy fries. I shared tips for seasoning and presentation to elevate your meal. You can also explore variations and alternative cooking methods. Storing and reheating properly ensures you can enjoy leftovers without losing quality.
Incorporate your favorite flavors and get creative. Remember, these fries are a tasty, healthy option for any meal. Enjoy your cooking adventure!


