Crispy Air Fryer Chickpeas Tasty Snack Delight

Are you ready to transform a simple can of chickpeas into a crunchy delight? My recipe for Crispy Air Fryer Chickpeas makes a fantastic snack that’s healthy and easy. With just a few spices and olive oil, you can whip up a tasty treat in minutes. Perfect for a movie night or a salad topper, these crispy bites will be your new go-to snack. Let’s dive in and get cooking!
Ingredients
Main Ingredients
- 1 can (15 oz) chickpeas, thoroughly drained and rinsed
- 1 tablespoon extra virgin olive oil
Spice Mixture
- 1 teaspoon smoked paprika
- 1/2 teaspoon garlic powder
- 1/2 teaspoon onion powder
- 1/2 teaspoon ground cumin
- 1/4 teaspoon cayenne pepper (adjust for spice preference)
- Sea salt, to taste
Optional Garnishes
- Fresh parsley, finely chopped (for garnish)
I love using simple ingredients to create a tasty snack. Chickpeas are my favorite base. They pack protein and fiber, making them a smart choice.
First, grab a can of chickpeas. Drain it well and rinse under cold water. This step removes excess salt and makes them cleaner. Pat them dry with paper towels. The drier they are, the crunchier they will be!
Next, you’ll need some olive oil. It adds flavor and helps the spices stick. Measure out one tablespoon and toss it with the chickpeas.
Now let’s talk spices! I use smoked paprika for a warm, smoky flavor. Garlic powder and onion powder give it a savory kick. Ground cumin adds depth, while cayenne pepper brings a subtle heat. Adjust the cayenne based on your taste. Finally, add sea salt to enhance all the flavors.
You can also garnish with fresh parsley. It adds a nice color and freshness to the dish.You’ll love how easy it is to whip up these crispy air fryer chickpeas!
Step-by-Step Instructions
Preparation Steps
- Preheat air fryer to 400°F (200°C) for roughly 5 minutes.
- Drain and rinse chickpeas, then pat dry.
Getting the air fryer hot is key. This step helps the chickpeas crisp up well. After preheating, drain a can of chickpeas. Rinse them under cold water to wash off the canned taste. Next, pat them dry with paper towels. This step is vital for achieving that perfect crunch. If you want, you can remove any loose skins for extra crispiness.
Seasoning and Cooking
- Combine chickpeas with olive oil and spices in a bowl.
- Spread chickpeas in a single layer in the air fryer basket.
Now it’s time to season! In a medium bowl, mix the chickpeas with olive oil and your favorite spices. For this recipe, I use smoked paprika, garlic powder, onion powder, ground cumin, and cayenne pepper. Stir until each chickpea is well-coated. Then, spread the seasoned chickpeas in a single layer in the air fryer basket. Make sure they aren’t crowded. This allows hot air to circulate, ensuring even cooking.
Air Frying Process
- Air fry for 15 to 18 minutes, shaking the basket halfway through.
- Allow cooling for a few minutes before serving.
Set the timer for 15 to 18 minutes. Halfway through, shake the basket to help the chickpeas cook evenly. Look for a golden brown color and a nice crunch. Once done, remove the chickpeas from the air fryer. Let them cool for a few minutes. This cooling time helps them get even crunchier. Now they’re ready to enjoy! You can use them as a snack or a crunchy topping for salads.
Tips & Tricks
Achieving Perfect Texture
To make your chickpeas super crunchy, pat them dry well after rinsing. This step helps remove any excess moisture. When you place them in the air fryer, shake the basket halfway through cooking. This move ensures even cooking on all sides.
Seasoning Variations
Feel free to get creative with your spices! You can try different herbs like rosemary or even curry powder for a fun twist. If you want a cheesy flavor, add a sprinkle of cheese right before serving.
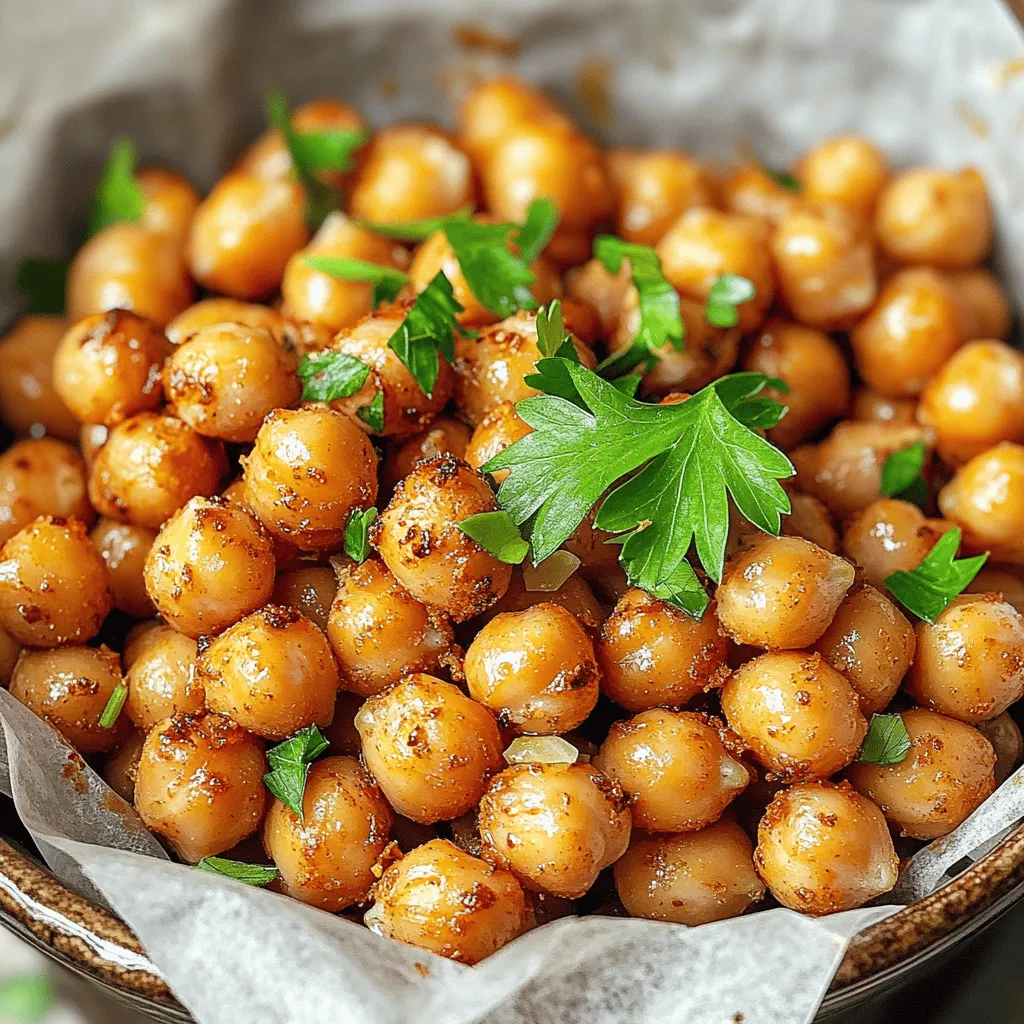
Presentation Ideas
For a charming look, serve your crispy chickpeas in small bowls lined with parchment paper. If you like to show off their crunchiness, use clear glass containers. Both options make your snack look appealing and ready to enjoy.

Variations
Flavor Profiles
I love to play with flavors when making crispy air fryer chickpeas. Here are two tasty ideas:
- Spicy BBQ Chickpeas: Add BBQ seasoning for a smoky flavor. This mix gives the chickpeas a sweet and spicy kick.
- Mediterranean: Incorporate herbs like oregano and thyme for an aromatic twist. This version is fresh and full of flavor.
Serving Suggestions
These crispy chickpeas are versatile and fun to eat. Here are some ways to enjoy them:
- Use as a crunchy topping on salads or grain bowls. They add great texture and taste.
- Enjoy as a nutritious standalone snack. They are perfect for munching while watching TV.
Dietary Adaptations
This recipe is both gluten-free and vegan-friendly. You can adapt it further:
- Adjust spices to suit your taste or dietary needs. If you want more heat, add more cayenne. If you prefer milder flavors, skip the spicy ingredients.
Storage Info
Keeping Them Fresh
Store your crispy air fryer chickpeas in an airtight container at room temperature. This helps keep them crunchy and tasty. Avoid leaving them out in open air, as that makes them soggy.
Shelf Life
These chickpeas are best eaten within 3 days for the best crunch. You can put them in the fridge, but they may lose their crispiness. If you notice them getting soft, it’s time to enjoy them!
Recrisping Techniques
If you have leftovers, you can air fry them for a few minutes to regain their crunch. Just pop them back in the air fryer at 400°F (200°C) for about 3 to 5 minutes. Avoid using the microwave. Microwaving will make them soggy and less enjoyable.
FAQs
How do I make crispy air fryer chickpeas?
- Follow the detailed steps in the recipe above.
Can I use dried chickpeas?
- Yes, but they require soaking and cooking first.
What dipping sauces pair well?
- Try hummus, tzatziki, or a spicy yogurt dip.
Are crispy air fryer chickpeas healthy?
- Yes, they’re a high-protein, low-calorie snack option!
This blog post showed you how to make crispy air fryer chickpeas. We covered the key ingredients, including chickpeas and spices. You learned step-by-step instructions for preparation and cooking. Tips for perfect crunch and variations for flavor make it easy to adapt. Storing options ensure they stay fresh, and I answered commonly asked questions.
Enjoy experimenting with this tasty snack. The options are endless. You can make it your own!


![For One Pot Fiesta Rice, you need: - 1 cup long-grain rice - 2 cups vegetable broth - 1 can (15 oz) black beans, drained and rinsed - 1 cup corn kernels (choice of fresh, frozen, or canned) - 1 red bell pepper, diced - 1 green bell pepper, diced - 1 small onion, finely chopped - 2 cloves garlic, minced These ingredients create a base full of colors and flavors. The rice absorbs all the tasty broth, making it fluffy and delicious. The black beans add protein, while the corn and peppers provide sweetness and crunch. You will also need: - 1 teaspoon ground cumin - 1 teaspoon chili powder - Salt and pepper to taste These spices give the dish its kick. Cumin adds warmth, while chili powder brings a bit of heat. Adjust the salt and pepper to balance the flavors just right. To finish off your meal, use: - Fresh cilantro, chopped (for garnish) - Lime wedges (for serving) Cilantro adds freshness, and lime juice brightens the dish. Together, they enhance the fiesta feel. The combination of these ingredients makes this dish not just tasty but also visually appealing. You can find the full recipe to guide you through the cooking process. - Heat olive oil and sauté onion and garlic. - Add diced bell peppers. Start by heating one tablespoon of olive oil in a large pot over medium heat. Once hot, add the finely chopped onion and minced garlic. Sauté for about three to four minutes. You want the onion to become soft and clear. The garlic will fill your kitchen with a lovely aroma. Next, toss in your diced red and green bell peppers. Cook them for two to three more minutes. Stir occasionally until they soften and brighten in color. - Incorporate spices and rice. - Simmer with vegetable broth. Now it's time to spice things up! Sprinkle in one teaspoon each of ground cumin and chili powder. Stir well to mix the spices into the onion and pepper mixture. Let them cook for one minute. This step helps release their rich flavors. Next, add one cup of long-grain rice to the pot. Stir it thoroughly so each grain gets coated with the mixture. Now, pour in two cups of vegetable broth. Turn the heat up to bring it to a boil. Once boiling, reduce the heat to low. Cover the pot and let it simmer for about 15 to 20 minutes. Do not lift the lid during this time; you want to keep the steam in. - Add black beans and corn. - Season and fluff. - Presentation tips. When the rice is tender and all the liquid is gone, gently fold in one can of drained black beans and one cup of corn. Allow the mixture to heat through for about five minutes on low heat. Afterward, taste your dish and season with salt and pepper as needed. Use a fork to fluff the rice gently, mixing all the ingredients together. For a beautiful presentation, serve the fiesta rice in bright bowls. Top with fresh cilantro and add lime wedges on the side. This adds a zesty touch and makes your meal look vibrant. Enjoy the colorful feast you've created! You can find the Full Recipe for more details. To prevent rice from sticking, rinse the rice before cooking. This step removes excess starch. After rinsing, dry the rice with a towel. This helps the grains stay separate. Next, use the right water ratio. For every cup of rice, use two cups of liquid. The right ratio keeps the rice fluffy. Simmering time is key for perfect rice. After bringing the pot to a boil, reduce the heat. Cover the pot tightly and let it simmer. Avoid lifting the lid during cooking. This keeps the steam inside, which is crucial. Allowing it to simmer for 15-20 minutes ensures even cooking. For an extra kick, try adding spices like paprika or oregano. These spices blend well with the base flavors. You can also add a pinch of cayenne for heat. Fresh ingredients like diced tomatoes or jalapeños work great too. Top your fiesta rice with fresh avocado or sour cream. It adds creaminess and balances the spice. Using pre-cooked ingredients saves time. You can find canned black beans and corn at the store. These options cut down your prep time significantly. You can also use pre-chopped veggies from the store. This helps you skip the chopping step. Quick prep ideas include using frozen vegetables. They cook fast and still taste fresh. Keep them on hand for busy nights. You can even prepare the rice ahead of time. Just reheat it when you're ready to serve. For the full recipe, check [Full Recipe]. {{image_4}} You can easily customize One Pot Fiesta Rice with protein. Try adding chicken or shrimp. For chicken, use bite-sized pieces and cook them first. Add them back in with the beans and corn. Shrimp cooks quickly, so toss them in during the last few minutes. They should turn pink when done. If you want a vegetarian dish, consider adding tofu or tempeh. Both soak up flavors well. Cut them into small cubes and sauté them with the veggies. You can also use extra beans to boost protein. Want a spicy kick? Add jalapeños to the mix. Dice them finely and sauté with the onions and garlic. This will give your dish a nice heat. Adjust the amount to fit your taste. For a Southwest edition, swap out black beans for pinto or kidney beans. You can also add diced tomatoes or corn salsa for a fresh taste. These small changes can make a big difference in flavor. If you're looking for alternatives to long-grain rice, try quinoa or cauliflower rice. Quinoa is packed with protein and cooks in about the same time. Rinse it well before cooking to remove any bitterness. Cauliflower rice is a great low-carb option. It cooks faster, so reduce your liquid and cooking time. You don't want it mushy. For a nuttier flavor, brown rice is another option. Just know it will take longer to cook, so adjust your time and liquid accordingly. These substitutes keep your meals fresh and exciting! Store your One Pot Fiesta Rice in an airtight container. It stays fresh for 3 to 5 days. Check for any signs of spoilage before using leftovers. To keep the rice at its best, let it cool down before sealing it. This helps prevent moisture build-up, which can cause mushy rice. You can freeze portions of One Pot Fiesta Rice for later. Use freezer-safe bags or containers. Make sure to remove as much air as possible to avoid freezer burn. It will last up to 3 months in the freezer. When you're ready to eat, thaw it overnight in the fridge. For quick meals, you can microwave frozen rice straight from the freezer. To reheat, place the rice in a pot with a splash of water. Cover and warm it over low heat. Stir occasionally to heat evenly. If it seems dry, add a bit more water. You can also microwave it. Just add a little water and cover it. After reheating, taste and adjust the flavors. You may want to add a squeeze of lime or a sprinkle of fresh cilantro for a burst of flavor. Can I use brown rice instead of white? Yes, you can use brown rice. It takes longer to cook. Add about 10-15 minutes to the cooking time. You may also need to add more broth to keep it moist. How do I adjust the recipe for more servings? To make more servings, simply double the ingredients. Use a larger pot to fit everything. Cooking time may not change much, but check the rice to be sure. What are the best side dishes to serve with One Pot Fiesta Rice? Some great sides include grilled veggies, avocado slices, or a fresh salad. You could also serve it with tortilla chips for a crunchy contrast. How to tell when the rice is cooked? The rice is ready when it has absorbed all the liquid. It should look fluffy and tender. You can taste a grain to check if it’s done. Can I substitute vegetable broth with chicken broth? Yes, chicken broth works well. It adds a different flavor that many people enjoy. Just make sure to choose low-sodium broth if you watch your salt intake. What is the calorie count per serving? Each serving has about 250 calories. This can vary based on additional toppings or sides added. Are there any allergens in this recipe? This recipe is generally free from common allergens. However, check the labels on canned goods for potential allergens. If you are sensitive to beans or corn, be cautious. This blog covered a simple recipe for One Pot Fiesta Rice. We explored ingredients like long-grain rice, black beans, and fresh veggies. I shared tips on cooking techniques and storage methods. You can enjoy many variations to suit your taste. Whether you prefer chicken, shrimp, or a spicy twist, the options are endless. This dish is easy to make and great for leftovers. Enjoy your cooking adventure!](https://dishtreats.com/wp-content/uploads/2025/07/eb10aa28-84d4-4922-bf2e-e4835b83e1a4-768x768.webp)


