Creamy White Cheddar Mac and Cheese Delightful Dish

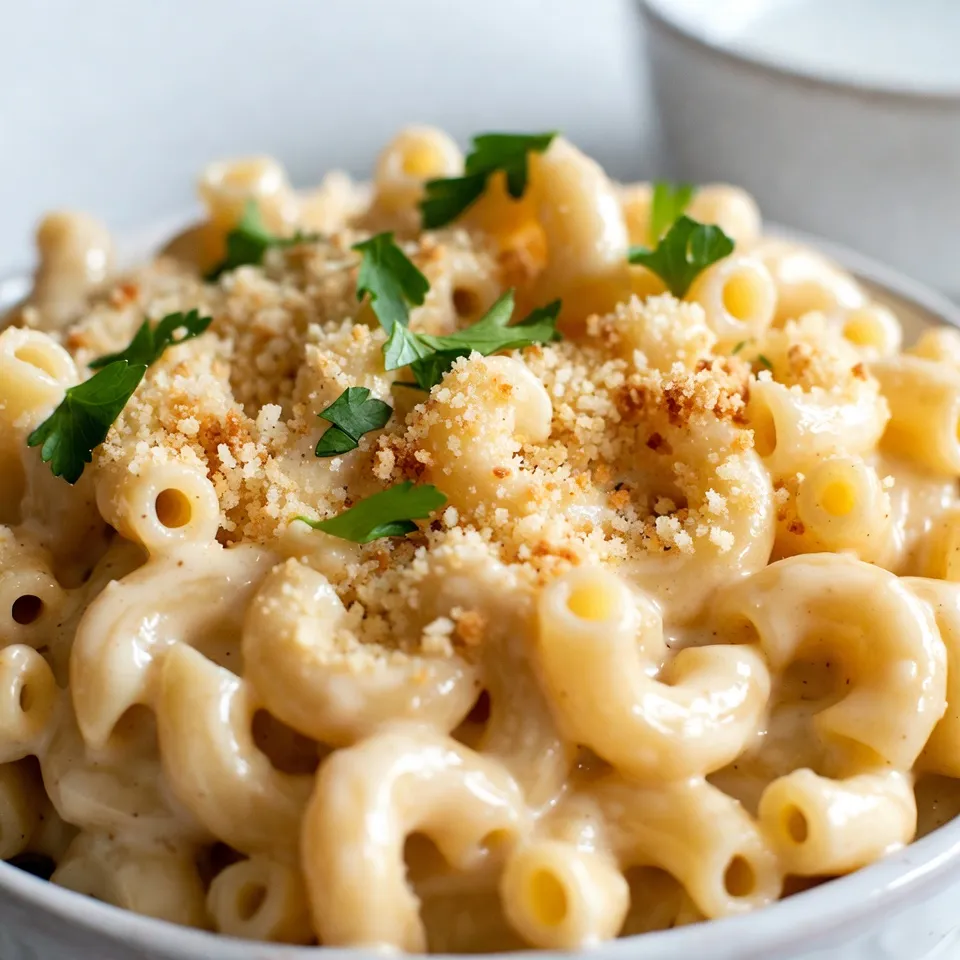
Craving a comforting bowl of creamy white cheddar mac and cheese? You’re in the right place! This delightful dish transforms simple ingredients into a rich, cheesy indulgence that warms the soul. Whether you’re making it for a family dinner, a special event, or just because, I’ll guide you step-by-step to achieve the perfect creamy texture and cheesy flavor. Let’s dive in and make your mac and cheese dreams come true!
Why I Love This Recipe
- Comfort Food Classic: This creamy white cheddar mac and cheese is the ultimate comfort food that warms the soul and satisfies cravings.
- Easy to Make: This recipe is simple and quick, making it perfect for weeknight dinners or unexpected guests.
- Customizable: You can easily customize this dish by adding your favorite ingredients, such as vegetables or proteins, to suit your taste.
- Decadent Flavor: The combination of white cheddar and Parmesan creates a rich and velvety cheese sauce that is truly irresistible.
Ingredients
List of Ingredients
- 8 ounces elbow macaroni
- 2 tablespoons unsalted butter
- 2 tablespoons all-purpose flour
- 2 cups whole milk
- 1 teaspoon Dijon mustard
- 1/2 teaspoon garlic powder
- 1/4 teaspoon onion powder
- 1/4 teaspoon paprika
- 1/2 teaspoon salt
- 1/4 teaspoon black pepper
- 2 cups shredded white cheddar cheese
- 1/2 cup grated Parmesan cheese
- 1/4 cup panko breadcrumbs (optional)
- 1 tablespoon fresh parsley, finely chopped (for garnish)
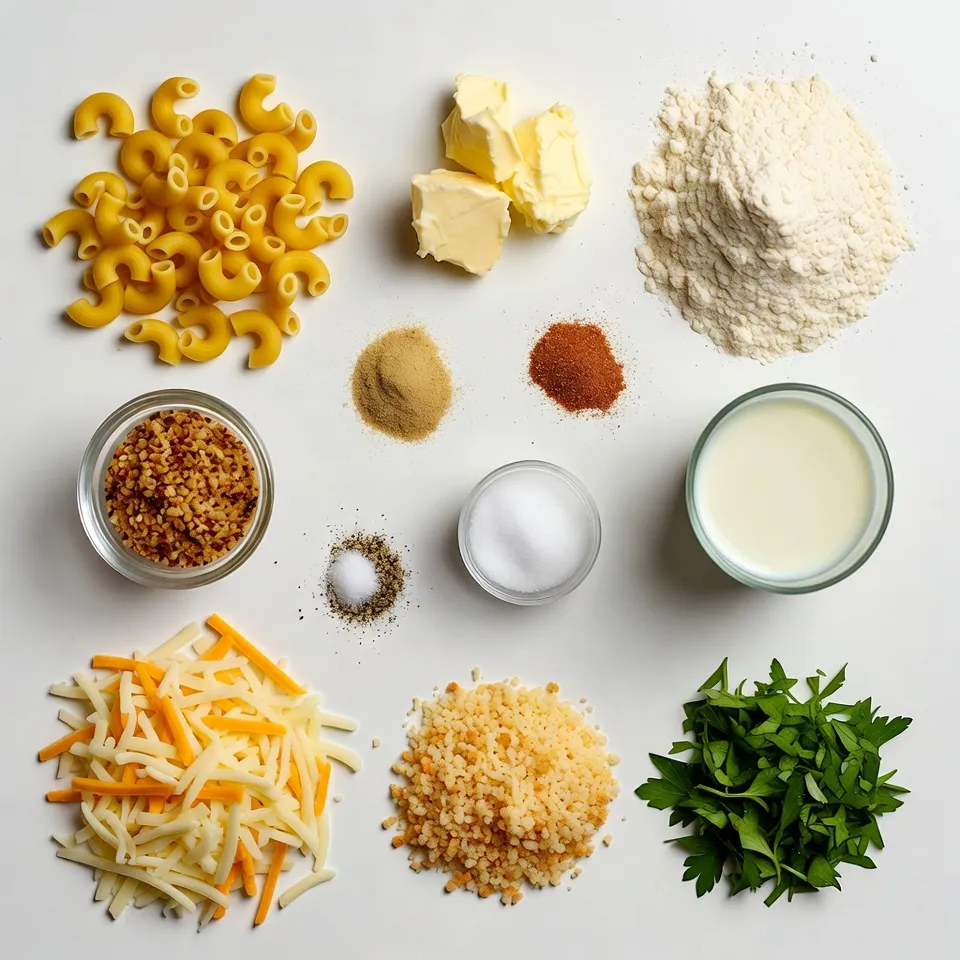
In this creamy white cheddar mac and cheese, I focus on simple yet tasty ingredients. You will need elbow macaroni to form the base. The unsalted butter helps create a rich flavor. Flour thickens the sauce, while whole milk gives it a creamy texture.
Dijon mustard adds a hint of tang. Garlic and onion powders offer depth in taste. Paprika adds a bit of warmth, and salt and pepper enhance the overall flavor. The stars are the two cheeses: white cheddar for creaminess and Parmesan for a savory kick.
Lastly, panko breadcrumbs, if used, provide a delightful crunch. Fresh parsley adds a pop of color and freshness when you serve it. With these ingredients, you can create a mac and cheese that is rich, creamy, and full of flavor.

Step-by-Step Instructions
Cooking the Elbow Macaroni
- Bring salted water to a boil.
- Cook macaroni until al dente.
- Drain and set aside.
Start with a large pot. Fill it with water and add salt. This step is key. The salt helps flavor the pasta. Once the water boils, add 8 ounces of elbow macaroni. Stir gently. Cook until the pasta is just firm, about 7-8 minutes. Drain the macaroni in a colander. Set it aside while you make the sauce.
Preparing the Roux
- Melt butter in the pot.
- Whisk in flour for 2 minutes.
In the same pot, add 2 tablespoons of unsalted butter. Heat it over medium. Once melted, add 2 tablespoons of all-purpose flour. Whisk the mixture. This creates a roux, which helps thicken your cheese sauce. Keep whisking for about 2 minutes until it is light golden brown.
Making the Cheese Sauce
- Gradually add milk while whisking.
- Incorporate seasonings (mustard, garlic powder, etc.).
Slowly pour in 2 cups of whole milk. Whisk constantly to avoid lumps. Add 1 teaspoon of Dijon mustard, 1/2 teaspoon garlic powder, 1/4 teaspoon onion powder, 1/4 teaspoon paprika, 1/2 teaspoon salt, and 1/4 teaspoon black pepper. Stir well. Cook for 5-7 minutes until the sauce thickens and becomes creamy.
Adding the Cheeses
- Lower heat to simmer.
- Stir in shredded cheddar and Parmesan.
Now, reduce the heat to a gentle simmer. Begin adding 2 cups of shredded white cheddar cheese and 1/2 cup of grated Parmesan cheese. Stir until both cheeses melt completely. This should create a smooth, velvety sauce.
Mixing Pasta with Sauce
- Combine cooked macaroni with cheese sauce.
- Ensure pasta is well-coated.
Next, add the drained macaroni to your cheese sauce. Stir gently but thoroughly. Make sure the pasta is well-coated with that rich cheese mixture. You want every piece of macaroni to get that creamy goodness.
Optional Baking Step
- Preheat oven and prepare baking dish.
- Sprinkle panko breadcrumbs and bake.
If you love a crunchy top, preheat your oven to 350°F (175°C). Transfer your creamy mac and cheese to a lightly greased baking dish. If using, sprinkle 1/4 cup of panko breadcrumbs evenly over the top. Bake in the oven for 15-20 minutes. Look for a golden brown crust that is bubbly and delicious.
Tips & Tricks
Achieving Creaminess
To make your mac and cheese super creamy, use whole milk. Whole milk gives the sauce a rich and smooth texture. Stir constantly when you add the cheese. This helps it melt evenly and keeps the sauce silky.
Perfecting Flavor
Want to spice things up? Add a pinch of cayenne. This small touch adds warmth without being too hot. You can also try different cheese blends. Mixing cheeses like gouda or sharp cheddar can create fun new flavors.
Baking vs. Stovetop
Baking your mac and cheese gives it a crunchy top. This adds texture and makes it look fancy. If you want a quick meal, use the stovetop method. It keeps the dish creamy and is ready in no time.
Pro Tips
- Use Fresh Ingredients: Always opt for fresh white cheddar and Parmesan cheese for a richer flavor and creamier texture. Freshly grated cheese melts better than pre-shredded varieties.
- Perfectly Cooked Pasta: Make sure to cook your macaroni until al dente. This ensures that the pasta retains its shape and texture when mixed with the creamy sauce.
- Add Spice: Feel free to experiment with spices! Adding a pinch of cayenne pepper or a dash of hot sauce can elevate the flavor profile of your mac and cheese.
- Make Ahead: You can prepare the cheese sauce and macaroni ahead of time. Store them separately in the fridge and combine them right before baking for a quick meal.

Variations
Add-Ins for Extra Flavor
You can make your mac and cheese even better. Try adding cooked bacon or ham for a savory touch. The saltiness of the meat blends well with the creamy cheese. You can also mix in steamed broccoli or spinach for a healthy crunch. These greens add color and nutrients to your dish.
Different Cheeses to Try
Don’t feel stuck with just white cheddar. You can substitute sharp cheddar or gouda for a different flavor. Gouda adds a nice smokiness, while sharp cheddar brings a tangy bite. You can also explore flavored cheeses like pepper jack or smoked cheese. This can give your dish a unique twist that surprises everyone.
Gluten-Free Options
If you need a gluten-free version, it’s easy to adapt. Use gluten-free pasta for the base. This keeps the texture similar to regular pasta. For the roux, simply substitute gluten-free flour. This will help thicken your cheese sauce without any gluten. Enjoy a tasty dish that everyone can love!
Storage Info
Refrigerating Leftovers
To keep your creamy white cheddar mac and cheese fresh, store it in an airtight container. This helps prevent it from drying out or absorbing other smells in the fridge. For the best taste, enjoy your leftovers within 3-5 days. The cheese sauce will stay creamy, making each bite just as delightful as the first.
Freezing Instructions
You can freeze your mac and cheese before or after baking. If you freeze it before baking, make sure to use freezer-safe containers. This way, you can save time later. If you freeze it after baking, let it cool first. Wrap it well to keep it from getting freezer burn.
Reheating Tips
For a crispy topping, reheat your mac and cheese in the oven. Set it at 350°F (175°C) and bake until warm. This method brings back that crunchy top. If you need a quick meal, use the microwave instead. Heat in short bursts, stirring in between, to warm it evenly. Enjoy!
FAQs
How can I make mac and cheese creamier?
To make mac and cheese creamier, use whole milk and add extra cheese. Stir the cheese in slowly to help it melt smoothly. You can also add a little cream for a richer texture. Mixing in some cream cheese or sour cream gives it a nice tang. Don’t forget to stir often as you cook the sauce.
Can I substitute different cheeses?
Yes, you can substitute different cheeses. Sharp cheddar adds a bold flavor. Gouda offers a smoky taste. Cream cheese can make the dish extra creamy. Use a mix of cheeses for a unique flavor. Just remember to melt them well into the sauce.
Is it okay to use milk alternatives?
Yes, you can use milk alternatives. Almond milk or oat milk works well. Choose unsweetened versions to avoid strange flavors. Keep in mind that the creaminess may change slightly. You might want to add a bit more cheese for extra richness.
How long does homemade mac and cheese last?
Homemade mac and cheese lasts about 3-5 days in the fridge. Store it in an airtight container to keep it fresh. If you freeze it, it can last for up to 2 months. Just reheat it well before serving.
What can I serve with mac and cheese?
You can serve mac and cheese with many sides. A simple green salad pairs well. Grilled chicken or shrimp adds protein. Roasted vegetables make a great side, too. For a fun twist, serve it with crispy bacon or fried onions on top!
In this post, we explored making a creamy and delicious mac and cheese. We covered key ingredients, step-by-step cooking, tips for flavor, and variations to try. Whether you bake or cook on the stovetop, the choice is yours. Remember, adding extras like bacon or broccoli can enhance the dish. Store your leftovers properly for later enjoyment. Enjoy your cooking adventure and make this classic dish your ow

Cheesy Delight: Creamy White Cheddar Mac and Cheese
Ingredients Â
- 8 ounces elbow macaroni
- 2 tablespoons unsalted butter
- 2 tablespoons all-purpose flour
- 2 cups whole milk
- 1 teaspoon Dijon mustard
- 0.5 teaspoon garlic powder
- 0.25 teaspoon onion powder
- 0.25 teaspoon paprika
- 0.5 teaspoon salt
- 0.25 teaspoon black pepper
- 2 cups shredded white cheddar cheese
- 0.5 cup grated Parmesan cheese
- 0.25 cup panko breadcrumbs (optional)
- 1 tablespoon fresh parsley, finely chopped (for garnish)
InstructionsÂ
- Begin by bringing a large pot of salted water to a rolling boil. Once boiling, add the elbow macaroni, and cook it according to the package instructions until it reaches al dente. Drain the macaroni in a colander and set it aside for later.
- In the same pot where you cooked the macaroni, melt the unsalted butter over medium heat. Once the butter has completely melted, whisk in the all-purpose flour. Stir the mixture constantly for about 2 minutes until it turns a light golden brown.
- Gradually and slowly pour in the whole milk while whisking vigorously to prevent any lumps from forming. Add the Dijon mustard, garlic powder, onion powder, paprika, salt, and black pepper, stirring well to combine. Continue to cook this mixture for 5-7 minutes over medium heat, stirring frequently until it thickens slightly and becomes creamy.
- Lower the heat to a gentle simmer. Begin adding the shredded white cheddar cheese and grated Parmesan cheese to the mixture, stirring continuously until both cheeses are fully melted and the sauce is smooth and velvety.
- Carefully add the drained macaroni to the rich cheese sauce, stirring gently until the pasta is thoroughly coated with the cheese.
- If you prefer a baked, crunchy topping, preheat your oven to 350°F (175°C). Transfer the creamy mac and cheese into a lightly greased baking dish. If using, sprinkle panko breadcrumbs evenly over the top. Bake in the preheated oven for 15-20 minutes, or until the top is golden brown and bubbly.
- Once baked, remove the dish from the oven and allow it to cool for a few minutes. For an elegant touch, garnish with freshly chopped parsley before serving.


![- 1 lb (450g) chicken breast, thinly sliced - 1 cup fresh Thai basil leaves, packed - 3 cloves garlic, minced - 2 red Thai chili peppers, thinly sliced (adjust based on your spice preference) For this dish, I prefer chicken breast. It cooks quickly and stays juicy. Fresh Thai basil gives this meal its unique flavor. Garlic adds a nice aroma, and Thai chili peppers bring heat. You can control the spice by adding more or less chili. - 2 tablespoons soy sauce - 1 tablespoon oyster sauce (or substitute with mushroom sauce for vegetarian) - 1 tablespoon fish sauce (or an extra tablespoon of soy sauce for vegetarian) - 1 teaspoon sugar (to balance flavors) - 1 tablespoon vegetable oil (for frying) These sauces are key to great taste. Soy sauce offers saltiness, while oyster and fish sauces add depth. Sugar balances the salty flavors, making everything taste better. - 1 bell pepper, sliced (your choice of color for visual appeal) - 1 small onion, sliced into thin wedges - Optional: other vegetables for added nutrition I like using bell pepper and onion for color and crunch. You can add other veggies like carrots or snap peas. They bring more nutrition and flavor, making the dish more vibrant. For the full recipe, refer to the [Full Recipe]. To start, you need to combine the chicken with the sauces. In a medium bowl, add the sliced chicken breast, soy sauce, oyster sauce, fish sauce, and sugar. Mix these ingredients well so the chicken gets all the flavor. Let it marinate for 15 minutes. This short time helps the chicken absorb the tasty sauces. Next, heat the vegetable oil in a large skillet or wok over medium-high heat. You want the oil to shimmer before adding anything. Then, add the minced garlic and sliced Thai chili peppers. Stir-fry them for about 30 seconds until they smell amazing. Be careful not to burn the garlic. Now, add the marinated chicken to the pan. Spread it out evenly for even cooking. Stir-fry for about 5 to 7 minutes. Cook until the chicken is no longer pink and has a nice brown color. After that, toss in the sliced bell pepper and onion. Stir-fry for another 3 to 4 minutes. This will make the vegetables tender but still crisp. Once the chicken and veggies are done, take the skillet off the heat. Gently fold in the fresh Thai basil leaves. They will wilt quickly from the heat and add a lovely aroma. Serve the dish hot, over a bed of fluffy jasmine rice. This rice complements the stir-fry well. Enjoy your Thai Basil Chicken Stir-Fry! For the full recipe, check out the details above. Using fresh ingredients makes a big difference. Fresh Thai basil gives a sweet and fragrant flavor to the dish. Always choose bright green basil leaves. They should smell strong and sweet. The chicken should be fresh, too. This keeps your stir-fry tasty and safe to eat. For the best flavor, cook on high heat. A hot pan helps to sear the chicken. This adds a nice caramel color and enhances the taste. When you add garlic and chili, cook them quickly. This brings out their strong flavors without burning them. You can change the heat level easily. If you want it milder, remove the seeds from the chili peppers. You can also use fewer peppers or substitute with sweet bell peppers. If you like a kick but want it less spicy, try adding sugar. It balances the heat. You can also use a bit of honey for sweetness without heat. Pair your Thai basil chicken stir-fry with jasmine rice. The rice absorbs the sauce well. You can also add a side of steamed veggies for extra nutrition. For garnishes, consider adding lime wedges or crushed peanuts. They add color and crunch. Fresh cilantro or extra basil leaves also make it pop. Enjoy your meal with these simple touches! For the full recipe, check out the details above. {{image_4}} For a vegetarian or vegan version, you can swap chicken for tofu or tempeh. These options give a nice texture. Use mushroom sauce instead of oyster sauce. It brings depth and umami flavor. For the fish sauce, simply add an extra tablespoon of soy sauce. This keeps the taste bold. To maintain flavor, marinate the tofu or tempeh just like chicken. Allow it to soak up the sauces. When cooking, make sure to press out excess moisture. This helps achieve that nice, crispy texture we all love. If you want to try something new, switch the chicken for shrimp or beef. Shrimp cooks quickly, so cut down the cooking time to about 3-4 minutes. Beef takes longer. Slice it thin and cook it for about 6-8 minutes. Remember, cooking times change based on what protein you use. Always make sure your protein is fully cooked before adding in the veggies. Want to shake things up? Add sauces like teriyaki or sriracha for an exciting twist. Teriyaki gives a sweet flavor, while sriracha adds heat. You can even mix both for a sweet and spicy kick. Feel free to experiment with herbs and spices too. Adding cilantro or mint can brighten the dish. Try a sprinkle of lime juice for an extra zest. These tiny changes can create a whole new taste experience. For the full recipe, check the section above. Enjoy cooking! To keep your Thai basil chicken stir-fry fresh, store it in an airtight container. Refrigerate the leftovers within two hours of cooking. If you want to save it longer, freeze the stir-fry. Make sure to cool it completely before freezing. This method helps retain flavor and texture. When you reheat your stir-fry, use a skillet for the best results. Heat it over medium warmth and stir often. This keeps the chicken juicy and prevents it from drying out. For rice, add a splash of water and cover it. This helps the rice steam and become fluffy again. In the fridge, your Thai basil chicken stir-fry lasts up to four days. If frozen, it can last for about three months. Always check for off smells or changes in color. If you see these, it's best to discard it for safety. Thai Basil Chicken Stir-Fry has roots in Thai street food. This dish reflects the vibrant flavors of Thai cuisine. It showcases fresh herbs, bold spices, and simple cooking techniques. Thai basil, known for its unique flavor, is key to this dish. It adds a sweet and slightly spicy note that enhances the chicken. This meal represents the balance of sweet, salty, and spicy tastes typical in Thai dishes. Each bite transports you to bustling markets in Thailand. Yes, you can prepare Thai basil chicken stir-fry in advance. Cook and store it in the fridge for up to three days. To keep it fresh, store it in an airtight container. When you are ready to eat, simply reheat it on the stove. This dish tastes even better the next day as flavors meld. Serve it over freshly cooked jasmine rice for a quick meal. If you cannot find Thai basil, you have options. Sweet basil or holy basil works well as a substitute. Sweet basil offers a milder flavor, while holy basil is spicier. You can also mix in a bit of mint for a fresh twist. While these substitutes change the taste slightly, they still create a tasty dish. Just remember, the flavor will differ from the original recipe. The spice level of Thai Basil Chicken Stir-Fry can vary. It depends on the number of Thai chili peppers you use. Typically, this dish has a mild to medium heat. If you prefer a milder dish, use fewer chilis or remove the seeds. For those who love heat, add extra chilis or a dash of hot sauce. Adjusting spice levels allows everyone to enjoy this flavorful meal. Thai Basil Chicken Stir-Fry is a simple yet flavorful dish. You learned about the key ingredients, like fresh basil and chicken. The step-by-step instructions make cooking easy, even for beginners. We explored tips to enhance flavor and adjust spice levels to suit your taste. You can even try fun variations with different proteins or herbs. Enjoy making it your own, and savor the fresh flavors. Every bite will bring joy to your table.](https://dishtreats.com/wp-content/uploads/2025/06/20a2f9de-1755-4b6a-ade1-393123d10e24-768x768.webp)


![To make Blueberry Lemon Breakfast Quinoa, you will need the following ingredients: - 1 cup quinoa, thoroughly rinsed - 2 cups almond milk (or your preferred milk) - 1 cup fresh blueberries (or frozen if fresh are not available) - Zest of 1 lemon - Juice of 1 large lemon - 2 tablespoons pure maple syrup (or honey for sweetness) - 1 teaspoon pure vanilla extract - 1/2 teaspoon ground cinnamon - A pinch of salt - Optional toppings: sliced almonds, extra blueberries, or a generous dollop of Greek yogurt Choose bright blueberries with no wrinkles. Look for firm berries, as they taste best. For lemons, pick ones that feel heavy. They should have a smooth, shiny skin. This shows they are juicy. When choosing quinoa, look for a grain that is clean and free of debris. If you need a non-dairy milk, try oat milk or coconut milk. Both have nice flavors. For sweeteners, you can use agave syrup or brown sugar. Adjust the amount to your taste. If you want to skip the sweetener, ripe bananas work great too. You can mash them and mix them in! Start by rinsing 1 cup of quinoa under cold water. This helps remove any bitter taste. Use a fine mesh sieve for best results. This step is key for a great flavor. Next, gather a medium saucepan. Add the rinsed quinoa to the saucepan. Pour in 2 cups of almond milk and a pinch of salt. This combination makes the quinoa creamy and rich. Place the saucepan over medium heat. Bring the mixture to a gentle boil. Watch it carefully; it can boil over quickly. Once it boils, reduce the heat to low. Cover the saucepan with a lid. Let it simmer for about 15 minutes. The quinoa will absorb most of the liquid during this time. When the quinoa is tender, remove it from heat. Allow it to sit for 5 more minutes. This helps steam the quinoa and makes it fluffy. After 5 minutes, uncover the saucepan. Use a fork to fluff the quinoa gently. This step adds air and lightness. Now, it’s time to mix in the flavors. Add the lemon zest and juice. Pour in 2 tablespoons of maple syrup, 1 teaspoon of vanilla extract, and 1/2 teaspoon of cinnamon. Stir well to combine everything. Finally, fold in the blueberries gently. Reserve some blueberries for garnishing if you like. Serve warm in bowls, and enjoy your Blueberry Lemon Breakfast Quinoa! For the full recipe, check out the details above. To get the best quinoa texture, rinse it well before cooking. This removes the bitter coating called saponin. Use two cups of liquid for every cup of quinoa. This ratio helps the quinoa absorb enough moisture. Cook it on low heat after boiling. Let it simmer for about 15 minutes. After that, let it steam for 5 more minutes. This step makes the quinoa fluffy and light. Fluff it gently with a fork at the end. This adds air and prevents clumping. Adding lemon zest brings a bright flavor. You can also try a pinch of nutmeg for warmth. Cinnamon adds a lovely spice that pairs well with blueberries. If you want more sweetness, add a little more maple syrup. For a kick, a dash of ginger powder can elevate the taste. Don’t hesitate to experiment with these flavors. Each adds its unique touch to your breakfast. This recipe serves four people. Each person gets a warm bowl full of deliciousness. For presentation, use colorful bowls that catch the eye. Top with fresh blueberries and sliced almonds. A dollop of Greek yogurt adds creaminess and visual appeal. You can also drizzle extra maple syrup for shine. Garnish with lemon wedges and mint for a refreshing look. This makes breakfast not only tasty but also beautiful. {{image_4}} You can mix in other fruits to change the flavor. Try strawberries, raspberries, or bananas. Each fruit adds its own taste. For a tropical twist, add diced mango or pineapple. These fruits work well with the lemon and blueberry. You can even use dried fruits like cranberries or apricots for a chewy texture. Just remember to adjust the sweetener if needed. Adding nuts or seeds makes the dish crunchy. Try sliced almonds, walnuts, or pecans. They add a nice contrast to the soft quinoa. You can also use seeds like chia or flaxseeds. These seeds give extra fiber and healthy fats. Toss them in right before serving for a fresh crunch. This recipe is already vegan if you use plant-based milk. To ensure it’s gluten-free, check the quinoa package. Some brands process quinoa with gluten grains. Always read labels closely. You can substitute maple syrup with agave nectar for a different sweet flavor. This breakfast fits many dietary needs, making it a great choice for everyone. For the Full Recipe, refer to earlier sections. To keep your Blueberry Lemon Breakfast Quinoa fresh, store it in an airtight container. Let the quinoa cool to room temperature before sealing it. This helps prevent moisture build-up. Place it in the fridge if you plan to eat it within a few days. When you’re ready to enjoy your quinoa again, reheat it on the stove or in the microwave. If using the stove, add a splash of almond milk to keep it moist. Stir often over low heat until warmed through. In the microwave, heat it in short bursts, stirring in between, to avoid hot spots. Your quinoa can last up to five days in the fridge. For meal prep, consider making a larger batch. You can portion it out for quick breakfasts. Store portions in single-serving containers for easy grab-and-go meals. This way, you always have a tasty and healthy breakfast on hand. For the full recipe, check out the [Full Recipe]. Yes, quinoa is a very healthy choice for breakfast. It has lots of protein and fiber. This helps keep you full longer. Quinoa also has vitamins and minerals like magnesium and iron. These nutrients are great for your body. Eating quinoa can boost your energy and help you stay focused all morning. Yes, you can use frozen blueberries. They work well in your breakfast quinoa. Frozen blueberries are picked at their peak ripeness, so they still have great flavor. Just add them straight to your cooked quinoa. There is no need to thaw them first. This makes preparation easier and faster. You can easily prepare this dish ahead of time. Cook the quinoa and mix in the other ingredients. Let it cool and then store it in an airtight container. Keep it in the fridge for up to four days. When you are ready to eat, just reheat it in the microwave. You may want to add a splash of milk to keep it creamy. For the full recipe, check out the details above. In this blog post, I covered the key ingredients for making Blueberry Lemon Breakfast Quinoa. You learned how to select fresh items and swap non-dairy options. I guided you through easy preparation and cooking steps for perfect quinoa. Remember the tips to enhance flavor with spices and zest. Explore variations by adding your favorite fruits and toppings. Lastly, I shared storage tips for leftovers to keep your meals fresh. Now you can enjoy a healthy, delicious breakfast with ease.](https://dishtreats.com/wp-content/uploads/2025/07/a7a4f1ef-75d1-48e3-91fc-d5884226b8fe-768x768.webp)
