Creamy Sun-Dried Tomato Spinach Pasta One Pot Delight

Craving a delicious and easy meal? You’re in the right place! My Creamy Sun-Dried Tomato Spinach Pasta One Pot Delight is the perfect solution. This quick, one-pot dish combines vibrant flavors with simple ingredients, making dinner a breeze. Whether you’re busy or just want something tasty, this recipe has you covered. Get ready to impress your family or treat yourself to a comforting bowl of goodness!
Ingredients
Main Ingredients
- 12 oz penne pasta
- 1 cup sun-dried tomatoes in oil, drained and sliced
- 3 cups fresh spinach, packed
Broth and Cream
- 4 cups vegetable broth
- 1 cup heavy cream or dairy-free alternative
Aromatics and Seasoning
- 1 medium onion, finely diced
- 3 cloves garlic, minced
- 1 teaspoon each of dried oregano and basil
- Salt and black pepper to taste
Optional Garnishes
- ½ cup grated Parmesan cheese or nutritional yeast
- Red pepper flakes
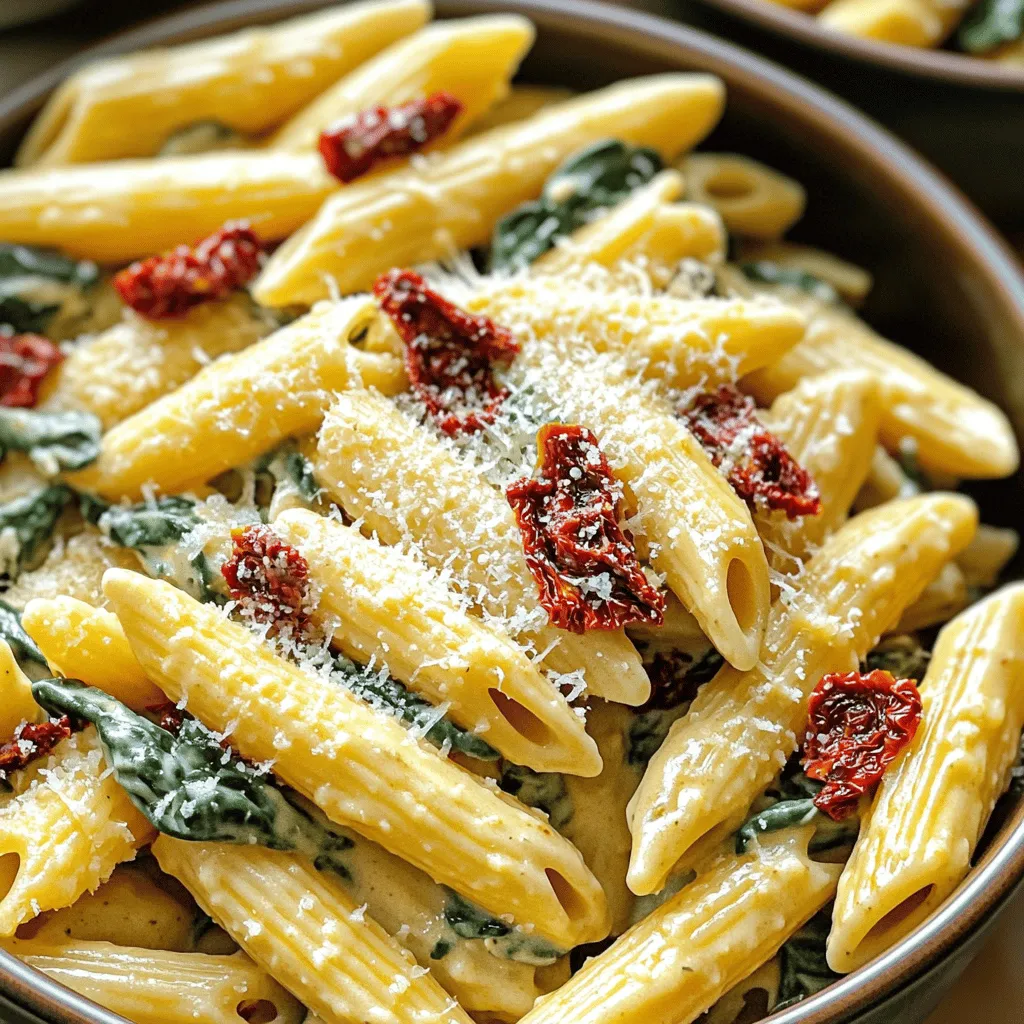
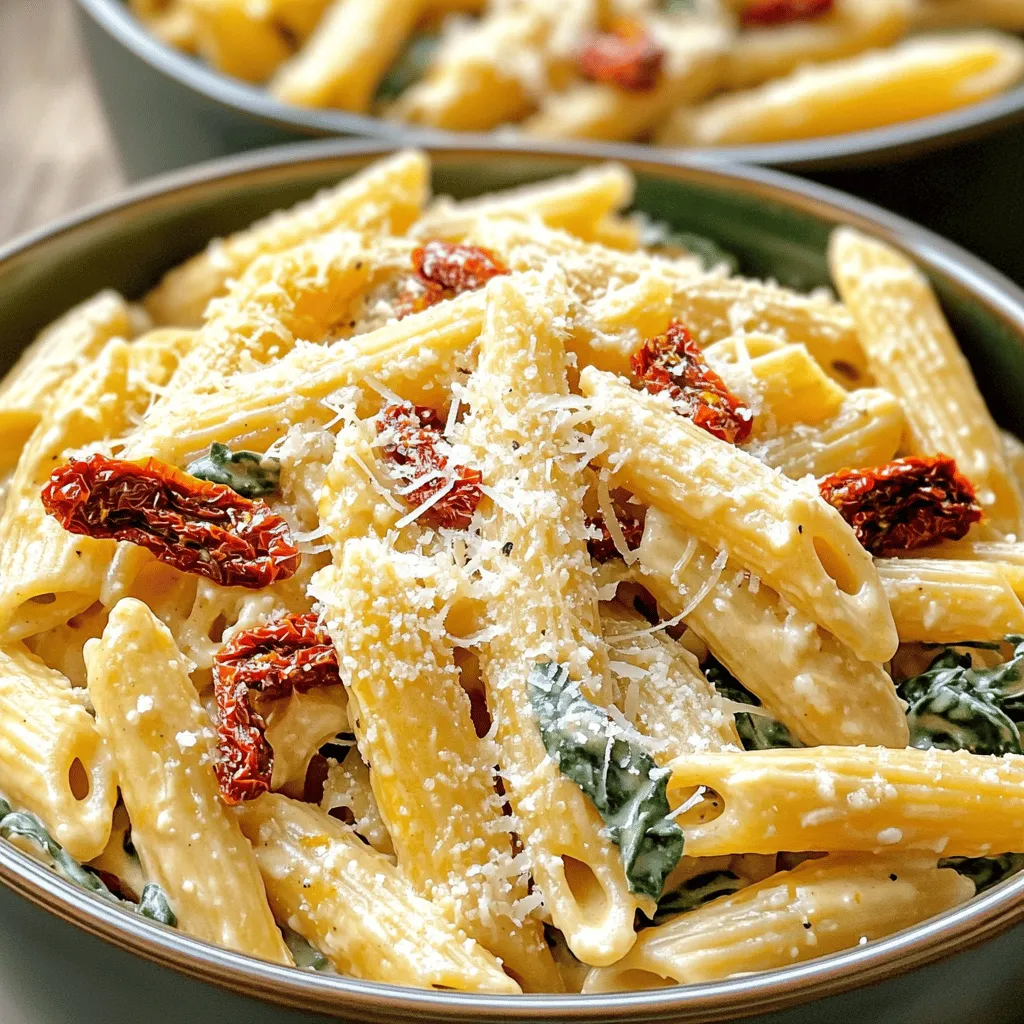
Gather these ingredients for a tasty one-pot meal. Start with the penne pasta, sun-dried tomatoes, and fresh spinach for a rich flavor. The vegetable broth and cream create a smooth sauce. Use onion and garlic for a solid base. Don’t forget the herbs for that extra kick. You can add cheese or red pepper flakes to make it special.
This dish is easy to make and fun to share. Each bite is creamy and filled with goodness. Enjoy cooking and savoring this pasta delight!
Step-by-Step Instructions
Preparing the Base
- Heat 2 tablespoons of olive oil in a large pot over medium heat.
- Add 1 finely diced medium onion. Sauté for 3-4 minutes until soft.
- Add 3 minced cloves of garlic and cook for 1 minute. Stir constantly.
Building Flavor
- Stir in 1 cup of drained and sliced sun-dried tomatoes.
- Add 1 teaspoon of dried oregano and 1 teaspoon of dried basil. Cook for 2 minutes.
- Pour in 4 cups of vegetable broth and bring to a boil.
Cooking the Pasta
- Add 12 oz of penne pasta to the pot. Stir well to mix.
- Reduce the heat and simmer, uncovered, for 10-12 minutes. Stir often until the pasta is al dente.
Final Touches
- Add 3 cups of fresh spinach directly into the pot.
- Pour in 1 cup of heavy cream and stir until the spinach wilts.
- Season with salt, black pepper, and optional red pepper flakes.
- Fold in ½ cup of grated Parmesan cheese until melted and creamy.
Tips & Tricks
Perfecting the Pasta
- To get al dente pasta, cook it until it is firm to the bite. Check the package time but start testing a minute early.
- Stir the pasta often while it cooks. This prevents it from sticking together and helps it cook evenly.
Creaminess Variations
- If you want a dairy-free option, use coconut milk or cashew cream instead of heavy cream. They add great flavor.
- For vegan cheese, try nutritional yeast. It gives a cheesy taste and is easy to mix in.
Customizing Flavors
- You can add protein to this dish. Cooked chicken, shrimp, or beans work great. They make the meal more filling.
- Adjust the spice level by adding herbs like thyme or red pepper flakes. This adds a nice kick if you like heat.

Variations
Different Types of Pasta
You can switch up your pasta choice. If you don’t want penne, try fusilli or rigatoni. Fusilli spirals hold onto the sauce well. Rigatoni’s ridges capture flavors, too. Each option brings a fun twist to your dish!
Additions and Substitutions
Feel free to add different veggies! Mushrooms bring a rich earthiness. Bell peppers add a sweet crunch. For a Mediterranean flair, toss in olives or artichokes. These additions will boost flavor and color in your pasta.
Creamy Sauce Alternatives
You can change the sauce base for a new taste. Consider using vegetable puree like cauliflower for a lighter option. If you want a creamier sauce, add more broth to thin it out. Adjust to your taste for the perfect consistency!
Storage Info
Storing Leftovers
To keep your creamy sun-dried tomato spinach pasta fresh, let it cool. Place the pasta in an airtight container. Store it in the fridge for up to three days. This keeps the flavors intact and prevents spoilage. If you have a large batch, consider portioning it out. It makes it easy to grab a quick meal later.
Reheating Guidelines
When you’re ready to enjoy leftovers, reheating is simple. For the microwave, place a portion in a bowl. Add a splash of water or broth to keep it moist. Cover it with a lid or microwave-safe wrap. Heat it for 1-2 minutes, stirring halfway. On the stovetop, use a non-stick pan. Add a little water or broth and warm over low heat. Stir often to prevent sticking. This way, your pasta stays creamy and delicious.
Freezing Tips
Yes, you can freeze this dish! To freeze, let it cool completely. Then, place it in a freezer-safe container. It can stay frozen for up to three months. When you want to eat it, move it to the fridge overnight to thaw. To reheat frozen portions, use the microwave or stovetop. If using the stovetop, add some liquid to help it warm evenly. Enjoy the taste of your creamy pasta anytime!
FAQs
Can I use a different type of pasta?
Yes, you can swap penne for other pasta types. Here are some options:
- Fusilli: Twisted shape holds sauce well.
- Rigatoni: Large tubes for a hearty bite.
- Farfalle: Bow-tie shape adds fun to your dish.
These choices work well in creamy sauces. Just adjust cooking times as needed.
Can I make this dish ahead of time?
You can prepare this dish in advance. Here are some tips:
- Store leftovers in an airtight container in the fridge.
- Let the dish cool before sealing.
- Reheat on the stovetop with a splash of broth or cream. This keeps it creamy.
How can I make it spicier?
If you want heat, here are some ideas:
- Add red pepper flakes while cooking.
- Include diced jalapeños or serrano peppers.
- Stir in hot sauce for a kick.
Adjust the spice level to your taste. Enjoy your creamy pasta!
This dish offers a tasty mix of simple ingredients. You can enjoy pasta, vegetables, and creamy broth. With easy steps for healthful cooking, it suits any meal plan. Try different pasta or add your favorite protein for flavor. Remember to store leftovers properly and reheat with care. Make this creamy pasta your go-to recipe for quick, satisfying meals. Cooking can be fun and easy!


![To make these tasty peanut butter banana oat bars, you'll need a few simple items. Here’s your shopping list: - 2 ripe bananas, well mashed - 1 cup peanut butter (smooth or crunchy) - 1/2 cup honey or maple syrup - 2 cups rolled oats - 1/2 teaspoon ground cinnamon - 1/4 teaspoon salt - Optional ingredients for enhancement: - 1/2 cup dark chocolate chips - 1/4 cup chopped nuts These ingredients come together to create a sweet, hearty snack. The ripe bananas add natural sweetness and moisture. The peanut butter gives a rich, creamy texture. Oats provide a filling base that keeps you energized. You can choose honey or maple syrup for sweetness. The cinnamon adds warmth and flavor, while salt enhances all the tastes. If you want to make them extra special, add dark chocolate chips or nuts for crunch. You can find the full recipe at the end of this guide. Enjoy gathering your ingredients and preparing for a delicious treat! - Preheat your oven to 350°F (175°C). - Line an 8x8 inch baking pan with parchment paper. - Combine bananas and peanut butter in a large mixing bowl. - Incorporate honey or maple syrup into the mixture. - Mix in oats, cinnamon, and salt. - Add dark chocolate chips and nuts if desired. - Spread the mixture into the prepared pan. - Bake for 20-25 minutes until golden brown. - Allow the bars to cool in the pan before transferring to a wire rack. - Cut into squares or rectangles. These simple steps lead you to a tasty treat. Follow the [Full Recipe] for more details. Enjoy your healthy snack! To make the best peanut butter banana oat bars, use overripe bananas. They add natural sweetness and moisture. Mix your ingredients well to get an even consistency. If you don’t mix well, some bites may taste different. Make your bars look great! Dust them with a sprinkle of cinnamon. You can also drizzle some extra peanut butter on top. This small touch adds flavor and makes them look appealing. Serve them on a decorative plate for a nice touch. A beautiful plate can make your snack feel special. Don’t be afraid to get creative! You can try adding spices like nutmeg or vanilla extract. These spices can bring out new flavors in your bars. Just a pinch can change your whole snack experience. Have fun experimenting to find your favorite taste! For the full recipe, check out the section above. {{image_4}} If you want a nut-free option, you can swap the peanut butter. Use sunflower seed butter or almond butter. Both options give a great taste. Sunflower seed butter adds a nice, nutty flavor without nuts. Almond butter gives a creamy texture that works well too. This change makes the bars safe for kids with nut allergies. For a gluten-free version, choose certified gluten-free rolled oats. Regular oats can often have gluten. Using gluten-free oats ensures everyone can enjoy these bars. They still taste delicious and keep all the good flavors. You won’t lose any texture or taste with this swap. To change the flavor, add dried fruits like cranberries or raisins. These fruits bring a sweet and chewy contrast to the bars. You can also mix in some chopped nuts for extra crunch. Feel free to get creative and use your favorite dried fruits. This way, you can make each batch of bars unique and exciting. Try these variations to find your favorite way to enjoy these tasty Peanut Butter Banana Oat Bars. If you want the full recipe, check out the section above. Store your peanut butter banana oat bars in an airtight container. This keeps them fresh at room temperature. If you want to keep them longer, put them in the fridge. They will stay good for about a week. If you want to save some bars for later, wrap them tightly in plastic wrap. Then, cover them with foil to prevent freezer burn. You can freeze them for up to three months. Just thaw them in the fridge when you're ready to enjoy. When you're ready to eat a bar, warm it in the microwave. A few seconds will give it a soft texture. This small step makes a big difference in taste and enjoyment. Yes, you can make these bars vegan. Just swap honey for maple syrup. Also, check that your chocolate chips are dairy-free. Look for golden brown edges and a set center. This means they are ready to come out. If you need a substitute, applesauce works well. It adds moisture and sweetness to the bars. When stored properly, these bars last up to a week in the fridge. You can freeze them for longer storage, too. Peanut butter banana oat bars are easy and tasty. You start by mixing ripe bananas, peanut butter, and oats. Then, you bake them until golden brown. Remember to cool and slice before serving. You can store them at room temp or freeze for later. Try adding dried fruits or other nut butters for more fun. With these simple steps, you can enjoy healthy snacks for days! Enjoy experimenting with your own versions!](https://dishtreats.com/wp-content/uploads/2025/06/65bd505b-0ff3-4866-91fc-ab6a46460c2c-768x768.webp)
![To make Crispy Parmesan Ranch Potato Skins, gather these simple ingredients: - 4 large russet potatoes - 1 cup shredded sharp cheddar cheese - 1/2 cup grated Parmesan cheese - 1/4 cup sour cream - 2 tablespoons ranch seasoning mix - 1/4 cup green onions, chopped - 3 tablespoons olive oil - Salt and pepper to taste - Optional: hot sauce for serving These items will help you create a tasty snack that everyone loves. The russet potatoes give a sturdy base, while the cheese brings flavor and creaminess. The ranch seasoning mix adds a punch of taste that makes these skins special. I always keep a few extra green onions on hand for garnish. They add color and a mild onion flavor that enhances the dish. I recommend using fresh ingredients for the best results. Fresh potatoes will give you a crispier skin. The cheese should be high-quality for a richer flavor. If you like spice, have hot sauce ready for a kick! For the full recipe, visit the [Full Recipe] section. 1. Preheat your oven to 400°F (200°C) to get it ready for baking. 2. Scrub the russet potatoes under cold running water. Dry them completely with a clean towel. 3. Prick each potato with a fork six to eight times. This helps steam escape while they bake. 1. Rub each potato with olive oil. Make sure they are well-coated. 2. Sprinkle salt on the potatoes for extra flavor. 3. Place the potatoes on the middle rack of the oven. Bake for 45-60 minutes. Check their doneness by piercing with a fork. 1. Once baked, let the potatoes cool for about 10 minutes. This makes them easier to handle. 2. Slice each potato in half lengthwise. Now you have boat-like shapes! 3. Scoop out a bit of the flesh, leaving about 1/4 inch intact along the skin. 1. Brush the insides of each potato skin with olive oil. Season with salt and pepper for taste. 2. Add a generous amount of shredded cheddar cheese in each skin. Then sprinkle the remaining Parmesan cheese on top. 3. Put the filled skins back in the oven, cut-side up. Bake for an extra 10-15 minutes. The cheese should melt and the edges should crisp. 4. While baking, mix the remaining Parmesan cheese, ranch seasoning, and chopped green onions in a bowl. 5. When the potato skins are crispy, take them out. Top each skin with the ranch mix. 6. Return the potato skins to the oven for 5 more minutes. This lets the flavors meld beautifully. Enjoy your Crispy Parmesan Ranch Potato Skins hot, served with sour cream and optional hot sauce! For complete details, refer to the Full Recipe. To make your potato skins crispy, follow these simple steps: - Bake at a high temperature: Set your oven to 400°F (200°C). High heat gets the skins nice and crisp. - Use olive oil: Coat the skins well in olive oil. This helps them crisp up and adds flavor. - Season well: Don’t skip the salt and pepper. Seasoning is key for great taste. You can switch up the cheese for your potato skins. Here are some ideas: - Monterey Jack: This cheese melts well and adds a creamy texture. - Gouda: It gives a smoky flavor that pairs nicely with ranch. - Feta: For a tangy twist, sprinkle some crumbled feta on top. Balancing flavors is important. Use milder cheeses with stronger toppings. Adding more flavor is easy! Here are some tips: - Spices: Try adding paprika or garlic powder for extra kick. - Herbs: Fresh herbs like parsley or chives brighten up the dish. - Toppings: Consider adding crispy bacon bits or diced tomatoes for extra texture. These tips help you make the best crispy Parmesan ranch potato skins. For the complete recipe, check out the Full Recipe section. {{image_4}} For a twist, try different spice blends. You can use garlic powder, onion powder, or smoked paprika. Each adds a unique taste. You can also switch the ranch seasoning for taco seasoning. It gives a fun and zesty flavor. - Garlic powder - Onion powder - Smoked paprika - Taco seasoning Explore different flavor profiles. For a spicy kick, add cayenne pepper or chili powder. If you like fresh herbs, try dill or parsley. These choices keep your potato skins exciting and tasty. Get creative with toppings to suit your taste. You can add crispy bacon bits for a savory crunch. If you're vegan, top with dairy-free cheese or avocado. - Crispy bacon bits - Dairy-free cheese - Avocado slices For a fresh touch, add chopped tomatoes or jalapeños. You can also sprinkle some fresh cilantro or green onions. This way, everyone can enjoy their potato skins just how they like them. Pair your potato skins with a hearty soup or salad. A warm chili or creamy broccoli soup works well. These sides make a filling meal. - Hearty chili - Creamy broccoli soup - Fresh garden salad You can also serve them with grilled chicken or fish. This gives a nice balance to your meal. The crispy potato skins shine as a fun side dish. For more ideas, check out the full recipe. To keep your crispy potato skins fresh, store them in the fridge. Place them in an airtight container. They will stay good for about 3 days. Make sure they cool completely before sealing. This helps prevent excess moisture. When you want to enjoy your leftovers, use an oven for the best taste. Preheat it to 350°F (175°C). Place the potato skins on a baking sheet. Heat them for about 10-15 minutes. This keeps them crispy. Avoid using a microwave, as it can make them soggy. Yes, you can freeze potato skins! To freeze, let them cool completely. Place them in a single layer on a baking sheet. Freeze them for about 1-2 hours. After that, transfer them to a freezer bag. Remove as much air as possible. For thawing, place the skins in the fridge overnight before reheating. The best potatoes for potato skins are large russet potatoes. They have thick skin and a fluffy interior. This makes them perfect for holding toppings. Their size allows for a good amount of filling. Plus, they get crispy when baked, which is what we want. Yes, you can prepare them ahead of time. Bake the potatoes and scoop out the flesh. Store the skins in the fridge until you're ready to bake. Just add cheese and toppings before the final bake. This saves time and makes serving easier. To keep potato skins crispy, follow these tips: - Ensure you coat the skins with olive oil. - Bake them at a high temperature. - Avoid overcrowding the baking sheet. - Don't cover them while they cool. These steps help maintain crunchiness and flavor. Crispy Parmesan Ranch Potato Skins go well with several sauces. Here are some tasty pairings: - Sour cream - Ranch dressing - Hot sauce - Guacamole - Salsa These sauces add flavor and enhance your snack experience. Yes, you can freeze potato skins for later use. Bake the skins and let them cool completely. Then, store them in airtight containers. They can last a couple of months in the freezer. When ready to enjoy, bake them directly from frozen. This way, you get to savor that crispy goodness again! This blog post guides you on making Crispy Parmesan Ranch Potato Skins, covering every step. You learned about needed ingredients and how to prepare them. I shared tips for achieving crispy skins and creative topping ideas. You also discovered ways to store and reheat leftovers. Enjoy making this tasty treat! With your new skills, you can impress friends and family. These potato skins are simple and delicious.](https://dishtreats.com/wp-content/uploads/2025/07/2d854721-5686-49a1-8fc7-db971342c8a3-768x768.webp)
