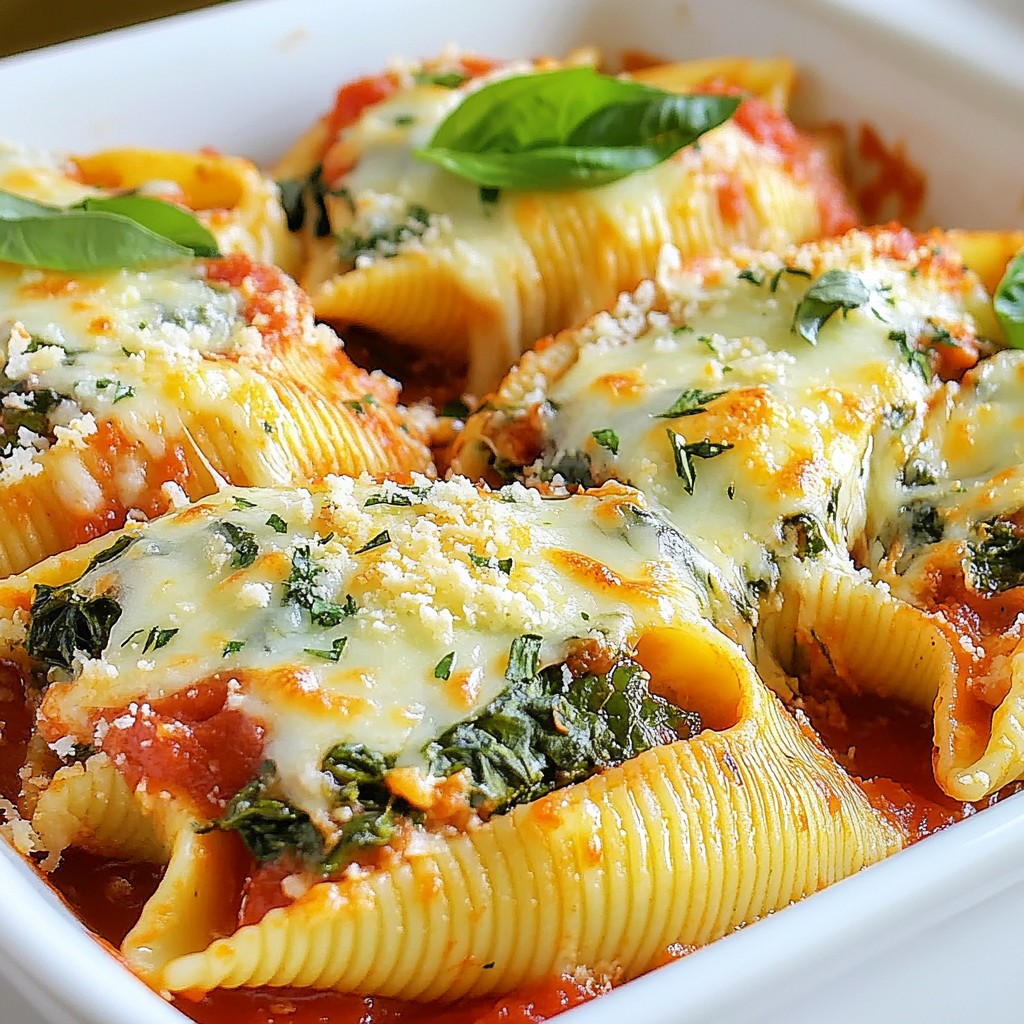
Looking for a tasty meal that'll impress your family? These Creamy Spinach Stuffed Shells are just what you need! Filled with a rich spinach and cheese mix, they’re easy to make and perfect for any dinner. In this post, I'll guide you step-by-step from the ingredients to the best tips. Join me as we transform simple pasta into a delightful dish that's sure to please everyone at the table!
Why I Love This Recipe
- Comforting and Delicious: These cheesy spinach stuffed shells are the perfect comfort food, combining creamy cheeses and fresh spinach in every bite.
- Easy to Make: With simple ingredients and straightforward steps, this recipe is accessible for cooks of all skill levels, making it a weeknight favorite.
- Customizable: Feel free to add your favorite ingredients, such as ricotta, different cheeses, or even some sautéed mushrooms for an extra flavor boost.
- Great for Meal Prep: These stuffed shells can be made ahead of time and stored in the fridge or freezer, making them a perfect option for busy days.
Ingredients
Complete List of Ingredients
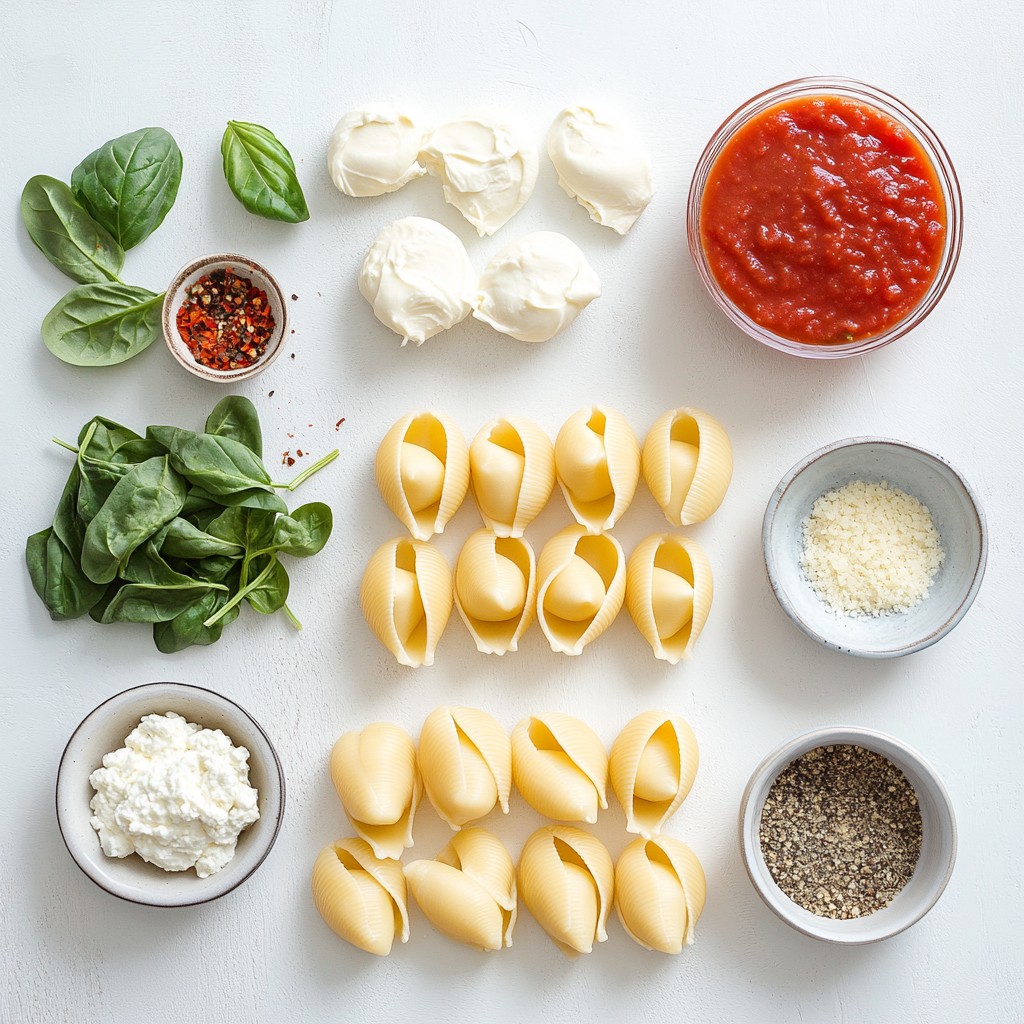
To make creamy spinach stuffed shells, gather these items:
- 20 large jumbo pasta shells
- 2 cups fresh spinach, chopped
- 1 cup ricotta cheese
- 1 cup shredded mozzarella cheese, divided
- ½ cup grated Parmesan cheese
- 1 teaspoon garlic powder
- 1 teaspoon onion powder
- 1 teaspoon dried oregano
- ½ teaspoon salt
- ¼ teaspoon black pepper
- 1 cup marinara sauce
- 1 tablespoon olive oil
- Fresh basil leaves for garnish (optional)
Each ingredient plays a key role in creating the creamy filling and delicious sauce. The ricotta and mozzarella cheeses provide a rich texture. The spinach adds freshness, while the spices enhance the flavor.
Substitutes for Common Ingredients
If you need swaps for some ingredients, here are a few options:
- Jumbo pasta shells: Use manicotti shells or even cannelloni.
- Ricotta cheese: Cottage cheese works well if blended smooth.
- Mozzarella cheese: Try provolone or fontina for a different taste.
- Marinara sauce: Any pasta sauce or homemade tomato sauce can be used.
These substitutes can help you make this dish even if you're missing something.
Optional Extras for Added Flavor
To take your stuffed shells to the next level, consider these extras:
- Add cooked ground meat like beef or turkey for protein.
- Stir in some artichoke hearts or sun-dried tomatoes for a twist.
- Top with fresh herbs like parsley or thyme for added freshness.
- Use different cheeses like goat cheese for a tangy flavor.
These options can make your creamy spinach stuffed shells even more special and personal to your taste.
Step-by-Step Instructions
Preparing the Oven and Pasta
First, preheat your oven to 375°F (190°C). This step is key for even cooking. Next, bring a large pot of water to a boil. Add salt to the water for flavor. Cook the jumbo pasta shells for about 8 to 10 minutes. Aim for al dente, which means they should be firm but not hard. Drain the shells carefully and let them cool on a plate.
Making the Spinach and Cheese Filling
In a skillet, heat one tablespoon of olive oil over medium heat. Add 2 cups of chopped fresh spinach. Sauté for 2 to 3 minutes until it wilts. Remove the skillet from heat and let the spinach cool slightly. In a mixing bowl, combine 1 cup of ricotta cheese, half a cup of grated Parmesan cheese, and half of the shredded mozzarella cheese. Add 1 teaspoon each of garlic powder, onion powder, and dried oregano. Don’t forget ½ teaspoon of salt and ¼ teaspoon of black pepper. Mix until everything blends well. Then, fold in the cooled spinach gently. This step ensures every bite has great flavor.
Stuffing and Baking the Shells
Spread ½ cup of marinara sauce across the bottom of a 9x13-inch baking dish. This keeps the shells from sticking. Now, take each pasta shell and stuff it with the spinach and cheese mix. Place the stuffed shells seam side up in the dish. Once all shells are filled, pour the remaining marinara sauce on top. Cover the shells completely. Sprinkle the rest of the mozzarella cheese evenly over the sauce. Cover the dish with aluminum foil and bake for 25 minutes. After that, remove the foil and bake for another 10 minutes. This will give you a nice golden crust on top. Let the dish cool for a few minutes before serving, and garnish with fresh basil if you like. Enjoy your creamy spinach stuffed shells!
Tips & Tricks
How to Achieve Perfectly Cooked Pasta
To cook pasta shells just right, follow these steps:
- Use a large pot: Fill it with water. This helps the shells move freely.
- Salt the water: Add 1-2 tablespoons of salt. It flavors the pasta as it cooks.
- Cook to al dente: Boil the shells for 8 to 10 minutes. They should be firm but not hard.
- Drain carefully: Use a colander. Avoid breaking the shells when you drain.
Perfectly cooked pasta makes stuffing and serving much easier.
Avoiding Common Mistakes
Here are some common mistakes to avoid:
- Overcooking the shells: This can make them mushy. Always follow the package time.
- Skipping cooling time: Let the shells cool before stuffing. This prevents burns and makes filling easier.
- Not seasoning: Season the cheese and spinach mix well. It enhances the flavor.
These tips will help you create a tasty dish without the usual hiccups.
Garnishing and Serving Suggestions
For a lovely presentation, try these ideas:
- Add fresh basil: Place torn basil leaves on top before serving. It adds color and flavor.
- Drizzle extra marinara: Pour a bit of marinara sauce over the shells for extra moisture.
- Sprinkle Parmesan cheese: Use grated Parmesan for a savory finish. It complements the dish well.
These small touches make your creamy spinach stuffed shells even more appealing.
Pro Tips
- Choose Quality Ingredients: Opt for fresh spinach and high-quality cheeses for the best flavor. Fresh ingredients elevate the dish and make a noticeable difference in taste.
- Don’t Overcook the Shells: Cook the pasta shells until al dente to prevent them from becoming mushy during baking. They will continue to cook in the oven with the sauce.
- Experiment with Fillings: Feel free to add other ingredients to the cheese mixture, such as chopped sun-dried tomatoes or artichokes, for an extra flavor twist.
- Make Ahead: You can prepare the stuffed shells in advance and store them in the refrigerator. Just bake them when you’re ready to serve for a convenient meal.
Variations
Adding Protein to the Filling
You can boost your stuffed shells by adding protein. Cooked chicken, turkey, or sausage works well. Simply chop cooked meat and mix it with the spinach and cheese. For a vegetarian option, try adding white beans or lentils. They add protein and keep the dish hearty.
Dairy-Free or Vegan Options
To make this dish dairy-free or vegan, use plant-based cheese. Look for vegan ricotta or mozzarella. You can also use tofu blended with lemon juice and nutritional yeast for a creamy texture. Replace the egg in the ricotta with ground flaxseed mixed with water. It helps bind the filling well.
Flavor Profile Modifications
You can play with flavors in your filling. Add fresh herbs like parsley or dill for brightness. A pinch of red pepper flakes adds a nice kick. Swap out the marinara for pesto for a fresh twist. You can even try sun-dried tomatoes for a tangy flavor. Each change gives the dish a unique touch.
Storage Info
How to Store Leftovers
Storing leftover creamy spinach stuffed shells is simple. First, let the dish cool down to room temperature. Then, place the leftovers in an airtight container. You can keep them in the fridge for up to three days. If you want to enjoy them later, use a freezer-safe container. This way, you can store them for about three months.
Reheating Tips
Reheating the stuffed shells is easy. For the best taste, use the oven. Preheat your oven to 350°F (175°C). Place the shells in a baking dish. Add a splash of marinara sauce on top to keep them moist. Cover the dish with foil to prevent drying out. Bake for about 20 minutes. Check that they are heated through before serving.
If you are in a hurry, you can use the microwave. Place the shells in a microwave-safe dish. Add a little sauce, cover, and heat for 2-3 minutes. Make sure they are warm all the way through.
Freezing for Future Meals
Freezing the stuffed shells is a great idea for quick meals later. After you prepare them, let them cool completely. Then, place them in a freezer-safe container or wrap them tightly in plastic wrap. You can also freeze them in single-serving portions for easy meals.
When you are ready to eat, thaw them in the fridge overnight. You can then reheat them in the oven or microwave as described above. This method helps you enjoy this tasty dish anytime you want!
FAQs
Can I make these shells ahead of time?
Yes, you can make these shells ahead of time. Prepare the stuffed shells and place them in the baking dish. Cover them with plastic wrap or foil. Store them in the fridge for up to two days. When you are ready to bake, remove the cover and add more marinara sauce if needed. Bake them as usual, adding a few extra minutes to the cooking time.
What side dishes pair well with creamy spinach stuffed shells?
These stuffed shells go well with many side dishes. Here are some great options:
- Garlic bread
- Simple green salad
- Roasted vegetables
- Steamed broccoli
- Caesar salad
Each of these side dishes adds a nice balance to the meal. They help to bring out the rich flavors of the creamy spinach stuffed shells.
Can I use different types of cheese?
Yes, you can swap out the cheeses in this recipe. Here are some tasty options:
- Use cottage cheese instead of ricotta for a lighter filling.
- Try feta cheese for a tangy twist.
- Use gouda or cheddar for a sharper flavor.
Mix and match to find your favorite cheese combination. This flexibility allows you to customize your stuffed shells to suit your taste.
In this article, we covered the ingredients and steps for making creamy spinach stuffed shells. You learned how to prepare the filling and bake the pasta. I shared tips for avoiding common mistakes and ideas for flavor variations. Remember, you can customize the dish with different proteins or cheeses, and store extras for future meals. Cooking should be fun and easy. With these steps, you’ll serve a great meal every time. Enjoy your pasta adventures!