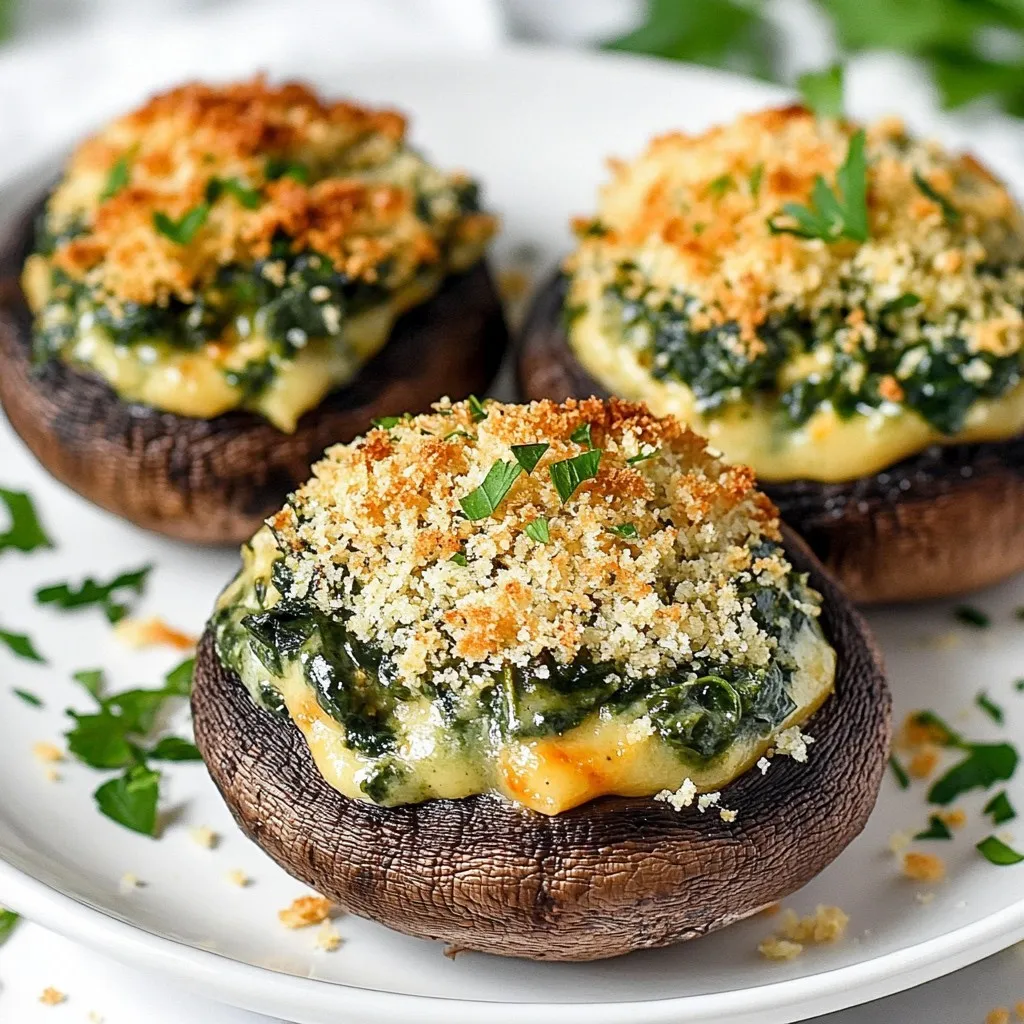
Looking for a tasty appetizer that impresses without all the fuss? My Creamy Spinach Stuffed Mushrooms are simple and savory. With just a few fresh ingredients, you can create a dish that’s creamy, flavorful, and sure to please any crowd. Whether you’re hosting a party or cooking dinner, these stuffed mushrooms are perfect. Get ready to learn how to make this delightful treat that everyone will rave about!
Why I Love This Recipe
- Delicious Flavor Combination: The creamy spinach filling paired with the earthy portobello mushrooms creates an irresistible bite that is both savory and satisfying.
- Easy to Prepare: This recipe requires minimal preparation and can be made in just 40 minutes, making it perfect for a quick appetizer or snack.
- Healthier Option: Packed with spinach and lower in calories, these stuffed mushrooms provide a nutritious option for those looking to indulge without the guilt.
- Versatile Dish: These mushrooms can be served as an appetizer, side dish, or even a main course, easily adaptable to fit any meal.
Ingredients
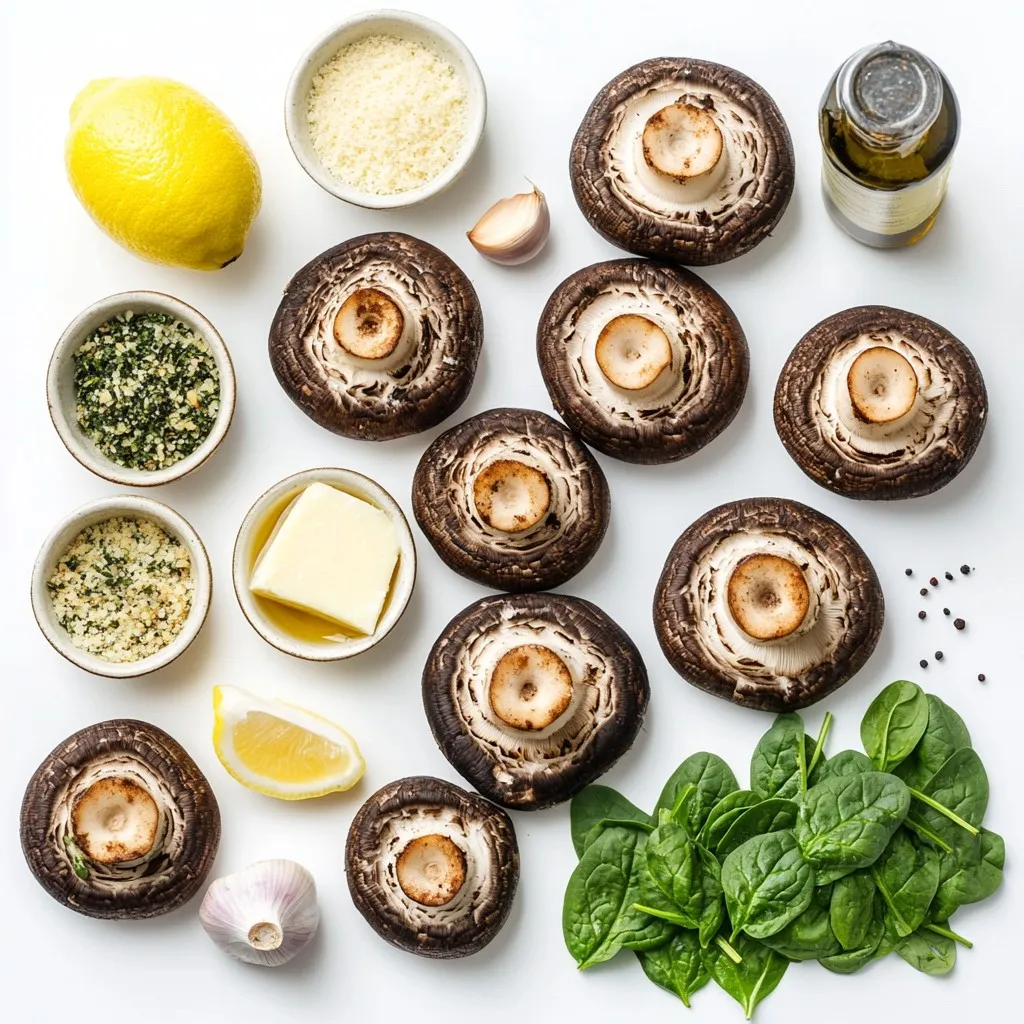
List of Ingredients
– 12 large portobello mushrooms, stems carefully removed
– 2 cups fresh spinach, coarsely chopped
– 1 cup cream cheese, brought to room temperature
– 1/2 cup grated Parmesan cheese
– 1/4 cup breadcrumbs (preferably panko for extra crunch)
– 2 cloves garlic, finely minced
– 1 tablespoon fresh lemon juice
– 1 teaspoon dried oregano
– Salt and freshly ground black pepper, to taste
– 2 tablespoons olive oil
– Fresh parsley, finely chopped for garnishing
Dietary Substitutions
You can adjust the recipe to fit different dietary needs. For a vegan option, use plant-based cream cheese and nutritional yeast instead of Parmesan. If you want it gluten-free, swap panko breadcrumbs for gluten-free ones.
Equipment Needed
Gather a few simple tools before you start. You will need:
– A baking sheet
– A skillet
– A mixing bowl
– A spoon for filling the mushrooms
– A damp cloth for cleaning the mushrooms
This list keeps things clear and simple. You can focus on the joy of cooking!
Step-by-Step Instructions
Preparation Steps
1. Preheat your oven to 375°F (190°C). This warms the oven for baking.
2. Clean the portobello mushrooms with a damp cloth. Remove dirt gently. Place them on a baking sheet, gill side up.
3. Heat a skillet over medium heat. Add olive oil and minced garlic. Cook for about 30 seconds to release the garlic’s aroma.
4. Add the chopped spinach to the skillet. Stir and cook for 2-3 minutes until it wilts. Remove from heat and let it cool.
5. In a bowl, mix the cream cheese, grated Parmesan, lemon juice, and oregano. Season with salt and pepper. Stir until smooth and creamy.
6. Fold the sautéed spinach into the cream cheese mixture. Combine until the colors blend well.
Cooking Process
7. Spoon the creamy spinach filling into each portobello mushroom’s gills. Make sure to fill them evenly.
8. Sprinkle breadcrumbs on top of each stuffed mushroom. This adds a nice crunch.
9. Place the baking sheet in the oven. Bake for 20-25 minutes. The mushrooms should be tender, and the breadcrumbs golden brown.
10. After baking, remove the mushrooms from the oven. Let them cool for one minute.
Serving Suggestions
Garnish the mushrooms with finely chopped parsley. This adds freshness and color. Serve them warm for a delicious appetizer or side dish. Pair them with a simple salad or crusty bread to create a lovely meal. Enjoy the creamy, savory goodness!
Tips & Tricks
Perfecting the Filling
To make the filling creamy, use room temperature cream cheese. It mixes better and blends smoothly with the spinach. When you sauté garlic, do it gently. This helps keep the flavor bright without burning. Add the spinach just until it wilts. Overcooking can make it lose that fresh taste.
Avoiding Common Mistakes
Don’t skip cleaning the mushrooms. Dirt can ruin the taste. Make sure to fill the mushrooms generously. If they are underfilled, they may dry out while baking. Watch the breadcrumbs closely. You want them golden, not burnt.
Enhancing the Flavor
For a zestier taste, add more lemon juice. It brightens the dish. Try mixing in some red pepper flakes for heat. Fresh herbs, like thyme or basil, can also boost the flavor. A sprinkle of extra Parmesan before baking adds a nice touch.
Pro Tips
- Choose Fresh Mushrooms: Selecting fresh portobello mushrooms ensures maximum flavor and texture. Look for firm, smooth caps without blemishes.
- Customize the Filling: Feel free to add other ingredients like cooked bacon bits or artichoke hearts to the spinach filling for extra flavor.
- Perfect Crispiness: For an extra crispy topping, broil the stuffed mushrooms for the last 2-3 minutes of baking, watching carefully to prevent burning.
- Make Ahead: You can prepare the mushrooms in advance and store them in the refrigerator. Bake them just before serving for a warm, delicious appetizer.
Variations
Different Cheese Options
You can change the cheese in this recipe for new flavors. Try using feta cheese for a tangy twist. Goat cheese adds a creamy texture and a unique taste. For a sharper bite, use aged cheddar. Each cheese will give the dish a different feel and taste.
Substituting Vegetables
Spinach is great, but you can swap it for other greens. Kale or Swiss chard can work well too. You might add artichoke hearts for a fun twist. Just chop them small so they mix well with the cream cheese.
Vegan or Gluten-Free Adaptations
To make this dish vegan, use dairy-free cream cheese. Nutritional yeast can replace Parmesan and add a cheesy flavor. For gluten-free options, use gluten-free breadcrumbs. These changes keep the taste while making it suitable for different diets.
Storage Info
Storing Leftovers
After enjoying your creamy spinach stuffed mushrooms, store any leftovers in an airtight container. Keep them in the fridge for up to three days. Make sure they cool down to room temperature before sealing them. This way, they stay fresh and tasty.
Reheating Instructions
To reheat your mushrooms, preheat the oven to 350°F (175°C). Place the mushrooms on a baking sheet. Cover them with aluminum foil to avoid drying out. Heat for about 10-15 minutes. You can also use the microwave, but the oven helps keep the texture.
Freezing Tips
You can freeze stuffed mushrooms for later use. Place them in a single layer on a baking sheet to freeze. Once frozen, transfer them to a freezer-safe bag. They can last up to three months. When ready to eat, bake them from frozen at 375°F (190°C) for about 25-30 minutes.
FAQs
How do I know when the mushrooms are done?
You can tell the mushrooms are done when they are tender and golden. The tops should be crispy and nicely browned. This usually takes about 20 to 25 minutes in the oven. Keep an eye on them after 20 minutes. If the mushrooms look soft and the breadcrumbs are golden, they are ready to enjoy.
Can I make this recipe ahead of time?
Yes, you can make this recipe ahead of time. Prepare the stuffed mushrooms and store them in the fridge. Cover them well to keep them fresh. You can bake them later when you are ready to serve. Just add a few extra minutes to the baking time if they are cold.
What can I serve with creamy spinach stuffed mushrooms?
Creamy spinach stuffed mushrooms pair well with many dishes. Here are some ideas:
– A crisp green salad with a light dressing.
– Garlic bread or breadsticks for dipping.
– Grilled chicken or fish for a complete meal.
– A refreshing soup, like tomato or minestrone.
These options will complement the flavors of the mushrooms and make your meal more satisfying.
You learned about the ingredients, substitutions, and equipment needed for creamy spinach stuffed mushrooms. I shared step-by-step instructions to guide you through the preparation and cooking process. We looked at tips to perfect your filling and avoid common mistakes. I also provided variations for different tastes and diets, plus storage and reheating tips.
Using this guide, you can confidently make this dish. Enjoy your cooking journey and let your creativity shine in the kitche


