Welcome to the world of creamy Spinach Ricotta Gnocchi! If you’re searching for a comforting, tasty dinner dish, you’ve come to the right place. In this blog post, I’ll share my easy recipe that takes you from basic ingredients to a delightful bowl of gnocchi in no time. With step-by-step instructions, tips for perfecting the dish, and creative variations, you’ll impress your family and friends with your cooking skills. Let’s dive in!
Ingredients
List of Ingredients with Measurements
– 2 cups fresh spinach, finely chopped
– 1 cup ricotta cheese
– 1 cup all-purpose flour (plus extra for dusting)
– 1 large egg
– 1/4 teaspoon freshly grated nutmeg
– Salt and freshly ground pepper to taste
– 1 tablespoon olive oil
– 1 cup heavy cream
– 1/2 cup grated Parmesan cheese
Optional Garnishes
– Fresh basil leaves for garnish
– Additional grated Parmesan cheese for topping
Nutritional Info Overview
This dish offers a blend of protein from ricotta and healthy fats from olive oil. Each serving contains key nutrients, including calcium from cheese and fiber from spinach. You can enjoy a serving of creamy spinach ricotta gnocchi for a hearty meal.
Step-by-Step Instructions
Preparing the Spinach
First, take 2 cups of fresh spinach and chop it finely. In a medium skillet, add the chopped spinach and a splash of water. Cook it over medium heat for about 2-3 minutes until it wilts. Stir occasionally to help it cook evenly. Once the spinach is wilted, remove it from heat. Let it cool for a few minutes. Squeeze out any extra moisture and chop it again if needed.
Making the Gnocchi Dough
In a large mixing bowl, combine 1 cup of ricotta cheese with the cooled spinach. Crack in 1 large egg and add 1/4 teaspoon of freshly grated nutmeg. Season with a pinch of salt and pepper. Mix these ingredients until they blend well. Now, add 1 cup of all-purpose flour, a little at a time. Stir gently until a soft dough forms, but do not overmix. This helps keep the gnocchi light and fluffy.
Shaping and Cooking the Gnocchi
On a lightly floured surface, divide the dough into four equal pieces. Roll each piece into a long rope about 1/2 inch thick. Cut each rope into 1-inch segments. If you want, you can roll each piece over the tines of a fork to create ridges. This step is optional but helps the sauce cling to the gnocchi.
Next, bring a large pot of salted water to a boil. Carefully add the gnocchi in batches. Watch for them to float to the surface, which takes about 2-3 minutes. Once they float, they are cooked. Use a slotted spoon to remove them and set them aside on a plate.
Creating the Cream Sauce
In the same skillet you used for the spinach, heat 1 tablespoon of olive oil over medium heat. Pour in 1 cup of heavy cream and bring it to a gentle simmer. Stir continuously to prevent burning. Add 1/2 cup of grated Parmesan cheese and let it melt into the cream. Stir until the sauce is smooth. Season it with salt and pepper to taste.
Combining the Gnocchi and Sauce
Gently toss the cooked gnocchi into the cream sauce. Make sure each piece is well-coated. Allow it to simmer on low heat for about one more minute. This helps meld the flavors together nicely.
Serving Suggestions
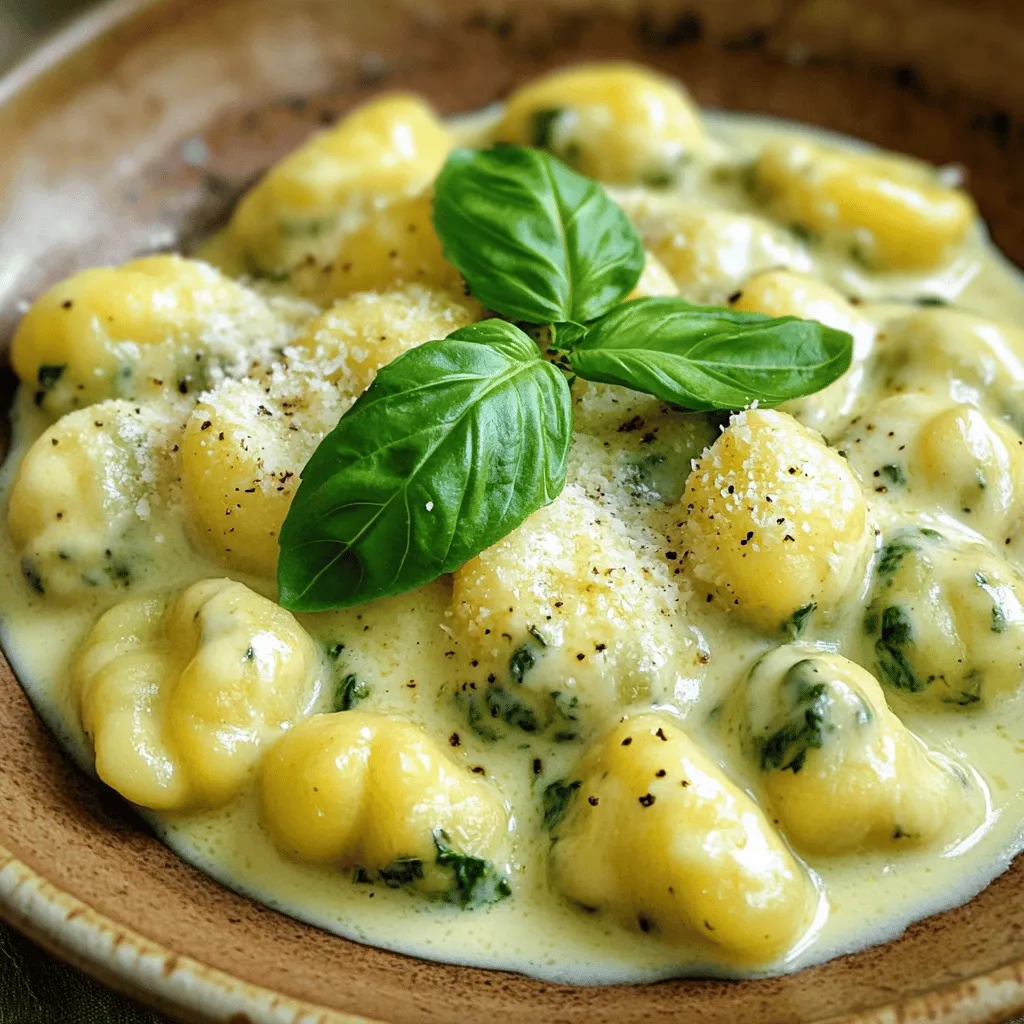
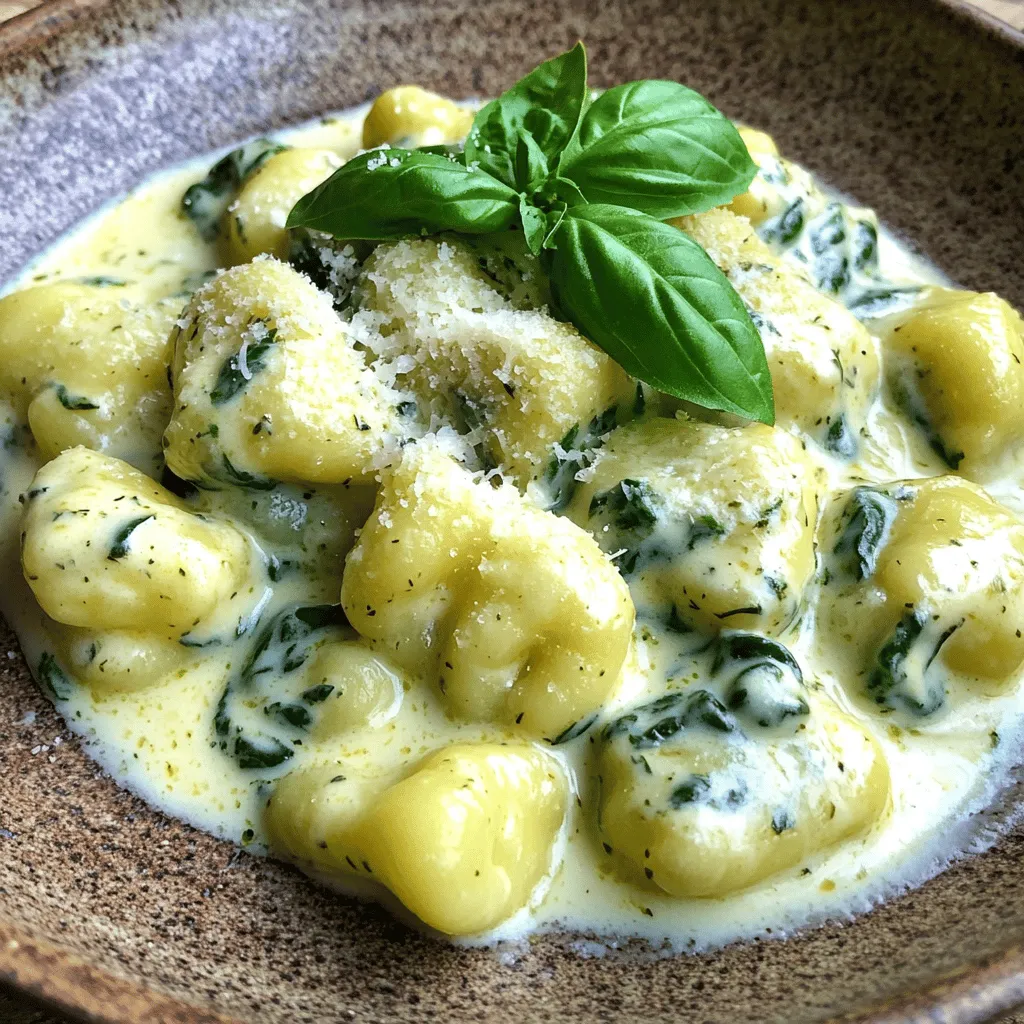
Plate the creamy spinach ricotta gnocchi in shallow bowls. Garnish with fresh basil leaves for a pop of color. If you like, sprinkle more grated Parmesan cheese on top. For an extra touch, drizzle a bit of cream sauce over the dish. Enjoy your delightful dinner!
Tips & Tricks
Common Mistakes to Avoid
Making creamy spinach ricotta gnocchi can be fun, but some common mistakes pop up.
– Overmixing the Dough: This can make your gnocchi tough. Mix just until combined.
– Not Salting the Water: A pinch of salt in boiling water is key. It adds flavor to the gnocchi.
– Cooking in Batches: Avoid crowding the pot. Cook gnocchi in small batches for even cooking.
How to Ensure Light and Fluffy Gnocchi
To get that perfect light and fluffy texture, follow these simple tips:
– Use Fresh Ingredients: Fresh spinach and good-quality ricotta make a big difference.
– Don’t Overwork the Dough: Mix gently and stop as soon as it comes together.
– Test Cook a Few: Before cooking all, try a few pieces. This helps you adjust the dough if needed.
Best Cooking Utensils and Tools
Having the right tools can make cooking easier:
– Mixing Bowl: A large bowl for mixing dough.
– Fork or Gnocchi Board: For creating ridges on the gnocchi, if you choose to.
– Slotted Spoon: Perfect for removing cooked gnocchi from boiling water.
– Skillet: A good skillet is essential for making the cream sauce.
With these tips and tricks, you’ll make a delicious creamy spinach ricotta gnocchi every time! Enjoy your cooking adventure!
Variations
Alternative Ingredients or Substitutions
You can change a few items to fit your taste. If you want a lighter meal, use low-fat ricotta cheese. For a gluten-free option, swap all-purpose flour with gluten-free flour blend. You can also try using sweet potato instead of regular potatoes for a different texture. If you love a bit of zest, lemon zest can add a bright flavor to the dough.
Flavor Additions
To enhance the taste, consider adding spices. A pinch of garlic powder gives a nice depth. Fresh herbs like thyme or parsley can bring more aroma. Try adding a dash of red pepper flakes for some heat. Nutmeg adds warmth, but keep it light. Don’t forget, the right seasoning makes a huge difference in your dish.
Dietary Adaptations
Many people have dietary needs. For a vegan dish, replace ricotta with cashew cream or tofu blended with lemon juice. You can also use plant-based cream to make the sauce. For those avoiding dairy, nutritional yeast can add a cheesy flavor without milk. Each of these changes makes the dish friendly for various diets while keeping it delicious.
Storage Info
How to Store Leftover Gnocchi
To store leftover gnocchi, place it in an airtight container. Make sure to separate layers with parchment paper. Keep it in the fridge for up to three days. This will help keep the gnocchi fresh and avoid sticking together.
Freezing Instructions
To freeze gnocchi, lay it on a baking sheet in a single layer. Make sure the pieces do not touch. Freeze for about one hour. Once frozen, transfer the gnocchi to a freezer-safe bag. It can last up to three months in the freezer. When you’re ready to use it, cook it directly from frozen, adding a few extra minutes to the cooking time.
Reheating Tips
To reheat gnocchi, you can use a skillet or the microwave. For the skillet, add a bit of olive oil. Heat the gnocchi on medium until warm, stirring gently. In the microwave, place the gnocchi in a bowl with a splash of water. Cover it and heat in 30-second intervals. Stir between intervals until heated through. Enjoy your creamy spinach ricotta gnocchi just like the first time!
FAQs
What can I serve with Creamy Spinach Ricotta Gnocchi?
You can serve creamy spinach ricotta gnocchi with a variety of sides. A fresh salad pairs well. Try a simple arugula salad with lemon and olive oil. Garlic bread also makes a great side. Its crunch complements the soft gnocchi. For a heartier meal, add grilled chicken or shrimp. These proteins add flavor and balance. Roasted vegetables can also be a tasty option. Their sweetness contrasts with the rich gnocchi.
Can I make gnocchi in advance?
Yes, you can make gnocchi in advance. After shaping the gnocchi, place them on a baking sheet. Make sure they do not touch each other. Freeze them for about an hour. Then, transfer to a freezer bag. This way, they won’t stick together. When you are ready to cook, boil them straight from the freezer. Just add a minute to the cooking time.
How do I know when the gnocchi is fully cooked?
You can tell when the gnocchi is fully cooked by watching for floating. When they rise to the surface of the boiling water, that’s a good sign. This usually takes about 2-3 minutes. You can also taste one to check its texture. It should be soft but still hold its shape. If it’s too firm, give it another minute.
In this blog post, we explored how to make Creamy Spinach Ricotta Gnocchi. I covered each step, from prepping spinach to serving suggestions. You learned about ingredients, cooking tips, and how to store your leftovers.
Now, you can enjoy this dish anytime. Experiment with flavors or share it with friends. Cooking can be fun, and this gnocchi is sure to impress. Happy cooking!


