Creamy Spinach Artichoke Pasta Delightful Dinner Dish

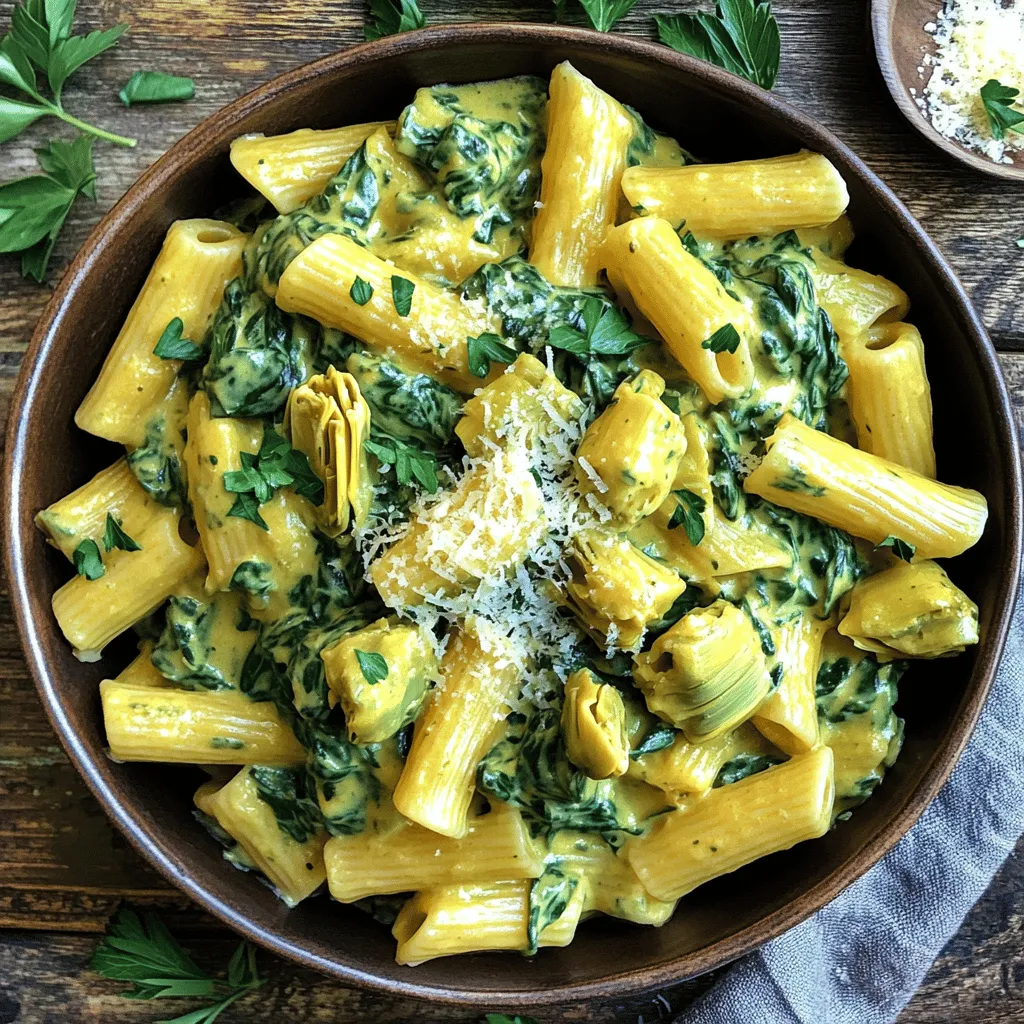
If you want a dinner that impresses and delights, you’ve found it! Creamy Spinach Artichoke Pasta combines rich flavors and textures that satisfy every time. This dish is easy to make and perfect for any night. I’ll guide you through choosing the best ingredients, crafting a creamy sauce, and adding your unique spin. Get ready to gather your supplies and whip up a delightful meal you’ll crave again and again!
Ingredients
Complete List of Ingredients
To make creamy spinach artichoke pasta, gather these ingredients:
- 8 oz (225g) pasta of your choice (penne or fettuccine highly recommended)
- 1 tablespoon extra virgin olive oil
- 3 cloves garlic, finely minced
- 1 cup fresh spinach, roughly chopped
- 1 cup canned artichoke hearts, drained and coarsely chopped
- 1 cup heavy cream
- 1/2 cup cream cheese, softened to room temperature
- 1/2 cup freshly grated Parmesan cheese, plus extra for serving
- 1/2 teaspoon garlic powder
- Salt and freshly cracked black pepper, to taste
- Red pepper flakes, optional (for a spicy kick)
- Fresh parsley, finely chopped, for garnish
Recommended Pasta Types
When choosing pasta, I suggest using penne or fettuccine. These shapes hold the creamy sauce well. Penne’s tubular shape captures the sauce inside, while fettuccine offers a smooth and rich experience. You can also try spaghetti or rigatoni for a twist!
Tips for Ingredient Substitutions
If you need to swap out ingredients, here are some ideas:
- Pasta: Use whole wheat or gluten-free pasta for a healthier option.
- Cream Cheese: Greek yogurt or ricotta can replace cream cheese for a lighter dish.
- Heavy Cream: Coconut cream or almond milk can offer a dairy-free alternative.
- Spinach: Kale or arugula works well if you prefer different greens.
Feel free to mix and match based on what you have at home!
Step-by-Step Instructions
How to Prepare the Pasta
First, you need to cook the pasta. Bring a large pot of salted water to a boil. Add 8 oz of your chosen pasta, like penne or fettuccine. Cook it until it is al dente, according to package directions. Once done, drain the pasta but save about 1/2 cup of the pasta water for later. Set the pasta aside.
Sautéing the Aromatics
Next, let’s sauté our aromatics. Heat 1 tablespoon of extra virgin olive oil in a large skillet over medium heat. Once hot, add 3 cloves of finely minced garlic. Sauté for 1-2 minutes until the garlic smells good but is not browned. This step adds a lot of flavor!
Making the Creamy Sauce
Now, it’s time to make the creamy sauce. Add 1 cup of roughly chopped spinach and 1 cup of drained and coarsely chopped artichoke hearts to the skillet. Cook for about 3-4 minutes until the spinach wilts. Lower the heat and pour in 1 cup of heavy cream and 1/2 cup of softened cream cheese. Stir until the cream cheese melts and the sauce becomes smooth.
Combining Pasta and Sauce
Take the cooked pasta and add it to your creamy sauce in the skillet. Toss everything gently until the pasta gets coated well. If the sauce looks too thick, mix in some of that reserved pasta water. This helps you get the perfect creamy texture.
Final Touches and Serving
To finish, sprinkle in 1/2 cup of freshly grated Parmesan cheese and 1/2 teaspoon of garlic powder. Season with salt and freshly cracked black pepper. If you like spice, add red pepper flakes. Stir everything together until it’s hot. Serve the creamy spinach artichoke pasta on plates, garnishing with finely chopped parsley and more Parmesan cheese if you want. Enjoy your delightful dinner dish!
Tips & Tricks
How to Perfect Creamy Sauce
To make a creamy sauce, focus on a few key steps. Start with low heat. This helps the cream and cheese blend well. If your sauce is too thick, add pasta water slowly. This water adds flavor and helps thin out the sauce. Stir constantly while you add the water. This keeps the sauce smooth and creamy.
Suggested Pairings and Sides
This creamy spinach artichoke pasta pairs well with many sides. A simple green salad adds freshness. Garlic bread is a great choice too. If you want some protein, grilled chicken or shrimp works well. You can also serve it with roasted vegetables for a healthy touch.
Storage and Reheating Tips
Store leftover pasta in an airtight container. It will stay fresh in the fridge for about three days. When you reheat, add a splash of cream or pasta water. This avoids drying the dish out. Heat it gently on the stove or in the microwave. Stir often to keep the sauce creamy. For best results, enjoy your pasta fresh.

Variations
Vegetarian Options
If you want a meat-free meal, this pasta is perfect. You can add more veggies like mushrooms, bell peppers, or zucchini. These veggies give a nice texture and flavor. You could also swap the heavy cream with nut milk for a lighter option. This keeps it creamy while being plant-based.
Adding Protein Sources
For a filling meal, add protein. Grilled chicken or shrimp are great choices. You can also use chickpeas or white beans for a plant-based protein. This helps you feel satisfied while enjoying the creamy taste. Just cook them separately and mix them in when you combine the pasta and sauce.
Gluten-Free Alternatives
If you need a gluten-free dish, choose gluten-free pasta. Many brands make pasta from rice or corn that tastes great. You can follow the same cooking instructions. The creamy sauce is already gluten-free, so you won’t miss a thing. Enjoy your meal without worry!
Common Questions (FAQs)
Can I make this dish ahead of time?
Yes, you can make creamy spinach artichoke pasta ahead of time. Just cook and cool the pasta and sauce separately. Store them in airtight containers in the fridge. When ready to eat, reheat the sauce and mix it with the pasta. This keeps the flavors fresh and delicious.
What can I use instead of cream cheese?
If you want a different taste, you can use ricotta cheese or Greek yogurt. Both options add creaminess without the same flavor as cream cheese. You can also try mascarpone for a richer texture. Just remember, each option gives a unique taste to your dish.
How do I make it spicier?
To add heat, sprinkle in red pepper flakes when cooking the sauce. You can also use diced jalapeños or a dash of hot sauce for extra spice. Adjust the amount based on your spice level. Taste as you go to find the perfect balance for you.It combines fresh spinach and artichokes with a creamy sauce. You will love how easy it is to make. This dish is perfect for dinner or a special gathering. It feels fancy but is simple enough for any home cook.
Key Cooking Techniques
To make this dish shine, focus on a few key skills:
- Sautéing: Start by heating olive oil and cooking garlic until it smells great. This step builds flavor.
- Simmering: Lower the heat to let the sauce gently cook. This creates a smooth blend of cream and cheese.
- Tossing: Mix the pasta and sauce carefully. You want every noodle coated nicely. If it gets thick, add some pasta water to loosen it up.
Mastering these techniques will help you create a dish that looks and tastes amazing.
Nutritional Information
This creamy dish packs a lot of flavor and nutrients. Here’s a quick look at what you get per serving:
- Calories: About 600
- Protein: 20g
- Fat: 35g
- Carbohydrates: 50g
- Fiber: 4g
The fresh spinach adds vitamins, while the artichokes offer fiber. This meal is a great way to enjoy comfort food while getting some nutrients.
In this article, we explored the key ingredients and steps for making creamy spinach artichoke pasta. We covered ingredient options, cooking methods, and common questions. Remember to try different pasta types and experiment with vegetarian or gluten-free choices. These small changes can make a big difference. Cooking is fun and allows for creativity. Enjoy each bite and share your tasty dish with friends!


![- 1 lb boneless, skinless chicken thighs, diced into bite-sized pieces - 1 tablespoon olive oil - 1 teaspoon chili powder - 1 teaspoon ground cumin - 1 teaspoon smoked paprika - Salt and pepper, to taste - 1 cup brown rice (or 1 cup cauliflower rice) - 2 cups chicken broth (or vegetable broth) - 1 can black beans, drained and rinsed - 1 cup corn kernels - Juice of 1 lime - 1 ripe avocado, diced - 1 cup cherry tomatoes, halved - 1 cup shredded cheese (such as cheddar) - ½ cup sour cream (or Greek yogurt) - Fresh cilantro, chopped - Sliced jalapeños (optional) - Large skillet - Medium-sized pot - Cooking utensils (spoon, spatula) - Measuring cups and spoons - Serving bowls These ingredients come together to create a tasty meal. The chicken thighs give great flavor. You can use brown rice for a healthy base or cauliflower rice for a low-carb choice. Black beans and corn add fiber and sweetness. For toppings, fresh veggies like avocado and tomatoes brighten the dish. Cheese and sour cream bring richness. You will love how customizable these bowls are! The kitchen tools are simple, making this fun and easy to prepare. Check out the Full Recipe for all the delicious details! To make brown rice, start with a medium pot. Bring chicken broth to a boil. Once boiling, add the rice. Lower the heat, cover, and let it simmer for 30-35 minutes. This method ensures the rice becomes fluffy and tender. If you prefer a low-carb option, use cauliflower rice. Heat a skillet with a splash of water. Sauté the cauliflower rice for 5 minutes until it’s tender. This quick cook keeps it fresh and light. For the chicken, heat olive oil in a large skillet over medium heat. Add diced chicken thighs once the oil is hot. Season the chicken with chili powder, cumin, smoked paprika, salt, and pepper. Cook for 8-10 minutes, stirring often. This helps the chicken cook evenly and become golden brown. The spices create a warm flavor that elevates the dish. After the chicken is cooked, add the rinsed black beans and corn to the skillet. Mix everything well and cook for another 3-4 minutes. This step ensures all ingredients are heated through and flavors blend nicely. Stir gently to keep the chicken tender. Once done, you can move on to building your loaded chicken burrito bowls. Enjoy creating a meal that looks as good as it tastes! Achieving the Perfect Texture To get juicy chicken, use boneless, skinless thighs. They stay moist and tender. Cut them into bite-sized pieces for even cooking. Heat a skillet over medium heat before adding the chicken. This helps lock in the juices and gives a nice sear. Preventing Dry Chicken Don’t overcook the chicken. Cook it until it's no longer pink, about 8-10 minutes. Keep stirring to avoid burning. If you find your chicken is dry, try adding a splash of broth or water. This will help rehydrate the meat. Suggested Toppings You can personalize your burrito bowls with fun toppings. Try adding diced avocados, cherry tomatoes, or shredded cheese. Fresh herbs like cilantro add a burst of flavor. For a kick, use sliced jalapeños or a drizzle of hot sauce. Dietary Modifications Make your burrito bowls fit your diet. If you're vegetarian, swap chicken for black beans or grilled veggies. For a low-carb option, use cauliflower rice instead of brown rice. You can also replace sour cream with Greek yogurt for a healthier choice. Spice Variations Want to spice things up? Add cayenne pepper or crushed red pepper flakes to the chicken. You can also try different spices like oregano or taco seasoning to change the flavor profile. Marinades for Chicken A good marinade can add great taste. Use lime juice, garlic, and cumin for a zesty kick. Marinate the chicken for at least 30 minutes before cooking. This will infuse the chicken with flavor and keep it tender. For the full recipe, check out the section above. {{image_4}} You can easily swap out the chicken. Use firm tofu or tempeh instead. These alternatives add great texture and protein. For a heartier option, try chickpeas or lentils. Both are tasty and filling. If you want a low-carb option, use cauliflower rice. It has fewer carbs and packs in nutrients. Cauliflower rice has a mild taste and absorbs flavors well. You can also add more veggies, like zucchini or bell peppers, for added crunch. You can adjust the spice level for your taste. For a spicy kick, add more chili powder or diced jalapeños. If you prefer mild flavors, skip the spicy ingredients. You can also play with international flavors. Try adding curry powder for an Indian twist or chipotle for a smoky flavor. Explore these variations to make the loaded chicken burrito bowls your own! For the complete recipe, check the [Full Recipe]. To keep your loaded chicken burrito bowls fresh, follow these tips: - Let the bowls cool down before storing. - Use airtight containers for storage. - Separate the toppings from the base for best flavor. For refrigeration: - Store leftovers in the fridge. - They last for up to 3 days. For freezing: - Portion out the chicken and rice mixture. - Use freezer-safe bags or containers. - They can last for up to 3 months. To reheat, you want to keep the flavors fresh. Here are some methods: - Use a microwave for quick heating. - Heat on medium for 2-3 minutes. - Stir halfway through to heat evenly. You can also use a skillet: - Warm it on medium heat. - Add a splash of broth for moisture. - Heat for about 5-7 minutes. Each component has its own shelf life: - Cooked chicken lasts 3 days in the fridge. - Cooked rice stays good for 4 days. - Black beans last up to 5 days. Watch for spoilage signs: - Look for any strange smells. - Check for mold or discoloration. - If it looks or smells off, throw it out. For more details, refer to the Full Recipe for loaded chicken burrito bowls. Yes, you can use different rice types. Here are some great substitutes for brown rice: - White rice: Cooks faster and has a different texture. - Quinoa: Adds protein and a nutty flavor. - Jasmine rice: Offers a fragrant touch to your bowls. - Cauliflower rice: A low-carb option that is light and healthy. If you crave heat, here are some tips to spice up your dish: - Add diced jalapeños to the chicken when cooking. - Use a spicy salsa or hot sauce as a topping. - Sprinkle crushed red pepper flakes into the chicken mix. - Swap chili powder for a hotter variety, like cayenne. If you need alternatives for sour cream, consider these options: - Greek yogurt: Creamy and packed with protein. - Cottage cheese: A lighter option that adds creaminess. - Avocado: Mash it for a rich and creamy topping. - Hummus: Adds flavor and creaminess with a unique twist. Yes, you can prep this dish in advance. Here’s how: - Cook the rice and chicken ahead of time. Store them separately in the fridge. - Prepare toppings like diced avocado and cheese. Keep them fresh in airtight containers. - Assemble the bowls just before serving for the best flavors and textures. - Reheat the chicken and rice gently to avoid drying them out. This article covered how to make delicious loaded chicken burrito bowls. We explored main ingredients, toppings, and kitchen tools needed. I shared step-by-step cooking tips for rice and chicken, followed by customization options to suit your taste. Storage info ensures you keep your leftovers fresh and safe. In closing, this dish is versatile and easy to make. Remember, you can adapt it to fit any diet. Enjoy creating your perfect burrito bowl!](https://dishtreats.com/wp-content/uploads/2025/06/cee601c9-6b34-4063-8b37-4b14688d7edb-768x768.webp)
![To make this tasty dish, gather these simple ingredients: - 1 pound Brussels sprouts, trimmed and halved - 3 tablespoons extra virgin olive oil - 1/4 cup pure maple syrup - 2 tablespoons balsamic vinegar - 1 teaspoon Dijon mustard - 1/2 teaspoon fine sea salt - 1/4 teaspoon freshly ground black pepper - 1/4 cup pecans, roughly chopped for added crunch - 1/4 cup dried cranberries for a touch of sweetness - Fresh thyme leaves for an aromatic garnish (optional) You can easily adjust ingredient amounts based on what you need. Here are some quick conversions: - If you want to make more, use 2 pounds of sprouts and double the glaze. - For less, cut the amounts in half. This still keeps the taste great. - In a pinch, you can swap the pecans for walnuts or almonds. This dish not only tastes good but is also good for you. Here’s a quick look at what’s inside: - Calories: About 200 per serving - Fat: 12 grams (mostly healthy fats from olive oil and nuts) - Carbohydrates: 24 grams (includes natural sugars from maple syrup) - Fiber: 5 grams (great for digestion from Brussels sprouts) - Protein: 3 grams (from nuts and sprouts) This breakdown helps you see the benefits of each ingredient. Enjoy making this dish with fresh, seasonal produce for the best flavor and health benefits. For the complete recipe, check out the Full Recipe. Start by preheating your oven to 400°F (200°C). This step is key for getting perfect crispness. While the oven warms up, clear your kitchen counter. Gather all your tools and ingredients. Having everything ready makes cooking much easier. Take 1 pound of Brussels sprouts. Trim off the ends and cut them in half. Place the halved sprouts in a large mixing bowl. Add 3 tablespoons of extra virgin olive oil and 1/2 teaspoon of fine sea salt. Sprinkle in 1/4 teaspoon of freshly ground black pepper. Toss the sprouts until they are well coated. This ensures each sprout gets flavor. Spread the seasoned Brussels sprouts on a baking sheet. Make sure the cut sides face down. This helps them brown nicely. Place the baking sheet in your preheated oven. Roast for 20-25 minutes. They should be crispy and golden. While they roast, make the maple glaze. In a small saucepan, mix 1/4 cup of pure maple syrup, 2 tablespoons of balsamic vinegar, and 1 teaspoon of Dijon mustard. Heat over medium heat but do not let it boil. Once the sprouts are ready, drizzle the glaze over them. Toss gently to coat. Return the glazed sprouts to the oven for 5 more minutes. This step caramelizes the glaze, making it rich and tasty. After that, take them out and add 1/4 cup of roughly chopped pecans and 1/4 cup of dried cranberries. These add crunch and sweetness. If you want, garnish with fresh thyme leaves for even more flavor. For the full details, check the Full Recipe. When you pick Brussels sprouts, look for bright green ones. They should feel firm and heavy in your hand. Avoid any that have yellow leaves or feel soft. The size matters too; smaller sprouts are sweeter and more tender. If you can, buy them on the stalk. They stay fresh longer that way. Caramelization makes Brussels sprouts sweet and tasty. To get it right, roast them cut-side down. This lets them get nice and brown. Make sure they have space on the baking sheet. If they are too close together, they will steam instead of roast. Use high heat, about 400°F, for best results. Check them halfway through and give them a stir for even cooking. One big mistake is overcooking the sprouts. They should be tender but still have a bit of crunch. Avoid using too much glaze; it can make them soggy. Always glaze right after roasting, then caramelize them for just a few minutes. This step adds flavor without losing the sprout's crispness. Lastly, don’t skip the nuts and cranberries; they add great texture and taste. For the full recipe, check the [Full Recipe]. {{image_4}} You can change the taste of maple glazed Brussels sprouts by adding different nuts or seeds. Try walnuts for a rich flavor or sunflower seeds for a crunch. Almonds also work well; they add a nice texture and nutty taste. Each option gives a new twist to your dish. Just sprinkle them on top after roasting for the best crunch and flavor. If you need to adjust for dietary needs, it’s easy. Use agave syrup instead of maple syrup for a vegan option. For a nut-free dish, skip the pecans and use pumpkin seeds. You can also swap balsamic vinegar with apple cider vinegar for a light zing. These swaps keep the dish tasty while meeting your needs. Brussels sprouts shine in fall and winter, but you can adapt them year-round. In spring, add fresh herbs like basil or parsley for brightness. In summer, pair with grilled corn for a sweet twist. You can also mix in seasonal veggies like carrots or sweet potatoes for color and taste. This way, your dish stays fresh and exciting no matter the season. For the full recipe, check out the Maple Glazed Brussels Sprouts Delight. After enjoying your maple glazed Brussels sprouts, store leftovers right. Place them in an airtight container. They will stay fresh for about three days in the fridge. Keep them away from strong-smelling foods. This helps maintain their flavor. When you reheat, aim to keep the sprouts crispy. Use your oven for the best results. Preheat it to 350°F (175°C). Spread the sprouts on a baking sheet. Heat them for about 10-15 minutes. This method helps keep them crunchy and flavorful. You can also microwave them for quick reheating, but they may not stay as crispy. If you want to enjoy these sprouts later, freezing works too. First, let them cool completely. Spread them on a baking sheet in a single layer. Freeze until solid, then transfer to a zip-top bag. They can last up to three months in the freezer. When ready to eat, thaw them overnight in the fridge. Reheat using the oven for the best taste. Enjoy your tasty treat again! Yes, you can prepare these Brussels sprouts ahead of time. After roasting them, let them cool. Store them in an airtight container in the fridge. They stay fresh for up to three days. When you're ready to serve, just reheat them in the oven. This keeps them crispy and tasty. These Brussels sprouts pair well with many dishes. Serve them alongside roasted chicken or grilled salmon for a complete meal. They also shine as a side dish for holiday dinners. You can even enjoy them with a grain salad or pasta for a light lunch. The sweet glaze adds a nice touch to any plate. You can easily change the sweetness of the glaze. If you want it sweeter, add more maple syrup. Start with an extra tablespoon and taste as you go. For a less sweet glaze, reduce the maple syrup. You can add more balsamic vinegar to balance the flavor. Adjust it to match your taste! We explored how to make Maple Glazed Brussels Sprouts from start to finish. You learned about ingredients, cooking steps, and storage tips. I shared helpful tricks to avoid mistakes and ensure a tasty outcome. You can now customize your dish with variations and serve it with confidence. Remember, fresh ingredients and careful roasting lead to the best flavors. Enjoy making this dish and impress your family and friends. With practice, your skills will grow. Happy cooking!](https://dishtreats.com/wp-content/uploads/2025/07/6c550e47-e99c-4554-a6d4-422f3e5f831a-768x768.webp)
![- 4 boneless, skinless chicken thighs - 1 cup teriyaki sauce - 1/2 fresh pineapple, sliced into 1/2-inch rings - 2 tablespoons soy sauce - 1 tablespoon brown sugar - 1 teaspoon freshly grated ginger - 2 cloves garlic, finely minced - 1 tablespoon sesame oil - 1 tablespoon rice vinegar - 2 green onions, finely chopped - Sesame seeds Gathering the right ingredients is key for Grilled Pineapple Teriyaki Chicken. Start with fresh chicken thighs. They stay juicy and tender when grilled. You can use store-bought or homemade teriyaki sauce. I often prefer making my own, as it gives a fresh taste. Next, you want ripe pineapple. Choose one that feels heavy and smells sweet. The sweetness will balance the salty teriyaki sauce. For the marinade, you need a few simple items. Soy sauce adds saltiness, while brown sugar gives a nice caramel note. Ginger and garlic bring warmth and depth. Sesame oil adds a nutty flavor, and rice vinegar gives a bit of tang. Finally, for garnishing, chop green onions for color and freshness. A sprinkle of sesame seeds adds a nice crunch. These ingredients come together to create a vibrant, tasty dish. For the full recipe, check the provided link. First, gather your ingredients for the marinade. In a bowl, mix teriyaki sauce, soy sauce, brown sugar, grated ginger, minced garlic, sesame oil, and rice vinegar. Whisk these together until smooth. Add the chicken thighs and coat them well with the marinade. Cover the bowl with plastic wrap and put it in the fridge. Let the chicken marinate for at least 30 minutes. For more flavor, let it marinate for up to 2 hours. While the chicken marinates, preheat your grill to medium-high heat. If you’re using charcoal, wait for the coals to glow red. This will ensure even grilling and great flavor in your chicken. Now it's time to grill the pineapple. Take your pineapple rings and brush both sides with teriyaki sauce. Once the grill is hot, place the pineapple on it. Grill for about 3-4 minutes on each side. You want to see nice grill marks and a caramelized look. When done, set the grilled pineapple aside on a plate. Next, take the chicken thighs out of the fridge. Let any extra marinade drip off. Place the chicken on the hot grill. Cook for about 5-7 minutes per side. Aim for an internal temperature of 165°F (75°C). In the last few minutes, brush on more marinade for added flavor. When the chicken is cooked, take it off the grill. Let it rest for a few minutes. This helps keep the juices inside. To serve, place a grilled pineapple ring on each plate. Top it with a grilled chicken thigh. For a beautiful touch, sprinkle chopped green onions and sesame seeds on top. Enjoy your meal! For the full recipe, check out [Full Recipe]. For juicy chicken, preheat your grill to medium-high heat. This temperature helps create a nice sear on the chicken. A hot grill also locks in moisture, making the meat tender. If using charcoal, wait until the coals glow red and spread evenly for the best result. The marinade is key to great flavor. I suggest marinating the chicken for at least 30 minutes. This time allows the flavors to soak in. For an even richer taste, let it marinate for up to 2 hours. Just remember, don’t go over 2 hours, or the chicken might turn mushy. When picking a pineapple, look for one that feels heavy for its size. The skin should be golden and slightly soft at the base. A ripe pineapple smells sweet at the bottom. Avoid ones that are too green or have brown spots. A good pineapple adds the perfect touch to your grilled chicken. For more details and to try the dish, check out the Full Recipe. {{image_4}} You can easily swap chicken for other proteins. Try pork tenderloin or shrimp for a tasty twist. Tofu is a great choice for a vegetarian option. Just make sure to press the tofu to remove extra moisture. This helps it absorb the marinade better. No matter what protein you choose, aim for similar cooking times for best results. Want to kick up the flavor? Add red pepper flakes for heat or lime juice for zest. You can also mix in a dash of sesame seeds or a splash of orange juice for sweetness. Experimenting with spices like smoked paprika or five-spice powder can add depth. This way, you can create a unique flavor profile each time. Pair your grilled pineapple teriyaki chicken with steamed rice or a fresh salad. Jasmine rice complements the dish's sweetness well. For salads, consider a mix of greens with a light vinaigrette. You can also serve it with grilled vegetables for added color and nutrition. These options enhance your meal and make it more satisfying. For the full recipe, check out the details above. Store your Grilled Pineapple Teriyaki Chicken in an airtight container. This keeps it fresh and prevents odors from mixing. The chicken and pineapple can last in the fridge for about 3 to 4 days. Always let the chicken cool down before sealing it. This helps avoid condensation inside the container. To freeze your grilled chicken and pineapple, first, let them cool completely. Wrap each piece tightly in plastic wrap. Then place them in a freezer bag or a container. This keeps air out and prevents freezer burn. You can freeze it for up to 3 months. Label the bags with the date for easy tracking. To reheat your chicken, use the oven or stovetop. Preheat your oven to 350°F (175°C). Place the chicken in a baking dish and add a splash of water or broth. Cover it with foil. Heat for about 15-20 minutes until warm. For stovetop, use a skillet over medium heat. Add a bit of oil and warm the chicken gently. Avoid high heat to keep it juicy. You can make teriyaki sauce easily at home. Here’s how: - 1 cup soy sauce - 1/2 cup brown sugar - 1/4 cup rice vinegar - 2 tablespoons sesame oil - 1 teaspoon grated ginger - 2 cloves minced garlic Combine all these ingredients in a saucepan. Heat over medium until the sugar dissolves. Stir it well, and let it simmer for a few minutes. Your homemade teriyaki sauce is ready to use! Yes, you can use chicken breasts. They are leaner but may dry out faster than thighs. To prevent this, marinate them longer. Chicken thighs stay juicy and tender. If you prefer breasts, just keep an eye on cooking time. Many sides pair well with this dish. Here are some ideas: - Steamed jasmine rice - Grilled vegetables - Asian slaw - Quinoa salad These sides will complement the sweet and savory flavors of the chicken. Marinate the chicken for at least 30 minutes. For the best flavor, aim for 2 hours. The longer it sits, the more flavor it absorbs. Just don’t marinate too long, or the texture may change. Yes, you can grill indoors! Use a grill pan on your stovetop. Another option is to use a broiler in your oven. Both methods will give you a nice char and keep the flavor intact. This blog post covered how to make Grilled Pineapple Teriyaki Chicken. We explored key ingredients, marinade tips, and grilling steps. I shared variations and storage info to help you enjoy this dish longer. Always remember to adjust the marinade and experiment with flavors. Whether serving to friends or family, this dish is sure to impress. With these tips, you'll cook with confidence and skill. Enjoy the process and the delicious outcome!](https://dishtreats.com/wp-content/uploads/2025/06/0924d723-9b8a-4a49-9695-7d965ac302d4-768x768.webp)

