Looking for a delicious dinner idea that’s easy to make? You’re in the right place! My Creamy Mushroom Chicken Thighs recipe is packed with flavor and sure to impress. With crispy chicken and a rich mushroom sauce, this dish brings joy to any meal. I’ll guide you step-by-step, from selecting the best ingredients to perfecting your cooking technique. Let’s dive into this tasty adventure together!
Why I Love This Recipe
- Comfort Food at Its Best: This creamy mushroom chicken thighs dish is the ultimate comfort food, perfect for cozy dinners at home.
- Rich and Flavorful Sauce: The combination of mushrooms, garlic, and cream creates a luxurious sauce that enhances the chicken’s natural flavors.
- Easy to Prepare: With straightforward steps and minimal prep time, this recipe is accessible for cooks of all skill levels.
- Versatile Serving Options: This dish pairs beautifully with rice, mashed potatoes, or even a fresh salad, making it a flexible choice for any meal.
Ingredients
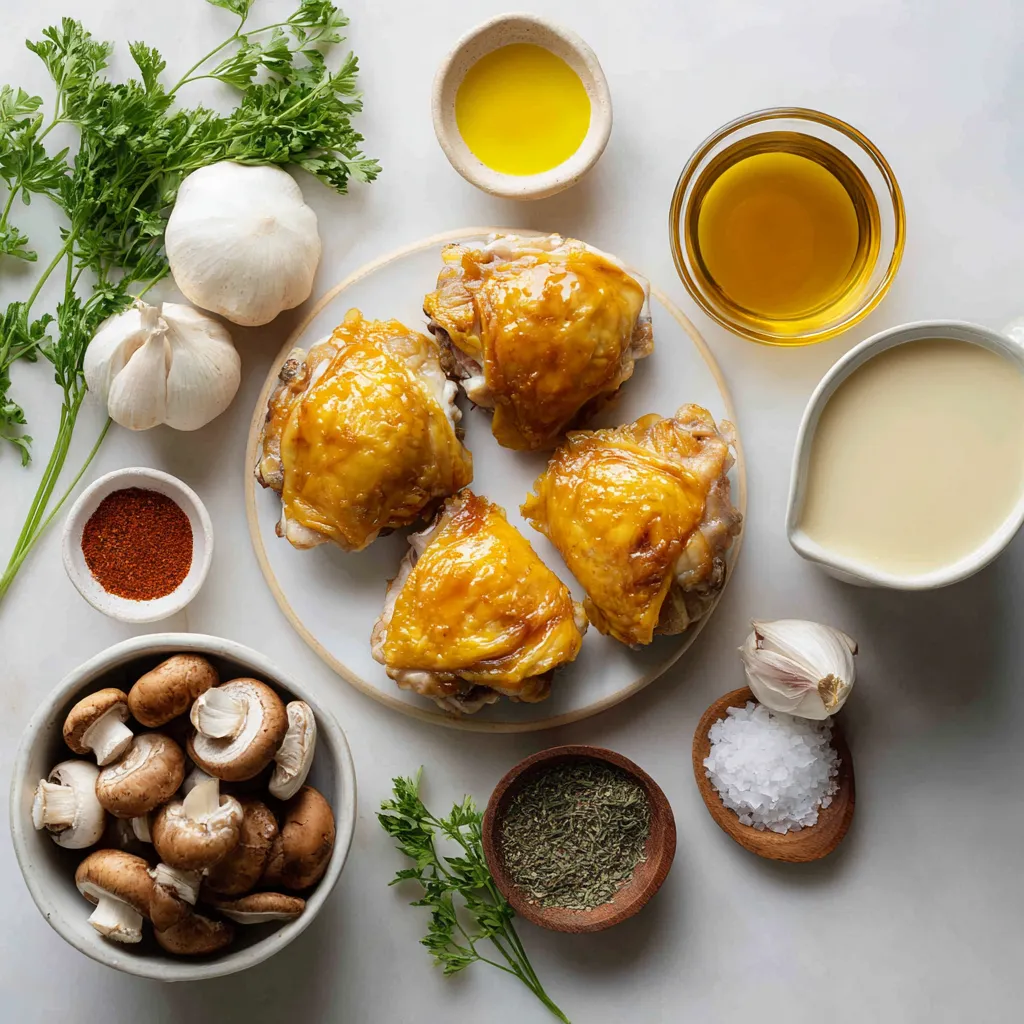
List of Ingredients
– 4 bone-in, skin-on chicken thighs
– 2 tablespoons extra virgin olive oil
– 1 cup sliced mushrooms (either cremini or button)
– 1 small onion, finely chopped
– 3 cloves of garlic, minced
– 1 cup low-sodium chicken broth
– 1 cup heavy cream
– 1 teaspoon dried thyme
– 1 teaspoon sweet paprika
– Salt and freshly ground black pepper, to taste
– Fresh parsley, finely chopped, for garnish
Notes on Ingredient Selection
Choose high-quality chicken thighs for great flavor. Bone-in and skin-on give the best taste and moisture. Use fresh mushrooms for a rich, earthy flavor. Pick low-sodium chicken broth to control salt levels. Heavy cream creates a rich sauce, but you can use half-and-half for a lighter option. Fresh parsley adds color and brightness to the dish.
Substitutions and Alternatives
You can swap chicken thighs for chicken breasts, but they won’t be as juicy. Use vegetable broth instead of chicken broth for a vegetarian option. If you can’t find fresh mushrooms, canned mushrooms work in a pinch but won’t have the same texture. You can replace heavy cream with coconut cream for a dairy-free version.
Step-by-Step Instructions
Preparing the Chicken
Start by patting the chicken thighs dry with paper towels. This helps make the skin crispy. Next, season both sides with salt, black pepper, and sweet paprika. This ensures the meat is tasty and flavorful.
Searing the Chicken
Heat two tablespoons of olive oil in a large skillet over medium-high heat. When the oil shimmers, add the chicken thighs skin-side down. Sear them for 5-7 minutes until the skin turns golden brown. Flip the chicken and cook for another 5 minutes. Once done, remove the chicken and set it aside on a plate.
Making the Mushroom Sauce
In the same skillet, add one finely chopped onion without cleaning it. Sauté for about 2 minutes until the onions look clear. Then, add three minced garlic cloves and cook for one more minute. This lets the garlic release its aroma. Now, add one cup of sliced mushrooms and cook for 4-5 minutes. Stir occasionally until the mushrooms soften and brown.
Cooking the Chicken in Sauce
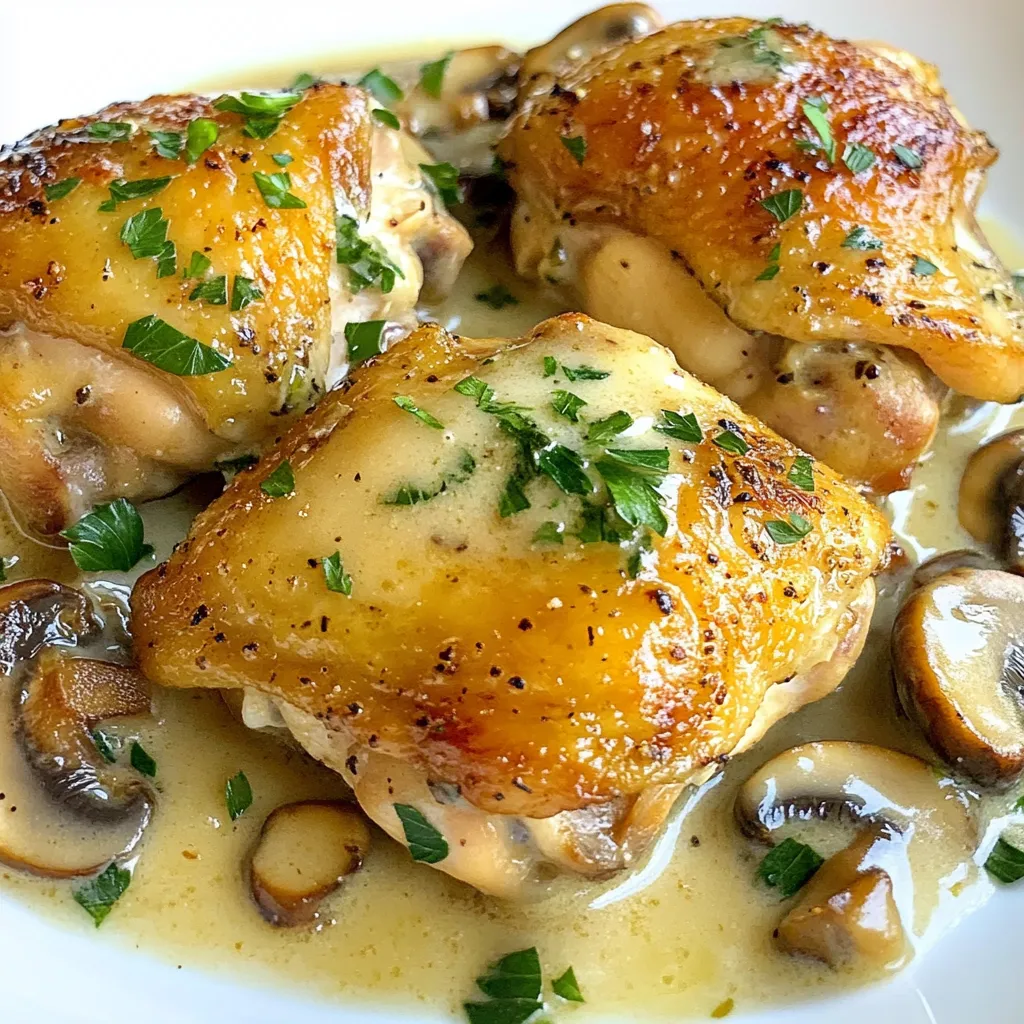
Pour one cup of low-sodium chicken broth into the skillet. Use a wooden spoon to scrape any tasty bits stuck to the bottom. Let the mixture simmer for a few minutes to reduce. Lower the heat and stir in one cup of heavy cream and one teaspoon of dried thyme. Mix until the sauce is creamy. Carefully return the chicken to the skillet, placing it skin-side up. Spoon sauce over the chicken. Cover the skillet and simmer on low for about 25 minutes. The chicken should reach 165°F (75°C) when done. Taste the sauce and adjust salt or pepper as needed. Serve the chicken drizzled with sauce and garnish with fresh parsley.
Tips & Tricks
Achieving Crispy Skin
To get crispy skin on your chicken thighs, start with dry meat. Pat the chicken thighs with paper towels. This step removes excess moisture. Next, season the chicken well with salt, pepper, and paprika. When you sear the chicken, use a hot skillet. This helps to create a beautiful, golden crust. Sear skin-side down for 5-7 minutes. Do not rush this step. The skin needs time to crisp up.
Perfecting the Creamy Sauce
For a rich and creamy sauce, use heavy cream. It adds a wonderful texture. After cooking the mushrooms and onions, add chicken broth. Stir well to scrape up any brown bits. These bits add flavor to your dish. Allow the sauce to simmer before adding the cream. This helps to deepen the flavors. Stir in dried thyme for a hint of earthiness. Taste the sauce before serving to adjust seasoning.
Serving Suggestions
Serve the creamy mushroom chicken thighs over rice or mashed potatoes. This lets you soak up the delicious sauce. You can also add steamed green vegetables on the side. Bright vegetables create a lovely contrast. For added freshness, sprinkle chopped parsley on top just before serving. This gives a nice pop of color and flavor. Enjoy your meal with a glass of white wine for a delightful pairing!
Pro Tips
- Dry the Chicken: Patting the chicken thighs dry helps achieve a crispy skin when searing. This step is crucial for texture.
- Don’t Rush the Sear: Allow the chicken to sear undisturbed for a few minutes to develop a golden-brown crust. It enhances flavor and presentation.
- Scrape the Skillet: When adding the chicken broth, make sure to scrape the bottom of the skillet to incorporate all the flavorful bits.
- Rest the Chicken: Let the cooked chicken rest for a few minutes before serving to allow the juices to redistribute, resulting in more tender meat.
Variations
Mushroom Choices
You can use different types of mushrooms. Cremini mushrooms give a rich flavor. Button mushrooms are lighter in taste. You can also try shiitake for a more earthy taste. Mix them up for a fun twist! Each type adds unique notes to the dish.
Adding Vegetables
For more color and nutrients, add vegetables. Spinach adds a nice pop of green. Peas bring sweetness and texture. Carrots can add a crunch if sliced thin. You can toss in any veggies you like. Just remember to cook them until tender.
Cream Substitutes for Healthier Options
If you want a lighter meal, swap heavy cream. Use half-and-half for a creamy taste with less fat. Coconut milk gives a fun twist and is dairy-free. Greek yogurt can add creaminess without too many calories. Just stir it in at the end for the best results.
Storage Info
How to Store Leftovers
To store your creamy mushroom chicken thighs, let them cool first. Place the chicken and sauce in an airtight container. This helps keep them fresh. You can store it in the fridge for up to three days. Make sure to keep the sauce with the chicken for the best flavor.
Reheating Instructions
When you’re ready to enjoy leftovers, reheat gently. You can use a skillet or microwave. If using a skillet, add a splash of chicken broth to keep the sauce creamy. Heat on low until warm. If using a microwave, cover the dish and heat in short bursts. Stir often to avoid hot spots. Check that the chicken is heated through before serving.
Freezing Tips
If you want to freeze the dish, it’s best to do so before reheating. Place the cooled chicken and sauce in a freezer-safe container. You can freeze it for up to three months. When you’re ready to eat, thaw it overnight in the fridge. Reheat the chicken and sauce on the stove for the best taste.
FAQs
Can I use boneless chicken thighs?
Yes, you can use boneless chicken thighs. They cook faster and are easier to eat. Just adjust the cooking time to about 20 minutes after returning them to the sauce. Check for doneness to ensure they reach 165°F (75°C).
What can I serve with creamy mushroom chicken thighs?
Creamy mushroom chicken thighs pair well with many sides. Here are some tasty options:
– Fluffy rice to soak up the sauce
– Creamy mashed potatoes for a rich complement
– Steamed green vegetables for color and crunch
– A simple salad to add freshness
These sides enhance the meal and balance the flavors.
How do I know when chicken thighs are fully cooked?
To check if chicken thighs are cooked, use a meat thermometer. Insert it into the thickest part of the thigh, avoiding the bone. The chicken is done when it reaches 165°F (75°C). If you don’t have a thermometer, cut into the meat. It should be opaque and the juices should run clear.
This blog post covers everything you need for a tasty creamy mushroom chicken. We looked at important ingredients, step-by-step cooking directions, and helpful tips to make your dish shine. You learned about variations and ways to store leftovers for later. Remember to choose fresh mushrooms and enjoy your meal with friends. Cooking can be fun and easy! Now, go ahead and make this dish your own. You’ll impress everyone at the tabl


